export_dtm_ortho
#Export DTMs and Orthoimages
Exporting DTMs and Orthoimages is a two step process:
-
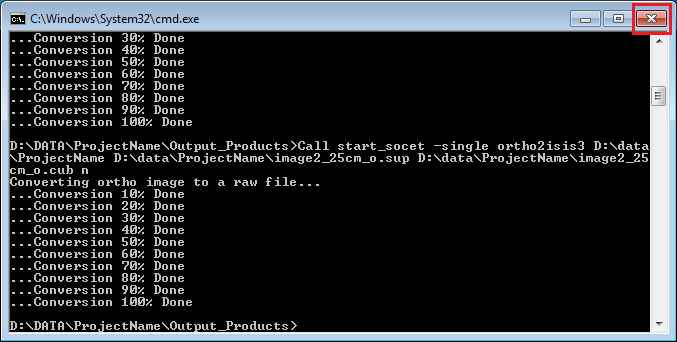
First we run utilities/programs on the SOCET SET workstations to convert SOCET SET file formats to raw binary files and build corresponding ISIS3 scripts. All raw binary files and ISIS3 scripts are placed in folder
D:\\DATA\\<ProjectName>\\Output_Products. -
Then we copy the entire
D:\\DATA\\<ProjectName>\\Output_Productsfolder to an ISIS3 processing machine, where the scripts are executed to generate the ISIS3 cubes.
-
From the SOCET Set menu bar, select
USGS Tools > Exports > Export DEM to ISIS.
-
Press
Project File.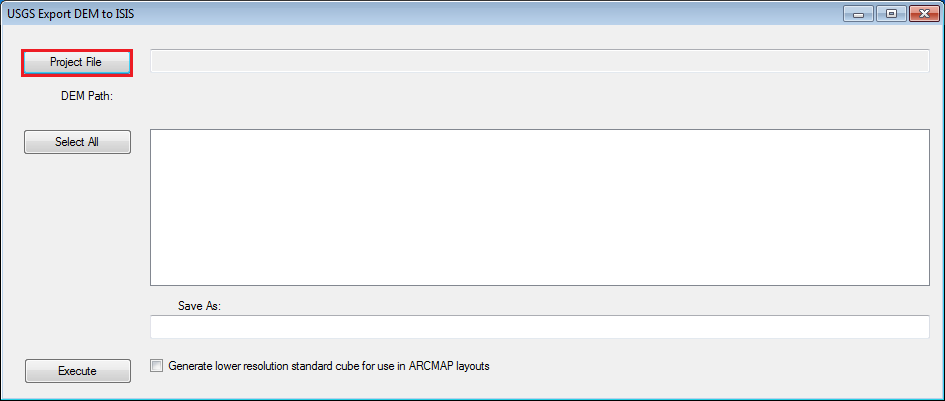
-
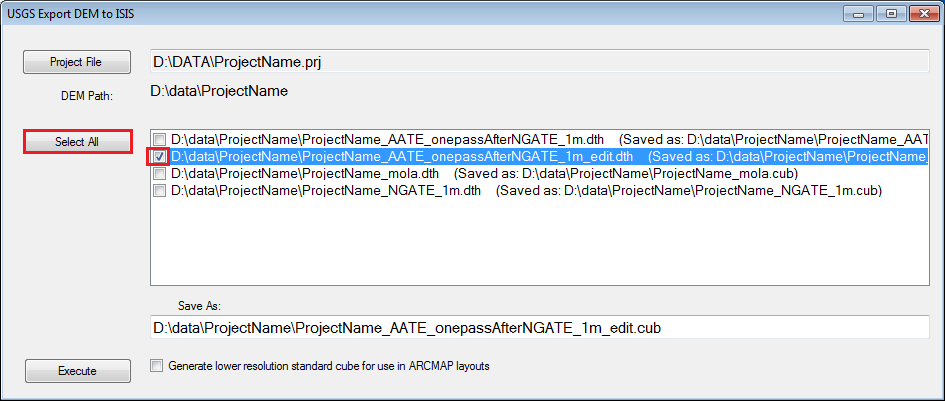
In the Open window, navigate to the main SOCET SET DATA folder (
D:\\DATA), select file<ProjectName>.prj, and then press “Open”.
-
Select DTM(s) to export. Either:
a. Press
Select Allif you wish to export all DTMs, orb. Double click on the check box for each DTM you wish to export.
-
Press
Execute.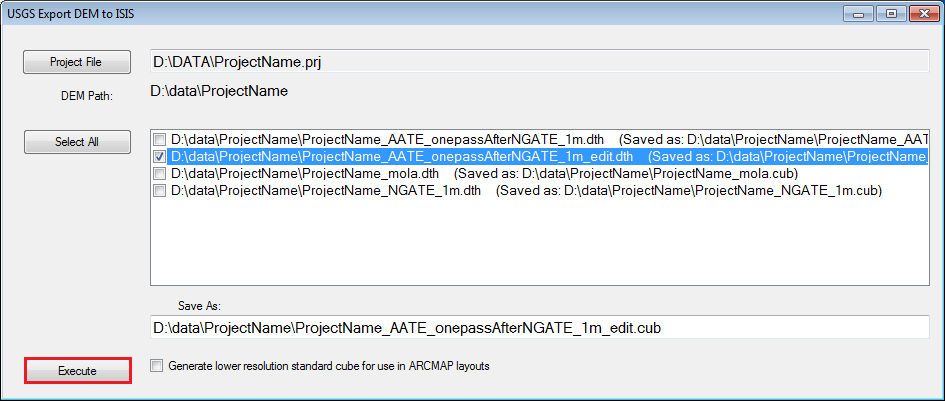
-
A Command Prompt window will pop-up. Upon completion of the program, close the Command Prompt window.

-
From the SOCET Set menu bar, select
USGS Tools > Exports > Export Orthos to ISIS.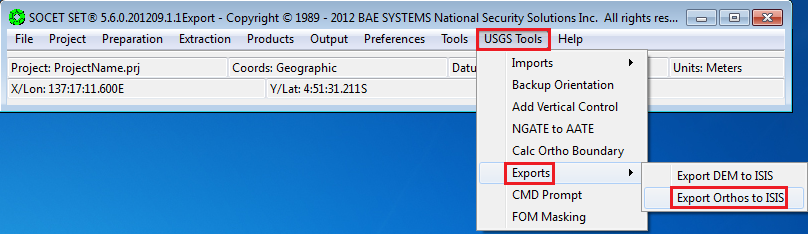
-
Press
Project File.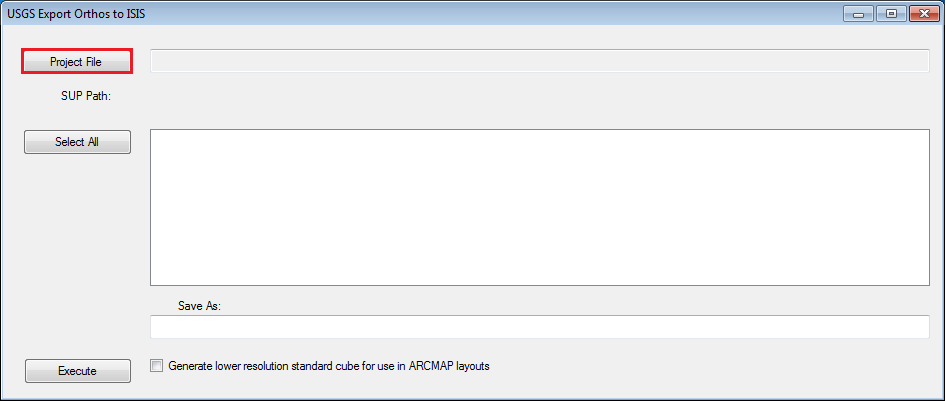
-
In the Open window, navigate to the main SOCET SET DATA folder (D:\DATA), select file .prj, and then press
Open.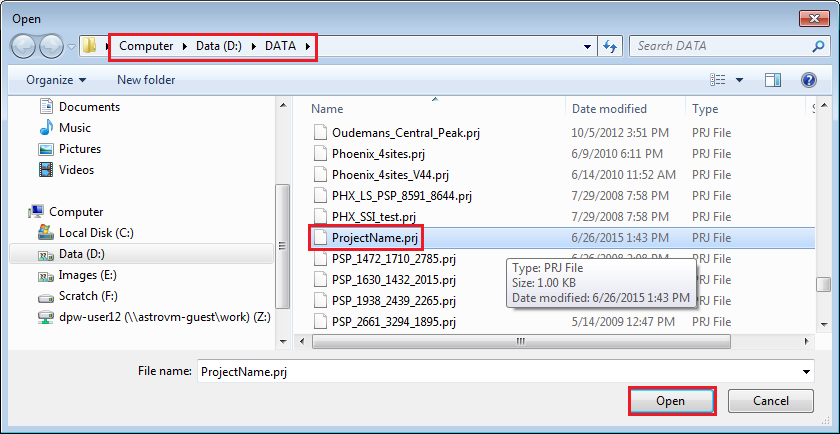
-
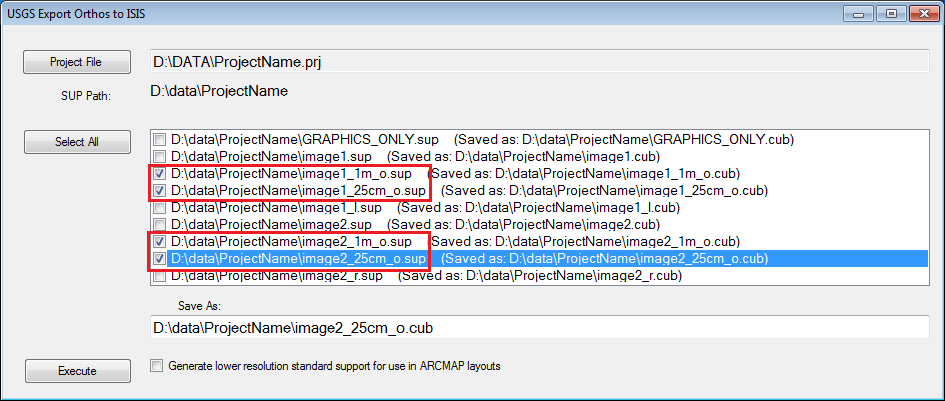
Select Orthoimages to export (these will have the _o suffix): double click on the check box for each Orthoimage you wish to export.
-
Press
Execute.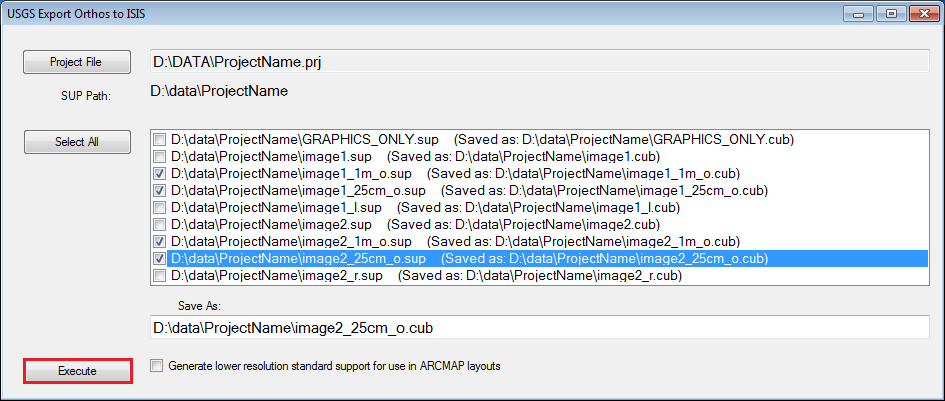
-
A Command Prompt window will pop-up. Upon completion of the program, close the Command Prompt window.
Using Windows/File Explorer, copy the
<data_path>\\<ProjectName>\\Output_Products folder to a
shared network drive. Place Output_Products in the <ProjectName>
working directory/folder on the ISIS machine.
-
Bring up Windows Explorer and navigate to
D:\\DATA\\<ProjectName>. -
Bring up a second Window Explorer window, and navigate to
Z:\\<ProjectName>. -
Copy the entire
Output_Productsfolder fromD:\\DATA\\<ProjectName>toZ:\\<ProjectName>.
-
Log onto the ISIS Processing (UNIX) Machine. For Guest Facility Users, log onto astrovm-guest (see 1 Guest Facility Log On Procedure for details.)
-
In the Unix window, change directory into the
<ProjectName>/Output_Productsdirectory.Unix Command for Guest Facility Users is:
$ cd <ProjectName>/Output_ProductsUnix Command for Astro Employees is:
$ cd <path_to_ProjectName>/Output_Products -
Run dos2unix on the scripts to update linefeed/carriage-return differences between Windows and UNIX. Use the wildcard (*) to update all scripts with one command, as follows:
$ dos2unix \*.sh -
Run
setisisto initiate ISIS, as follows:$ setisis isis3 -
Use the source command to execute each script. Wildcarding does not work with source, so use awk to generate a script to source all the dem- and ortho-to-isis scripts “automatically. The commands are:
$ ls \*.sh | awk ‘{print “source”,\$1}’ > generate_cubes.script
$ source generate\_cubes.script