物品系統
注意: If you want to learn how to use hotkeys to spawn items, check out this page.
For information about Live2D 物品 in VTube Studio, check out this other page.
You can import your own props ("items" or "assets") directly into the scene and even attach them to your Live2D model.
Items are read from the "Items" folder next to your "Live2DModels" folder. VTube Studio comes with a few items included, but you can add your own by putting PNGs into that folder.
If you put a folder into the "Items" folder, this folder will be considered to contain the frames for an Animated Item. PNGs you put into that folder will be read in alphabetical order and combined into an animation that can be loaded like a regular item in VTube Studio. Keep in mind that items with many frames may take up to a couple seconds to load.
You can also add GIFs as animated items.
FPS for the animated item can be set freely between 0 and 60 and once set will be remembered when you load the item again.
It's recommended but not required to keep frames of an animated item at the same size. The "hitbox" (clickable part of the item) will be based on the first frame of the animated item.
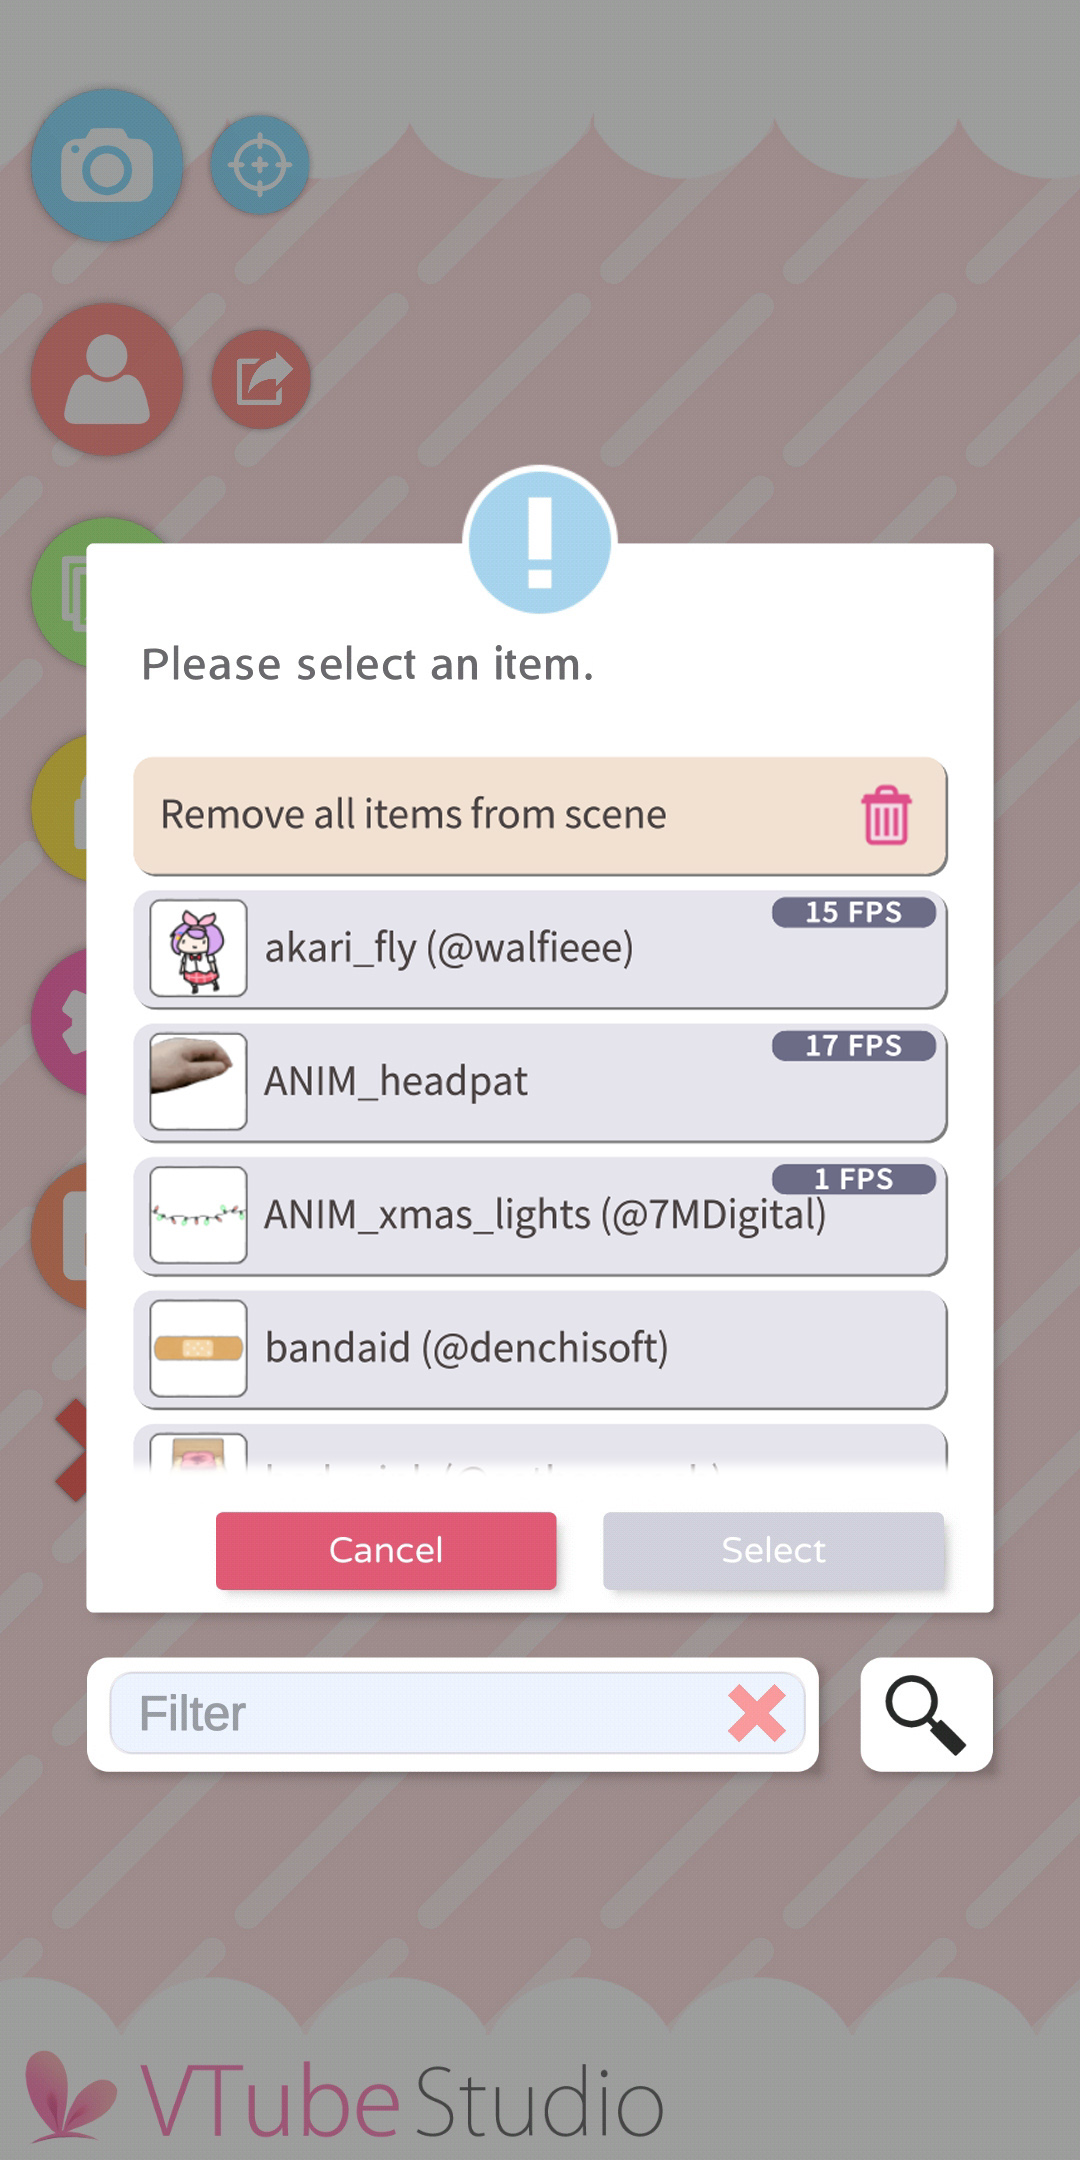
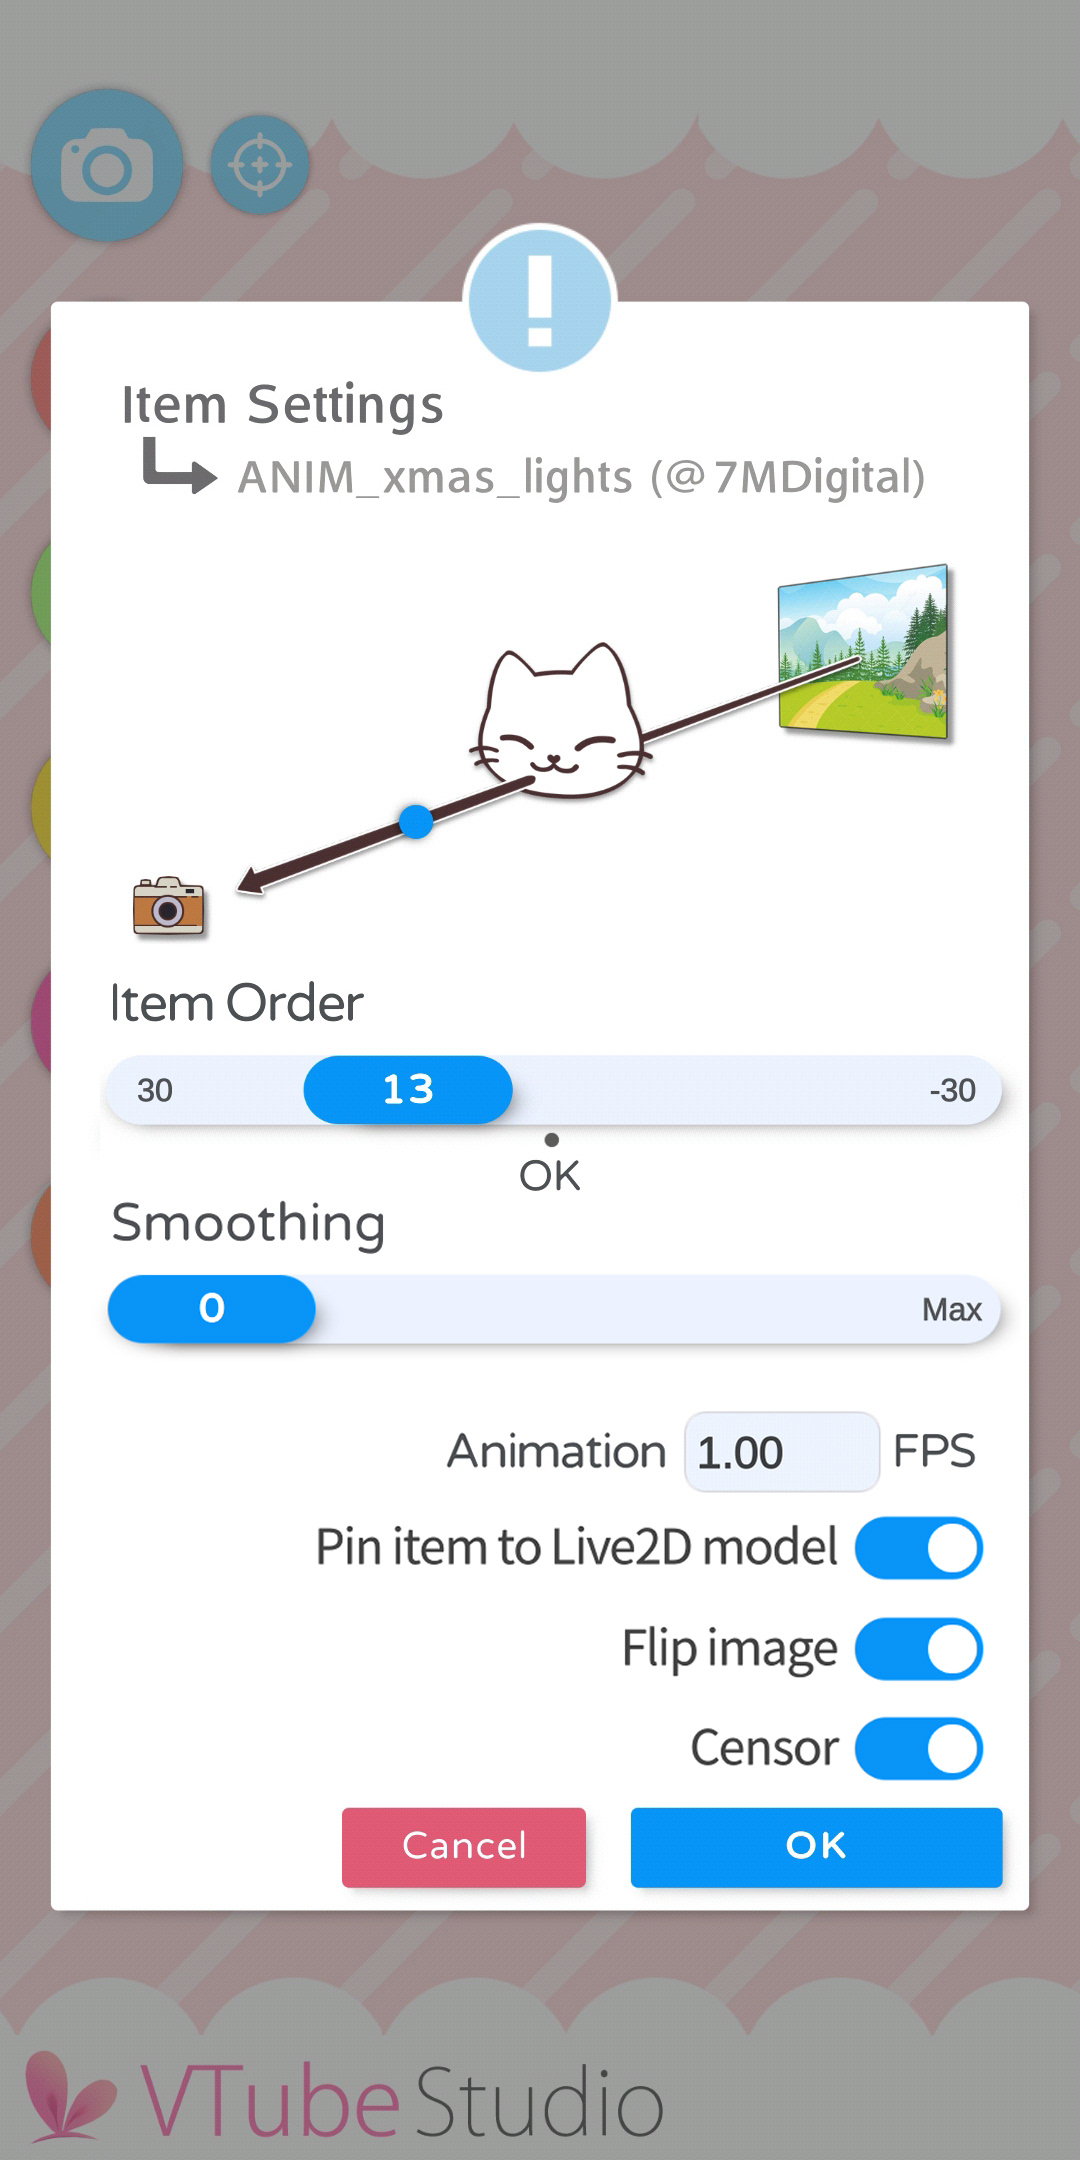
First, choose the item you'd like to add. Then choose an order. Items with a higher order are in front of items with a lower order. The Live2D model itself is at order 0, so you can also place items behind it.
If you want the item to be able to attach to the Live2D model, make sure to select "Pin item to Live2D model".
There is an experimental "Censor" option that applies a mosaic censor effect to the item. There is also a "Mirror" option that reflects the item.
By using the "Smoothing" slider, you can make the item follow your model more smoothly/loosely. Smoothing for an item will only be active when the item is locked (double-click the item after attaching it to the model).
If the item is animated (must be multiple PNGs in a folder in the "Items" folder), you can set the FPS here. It's generally recommended to keep item FPS under 45. You can put any floating-point number here, so even something like 3,7 FPS is valid.
Alternatively, you can also use GIFs as animated items, but it is recommended to use PNG sequences as described above to get the best quality (GIFs can be a bit grainy).

Once the item is in the scene, you can move/scale/rotate it with the same controls as for the model on PC/Mac and iOS/Android. To attach an item to the model, just drop it on there.


The item will be attached to the uppermost ArtMesh in your model at the position where you drop the item. The point of attachment will be the CENTER OF THE ITEM IMAGE. This can make it a bit tricky sometimes to attach the item to the correct ArtMesh, so you may need to play around a little bit to make it work properly.

Once your item is at the correct position, you can double-tap (double-click) it to lock the position. That way, you can no longer move, scale or rotate the item until it is unlocked again. If the item is attached to your model, it will still move according to the model movement.
If you move, scale or rotate the Live2D model itself, any locked items attached to the model will also move, scale and rotate with it as you would expect.
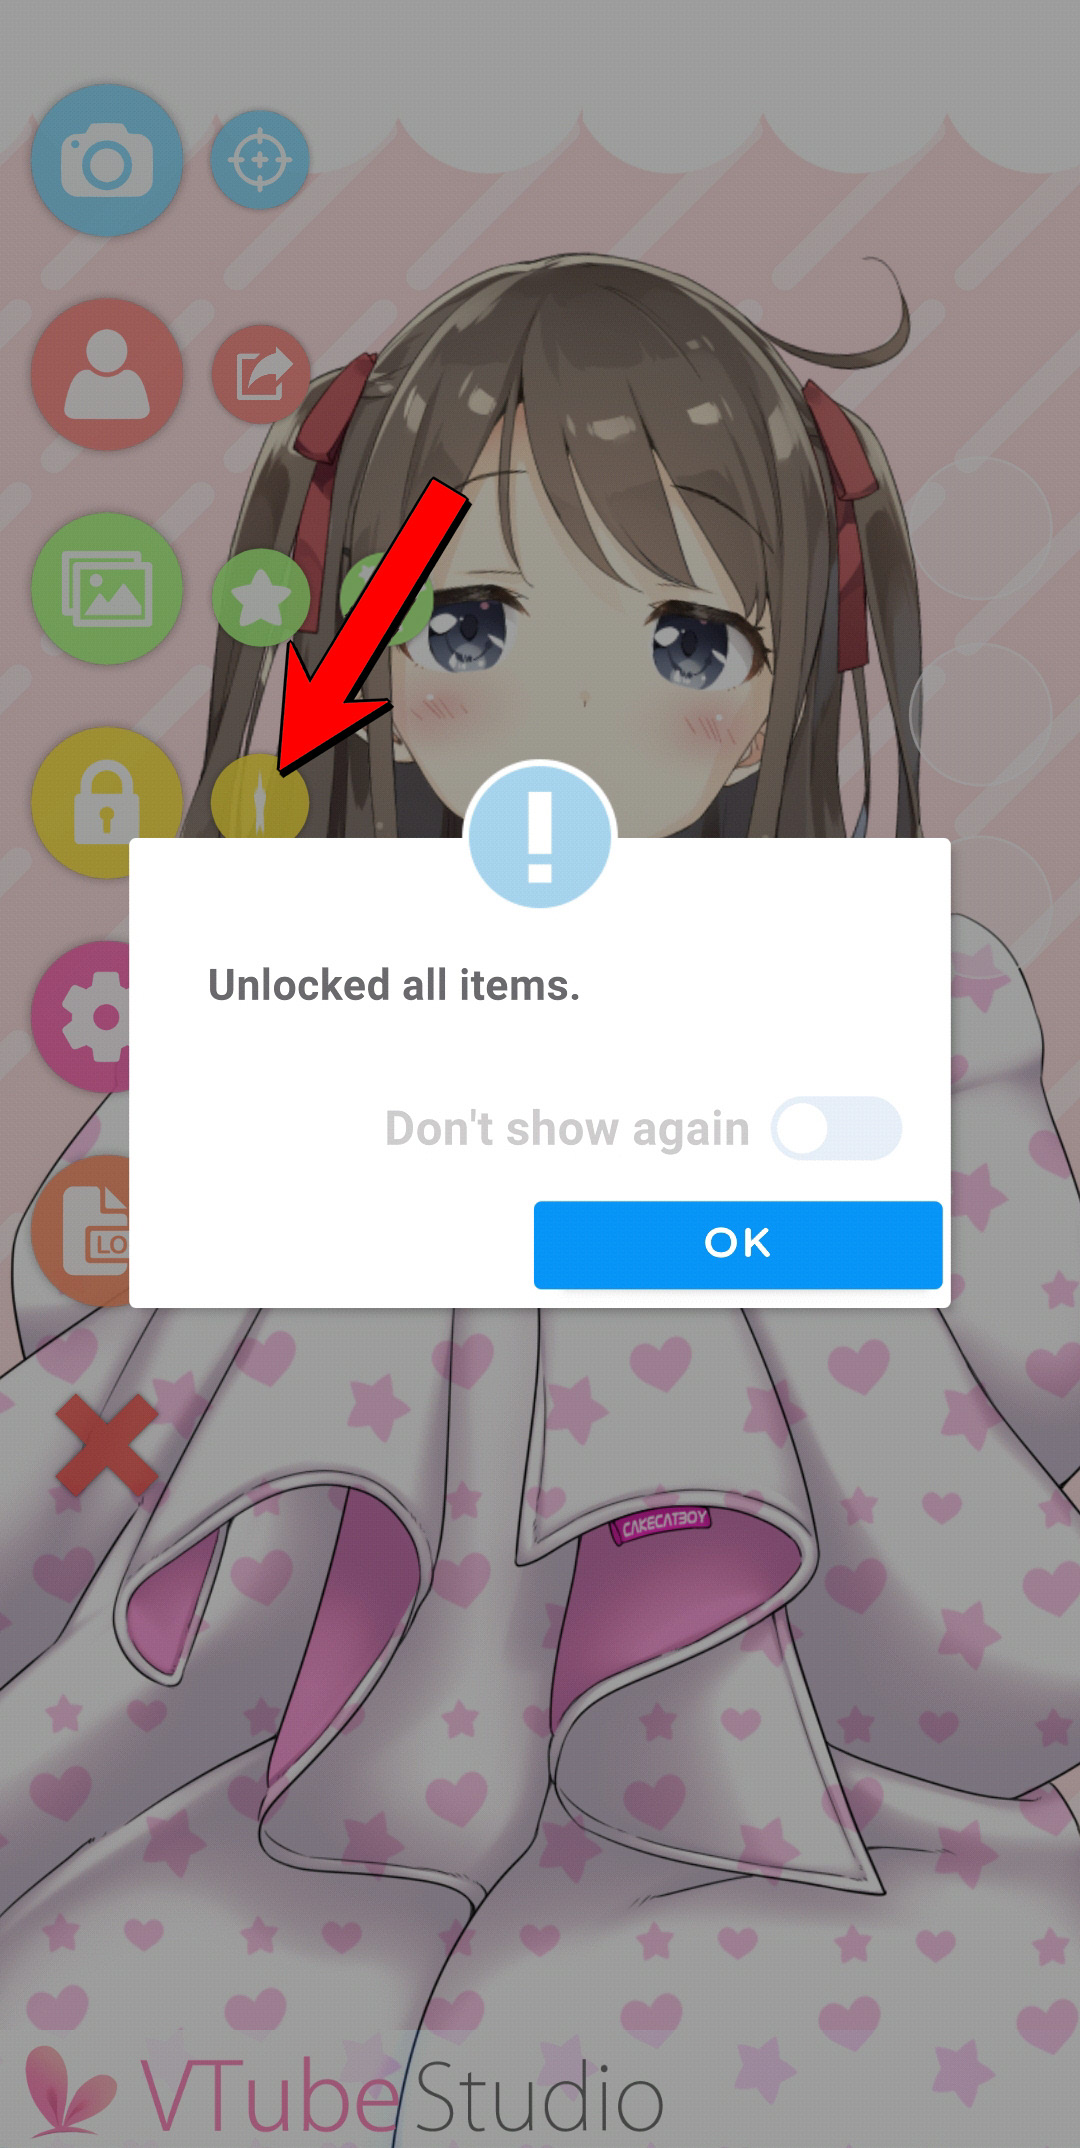
To unlock locked items, choose the option from the main menu (see arrow in second image). By pressing that button once more, all items will be locked again.
To delete items from the scene, simply drag them over the trash can icon in the bottom right. It will only appear if you drag an item near it. You can also drag and drop items off-screen, that will also delete them from the scene.
You can [Ctrl] + Click items to flip them (only if not locked).
Most of the free included items/props have been provided by @catboymech and @7MDigital on Twitter. They have many other great VTuber assets as well, so please make sure to follow and thank them!! <3
You can also use Live2D models as items. For more info, see this page.
On Windows and macOS you can also directly drag items into the VTube Studio window. You can drag them from anywhere on your PC or Mac (any folder, desktop, etc.) onto the VTS window and they will spawn at the center of the scene. They will be set to 0 smoothing and to track the model, so you can attach them afterwards. This allows you to add items to the scene without opening the UI mid-stream.
You can drag in PNGs, JPGs, GIFs and folders containing PNG animation frames, which will be imported as animations. On Windows, you can also drag in multiple files at the same time. Items added later will be placed in front of items added earlier. The limit for the maximum number of items still applies.

You can exclude ArtMeshes (parts of your model, basically the layers of the base PSD) from item pinning. You might want to do that for overlay layers like blushes, effects and so on. You can also select ArtMeshes that that delete any items that are dropped on them. For more information on how to do that, check the page "Add Special ArtMesh Functionality".
![]() 如果本使用手冊沒有回答到您的問題,請在 VTube Studio Discord
如果本使用手冊沒有回答到您的問題,請在 VTube Studio Discord ![]() 伺服器中詢問!
伺服器中詢問!
![]()
- 介紹&需求
- 已知問題
- 在哪裡可以取得模型?
- Android vs. iPhone vs. 網路攝影機
- 開始使用
- 載入您自己的模型
- 載入您自己的背景
- VTube Studio 設定
- 顯示器光源
- 視覺效果
- Spout2 背景
- VTS 模型設定
- 表情(貼圖/表情符號)
- 動畫
- 動畫、追蹤、物理等之間的互動
- 串流到 Mac/電腦
- 使用 OBS 錄製/串流
- 不使用 Steam 啟動
- 以系統管理員身分啟動
- 復原舊版本的 VTS
- NVIDIA Broadcast 人臉追蹤器
- Google Mediapipe 人臉追蹤器
- Tobii 眼動追蹤器
- 手部追蹤
- 唇音同步
- 使用單一網路攝影機或 iPhone/Android 裝置控制多個模型
- 連線問題&故障排除
- 拍攝/分享螢幕截圖
- 物品系統
- Live2D 物品
- 重新著色模型和物品
- 錄製動畫
- 多人遊戲
- VNet 安全性
- Twitch 互動
- 新增特殊圖形網格功能
- 物品場景&物品快速鍵
- 外掛程式(YouTube、Twitch 等等)
- VTube Studio 模型檔案
- 在模型間複製設定
- 傳送資料至 VSeeFace
- Steam 工作坊
- 如何解決延遲問題
- 如何解決網路攝影機問題
- Live2D Cubism Editor 溝通
- 常見問答
- 隱私權政策、授權條款和其它條款
