使用 OBS 錄製/串流
- You should never use green-screen. VTube Studio supports transparency using various capture methods.
- On Windows, using Spout2 is recommended. It is fast and does not capture the VTube Studio UI. See the next section for more details.
- On macOS, use a normal game capture or NDI, which supports transparent video streaming as well. However, NDI may not be very performant.
ONLY AVAILABLE ON WINDOWS. This is the recommended OBS capture method in VTube Studio, because:
- It is fast (almost no CPU usage).
- The video is high-quality and supports transparency (no green-screen needed).
- It does not capture the VTube Studio UI.
- It supports any number of VTube Studio windows at the same time (see here for info on how to start VTube Studio multiple times).
To be able to use this, you must first install the Spout2 plugin for OBS.
⚠️ IMPORTANT: The official Spout2 installation guide (on their website, [LINK REMOVED]) mentions "Resize Output (source size)". IF YOU READ THE OFFICIAL GUIDE, DO NOT FOLLOW THIS STEP AS IT MAY BREAK YOUR OBS SCENES!!!!! ⚠️
You can download the Spout2 OBS plugin from here: https://github.com/Off-World-Live/obs-spout2-plugin/releases
There are different versions for different OBS versions (like OBS v27, 28, 29, ...). Make sure you download the correct Spout2 plugin version for your OBS version.
IF IT FAILS TO INSTALL, try using the other installer (they have two, one "manual" and one "automatic"). Also, try running the installer as admin.
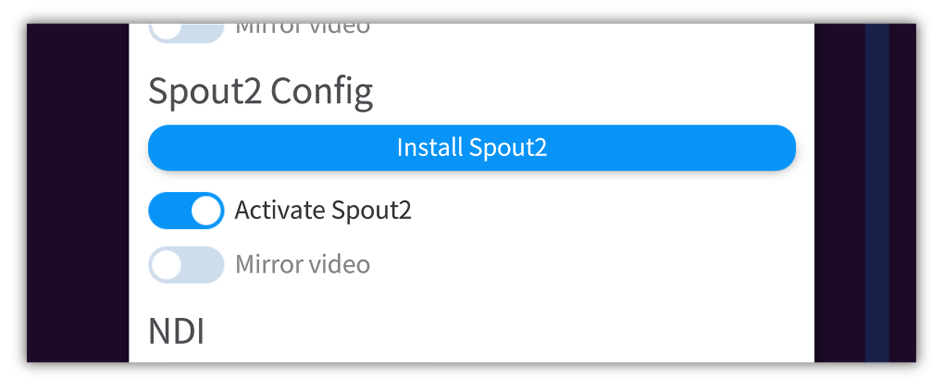
Then, turn on Spout2 in VTube Studio.
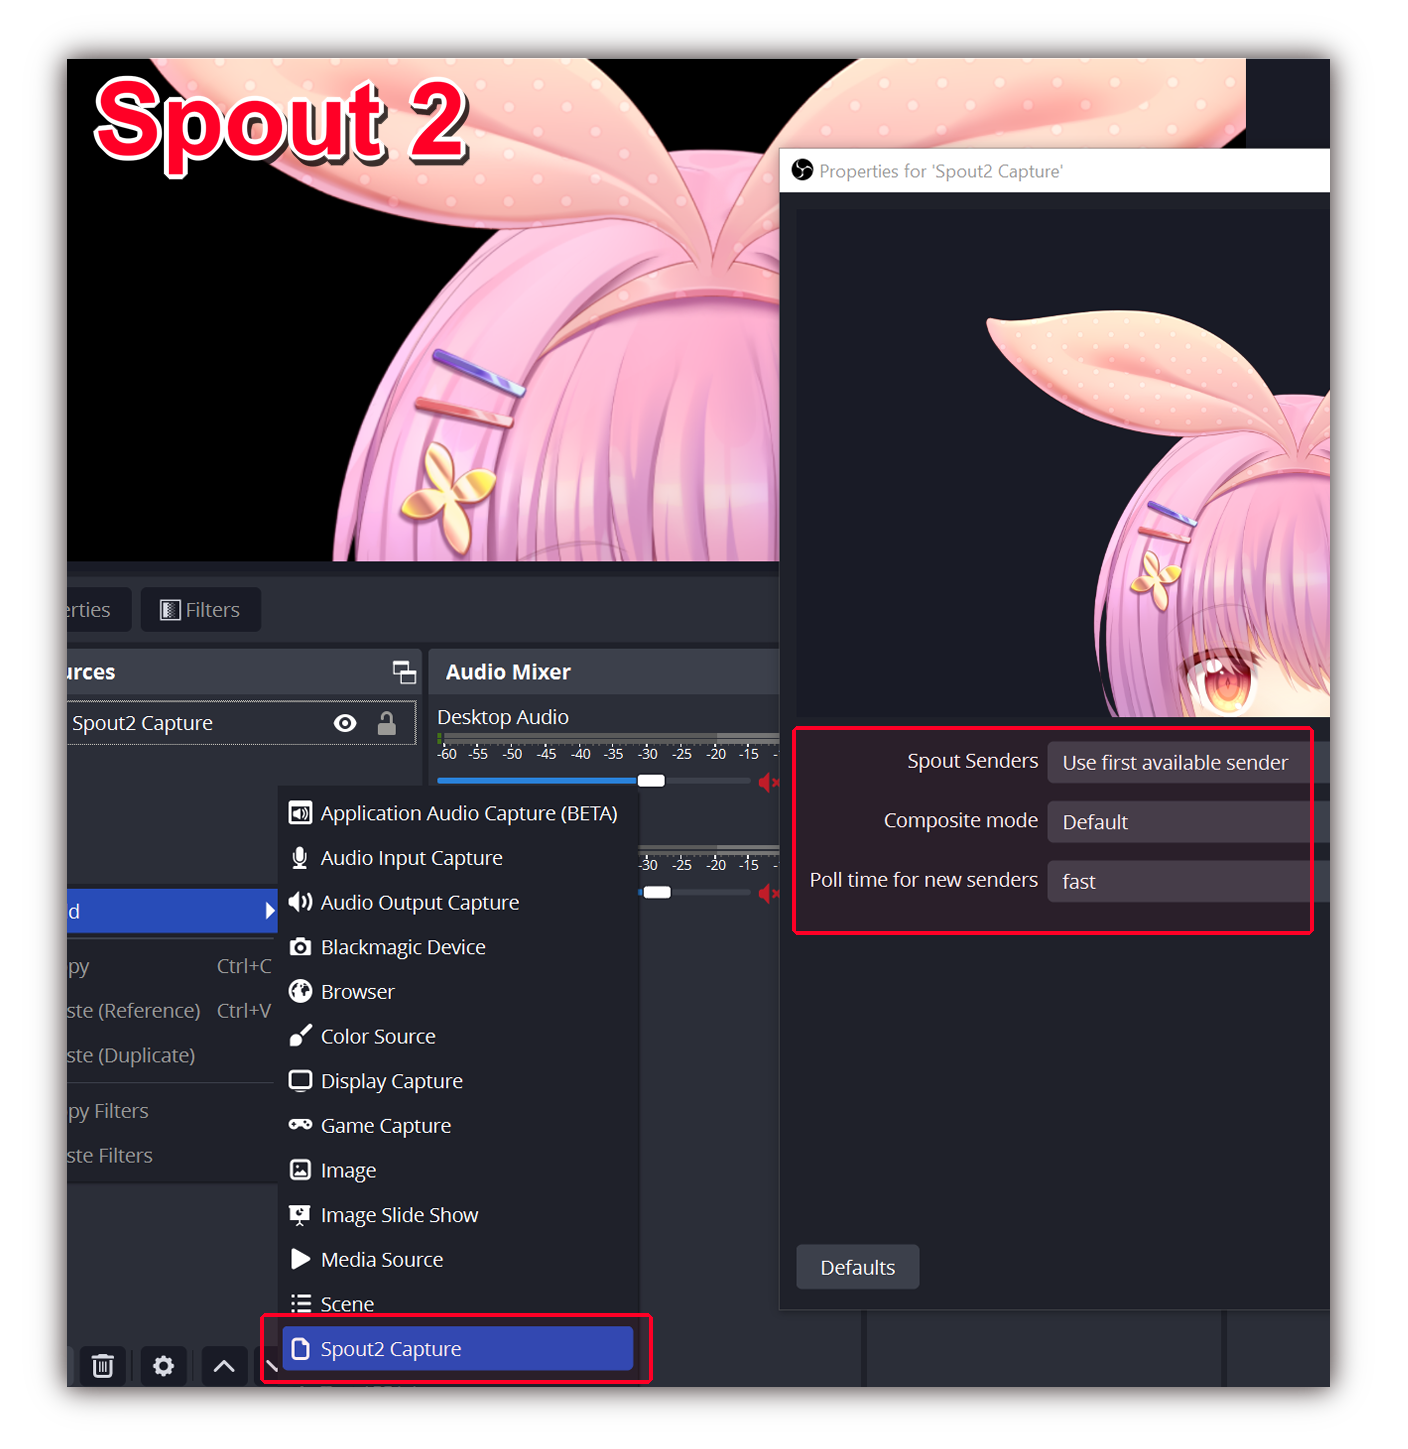
Finally, create a Spout2 source in OBS like this.
Note: Instead of "First available sender", you can also directly choose "VTubeStudioSpout", here. If you have multiple VTube Studio windows active, they will show up as "VTubeStudioSpout2", "VTubeStudioSpout3", ...
If you want to use transparency (YOU SHOULD), make sure you have selected the "Color Picker Background" in VTube Studio and "Transparent in capture" is on.
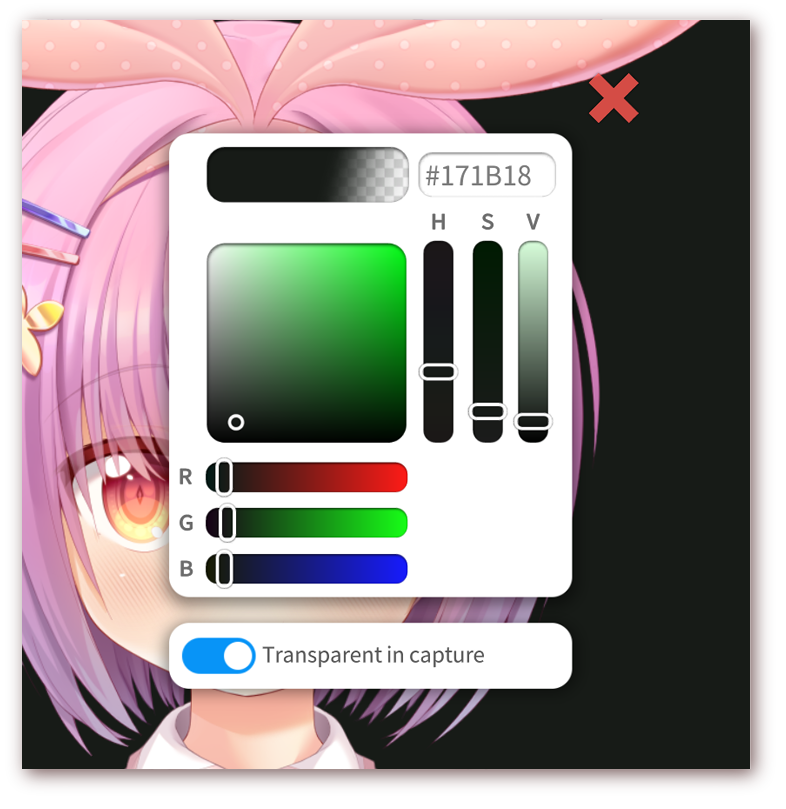
On your PC in VTube Studio, choose the Color Picker background. On Windows, you can use the "Transparent in capture" option here, which will make the window background transparent when the window is recorded in OBS so you don’t need to use greenscreen/chroma keying.
On macOS, this feature is not supported by OBS, so choose any color you want here. You can remove that color from the video capture in OBS using a "Chroma Key" filter. Keep in mind that you can't use that color in your Live2D model, otherwise some parts of your model may be transparent as well.
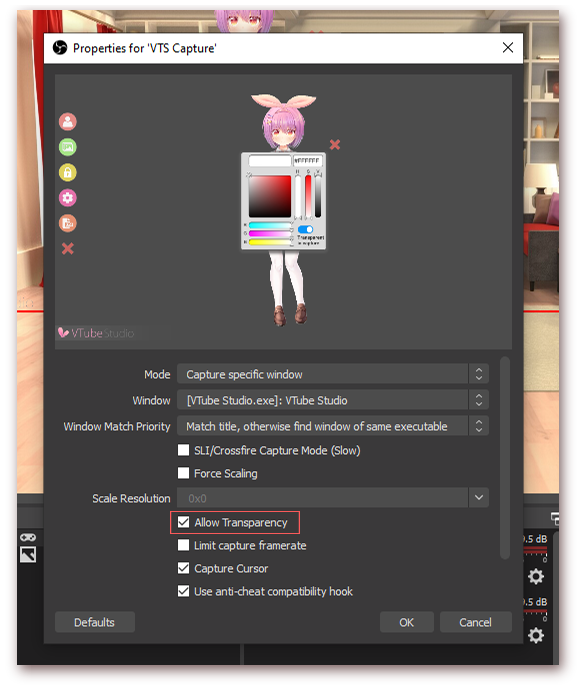
Add a background in OBS, then add a capture for VTube Studio. To do that, select "Game Capture". This supports transparent backgrounds but is only available on Windows. On macOS, this option is called "Syphon Client", but does not work after macOS 10.14 Mojave (see https://github.com/zakk4223/SyphonInject), so you need to use a regular window capture and a chroma key filter.
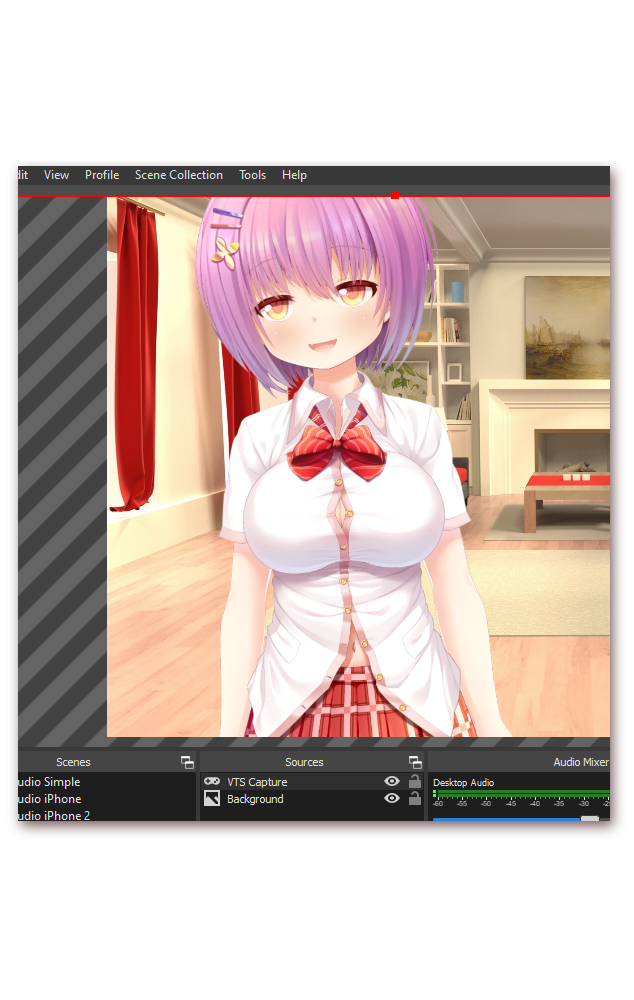
Your capture is now active. On macOS, you need to add a filter to remove the green (or whatever color you selected) background using Right Click your capture → Filters → Add Filter → Chroma Key.
You can now place your character anywhere on screen by moving/scaling/rotating it in directly in VTube Studio or in OBS.
Alternatively, you can use the Virtual Webcam feature or NDI in VTube Studio to create a webcam stream and then directly use that in apps like Zoom, Discord, etc. (see FAQ).
It is recommended to use OBS "Game Capture" to record the VTS window. Alternatively, you can use the Virtual Webcam or Newtek NDI (Network Device Interface) to create a video stream that can be used as input for software such as OBS.
The quality and latency of NDI streams is very good. It also supports a transparent background (no chroma/color key needed) and does not record the VTube Studio UI at all. CPU utilization of VTS may increase when using NDI. OBS plugins exist for macOS and Windows.
OBS Plugin Page: https://obsproject.com/forum/resources/obs-ndi-newtek-ndi%E2%84%A2-integration-into-obs-studio.528/
OBS Plugin Download (Win/Mac): https://github.com/Palakis/obs-ndi/releases/tag/4.9.1
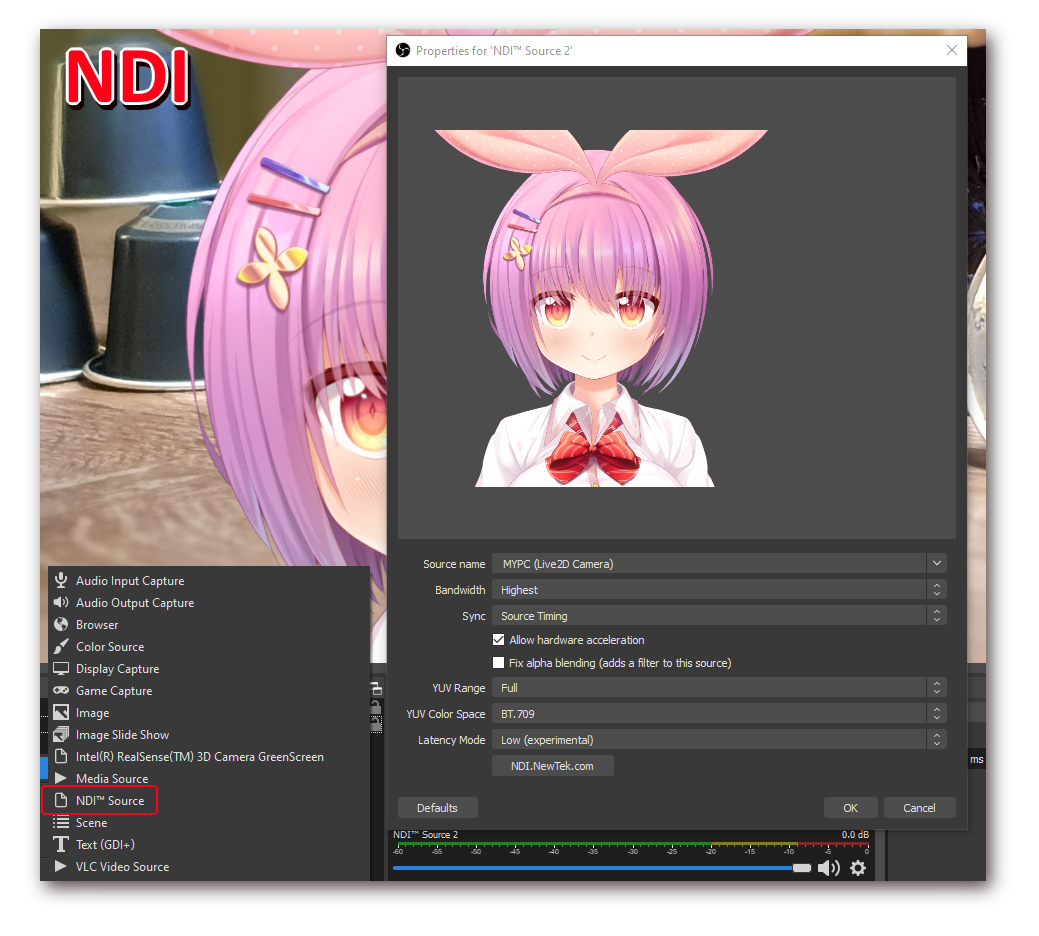
To use NDI, download the plugin from the GitHub-page linked above (.exe for Windows, .pkg for macOS) and install it. In VTube Studio, activate the NDI toggle in the "Camera Settings" tab. It is possible but not recommended to have NDI and the Virtual Webcam active at the same time.
VTube Studio lets you choose between NDI 4 and 5. It is recommended to use NDI 5 if it works without lag on your PC. By the way, NDI streams created by VTube Studio will be visible in your whole local network, so you could even have OBS running on a different PC and it will be able to read the NDI stream from VTube Studio (unless a firewall or network security settings prevent it).
Unlike with the Virtual Webcam, which only supports one stream, if you have multiple VTube Studio instances open, they will all show up as different (numbered) NDI sources in OBS.
In OBS, the following settings are recommended:
This works similar to NDI. Just activate the Virtual Webcam in the VTube Studio settings, go to the color picker background and make sure you've checked "Transparent in OBS".
In OBS, you should now see a webcam called "VTubeStudioCam". Add it to your scene with the following settings (except the resolution):
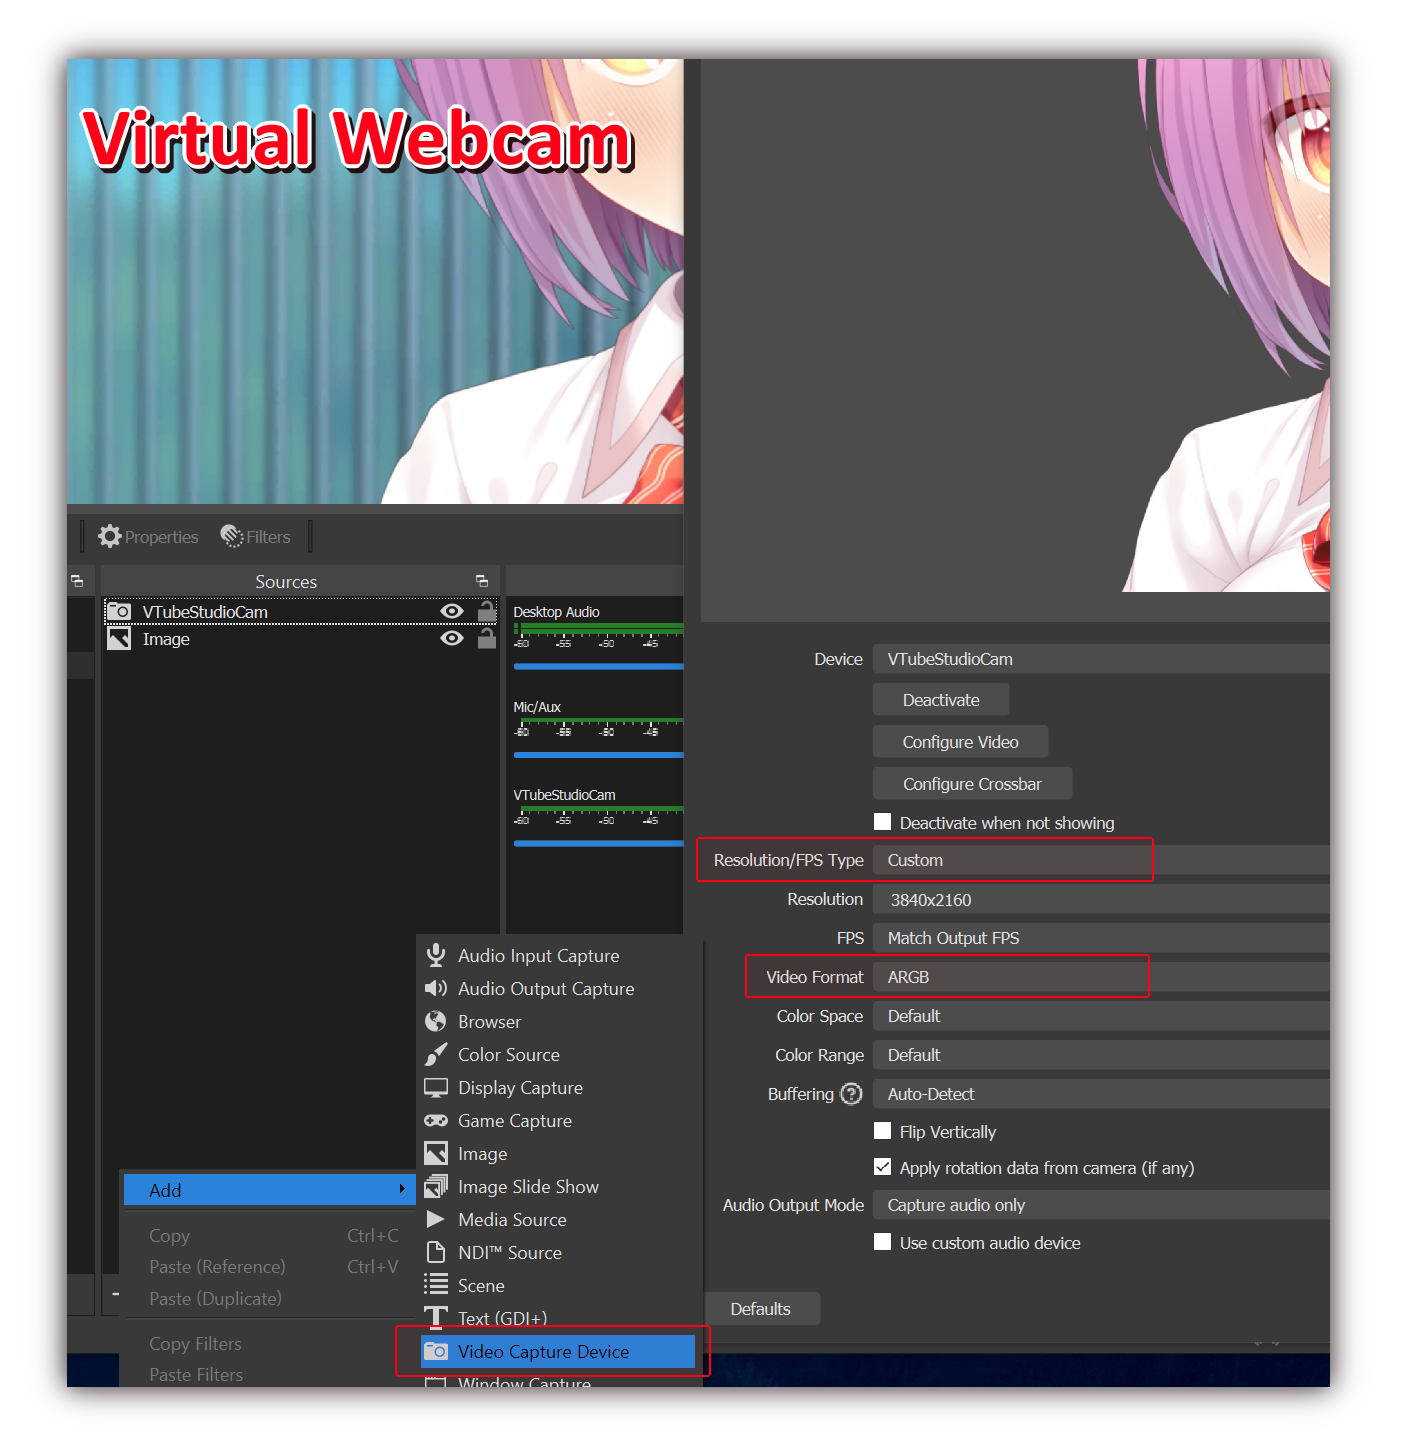
Make sure you have actually turned on the Virtual Webcam in VTube Studio. Go to the camera settings in VTube Studio and check if "Activate Virtual Webcam" is on.
Try starting both OBS and VTS as admin. For more info on how to do that check out this page.
Also, some apps like "RTSS Rivatuner" can prevent OBS from capturing certain apps like VTube Studio.
Make sure OBS is running as admin.
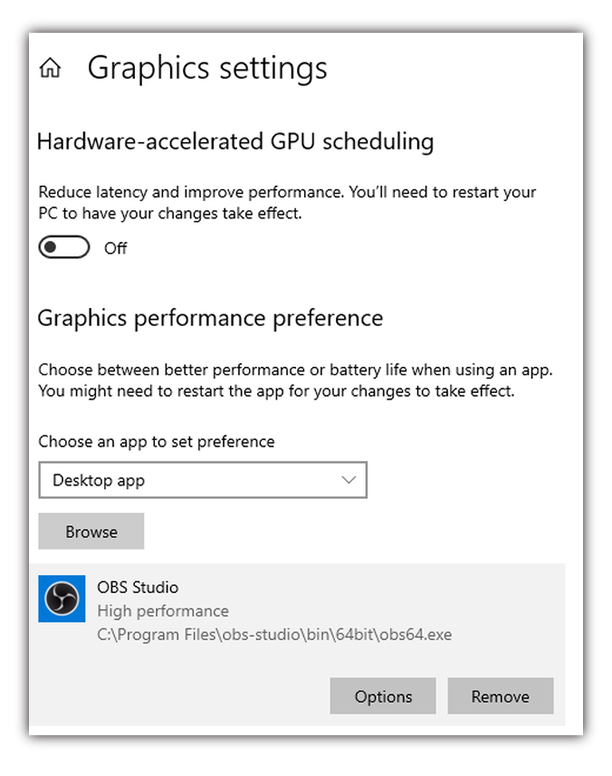
Also, if you are on a laptop (or multi-GPU-PC) and Game-Captures or Spout2-Captures just show up as black/invisible, it's possible that VTube Studio and OBS are running on different GPUs. Many laptops will have one integrated GPU (included in the CPU) and one dedicated GPU. Make sure both OBS and VTS are running on the dedicated GPU.
How to do that is explained here in detail: https://obsproject.com/kb/gpu-selection-guide
![]() 如果本使用手冊沒有回答到您的問題,請在 VTube Studio Discord
如果本使用手冊沒有回答到您的問題,請在 VTube Studio Discord ![]() 伺服器中詢問!
伺服器中詢問!
![]()
- 介紹&需求
- 已知問題
- 在哪裡可以取得模型?
- Android vs. iPhone vs. 網路攝影機
- 開始使用
- 載入您自己的模型
- 載入您自己的背景
- VTube Studio 設定
- 顯示器光源
- 視覺效果
- Spout2 背景
- VTS 模型設定
- 表情(貼圖/表情符號)
- 動畫
- 動畫、追蹤、物理等之間的互動
- 串流到 Mac/電腦
- 使用 OBS 錄製/串流
- 不使用 Steam 啟動
- 以系統管理員身分啟動
- 復原舊版本的 VTS
- NVIDIA Broadcast 人臉追蹤器
- Google Mediapipe 人臉追蹤器
- Tobii 眼動追蹤器
- 手部追蹤
- 唇音同步
- 使用單一網路攝影機或 iPhone/Android 裝置控制多個模型
- 連線問題&故障排除
- 拍攝/分享螢幕截圖
- 物品系統
- Live2D 物品
- 重新著色模型和物品
- 錄製動畫
- 多人遊戲
- VNet 安全性
- Twitch 互動
- 新增特殊圖形網格功能
- 物品場景&物品快速鍵
- 外掛程式(YouTube、Twitch 等等)
- VTube Studio 模型檔案
- 在模型間複製設定
- 傳送資料至 VSeeFace
- Steam 工作坊
- 如何解決延遲問題
- 如何解決網路攝影機問題
- Live2D Cubism Editor 溝通
- 常見問答
- 隱私權政策、授權條款和其它條款
