How to import data into PINT
- Introduction
- How do you want to call this dataset
- Upload input files
- Sample organism(s)
- Tissue/Cell line
- Isobaric Label
- Samples
- Experimental conditions(s)
- Experiment/Replicates
- Summary of elements
- Input files
- Experiment / Replicates map
To import datasets into PINT, click on Submit button from the PINT home page. That will open the new re-designed import dataset wizard
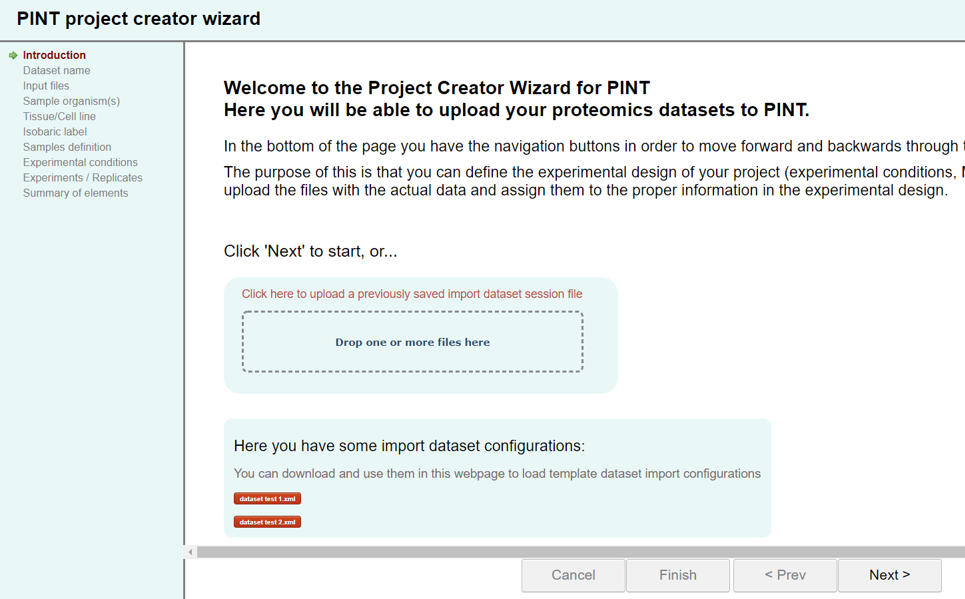
To start there is 2 options:
- you can just click on Next>> button on the bottom-right to start a new import dataset process from scratch, or
- you can upload a previously saved import dataset progress file and continue a previous submission. This file could also be one of the template dataset files available to download at the bottom.
After you enter the dataset name and description, you can download the progress of the import process by clicking on the button save progress on the top-right and download a file which you can use to continue the process later.
You can also use it as a template for next datasets you want to import in PINT.
Go to the next section to learn more about using these XML files.
Then, in the left panel of the wizard you will see the steps that you will need to follow in order to import the dataset. The green arrow highlights the current wizard step. You can go forwards and backwards in any moment to modify each step in any time, unless an action is required by the wizard before you leave the current wizard step.
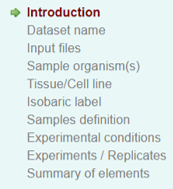
Here we are going to try to explain each of the steps that you have to follow. However, we have tried to include the necessary explanations in the web interface. Anyway, we are here to help you on this, and if you have any other suggestion, please let us know.
-
Introduction:
First, you will have the option to use a previously saved progress or just start from scratch. As explained before, you can download and save the progress of the import process by clicking on the button save progress. Here you can upload that file so that all the experimental design and input data files are loaded into the interface and you can continue the dataset import process where you left it.
You can also download and load one of the available examples at the bottom so that you can see some examples of how to fill the information. -
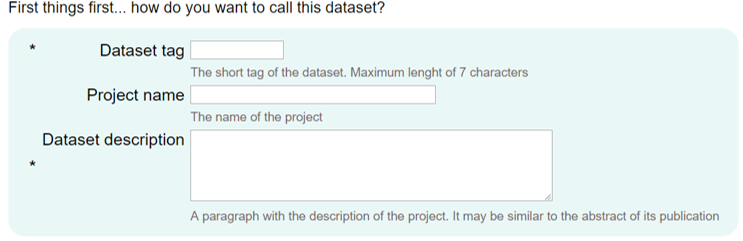
How do you want to call this dataset?
In this first step, you will need to enter a short name, a name and a description for the dataset. The short name will be the one that will appear in the list of datasets on the Browse page and it cannot be changed later since it will determine the direct link to the dataset.
-
Upload input files:
Secondly, you need to upload your dataset files from your computer. You can either select them or drag and drop them in the area marked.
Once they are uploaded, PINT will try to assign them a format, however if not possible, you will have to select the type of files that they are before continuing to the next step.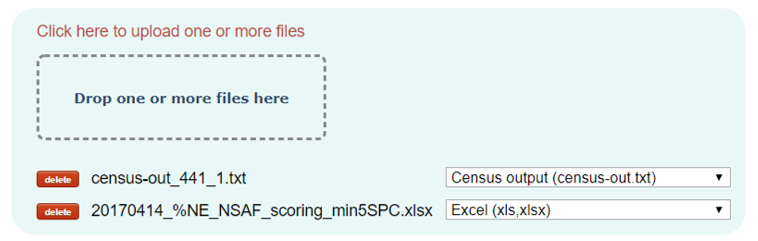
-
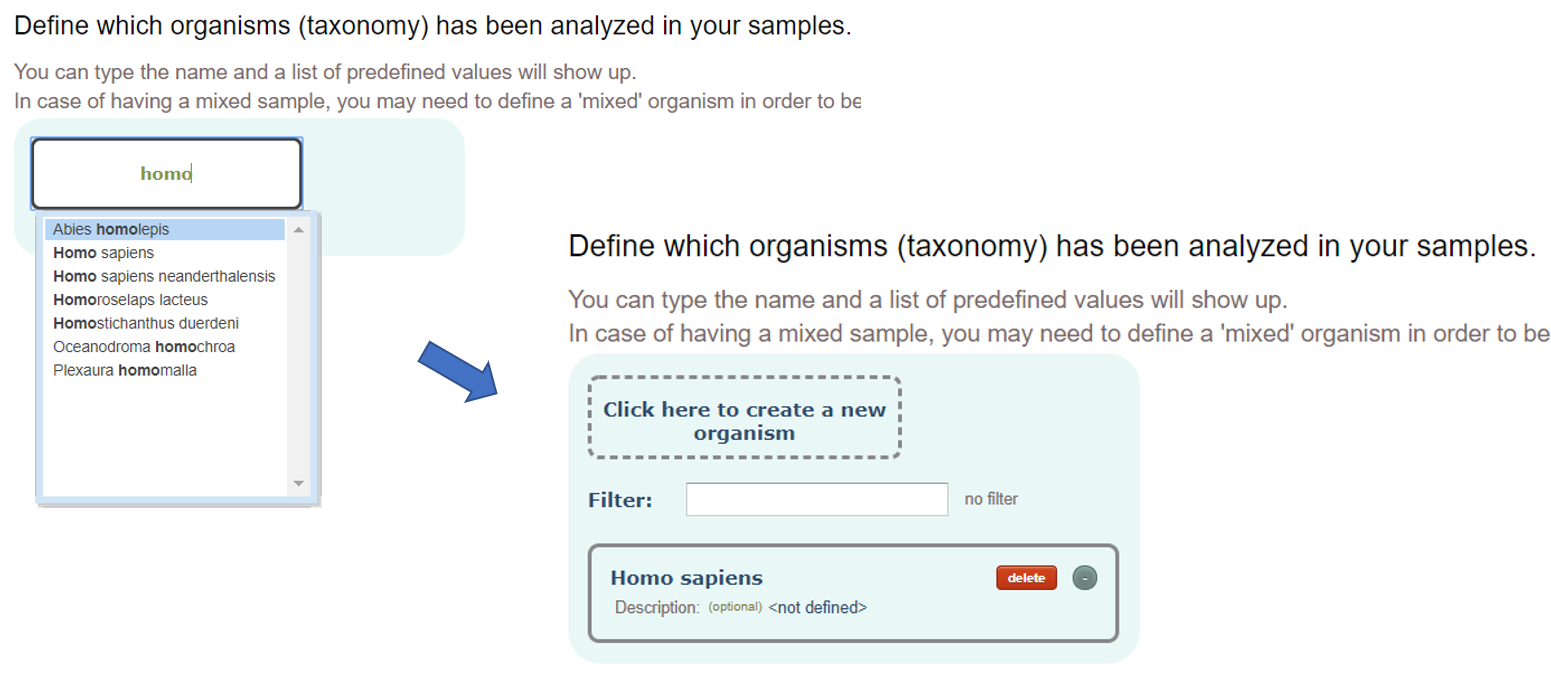
Sample organism(s):
Organism or taxonomy from which the samples were extracted from. You will be able to select from a comprehensive list of organisms once you type something.
Note that if the list of proteins of the dataset contains UniprotKB identifiers or identifiers that can be mapped to UniprotKB, the Organism of the proteins will be automatically assigned from the information annotated in UniprotKB.
Optionally, you can add a description to it.
-
Tissue/Cell line:
Tissue or Cell line from which the samples were extracted.
Optionally you can add a description to it.

-
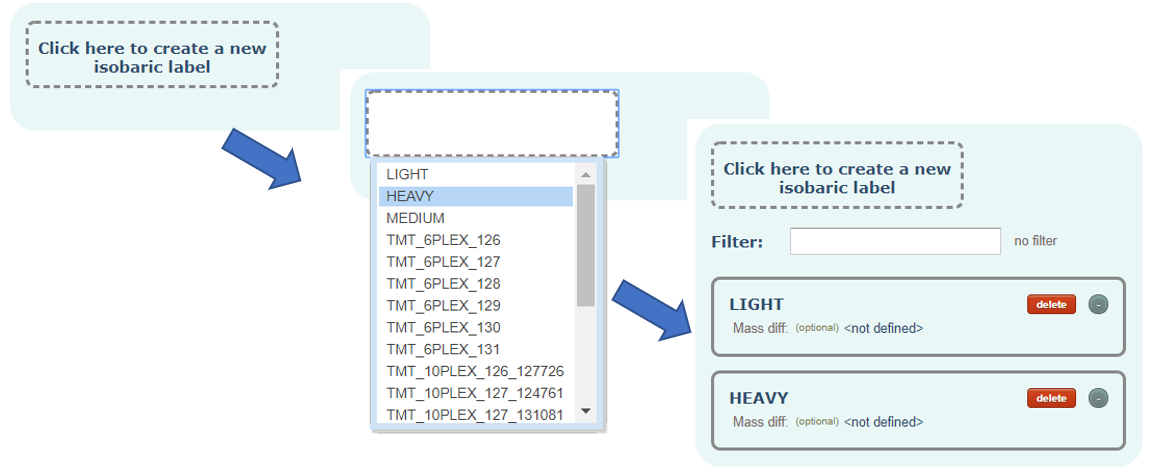
Isobaric Label:
The isobaric label in case of having labelled samples. Each sample will be able to be associated with none or one label.
Optionally, you can define the mass modification that implies the label.
-
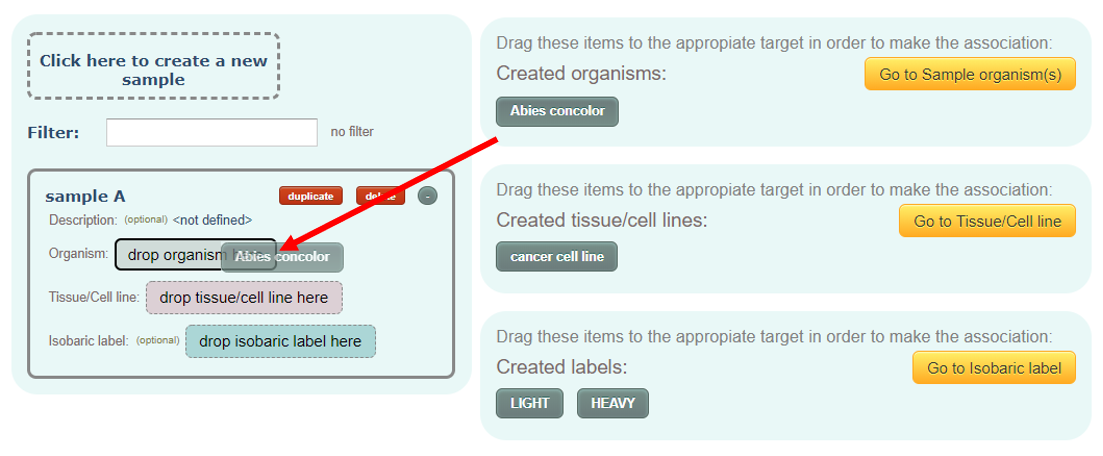
Samples:
Here you have to define the samples in your analysis. The concept of sample here may be different than a tube in which you have your experimental sample. The sample here means any sample with an specific experimental condition associated to it.
This is a one-to-one association and therefore a sample cannot be associated with multiple experimental conditions and an experimental condition cannot be associated with multiple samples.
In this page, you must create at least one sample, and it must be associated with an organism and a tissue/cell type. Optionally, with an isobaric label too.
You can optionally add a description text for each sample.
Associations are done by dragging and dropping the elements at the right to the sample items in the left.
-
Experimental condition(s):
These are the experimental conditions analyzed in the dataset. As we explained before, an experimental condition must be associated with only one sample and likewise, one sample must only be associated with one experimental condition.
After creating the experimental conditions, you will have to use them in several other steps such as in the processing of input files or the definition of quantitative ratios. Then, you will see the name of the experimental condition together with the associated sample (and label in case of a labelled sample).
You can optionally add a description text for each experimental condition.
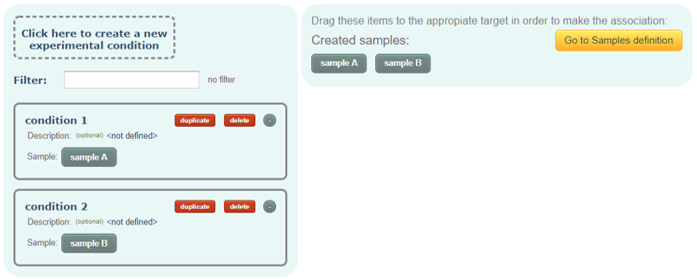
Tip: If you click on duplicate button of an experimental condition, a new experimental condition will be created with the same name but numbered as _2, _3, etc. Additionally, if more than one sample has already been created, the new experimental condition will be associated with the next non-associated sample. So, if you have samples: sample A, sample B, and sample C, and you create condition 1, by clicking twice to duplicate red button, it will automatically create the conditions condition 2 associated with sample B and condition 3 associated with sample C. This can speed up the process by avoiding the need of drag and drop every single sample into all the experimental conditions after creating all of them manually. Tip 2: You can always rename the name of the created items by clicking on it.
-
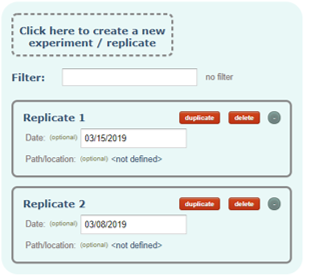
Experiment/Replicates:
An experiment or replicate in which proteins, peptides and PSMs where detected. This serves to avoid duplications of proteins, peptides and PSMs in certain cases. For example, if a pooled sample (2 samples from 2 experimental conditions) was analyzed in a single MS run, the user will have to associate the input file containing the identified proteins and peptides with the same Experiment in both experimental conditions.
If you have multiple input files coming from different technical replicates, you will have to create as many replicates as you have and then associate each of them with the corresponding input file in the latest step.
-
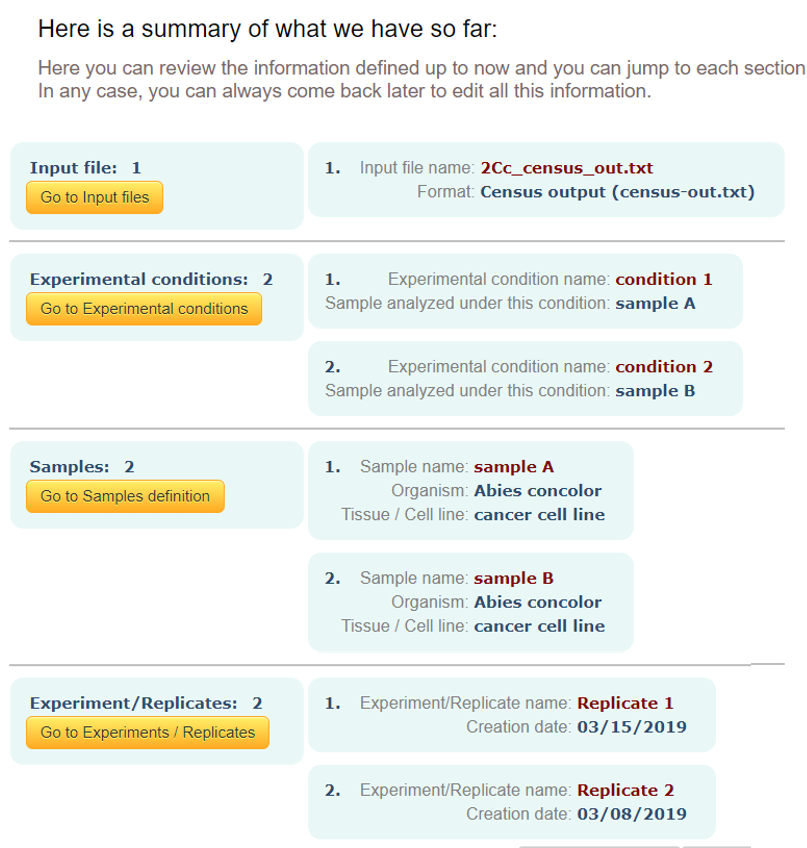
Summary of elements:
In this page you will be able to see all elements created up to this step. In case you want to come back to modify or add something, you can click on "< Prev" button or on any of the yellowish buttons to directly jump to the desired step.
-
Input files:
-
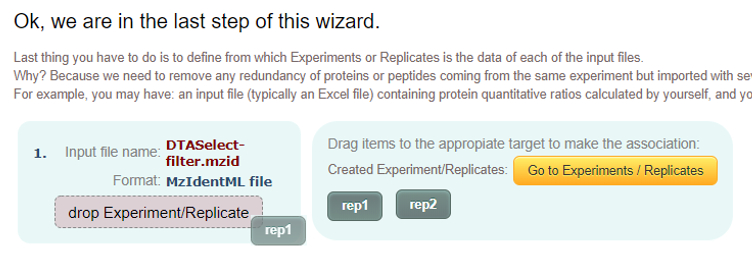
Experiment / Replicates map:
In this page you will have to map the experiments or replicates to you input files.
Therefore in case of having information about the same set of proteins and peptides in two different files, for example, one with the identification information and other file with the quantification information, in this step, you will have to associate both input files to the same experiment or replicate in order to not duplicate the same proteins and peptides in the system.