2. Software setup
After assembling the case and wiring the electronics for the RPi (see the 'hardware directory'), it's time to get the Software and configurations set.
Get in touch with us and we will provide you with a working SD card image which you can Flash to an sd card.
Boot up Raspberry Pi and connect to internet, and update Raspberry Pi with commands
sudo apt-get update
sudo apt-get upgrade
sudo reboot
Applications menu -> Preferences -> Raspberry Pi Configuration -> Interfaces -> ENABLE; Camera, SPI,(SSH, VNC are optional)
sudo reboot
After reboot
Power Raspi off and add header extension, attach GPS to UART pins. Place RTC on I2C.
Connect Pi HQ camera to raspberry pi
Connect Button to GPIO26 and to GND
Connect LED light to GPIO18, 5v (back of RTC), and GND
Power Raspberry pi on
pip3 install pandas
sudo pip3 install maplotlib
sudo apt-get install libatlas-base-dev
pip3 install scipy
if this does not work, try:
sudo apt-get install python3-scipy
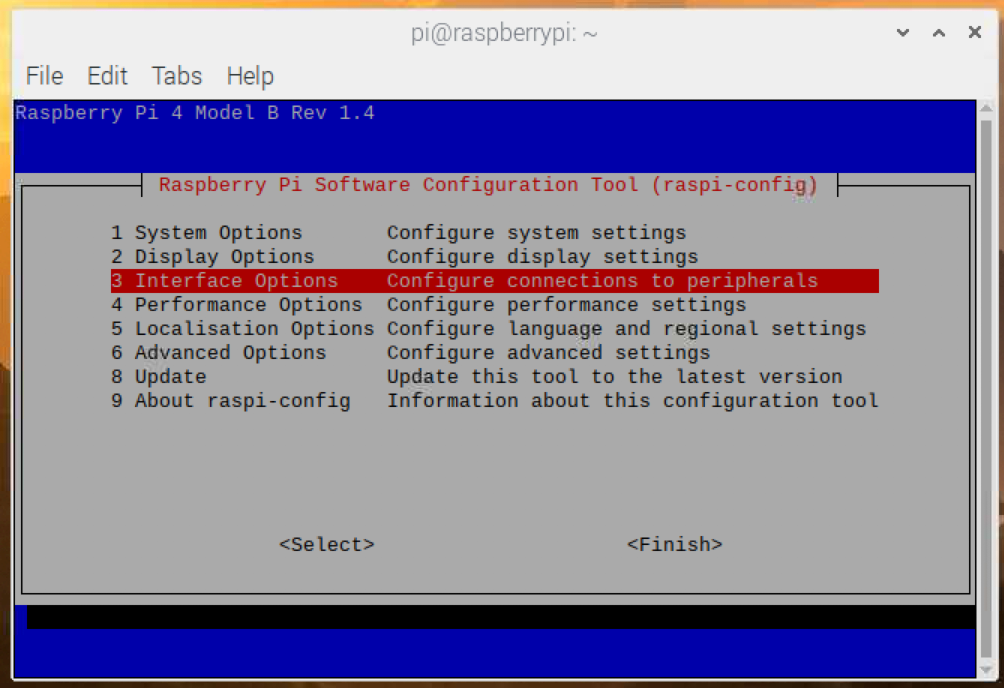
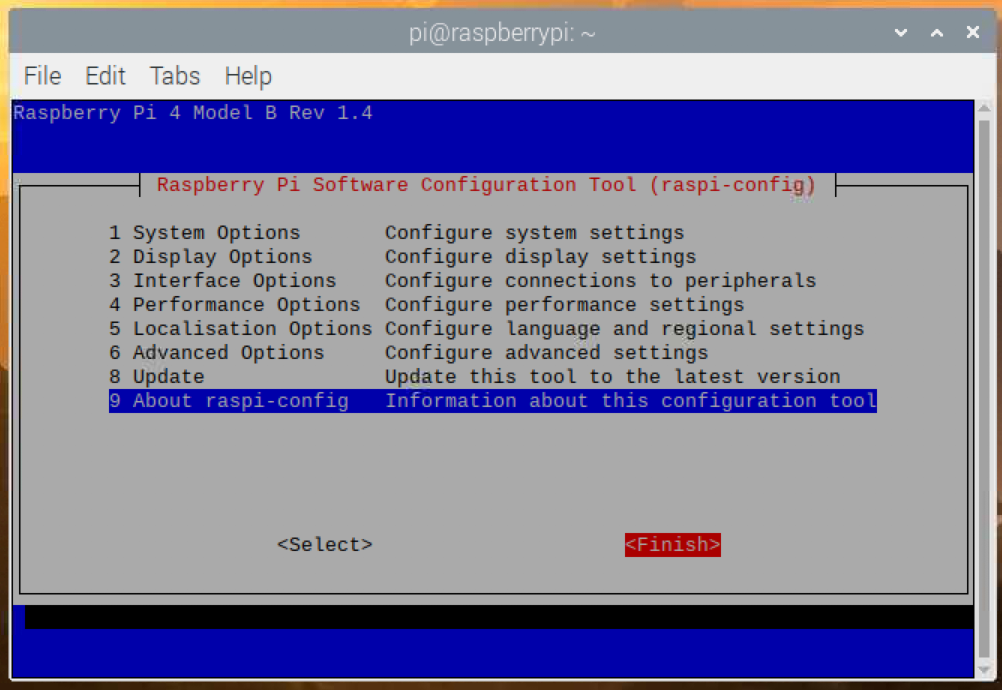
sudo raspi-config
interfacing options (3) -> Serial Port (P6) -> No -> Yes -> Finish
then reboot
Install, gpsd, gpsmon and cgps
sudo apt-get install gpsd-clients gpsd -y
config GPS to work with correct serial device
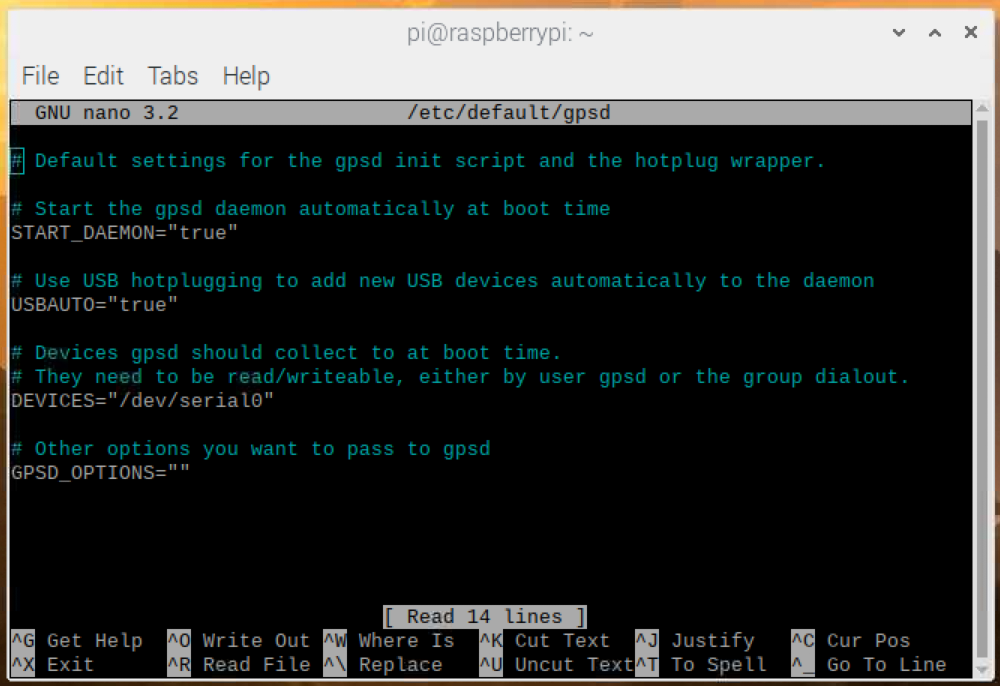
sudo nano /etc/default/gpsd
Look for DEVICES=""
Change to DEVICES="/dev/serial0"
Now save file (control X, Y)
pip3 install gpsd-py3 to download gps for python3
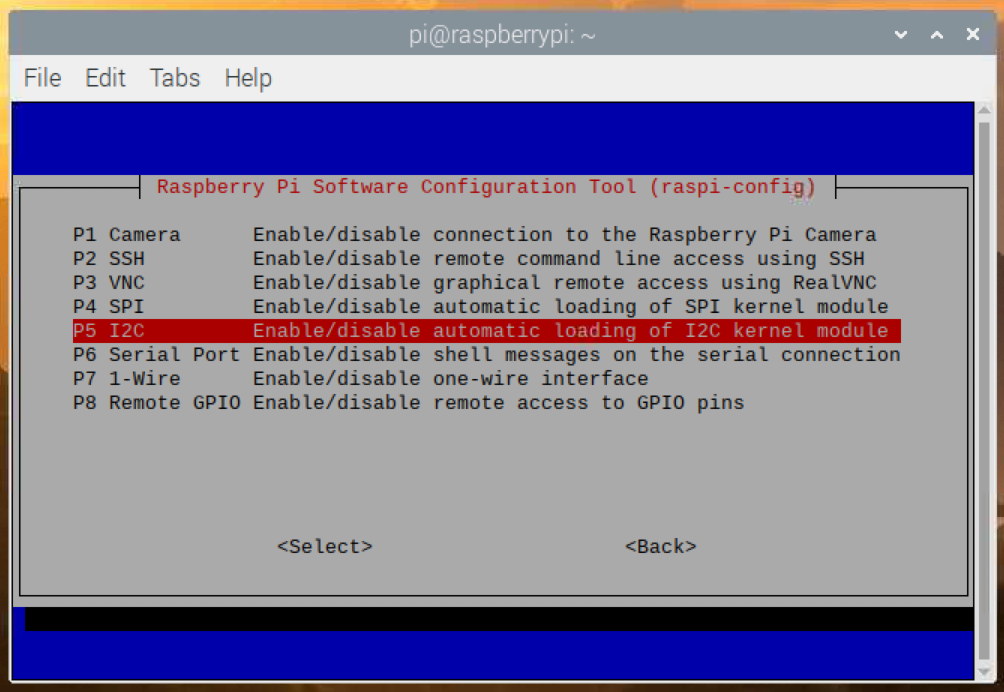
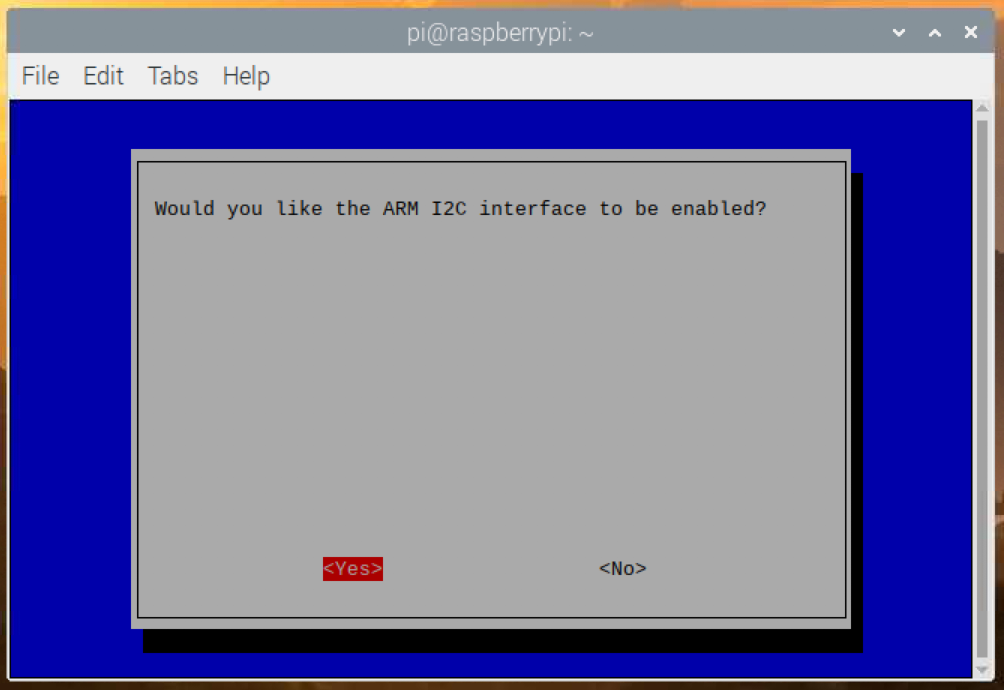
sudo raspi-config Interface options (3) -> (P5) I2C -> yes -> finish
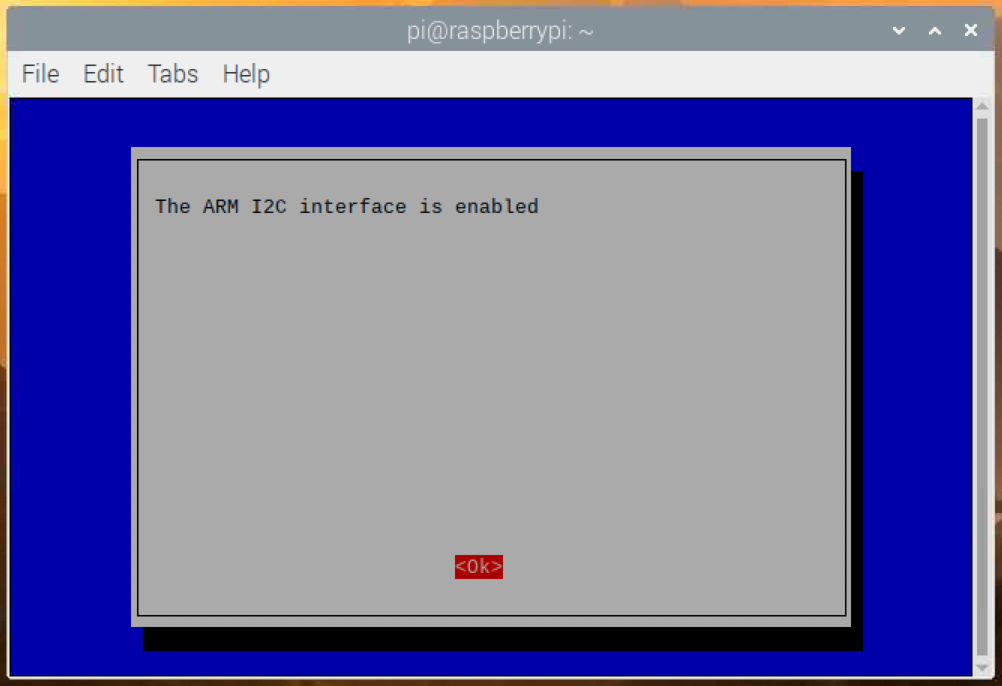
sudo reboot
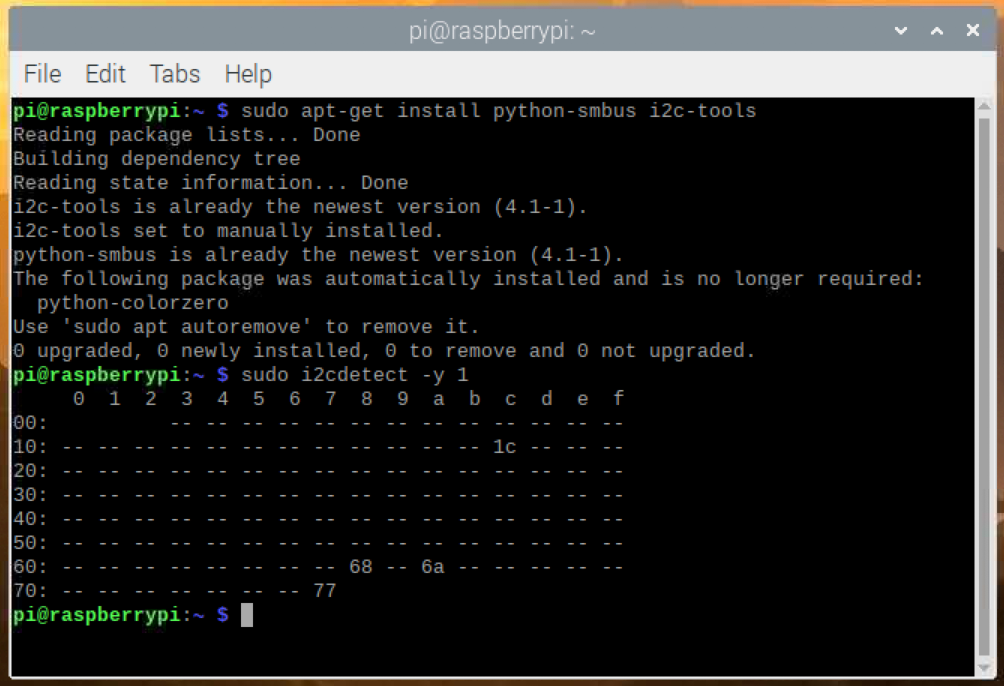
Now use i2cdetect to see if the RTC is working
sudo i2cdetect -y 1 will show mounted drives, you should see a 68
sudo nano /boot/config.txt
Add to the end
#rtc
dtoverlay=i2c-rtc,ds3231
save and exit (control x, y, enter)

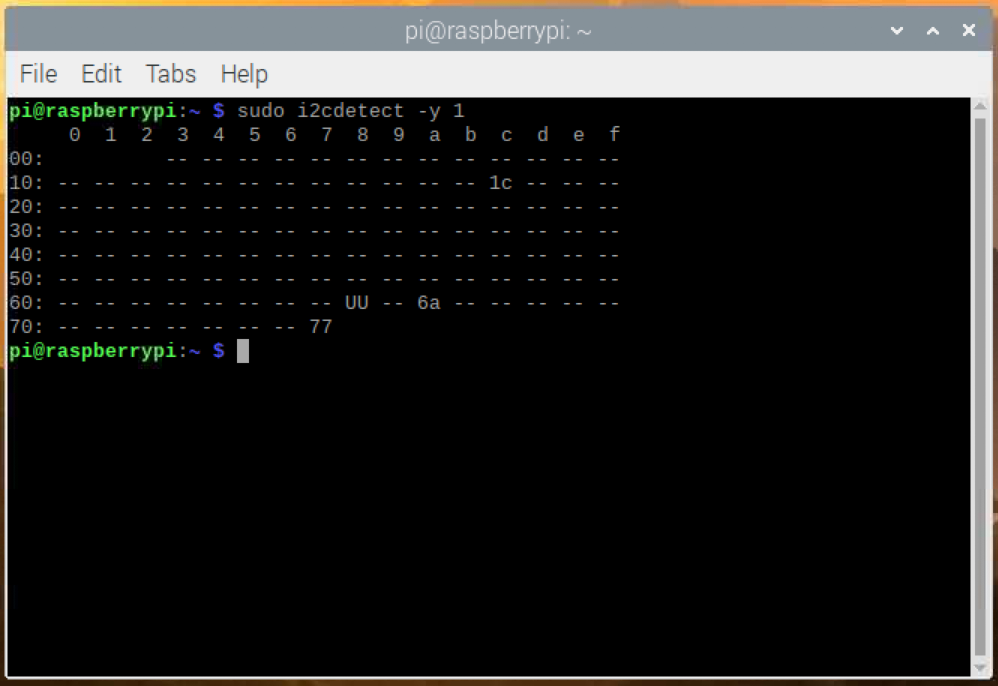
Now that we have the RTC ready to work on boot, restart your pi and..
sudo i2cdetect -y 1 a mounted drive will have a "UU" ID
Setting up RTC to be the main clock
First disable the fake "hwclock"
sudo apt-get -y remove fake-hwclock
sudo update-rc.d -f fake-hwclock remove
sudo systemctl disable fake-hwclock
Second make the RTC to the main clock
Run sudo nano /lib/udev/hwclock-set and comment out the following lines with #
if [-e/run/systemd/system];then
exit 0
fi
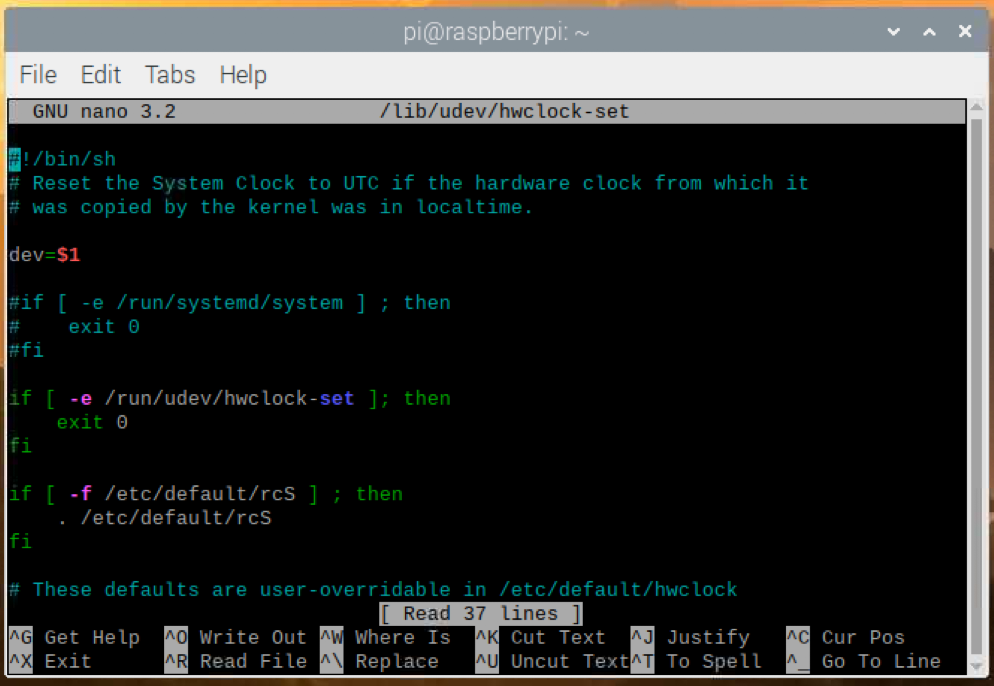
/sbin/hwclock --rtc=$dev --systz --badyear
/sbin/hwclock --rtc=$dev --systz
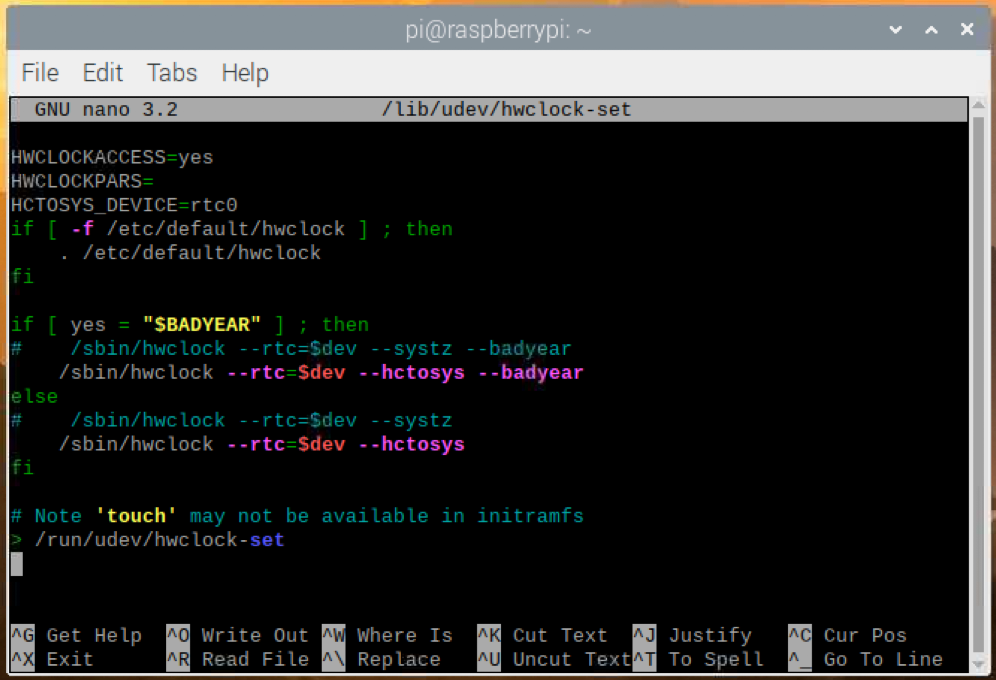
Make sure there is an internet connection so that the clocks can sync
sudo pip3 install rpi_ws281x adafruit-circuitpython-neopixel
Follow instructions to pip install the tflite runtime on the Raspberry Pi
https://www.tensorflow.org/lite/guide/python
create a /models/ directory on the desktop and place the *.tflite file (the tflite model) in that directory.
visit https://github.com/dbuscombe-usgs/pyDGS to look pyDGS or download to pi with git clone --depth 1 https://github.com/dbuscombe-usgs/pyDGS.git
once downloaded edit test.py script to look like example code in SandCam --> camerasoftware --> pyDGS --> example_test.py
next copy the pycache folder, dgs.pyc, and dgs.py to your SandCam folder
Helpful instructions to get packages for Ring LED, GPS, and RTC
https://www.thegeekpub.com/16187/controlling-ws2812b-leds-with-a-raspberry-pi/
https://ozzmaker.com/berrygps-setup-guide-raspberry-pi/
https://maker.pro/raspberry-pi/tutorial/how-to-add-an-rtc-module-to-raspberry-pi