Simple Wizard Tutorial
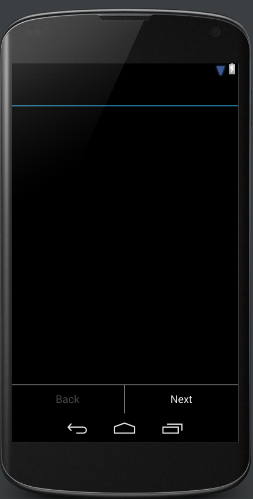
This tutorial demonstrates a simple case scenario where the wizard is only providing information in a couple of steps. WizarDroid comes with a basic built-in Wizard layout that can be used. The layout consists of two buttons, with default labels: 'Next' and 'Back' (configurable if needed) located at the bottom of the screen. See Creating Custom Wizard Layout If you wish to create your own custom wizard layout.
* The source code for this tutorial is available on GitHub under wizardroid-sample folder
- Create a Fragment that inherits from BasicWizardLayout and override onSetup() to define the wizard's flow
- Set up the layout for each step (or reuse the same layout and dynamically modify its content)
- Create your Wizard's steps by inheriting from WizardStep
- Hook up the wizard to its host activity
###1. Inheriting from BasicWizardLayout
public class TutorialWizard extends BasicWizardLayout {

    /**
     * Note that initially BasicWizardLayout inherits from {@link android.support.v4.app.Fragment} and therefore you must have an empty constructor
     */
    public TutorialWizard() {
        super();
    }

    //You must override this method and create a wizard flow by
    //using WizardFlow.Builder as shown in this example
    @Override
    public WizardFlow onSetup() {
		/* Optionally, you can set different labels for the control buttons
        setNextButtonLabel("Advance");
        setBackButtonLabel("Return");
        setFinishButtonLabel("Finalize"); */

        return new WizardFlow.Builder()
                .addStep(TutorialStep1.class)           //Add your steps in the order you want them
                .addStep(TutorialStep2.class)           //to appear and eventually call create()
                .create();                              //to create the wizard flow.
    }
}
Since we are using the built-in wizard layout, there is no need to handle onClick() event for the wizard control buttons. In this scenario we just display text without any input given from the user. Learn how to handle user input and persist it among steps in this tutorial.
#####1.A. Buttons Labels
You can change the default buttons' labels by calling setNextButtonLabel(string), setBackButtonLabel(string), setFinishButtonLabel(string) in onSetup().
###2. Steps Layout
For simplicity, we will re-use the same layout for all the steps and dynamically change its content.
<LinearLayout xmlns:android="http://schemas.android.com/apk/res/android"
          android:orientation="vertical"
          android:layout_width="match_parent"
          android:layout_height="match_parent">

<TextView
        android:layout_width="fill_parent"
        android:layout_height="wrap_content"
        android:id="@+id/textView"
        android:layout_marginTop="10dp"
        android:textSize="20dp"/>
</LinearLayout>
###3. Creating the steps by inheriting from WizardStep
TutorialStep1
public class TutorialStep1 extends WizardStep {

    //Wire the layout to the step
    public TutorialStep1() {
    }

     //Set your layout here
    @Override
    public View onCreateView(LayoutInflater inflater, ViewGroup container,
        Bundle savedInstanceState) {
        View v = inflater.inflate(R.layout.step_tutorial, container, false);
        TextView tv = (TextView) v.findViewById(R.id.textView);
        tv.setText("This is an example of Step 1 in the wizard. Press the Next " +
                   "button to proceed to the next step. Hit the back button to go back to the calling activity.");

        return v;
    }
}
TutorialStep2
public class TutorialStep2 extends WizardStep {

    //You must have an empty constructor for every step
    public TutorialStep2() {
    }

    //Set your layout here
    @Override
    public View onCreateView(LayoutInflater inflater, ViewGroup container,
                             Bundle savedInstanceState) {
        View v = inflater.inflate(R.layout.step_tutorial, container, false);
        TextView tv = (TextView) v.findViewById(R.id.textView);
        tv.setText("This is an example of Step 2 and also the last step in this wizard. " +
                "By pressing Finish you will conclude this wizard and go back to the main activity." +
                "Hit the back button to go back to the previous step.");
        return v;
    }
}
###4. Hook up the wizard to its host activity
IMPORTANT: The activity MUST inherit from FragmentActivity or its child classes! Otherwise, you will get the following exception when starting the activity: android.view.InflateException: Binary XML file line #5: Error inflating class fragment.
public class TutorialActivity extends FragmentActivity {

    @Override
    public void onCreate(Bundle savedInstanceState) {
        super.onCreate(savedInstanceState);
        setContentView(R.layout.activity_tutorial);
    }
}
And the activity's layout:
<FrameLayout xmlns:android="http://schemas.android.com/apk/res/android"
    android:orientation="vertical"
    android:layout_width="fill_parent"
    android:layout_height="fill_parent">

    <fragment
        android:id="@+id/tutorial_wizard_fragment"
        android:layout_width="match_parent"
        android:layout_height="wrap_content"
        android:name="org.codepond.wizardroid.sample.wizards.TutorialWizard" />
</FrameLayout>
That's it! Run the application and see how it's working.
This is just a very basic example of what you can do with WizarDroid. Carry on to the next tutorial to learn. how you can create a form in multiple steps while WizarDroid handles persistence in the background.