-
Notifications
You must be signed in to change notification settings - Fork 10
Home
This guide will get you started in using the CoreMedia Content as a Service (CaaS) experience.
CoreMedia CaaS is the framework which allows you to access your CoreMedia content as JSON through a REST API.
Processing Definitions configure the response for specific types of content.
The first step in making a Processing Definition is to create a GraphQL Schema, which defines a mapping from the content properties in the repository scheme to the attributes
that you would like to expose. These attributes can be as simple as pass through properties from the document types, properties with fallback logic or arbitrarily computed attributes.
The schema can be defined statically following the Schema Definition or can be generated mostly automatically using the Schema Generator.
Then you define a set of GraphQL Queries which will be matched against the schema. The queries are executed on the server side and define the selection of attributes from the schema to include in the JSON response.
There are two types of content properties which require special attention: links and richtext:
- Generating links is always tied to the client applications and use cases so there is only a simple sample implementation of a link builder. See Link Building for implementing custom link builders and adding them to a Processing Definition.
- Richtext in CoreMedia has a complicated structure and the richtext markup must be transformed to plain string form in order to be delivered as usable JSON. A generic Richtext Transformation API has been defined for this which can be extended as needed.
The workspace contains a sample module headless-pd/headless-pd-sample which can be used out of the box with the React Example Workspace.
-
Log in to CoreMedia Studio and open the Site Indicator document of the site
-
Note the ID property on the content tab. The value will be used for the
{siteId}placeholder in the REST URLs -
Go to the system tab end expand the Local Settings property box.
-
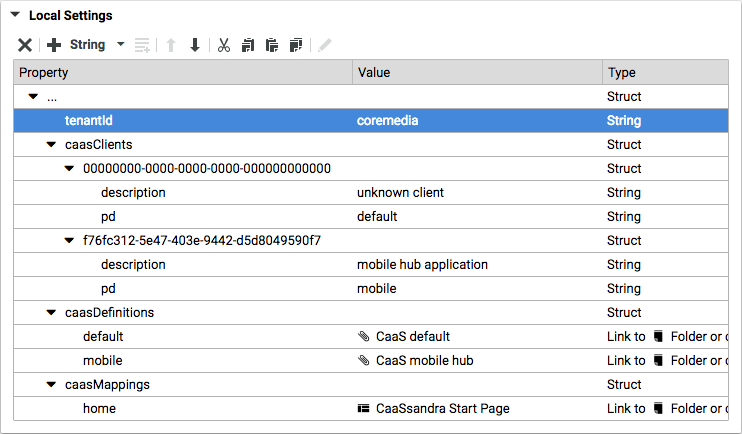
Add a String property wíth the tenant identifier to the settings.
Use only lowercase alphanumerical characters for it's value. This value will be used for the{tenantId}placeholder in the REST URLs.
-
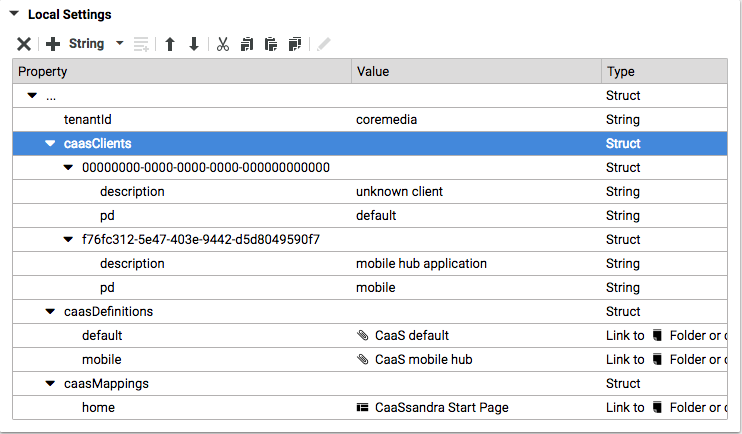
Add a Struct property
caasClients.
Below that add a Struct for every client you need to support with a different Processing Definition. The client identifiers are UUIDs. If you don't need to distinguish your clients you must still add one mapping with the empty UUID:
Clients must pass their identification as request header field
CoreMedia-ClientId. -
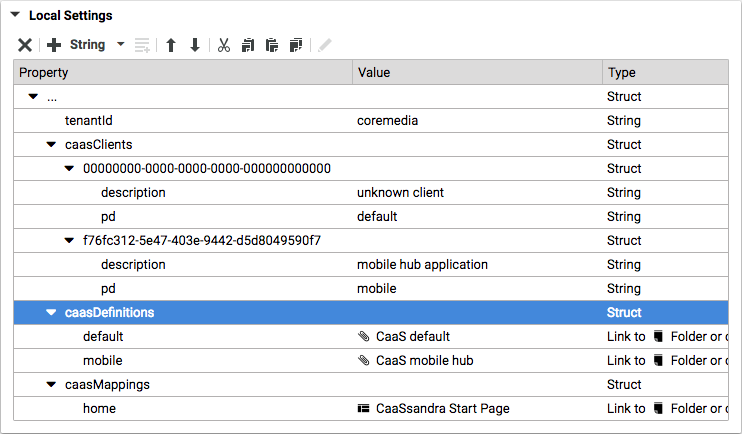
(Optional) Register Processing Definitions.

-
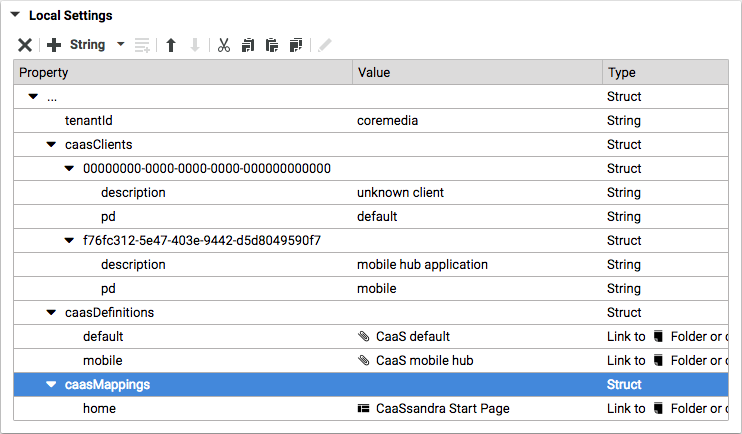
(Optional) Register alias names for special content.

Alias names can be used instead of numerical content IDs in the REST URLs.
-
Once your processing definitions have been created and added to Maven build or CoreMedia repository, you can build the server and start it, either by Spring Boot or as a Tomcat webapp. See the headless server README for details.
Use your favorite client side language and framework to connect to the headless server. Fetch the CoreMedia content as JSON and generate the output you require for your application. For an example take a look at the React-Fragments repository.