This is a repository containing a sample application that shows how to monetize your APIs using Zuplo.
Zuplo helps you ship great APIs from day one. Startups and big enterprises ship API auth, rate limiting, and developer documentation with amazing DX using our serverless API Gateway deployed at the edge. You can start free at zuplo.com and ship an API in minutes.
This example shows how to monetize an API using Zuplo. It uses a simple ToDo API as an example.
This sample application consists of 3 parts:
- Zuplo API Gateway: secures your API and allows you to monetize it
- Web app (NextJS): allows users to sign up and subscribe to the API
- Auth0: sign up and log in to web-app
- Stripe: subscribe and pay for the exact number of requests you make.
Your customers will be able to sign up to use your API using the web-app and make requests to your API using an API Key that they can generate in the Zuplo Developer Portal.
Stripe is used to manage the subscription of your users to your API. In this section, you will create a Stripe subscription product to allow your users to "pay as they go" and bill them for the exact number of requests that they made in a period of time.
Steps:
Login to your account in https://stripe.com.
If you're creating a new account, you can skip the section of Activate payments on your account.
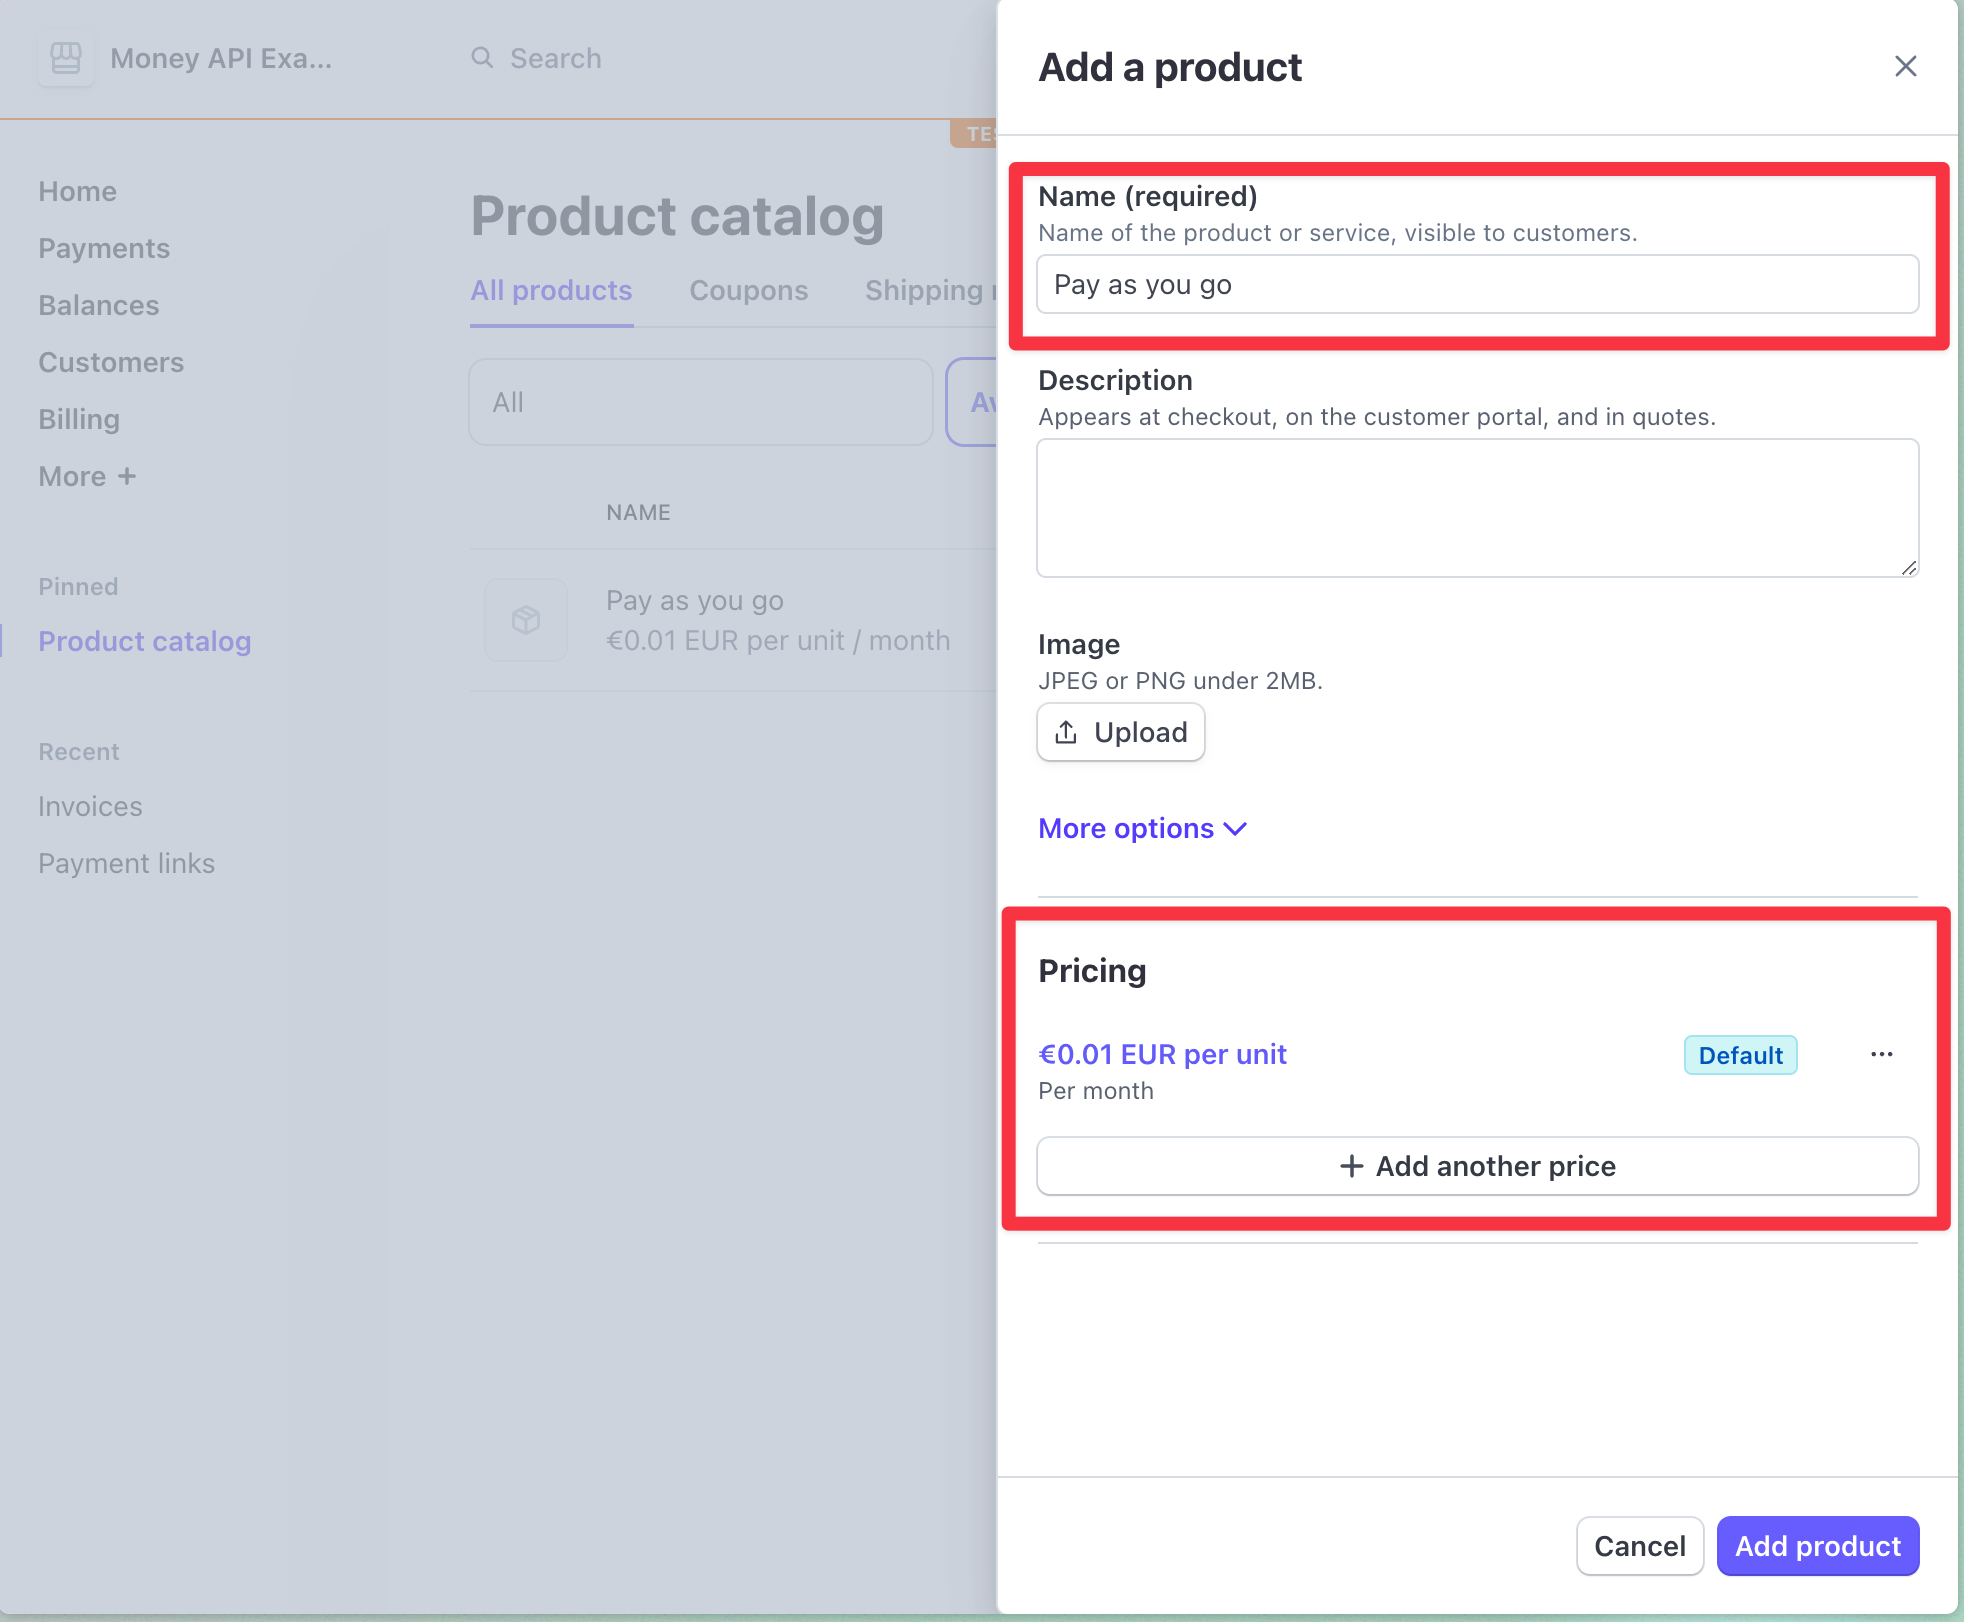
Go to Products and click Add a product.
Now create a product with the following details:
This Key will be used in the next step to configure the Zuplo API Gateway.
Copy the Stripe Secret Key from the top right menu Developers > API Keys > Copy Secret Key.
This API is configured to be deployed to Zuplo. You can find the git repo here, but all you have to do is click on the deploy button below and Zuplo will automatically create a copy of the project and deploy it for you 😎
You should see the below screen. Enter a custom name for your project or accept the default suggestion. Click Zup It! to complete the deployment.
Auth0 Demo Tenant: To make it easier to get started with this demo we have provided you with a demo Auth0 tenant. You can easily create and configure your own Auth0 tenant by modifying the environment variables in the auth translation service and your developer console projects.
Go to Settings > Environment Variables and create the following Environment Variables:
-
AUTH0_AUDIENCE: This is the value of your configured API Audience in Auth0. For simplicity you can use the value below from our sample Auth0 tenant to test.https://api.example.com/ -
AUTH0_DOMAIN: This is the value of your Auth0 domain. For simplicity, you can use the value below from our sample Auth0 tenant to test.zuplo-samples.us.auth0.com -
BUCKET_URL: Get the value for this from Settings > Project Information tab. The value is labelled ‘API Key Bucket URL’. -
ZAPI_KEY: (Secret) Get your ZAPI (Zuplo API) Key from the Settings > Zuplo API Keys section. -
STRIPE_API_KEY: This key is the Stripe Secret Key that you got in the previous step.
All done! Your auth translation service is all ready to go 👏.
E-mail verification To keep the demo simple, we do not check if the user's e-mail is verified. You should do this in any real implementation.
We have prepared a sample NextJS project that will be used to allow users to sign up and subscribe to your API.
Clone the project by running the following command. You will be asked to name your project.
npx create-next-app --example \
  https://github.com/zuplo-samples/money-api-dashboard
We'll now need to get the Auth Translation API url from the previous steps to start the Developer Console.
-
Copy the API url
In Zuplo, Go to the Settings > Project Information tab in Zuplo and grab the Current Env URL value (it will look something like
https://sample-auth-translation-api-main-a494b6a.d2.zuplo.dev) -
Set the Environment Variable
In your web app, open the
.env.localfile and set theNEXT_PUBLIC_API_URLvariable using the URL from the previous step:NEXT_PUBLIC_API_URL=http://localhost:9000 NEXT_PUBLIC_AUTH0_DOMAIN=zuplo-samples.us.auth0.com NEXT_PUBLIC_AUTH0_CLIENT_ID=E45HVjhgkvtZptsiS6wapekDS7rnfHOF NEXT_PUBLIC_AUTH0_AUDIENCE=https://api.example.com/
Auth0 Demo Tenant If you are using your own Auth0 account, set the other variables accordingly, otherwise just leave our sample values.
-
Start the project
npm run dev
You can now go through the flow of signing up to your API, creating an API Key, and making requests to your API.
While signing up with Stripe, you can use Test Credit Cards to simulate the payment flow.
Go make some money!

