-
-
Notifications
You must be signed in to change notification settings - Fork 12
Home
This is the documentation of the NativeIFC addon. It is made a of a series of common BIM tasks, and explains simply how to perform each of them with the NativeIFC addon.
- Introduction
- Enabling NativeIFC
- Import an IFC file
- Expand sub-objects of an IFC object
- Collapse sub-objects of an IFC object
- Expand the property sets of an object
- Load the shape of an IFC object
- Change IFC attributes
- See the changes in an IFC document
- Saving the modified IFC file
- Add a new IFC document
- Modifying the IFC type of an object
- Inspecting the IFC structure of an object
- Add a new model structure
- Add a new object
- How to add a wall
- How to add a column or beam
- How to add a door or window
- Delete an object
- Modify the position of an element
- Modify the shape of an element
- How to edit an opening
- Change the schema of an IFC document
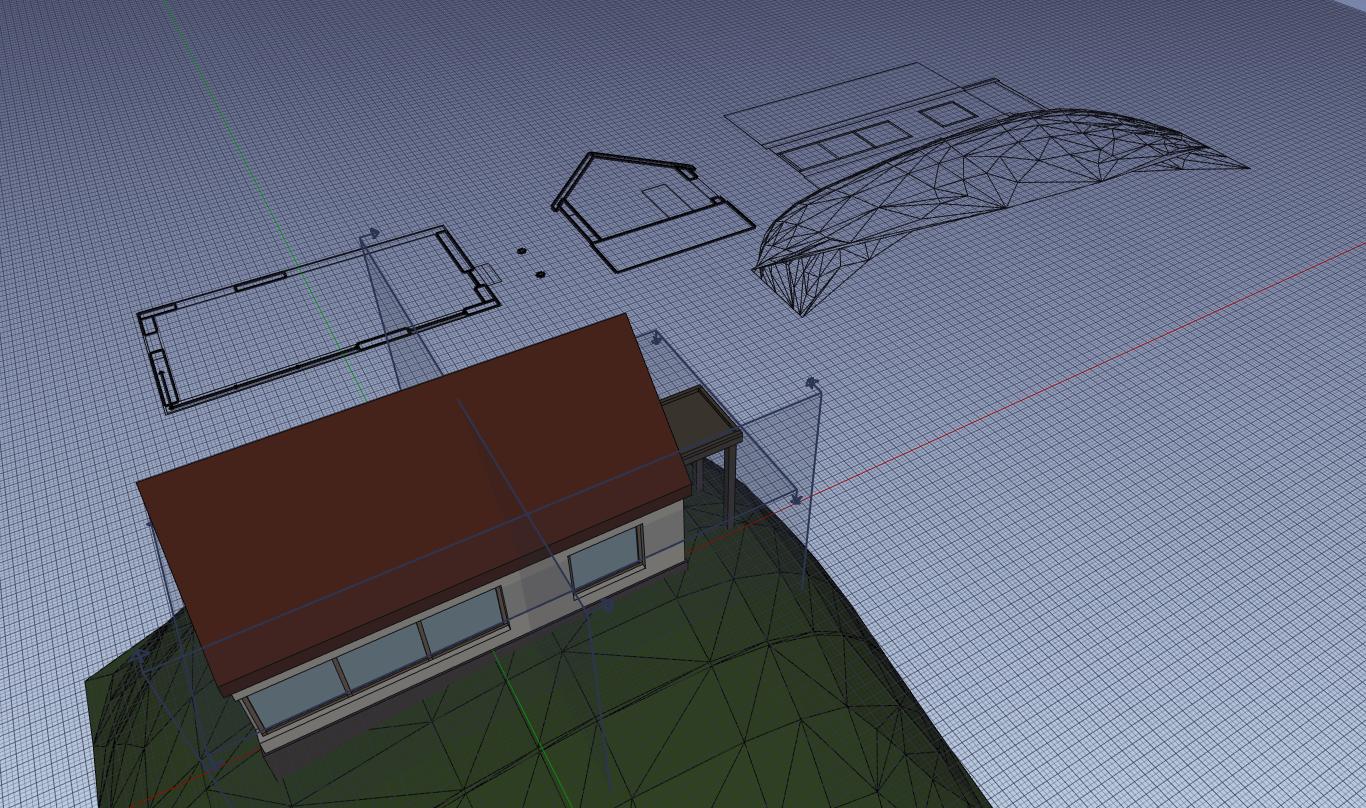
- Create 2D drawings (plans, sections) from an IFC file
The NativeIFC add-on is designed to allow you to work on IFC file in FreeCAD natively.
The traditional way most BIM applications work with IFC files consists of loading the file, translating its contents into the application's own format, then letting you work with the model. When saving back to IFC, another translation is done between the application's format and the IFC format. That's two translation operations each time you need to work on the file. This brings huge imprevisibility and a lot of data loss.
The Native IFC concept, on the other way, considers the IFC file as the only source of truth. Loading an IFC file into FreeCAD merely shows you the contents of the IFC file in the FreeCAD interface and 3D view. Any operation made on those contents is directly affecting the contents of the IFC file. When saving the file, only what you have modified will have changed in the IFC file.
This allows a lot more control over what changes in different stages of the life of an IFC file, and turns it truly and fully versionable with systems like Git. FreeCAD is the second BIM application that supports NativeIFC, after BlenderBIM.
Working with native IFC files in FreeCAD is simple: Open an existing IFC file or create a new project using the project tool from the BIM workbench. Create new objects with any of the FreeCAD workbenches or tools. Add these objects to your IFC project by dragging them into the project structure. Save the file, and you are done!
- Install the add-on as described in the installation page
- Also install the BIM workbench add-on to be able to create new IFC projects
- Restart FreeCAD
- From menu
File→OpenorFile→Insert: choose an IFC file, choose the NativeIFC importer - Alternatively, from the start page: set "ifc_import" as a default importer for IFC files, then just click an IFC file
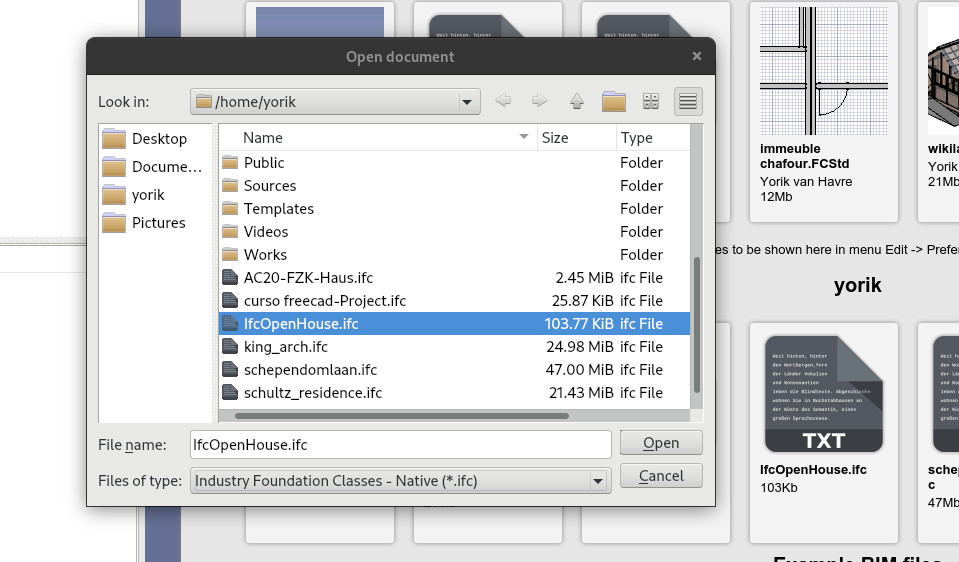
- Set the desired options. For large files, creating one root object only and no shapes (coin representation only) is the fastest way. Objects can have their children and shapes expanded later, as needed. A "no representation" mode is also available, which will load the IFC file structure in the tree, but no 3D representation is created. Again, this can be changed anytime later on by changing the Shape Mode property of any object.

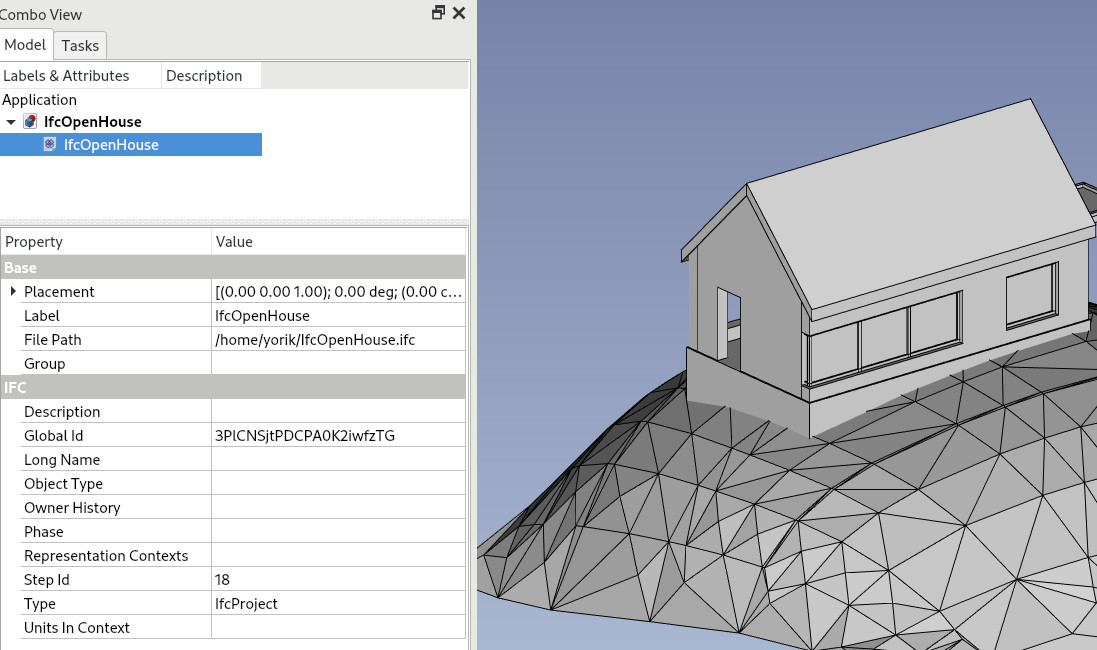
- A FreeCAD document is created
- One or more object(s) is/are created representing the IFC root document + project, and any other child object depending on the import mode you chose in the previous step.
# From python:

import ifc_import
ifc_import.open(filepath) # or ifc_import.insert(fileapth,document)- Right-click any IFC object on the tree and select Expand children
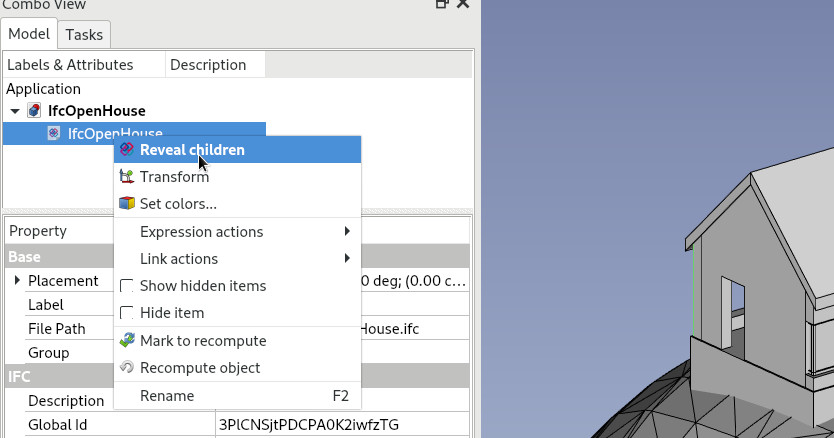
- A site object, or any other child object is created. You can further expand those children, until there is no more child to expand.

# From Python:

import ifc_tools
ifc_tools.create_children(myObject,[recursive=True/False])- Right-click any IFC object on the tree and select Collapse children
- Right-click any IFC object on the tree and select Expand property sets
# From Python:

import ifc_tools
ifc_tools.show_psets(myObject)Right-click the object in the tree and select Load shape. Alternatively, you can also set its Shape Mode property to "Shape"
# From Python:

myObject.ShapeMode = "Shape"
myObject.Document.recompute()
Change values of available attributes like name, description... directly from the object's properties
# From Python:

myObject.Label = "My New Name"
myObject.Description = "A very nice object"- Right-click a modified IFC project object in the tree view and select View diff...
- A dialog window pops up showing the modified lines since last saved version
# From Python:

import ifc_diff
# get an existing IFC document object by its name
project = FreeCAD.ActiveDocument.getObject("IfcObject")
ifc_diff.get_diff(project)- When any attribute of an object in an IFC document has changed, the icon of the IFC document object shows a red dot, and a Save option becomes available when right-clicking it
- All modified IFC document objects will be automatically saved when you save your FreeCAD document
- You can also manually save individual IFC documents anytime, by right-clicking the project object in the tree and selecting Save or Save as...
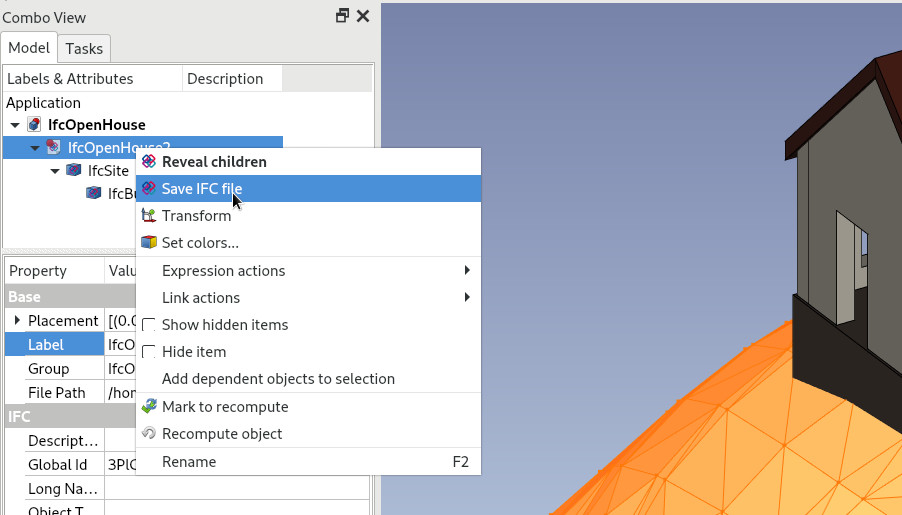
- After saving, only the changed parameters have changed in the linked IFC file

# From Python:

import ifc_tools
ifc_tools.save(myProject,[filepath=/path/to/somefile.ifc])Use the Project tool from the BIM workbench. When the NativeIFC add-on is installed, the Project tool detects it (its toolbar icon will have the purple IFC logo displayed on top, so you can check if this is enabled), and produce a NativeIFC-ready project object.
It is not mandatory to save your new IFC project immediately, but it is a good practice anyway. If you forget to do so, you will get notified and be able to do it when saving the FreeCAD document.
# From Python:

import ifc_tools
doc = FreeCAD.ActiveDocument
ifc_tools.create_document(doc)A note of warning: The IFC format uses the term Class to describe the type of an object, such as a window or a wall. That is because many IFC objects can also have a type, which is a parent entity from which the object inherits some of its properties (this is also called "families" in some other BIM applications).
Change the class directly from the object's properties
# From Python:

myObject.Class = "IfcWall"Right-click any object in the tree, and choose Show geometry tree
# From Python:

import ifc_tools
import ifc_tree
element = ifc_tools.get_ifc_element(myObject)
ifc_tree.print_geometry_tree(element) # this prints text, or
tree_list = ifc_tree.get_geometry_tree(element) # this returns a list- Switch to the BIM workbench
- Create a Project object
- Create a Site object
- Drag the site onto the project
- Create a Building object
- Drag the building onto the site
- Create a Level object
- Drag the level onto the building
When creating a new project, you can also have a basic structure automatically created for you by answering "yes" on the dialog that will pop up
# From Python:

import ifc_tools
import Arch
doc = FreeCAD.ActiveDocument
project = ifc_tools.create_document(doc)
site = Arch.makeSite()
site = ifc_tools.aggregate(site, project)
building = Arch.makeBuilding()
building = ifc_tools.aggregate(building, site)
level = Arch.makeFloor()
level = ifc_tools.aggregate(floor, building)- Create any desired object with other FreeCAD tools, for example a cube with the Part workbench
- In the tree view, drag that object onto an IFC project object or a building structure element (building, storey,...)
- Adjust the IFC class of the object
# From Python:

import Part
import ifc_tools

# create an object with any other workbench
shape = Part.makeBox(200,300,400)
box = Part.show(shape)

# get an existing IFC document object by its name
project = FreeCAD.ActiveDocument.getObject("IfcObject")

# aggregate our box under it
new_object = ifc_tools.aggregate(box, project)

# change the type
new_object.Class = "IFcWall"- Create a wall using the Wall tool from the BIM or Arch workbenches
- In the tree view, drag that wall onto an IFC project object or a building structure element (building, storey,...)
# From Python:

import Arch
import ifc_tools
wall = Arch.makeWall(None,220,400,20)
ifc_tools.aggregate(wall, project)- Create a beam or a column using the Structure tool from the Arch workbench (or the Column or Beam tool from the BIM workbench)
- In the tree view, drag that beam or column onto an IFC project object or a building structure element (building, storey,...)
# From Python:
import Arch
import ifc_tools
wall = Arch.makeStructure(None,220,400,20)
ifc_tools.aggregate(wall, project)- Create a door or window using the Window tool from the Arch workbench (or the Door or Window tool from the BIM workbench)
- You can add that door/window to a wall or not. It does not matter, as the inclusion of the window into another IFC object will be done in the next step, and an opening will be created automatically
- In the tree view, drag that window or door onto a host element, such as a wall. The opening will be created automatically
Select any object and delete it normally by pressing the Delete key on your keyboard or right-clicking it and selecting Delete
You can move or rotate any object directly by editing its Placement property or using the Move or Rotate tools
- Right-click the element you wish to modify in the tree view and select Add geometry properties
- Edit the desired properties under the Geometry group
- Select a wall or any object that has an opening
- Right-click that object in the tree view, and select Expand children
- The openings will be revealed in wire frame
- You can move an opening
- If the opening shape is editable, right-click the opening in the tree view and select Add geometry properties
- Edit the available properties
- When you are done, optionally, right-click the wall in the tree view and select Collapse children
Change the 'Schema' property of the object
# From Python:

myProject.Schema = "IFC4"- Make sure all the objects you need to see have their shape loaded
- Select all the objects to be cut or viewed
- Create a section plane
- Optionally, rotate the section plane into desired position, using the Rotate tool or double-clicking the section plane in the tree and using the available calibration tools
- Optionally, move the section plane into desired position using the Move tool
- Create a Shape view of the section plane. Move it into desired position
- Optionally, to show cut lines, create a second Shape view, set its projection mode to Cut Lines, set its line width a bit higher, and move it to the same position as the first one
- This view can now be annotated using Draft tools
- This view and its annotations can be exported to DXF/DWG using File -> Export
- This view and its annotations can be added to a printable page using the TechDraw Workbench
- Extracting quantities from an IFC file
- Creating renderings of an IFC file