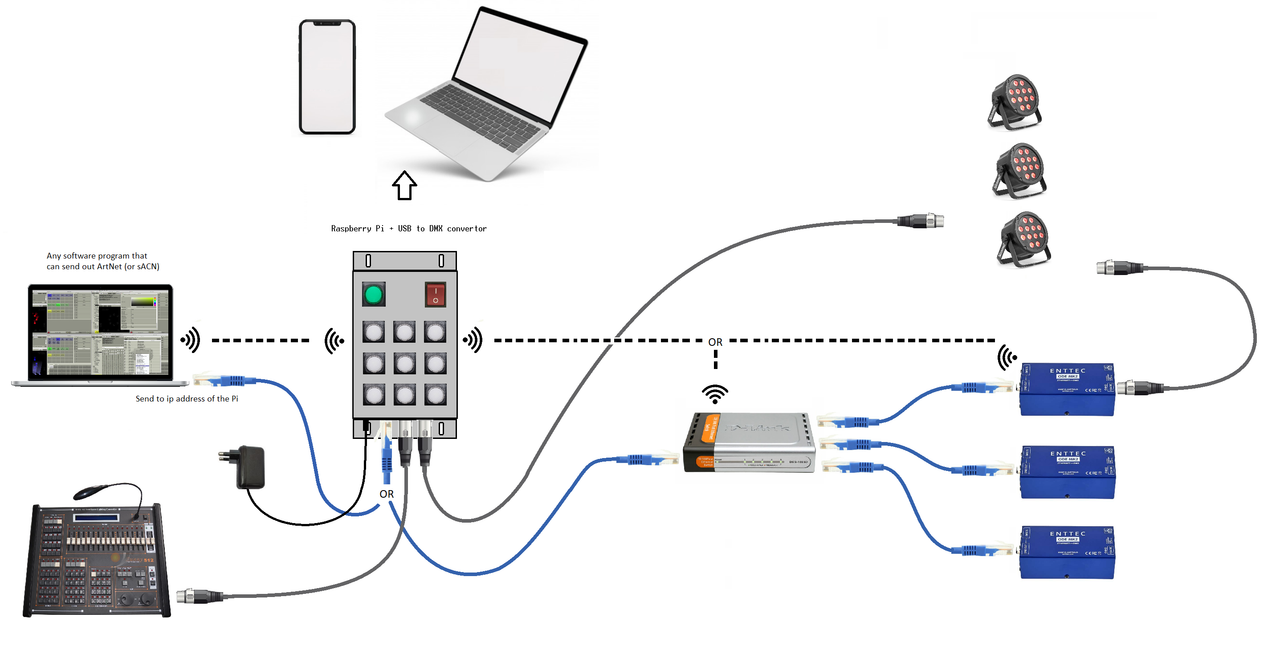
A project made with Spring Boot & Angular for recording and playing lightscenes through the Art-Net/DMX protocol. The purpose of this project is to be deployed on a custom Raspberry Pi, with physical buttons.
If you wish to run the project on your computer for testing, follow these instructions:
Make sure npm is installed on your computer. If you are deploying for the first time, run this command in the client folder:
npm install
After running previous command, you can start running the Angular application with this command:
npm start
After this is completed, the Angular application should be running at http://localhost:4200/
Note: the Angular application won't work properly without running the Spring Boot backend first.
Follow the instructions below.
Warning
To make sure the directories for scenes and settings are created on your computer, make sure the parentDir variable in
DMX-Lighting/server/src/main/java/lighting/server/IO/IOServiceImpl.java is set to:
private Path parentDir = Paths.get(System.getProperty("user.dir"));You can replace the user.dir property with another physical filepath on your drive.
Make sure Maven is installed on your computer. After this, run following command in the server folder:
mvn spring-boot:run
This will create the scenes and settings directories in the server directory because of the previous command, unless you have replaced user.dir in the parentDir variable.
In case you want to make sure everything works as intended, you can send out random DMX data with the SendRandomData class.
Warning
To make sure the DMX data gets shown in the Monitor component of the Angular application, make sure the brokerURL property in DMX-Lighting/client/src/app/app-rx-stomp.config.ts is set to:
brokerURL: 'ws://localhost:8080/stomp/websocket'
In the special case of deploying the Angular application on your computer to read the DMX data coming from the Raspberry Pi, this has to be set to:
brokerURL: 'ws://raspberrypi:8080/stomp/websocket'
Make sure Maven is installed on your computer. After this, run following command in the server folder:
mvn -X clean install exec:java -Dexec.mainClass=lighting.server.SendRandomData -Dexec.classpathScope=test -e
Now you should be able to see random data in the Monitor component. Make sure you enter a universe (1,2 or 3) in the text field.
To test the recording capability, you can record a single or multiple frames. After recording, you should be able to see the recorded scenes in the List of Scenes component.

