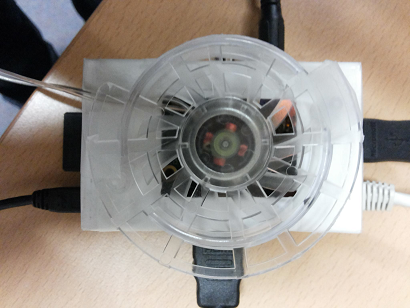
Converting the custom made lap-desk into a smart desk using the Raspberry pi running raspBMC and controlling its various features via Dataplicity

intall raspBMC (http://www.raspberrypi.org/downloads/) into your SD Card (there are various ways to do it and if you are a Mac user I would strongly recommend using Pi Filler (http://ivanx.com/raspberrypi/)
install Dataplicity (http://dataplicity.com/get-started/), it is an amazing free tool for devs to control Raspberry pi online
The most efficient way to get into the command line for raspBMC OS is to SSH it (http://www.raspbmc.com/wiki/user/using-ssh/)
Once you login your screen should say something like
pi@raspbmc :
There is a great tutorial for Rasbian OS (http://dataplicity.com/get-started/raspberry-pi/), but for RaspBMC there are some minor changes
Just before 'Install the dataplicity examples' you got to sudo install git and ssl certificates
sudo apt-get install git-core
sudo apt-get install ca-certificates (more details on ssl can be found here https://help.ubuntu.com/community/OpenSSL)
sudo dataplicity init -u USERNAME -p PASSWORD initializes the dataplicity Core
Now in raspBMC '~/' = /home/pi/
to avoid this confusion quickly do a 'ls -la' to list all files, by default it should be
/home/pi/dataplicity/dataplicity/examples/sinewave
'vi' editor should be present by default to edit text files
sudo vi dataplicity.conf will get you into the file as admin. Press 'i' to edit the file and once completed press 'Esc' followed by 'Shift + zz" to save and close the file
To create a new file with 'vi' just go
'sudo vi pitest.py'
I have only tested this on nBox Skin (It is the sexiest of all!!), System->System->Skin and install nBox
Log back into the SSH Sapota requires XBMC Client sudo pip install xbmc-json https://github.com/jcsaaddupuy/python-xbmc this is a great tool for controlling the raspBMC via JASON Rest based callsNavigate into dataplicity examples
cd dataplicity/dataplicity/examples
Git Clone the Smart Desk
git clone https://github.com/vivek306/smartdesk.git
To Run the Smart Desk
sudo dataplicity run inside the Smartdesk folder and to stop "Ctrl+c"
Now Go to your dataplicity account and you should see my/Smart Desk/"Weird Numbers"/"Yor Device with Weird Numbers" click it
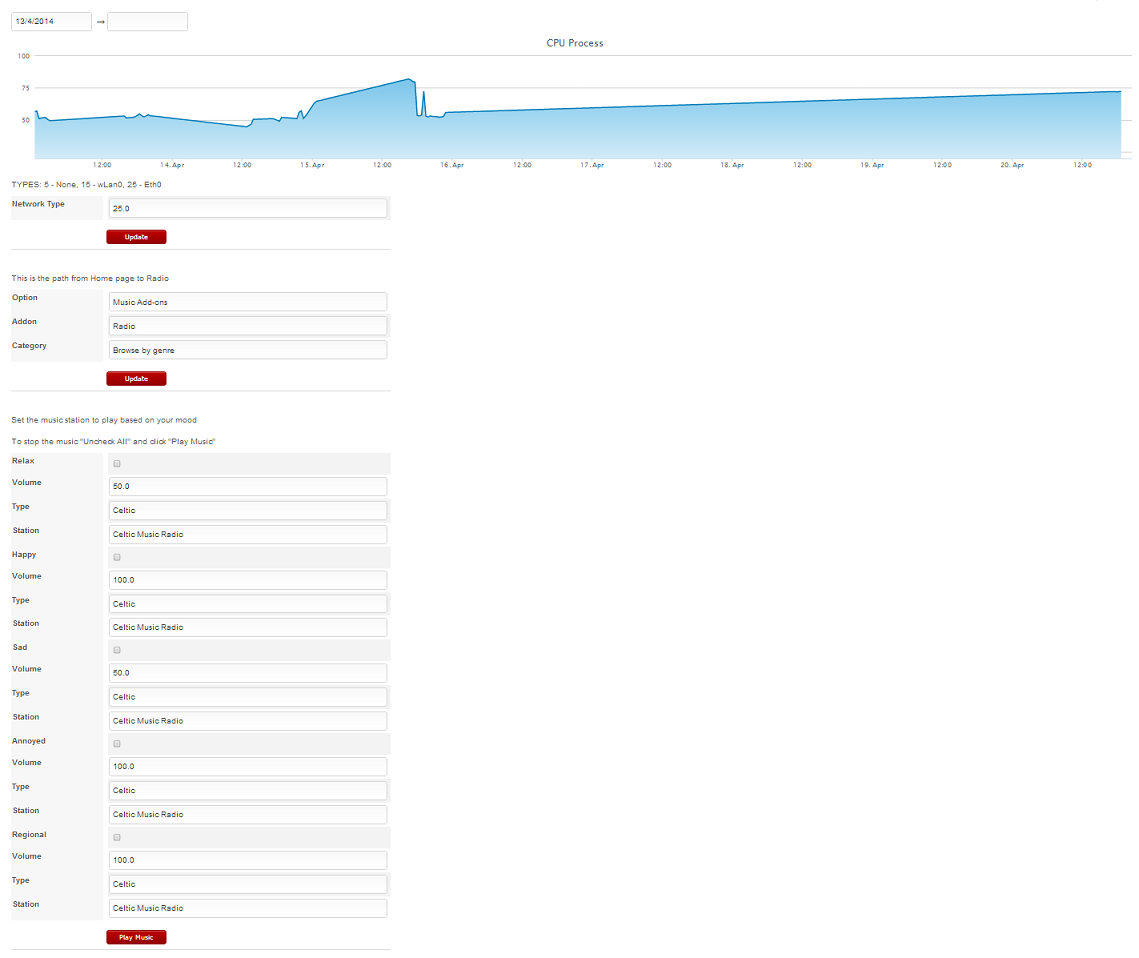
Now "Check" - Relax and Click "Play Music", you should see
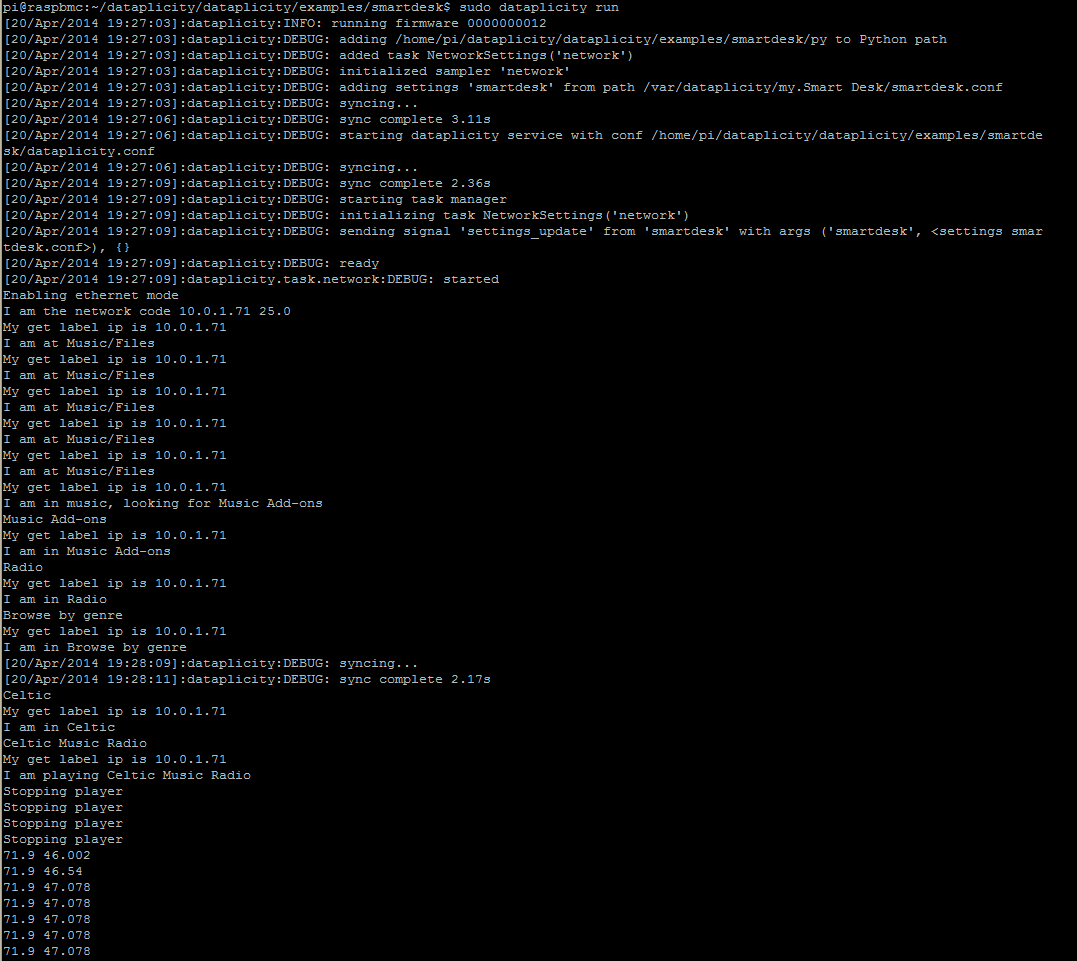
Please note that polling happens once every 60 secs and hence the music will take some time to play, feel free to poll it every second
Essa Saulat (Helped me build Custom Case for the Raspberry Pi with the help of http://squareitround.co.uk/Resources/Punnet_net_Mk1.pdf")
Essa Saulat and Riham Satti (Helped me name the the software Sapota :D)