Measures background radiation and sends CPM (clicks per minute) and µSv/h (micro Sieverts per hour) values to MQTT
To access RaspberryPi GPIO from the container, we need to share the gpiomem device and run the container in privileged mode:
# docker-compose.yml

version: '3'

services:
  radiation-counter:
    image: valentas/background-radiation-monitor:latest
    devices:
      - /dev/gpiomem
    privileged: true
    environment:
      - TUBE_USVH_RATIO=0.00812037037037 # (default) This is for the J305 tube
      - GPIO_PORT=7 # (default) The GPIO port used with the Geiger counter
      - MQTT_HOST=mosquitto # (required) MQTT host
      - MQTT_PORT=1883 # (default) MQTT port
      - MQTT_USER=user # (required) MQTT user
      - MQTT_PASS=pass # (required) MQTT password
      - MQTT_TOPIC_PREFIX=home # (required) prefix for MQTT topics
Two topics will be sent to MQTT every second:
{MQTT_TOPIC_PREFIX}/radiation/cpm- Clicks per minute value{MQTT_TOPIC_PREFIX}/radiation/usvh- Micro Sieverts per hour value
- A Raspberry Pi (any model should be good for this, but I’d recommend a 3 or above just for performance reasons)
- An 8GB (or larger) SD card (we recommend SanDisk Extreme Pro SD cards)
- A power supply (PSU)
- A radiation detector Amazon UK or AliExpress
- Some Dupont cables/jumper jerky (you’ll need 3 female-female cables)
There are 3 connections we need to make from the radiation detector board to the Raspberry Pi. They are +5V and Ground (GND) for power, and the output pulse line to detect the count. Note that this is called VIN which can be a bit confusing as this usually means ‘voltage input’ or something similar, but on this board, it’s the output.
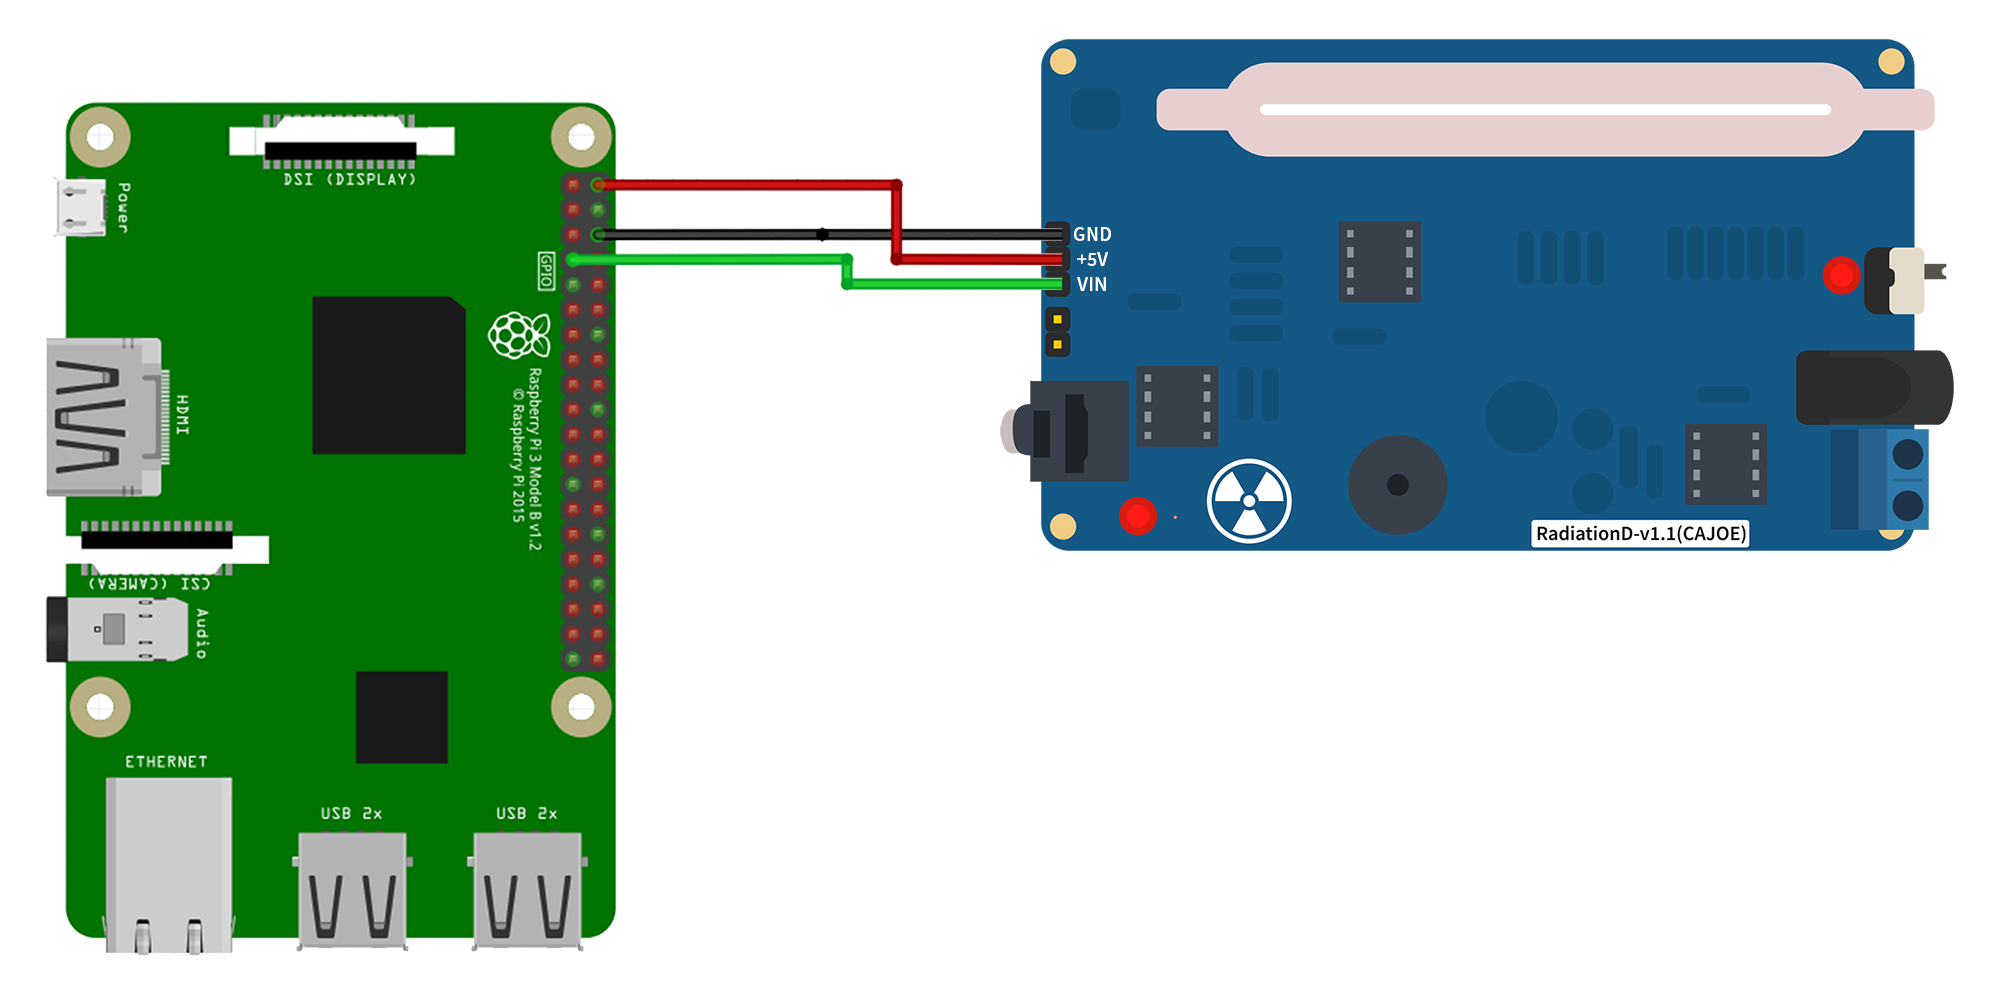
In this configuration you only need to provide 5 volt power to one of the two boards; if you’re powering the Pi with a standard micro-USB power supply, that will power the detector board via the connections we’ve just made, as well.