-
-
Notifications
You must be signed in to change notification settings - Fork 40
Post‐Install
- Press
ALT + SPACEand open terminal. Typesudo diskutil mountDisk disk0s1(where disk0s1 corresponds to the EFI partition of the main disk) - Open Finder and copy the EFI folder of your USB device to the main disk's EFI partition.
- Unplug the USB device and reboot your laptop. Now you can boot macOS without your USB device.
If you have a Boardcom WiFi card and want to use macOS Sonoma or newer, the system must be patched after installation.
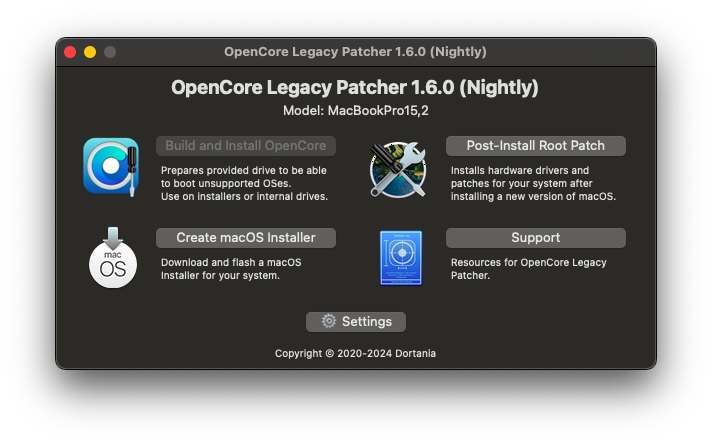
You need OpenCore Legacy Patcher for this. Download the latest version here (download OpenCore-Patcher.pkg).
Important
If you are using macOS Sequoia, then you must use the latest nightly version (from the current status), as OCLP v1.5.0 does not currently support this macOS version. Go to the GitHub Action page of OCLP and download the latest artifact from the sequoia-development branch.
- Start OCLP and click on "Post-Install Root Patch".
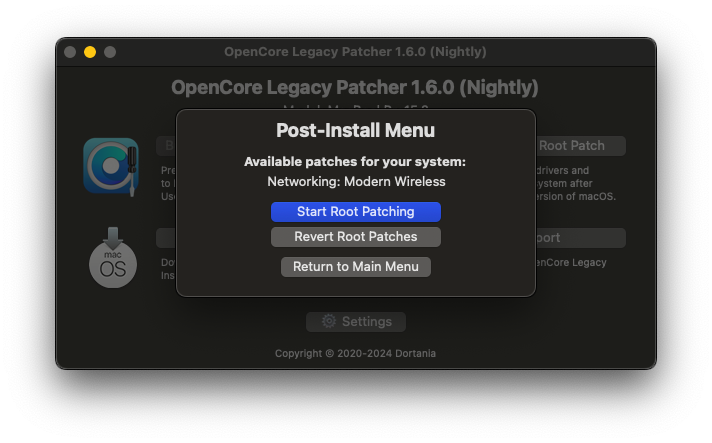
- Now select "Start Root Patching".
Note
If a warning appears regarding activated SIP, you must first deactivate SIP. By default, SIP should already be deactivated with the current version, but an NVRAM reset may be necessary.
For an NVRAM reset, I recommend performing an inplace upgrade of the BIOS, as many Lenovo laptops have been bricked by OpenCore's NVRAM reset in the past.
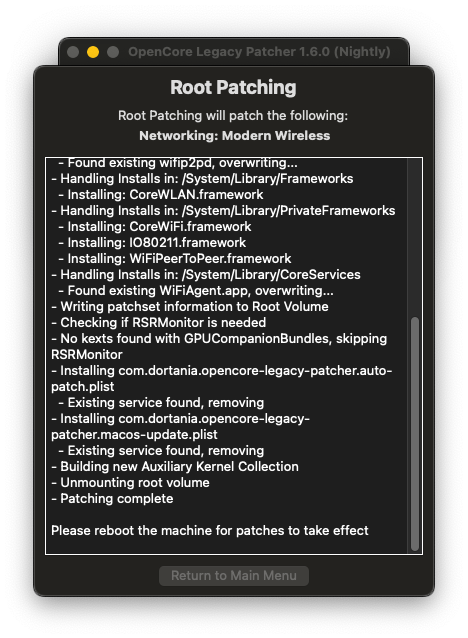
- OCLP will now patch the system. This may take a few minutes. You will then be asked whether a restart should be performed. Confirm this with Yes.
After the restart, WiFi should work again.
In case of reinstalling macOS, a offline install media can save some time. You also don't need an Ethernet connection for the installation. To create a offline install media, you need the following stuff:
- macOS Installer from the App Store.
- A 16 GB pendrive (Keep in mind, during the preperation we will format the disk to create the install media).
Press ALT + SPACE and open Disk utility. Select your USB device and click erase. Name it MyUSB and choose Mac OS Extended with GUID Partition Map. After erasing the USB device, close Disk utility.
Now press ALT + SPACE and open terminal. Type the following command:
Big Sur:
sudo /Applications/Install\ macOS\ Big\ Sur.app/Contents/Resources/createinstallmedia --volume /Volumes/MyUSB --downloadassets
Monterey:
sudo /Applications/Install\ macOS\ Monterey.app/Contents/Resources/createinstallmedia --volume /Volumes/MyUSB --downloadassets
Ventura:
sudo /Applications/Install\ macOS\ Ventura.app/Contents/Resources/createinstallmedia --volume /Volumes/MyUSB --downloadassets
After creating the install media, copy your EFI folder to the EFI partition of your USB device.


