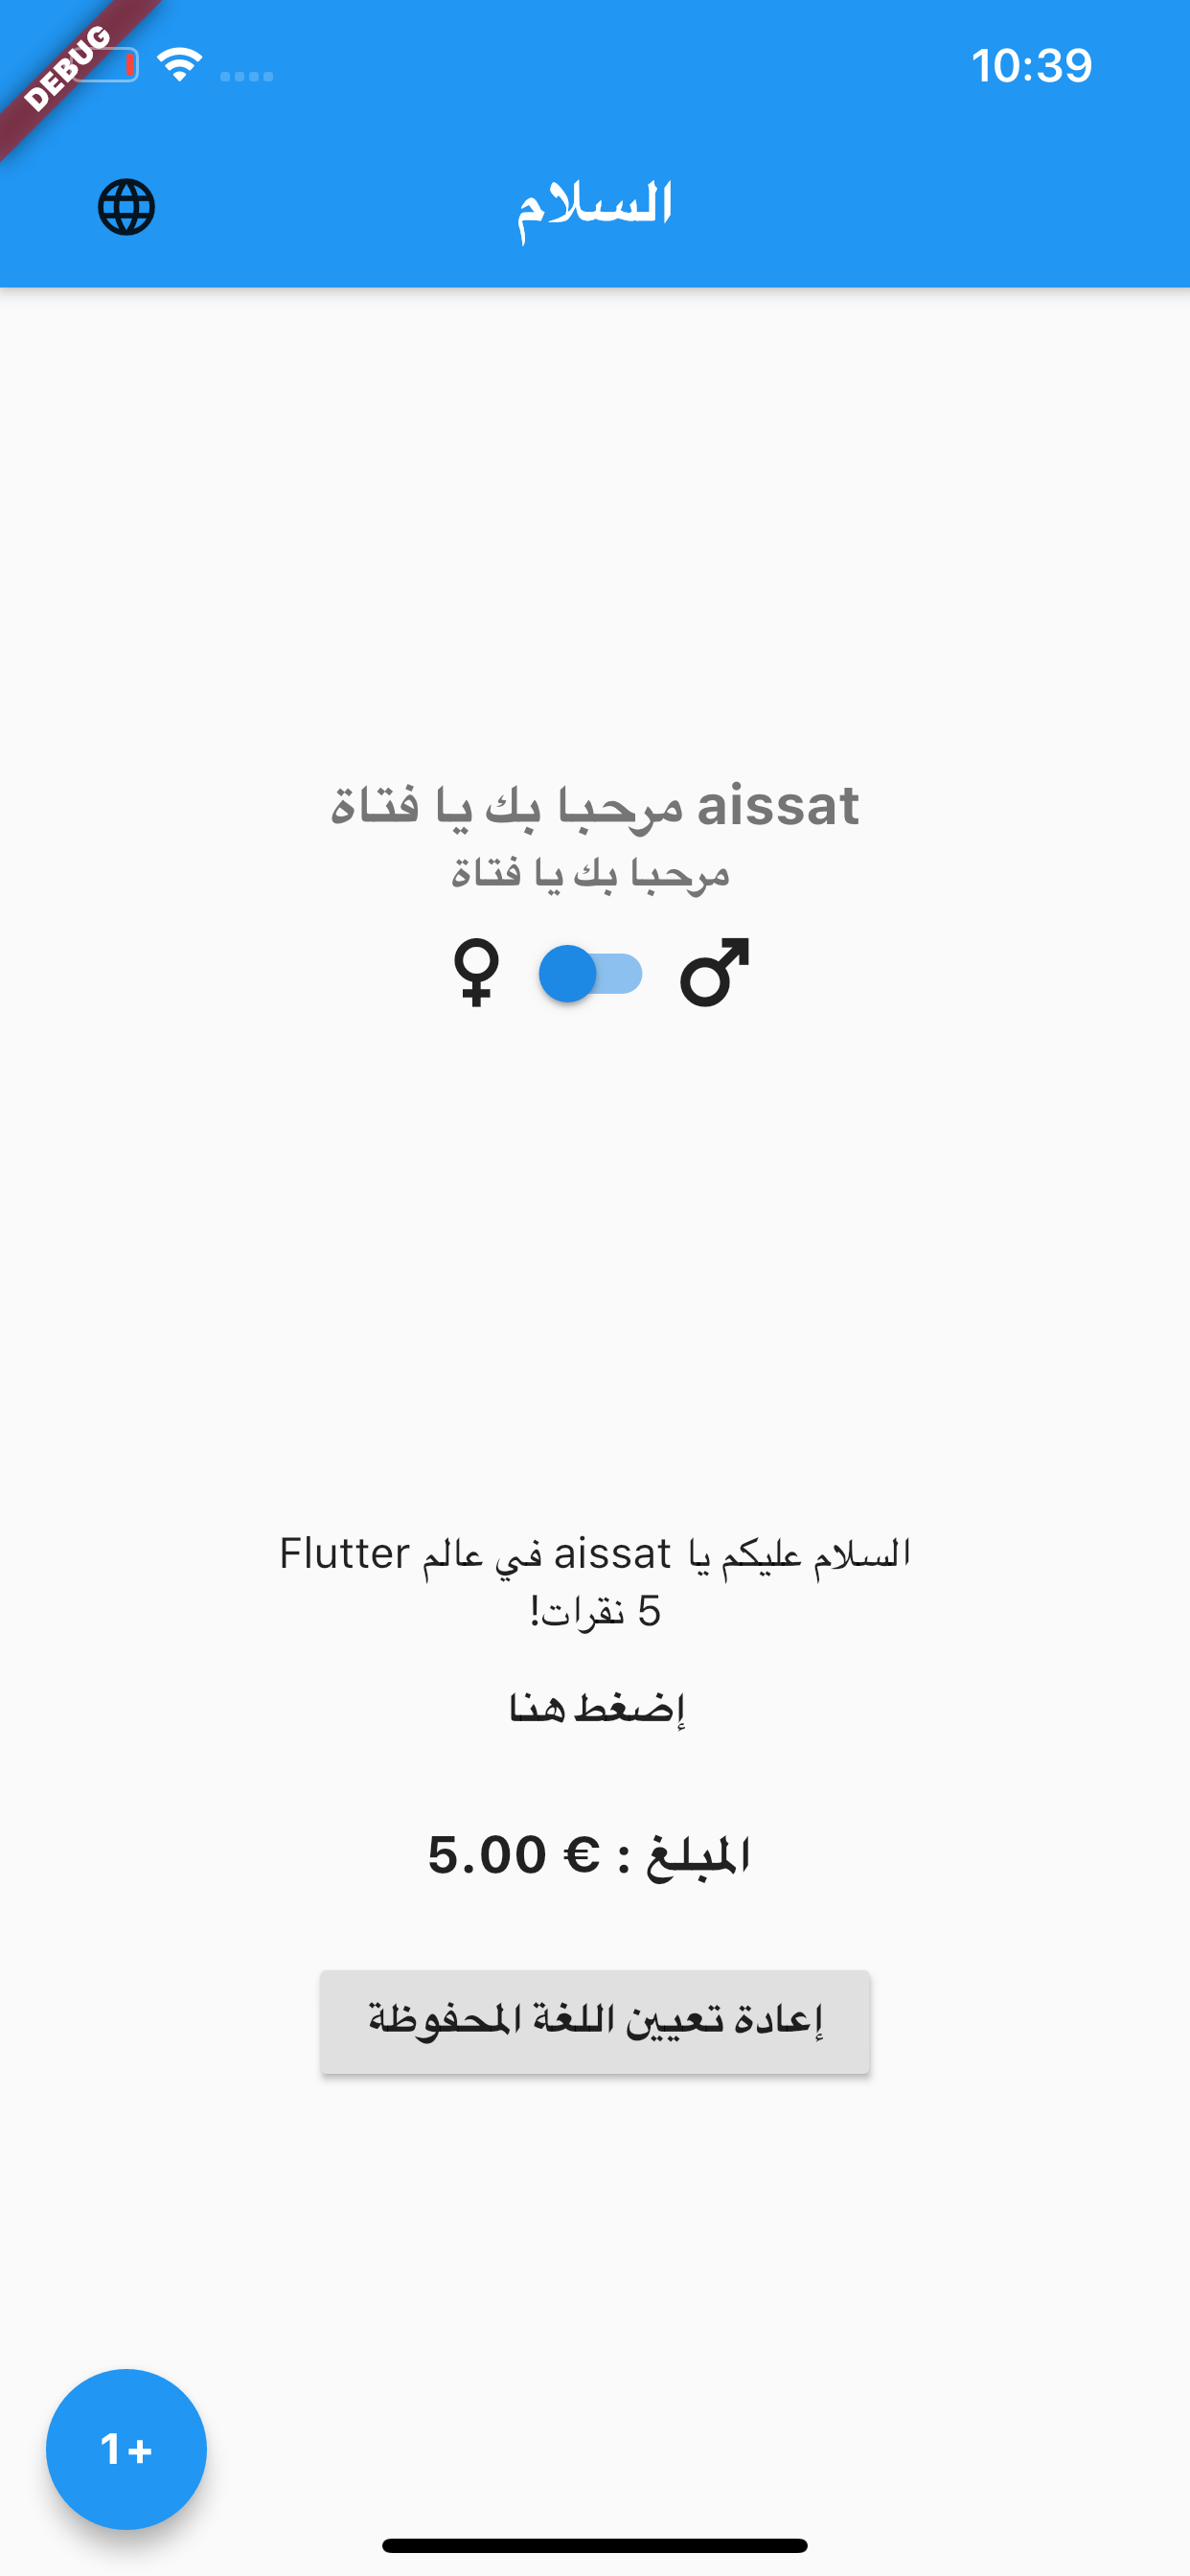
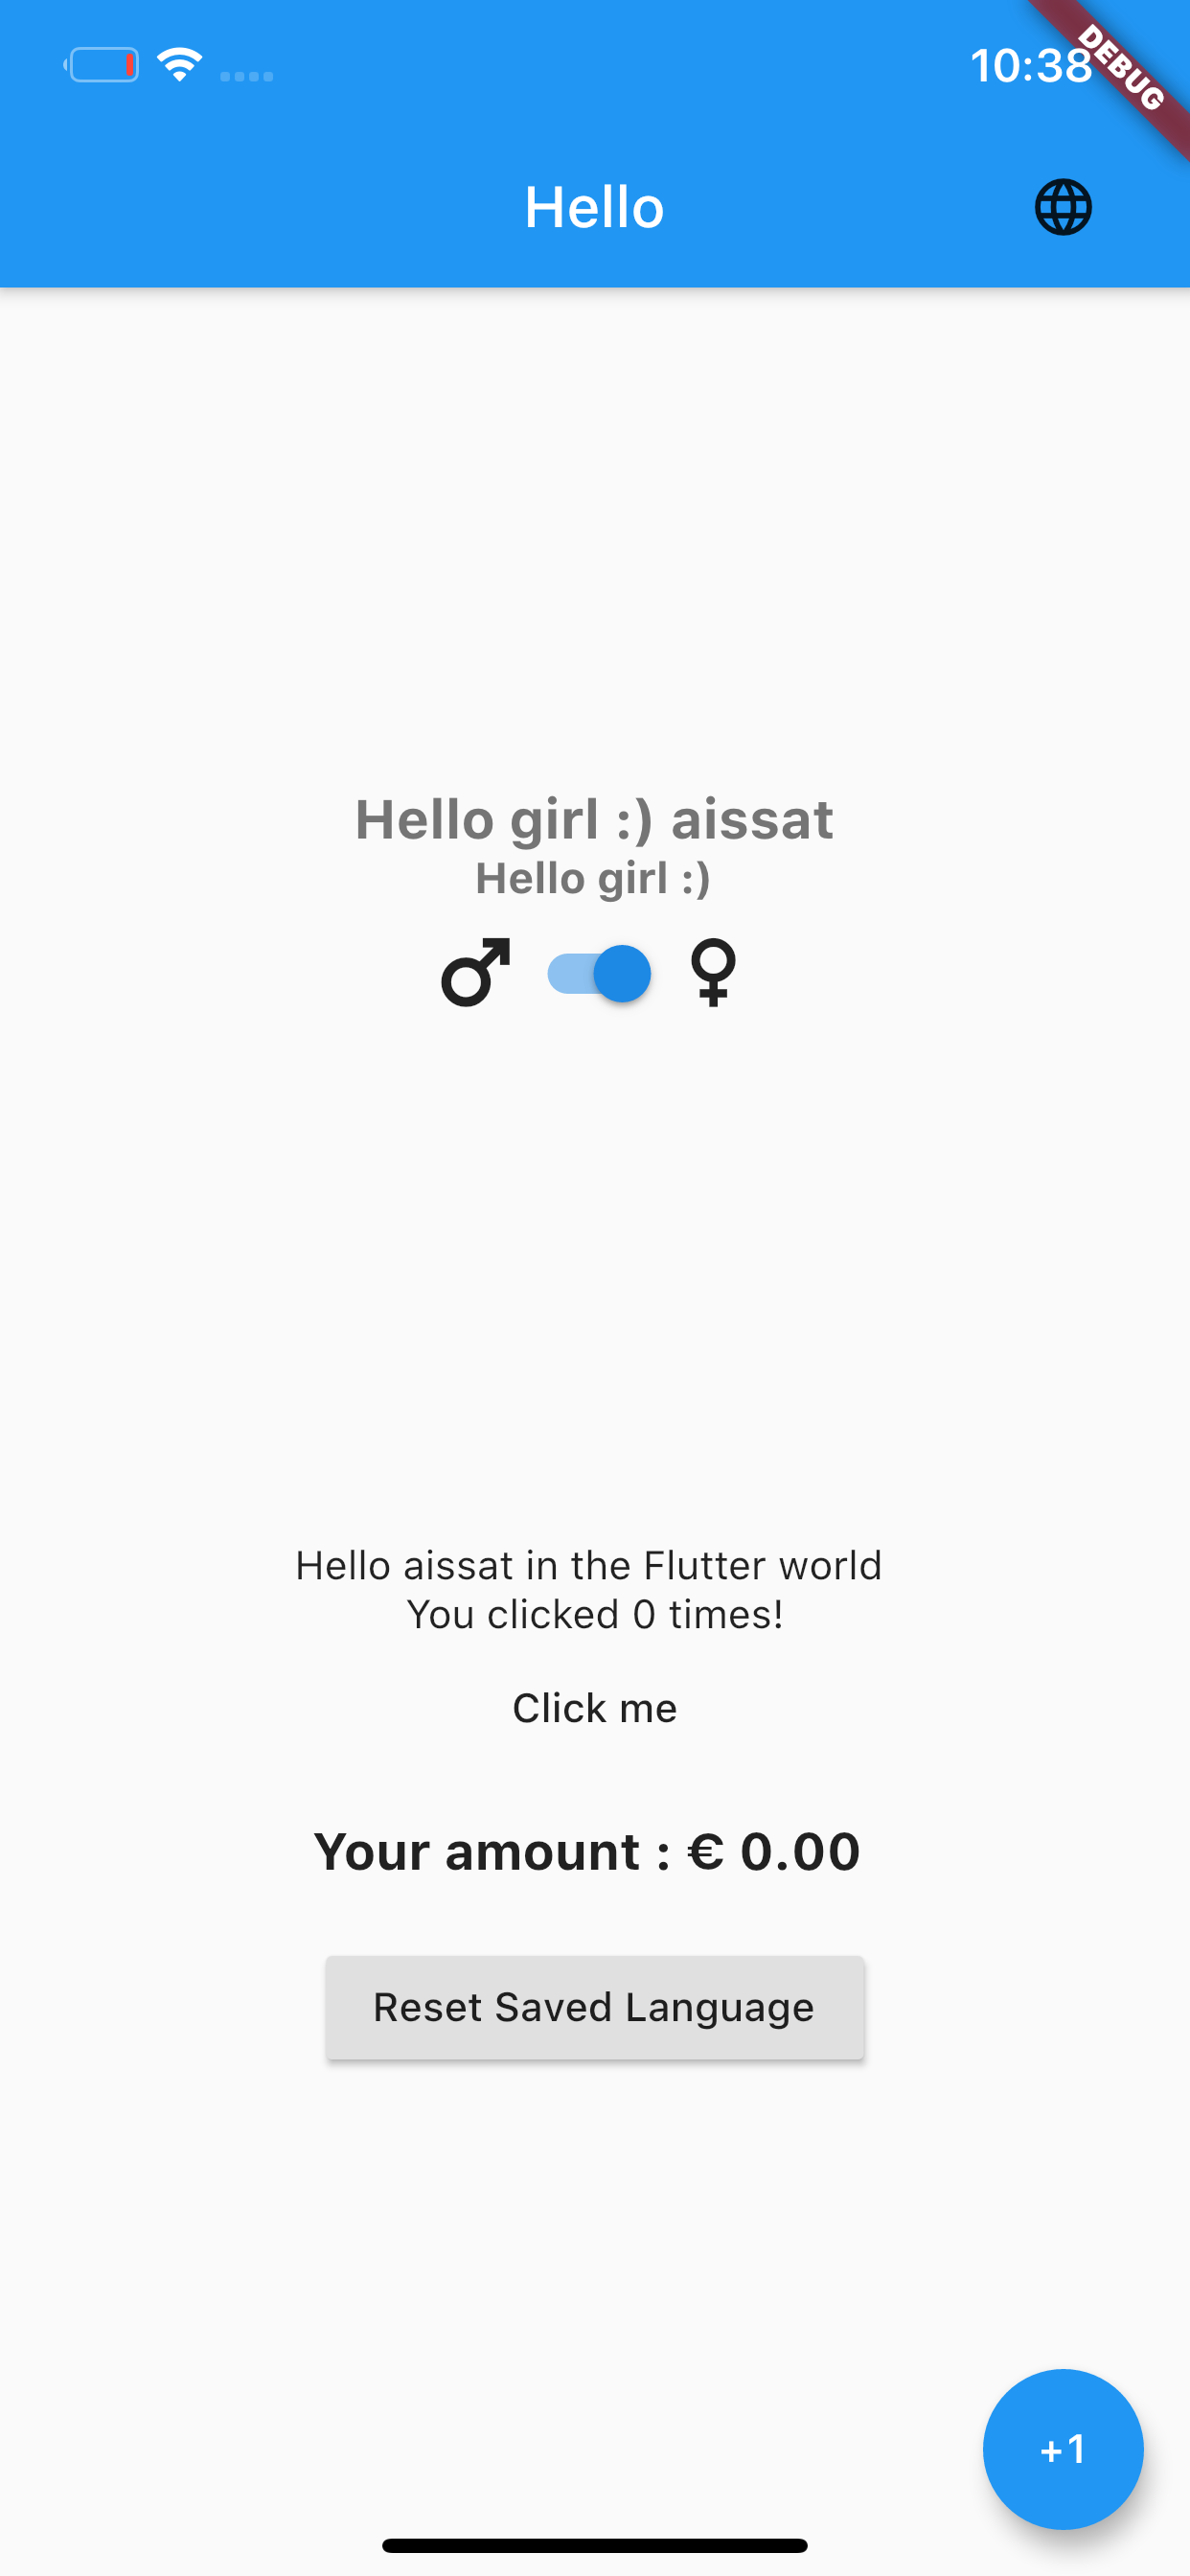
- 🚀 Easy translations for many languages
- 🔌 Load translations as JSON, CSV, Yaml, Xml using Easy Localization Loader
- 💾 React and persist to locale changes
- ⚡ Supports plural, gender, nesting, RTL locales and more
⁉️ Error widget for missing translations- ❤️ Extension methods on
TextandBuildContext - 💻 Code generation for localization files and keys.
- 👍 Uses BLoC pattern
Add to your pubspec.yaml:
dependencies:
  easy_localization: <last_version>
Create folder and add translation files like this
assets
└── translations
    ├── {languageCode}.{ext}                  //only language code
    └── {languageCode}-{countryCode}.{ext}    //or full locale code
Example:
assets
└── translations
    ├── en.json
    └── en-US.json
Declare your assets localization directory in pubspec.yaml:
flutter:
  assets:
- assets/translations/You can use JSON,CSV,HTTP,XML,Yaml files, etc.
See Easy Localization Loader for more info.
For translation to work on iOS you need to add supported locales to
ios/Runner/Info.plist as described here.
Example:
<key>CFBundleLocalizations</key>
<array>
	<string>en</string>
	<string>nb</string>
</array>Add EasyLocalization widget like in example
import 'package:flutter/material.dart';
import 'package:flutter_localizations/flutter_localizations.dart';
import 'package:easy_localization/easy_localization.dart';

void main() {
  runApp(
    EasyLocalization(
      supportedLocales: [Locale('en', 'US'), Locale('de', 'DE')],
      path: 'assets/translations', // <-- change patch to your
      fallbackLocale: Locale('en', 'US'),
      child: MyApp()
    ),
  );
}

class MyApp extends StatelessWidget {
  @override
  Widget build(BuildContext context) {
    return MaterialApp(
      localizationsDelegates: context.localizationDelegates,
      supportedLocales: context.supportedLocales,
      locale: context.locale,
      home: MyHomePage()
    );
  }
}| Properties | Required | Default | Description |
|---|---|---|---|
| key | false | Widget key. | |
| child | true | Place for your main page widget. | |
| supportedLocales | true | List of supported locales. | |
| path | true | Path to your folder with localization files. | |
| assetLoader | false | RootBundleAssetLoader() |
Class loader for localization files. You can use custom loaders from Easy Localization Loader or create your own class. |
| fallbackLocale | false | Returns the locale when the locale is not in the list supportedLocales. |
|
| startLocale | false | Overrides device locale. | |
| saveLocale | false | true |
Save locale in device storage. |
| useOnlyLangCode | false | false |
Trigger for using only language code for reading localization files. Example: en.json //useOnlyLangCode: trueen-US.json //useOnlyLangCode: false |
| preloaderColor | false | Colors.white |
Background color for EmptyPreloaderWidget. If you use a different color background, change the color to avoid flickering |
| preloaderWidget | false | EmptyPreloaderWidget() |
Shows your custom widget while translation is loading. |
| errorWidget | false | FutureErrorWidget() |
Shows a custom error widget when an error occurs. |
Easy localization uses extension methods [BuildContext] for access to locale.
It's more easiest way change locale or get parameters 😉.
ℹ️ No breaking changes, you can use old the static method EasyLocalization.of(context)
Example:
context.locale = Locale('en', 'US');

print(context.locale.toString());Main function for translate your language keys
You can use extension methods of [String] or [Text] widget, you can also use tr() as a static function.
Text('title').tr() //Text widget

print('title'.tr()); //String

var title = tr('title') //Static function| Name | Type | Description |
|---|---|---|
| context | BuildContext |
The location in the tree where this widget builds |
| args | List<String> |
List of localized strings. Replaces {} left to right |
| namedArgs | Map<String, String> |
Map of localized strings. Replaces the name keys {key_name} according to its name |
| gender | String |
Gender switcher. Changes the localized string based on gender string |
Example:
{
   "msg":"{} are written in the {} language",
   "msg_named":"Easy localization are written in the {lang} language",
   "msg_mixed":"{} are written in the {lang} language",
   "gender":{
      "male":"Hi man ;) {}",
      "female":"Hello girl :) {}",
      "other":"Hello {}"
   }
}
// args
Text('msg').tr(args: ['Easy localization', 'Dart']),
// namedArgs
Text('msg_named').tr(namedArgs: {'lang': 'Dart'}),
// args and namedArgs
Text('msg_mixed').tr(args: ['Easy localization'], namedArgs: {'lang': 'Dart'}),
// gender
Text('gender').tr(gender: _gender ? "female" : "male"),
You can translate with pluralization.
To insert a number in the translated string, use {}. Number formatting supported, for more information read NumberFormat class documentation.
You can use extension methods of [String] or [Text] widget, you can also use plural() as a static function.
| Name | Type | Description |
|---|---|---|
| context | BuildContext |
The location in the tree where this widget builds |
| value | num |
Number value for pluralization |
| format | NumberFormat |
Formats a numeric value using a NumberFormat class |
Example:
{
  "day": {
    "zero":"{} дней",
    "one": "{} день",
    "two": "{} дня",
    "few": "{} дня",
    "many": "{} дней",
    "other": "{} дней"
  },
  "money": {
    "zero": "You not have money",
    "one": "You have {} dollar",
    "many": "You have {} dollars",
    "other": "You have {} dollars"
  }
}//Text widget with format
Text('money').plural(1000000, format: NumberFormat.compact(locale: context.locale.toString())) // output: You have 1M dollars
//String
print('day'.plural(21)); // output: 21 день
//Static function
var money = plural('money', 10.23) // output: You have 10.23 dollarsIf there's a translation key that will always have the same concrete text as another one you can just link to it. To link to another translation key, all you have to do is to prefix its contents with an @: sign followed by the full name of the translation key including the namespace you want to link to.
Example:
{
  ...
  "example": {
    "hello": "Hello",
    "world": "World!",
    "helloWorld": "@:example.hello @:example.world"
  }
  ...
}print('example.helloWorld'.tr()); //Output: Hello World!You can also do nested anonymous and named arguments inside the linked messages.
Example:
{
  ...
  "date": "{currentDate}.",
  "dateLogging": "INFO: the date today is @:date"
  ...
}print('dateLogging'.tr(namedArguments: {'currentDate': DateTime.now().toIso8601String()})); //Output: INFO: the date today is 2020-11-27T16:40:42.657.Formatting linked locale messages
If the language distinguishes cases of character, you may need to control the case of the linked locale messages. Linked messages can be formatted with modifier @.modifier:key
The below modifiers are available currently.
upper: Uppercase all characters in the linked message.lower: Lowercase all characters in the linked message.capitalize: Capitalize the first character in the linked message.
Example:
{
  ...
  "example": {
    "fullName": "Full Name",
    "emptyNameError": "Please fill in your @.lower:example.fullName"
  }
  ...
}
Output:
print('example.emptyNameError'.tr()); //Output: Please fill in your full nameClears a saved locale from device storage
Example:
RaisedButton(
  onPressed: (){
    context.deleteSaveLocale();
  },
  child: Text(LocaleKeys.reset_locale).tr(),
)At any time, you can take the main properties of the Easy localization widget using [BuildContext].
Are supported: supportedLocales, fallbackLocale, localizationDelegates.
Example:
print(context.supportedLocales); // output: [en_US, ar_DZ, de_DE, ru_RU]

print(context.fallbackLocale); // output: en_USCode generation supports only json files, for more information run in terminal flutter pub run easy_localization:generate -h
| Arguments | Short | Default | Description |
|---|---|---|---|
| --help | -h | Help info | |
| --source-dir | -S | resources/langs | Folder containing localization files |
| --source-file | -s | First file | File to use for localization |
| --output-dir | -O | lib/generated | Output folder stores for the generated file |
| --output-file | -o | codegen_loader.g.dart | Output file name |
| --format | -f | json | Support json or keys formats |
Steps:
- Open your terminal in the folder's path containing your project
- Run in terminal
flutter pub run easy_localization:generate - Change asset loader and past import.
import 'generated/codegen_loader.g.dart';
...
void main(){
  runApp(EasyLocalization(
    child: MyApp(),
    supportedLocales: [Locale('en', 'US'), Locale('ar', 'DZ')],
    path: 'resources/langs',
    assetLoader: CodegenLoader()
  ));
}
...- All done!
If you have many localization keys and are confused, key generation will help you. The code editor will automatically prompt keys
Steps:
- Open your terminal in the folder's path containing your project
- Run in terminal
flutter pub run easy_localization:generate -f keys -o locale_keys.g.dart - Past import.
import 'generated/locale_keys.g.dart';- All done!
How to usage generated keys:
print(LocaleKeys.title.tr()); //String
//or
Text(LocaleKeys.title).tr(); //Widget| Arabic RTL | English LTR | Error widget |
|---|---|---|
 |
 |
 |
We need your support. Projects like this can not be successful without support from the community. If you find this project useful, and would like to support further development and ongoing maintenance, please consider donating.


