Automation trigger for Qlik Sense is a extension which allows you to trigger automations directly from Qlik Sense. There are three basic options on how you can trigger an automation:
- Dialog with form items
- Within extension with form items

- Simple button
- Download the latest release from the following link: https://github.com/rileymd88/automation-trigger/releases/download/v1.2.1/automation-trigger.zip
- Import into Qlik Sense using the management console
- 1.2.1
- Bug fix which stopped form data from being sent to the automation
- 1.2.0
- Added support for asynchronous automation runs
- 1.1.9
- Added required input setting to checkbox and switch
- 1.1.8
- Text input will show multiple lines when longer text is inputted
- Fixed bug which prevented a vertical scrollbar from showing
- 1.1.7
- Fixed bug when migrating extension from a version < 1.1.0
- 1.1.6
- Updated to deal with new automations API
- 1.1.5
- Bug fixes
- 1.1.4
- Improved error handling
- 1.1.3
- Bug fixes
- 1.1.2
- Further bug fixes for error when user runs an automation that they do not own
- 1.1.1
- Fixed error when user runs an automation that they do not own
- 1.1.0
- Added Date picker form item
- Added Rating form item
- Renamed everything to reference automations instead of blends
- Added ability to select automations from a list
- Added direct link to automation from the extension
- Added ability to copy an input block from the extension which can be pasted into an automation for faster startup
- Added ability to create bookmark when the automation is triggered and have this bookmark ID sent to the automation
- Added sheetId and appId to data sent to automation
- Added ability to redirect users to another website after the automation has finished
- Added font color theme property
- 1.0.1
- Bug fix for the Dropdown multiple select form item
- 1.0.0
- First release
- Any data added as dimensions and measures will be sent to the automation within the body of the webhook
-
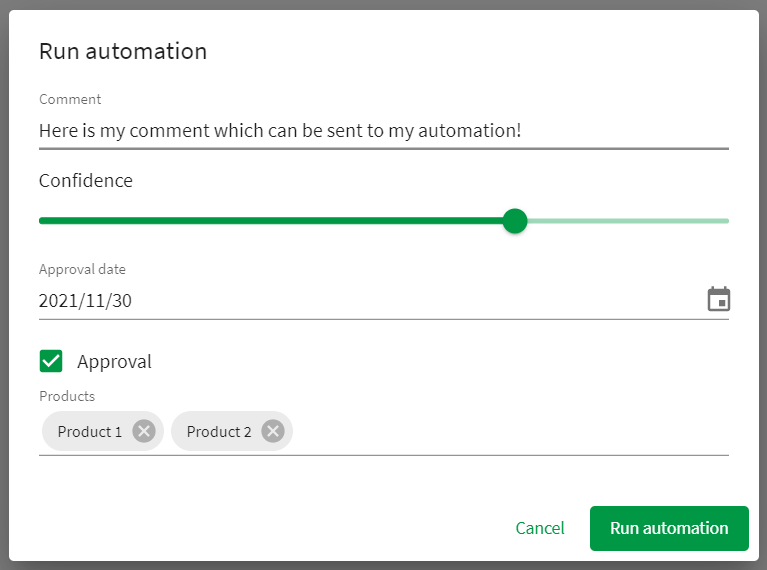
You can click on add items to add a form item to the extension. You will then be prompted to choose the type and set some appearance settings. Each item will save data which will also be sent to the automation within the body of the webhook. The
Referencefield will be used as a JSON key in the data which gets sent to the body of the webhook so either remember the generated id or change it to something you can remember. Ensure that the reference string does NOT contain any spaces or strange characters -
The following form item types available
- Checkbox
- Date picker
- Dropdown
- Dropdown multiple select
- Number
- Rating
- Slider
- Switch
- Text
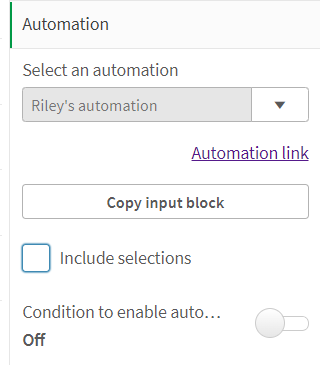
- Select an automation: Here you can select an automation - At this time it is only possible to select an Automation that you have created
- Automation link: This is a hyperlink which brings you directly to the automation editor for the selected automation
- Copy input block: By clicking on this button, you will copy into your clipboard an input block for your automation which parses the data sent from this extension to the automation. From within your automation simply right click and select Paste Block(s)
- Include selections: If this option is enabled, a bookmark will be created when the automation is run and the bookmark id will be sent to the automation. You can use the bookmark id together with the apply bookmark
- Condition to enable automation: Here you can use a Qlik Sense formula to determine when it should be possible to run the automation. If the formula returns 1, the automation can be run. If the formula returns 0, the automation cannot be run
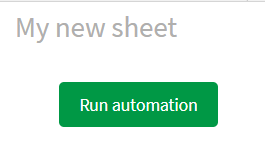
- Run automation button: Here you can define the look and feel of the run automation button
- Dialog: Here you can choose if you want to have a dialog to enter form information. The look and feel of the dialog can also be defined here
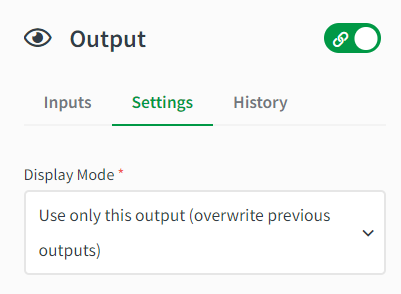
- Notification: Here you can choose if you want to have a notification pop up when the automation has finished running. You can define the message by using the Output block in your automation or within the extension itself. If your automation is running asynchronously, the Success message will show in the notification. The Success message can be found in Appearance -> Notification settings when toggling off the Show automation output switch. If you would like to redirect your end user after the automation has run, then you can do this be returning a JSON response in the following format within the Output block:
{
  "message": "Hello world",
  "redirect": "https://google.de",
  "newTab": true,
  "timeout": 100
}
When using the redirect option ensure that the Display Mode for the Output block is set to Use only this output (overwrite previous outputs) and that popups are not being blocked
| attribute | description | type |
|---|---|---|
| message | The message which will be shown in the notification | string |
| redirect | The URL which the user will be redirected to after the automation has run | string |
| newTab | Determines if the URL will open in a new tab or not | boolean |
| timeout | The amount of time in ms before redirecting the user | integer |
You can also choose to have the notification message be based on a Qlik Sense formula
- Theme: Here you can define the color scheme for the extension
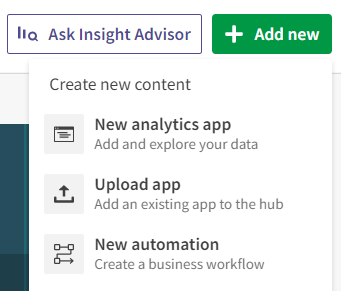
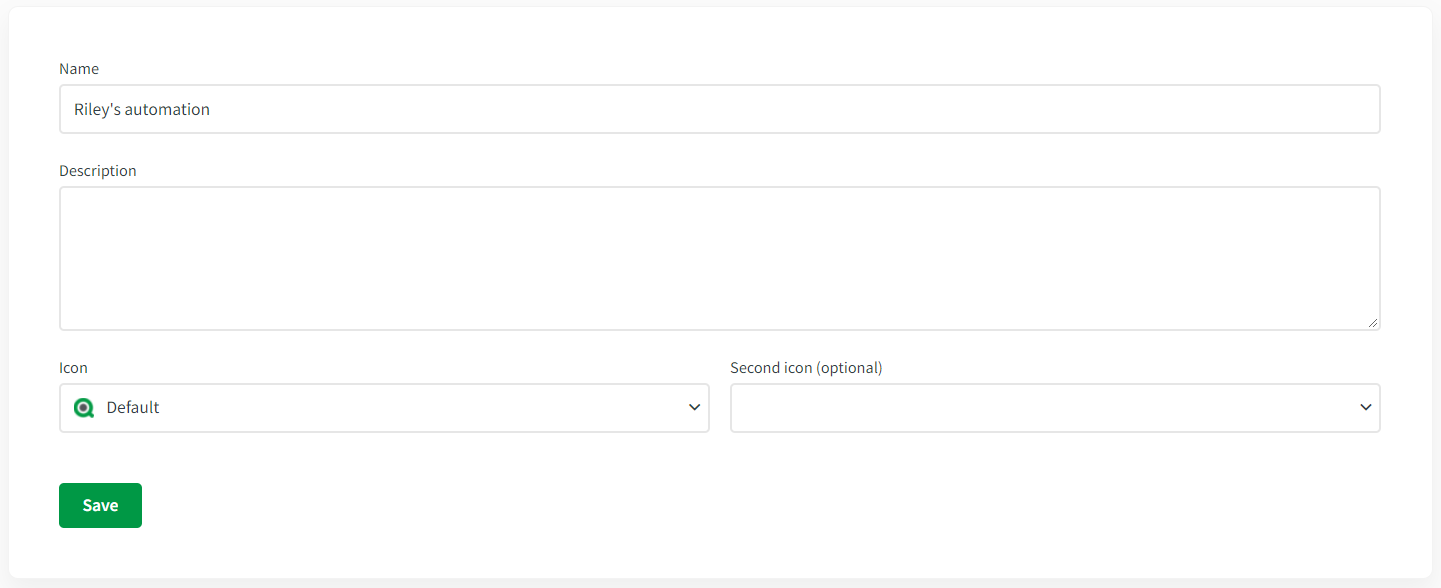
- Create an empty automation by clicking on + Add new and then New automation from the Qlik Sense hub
- Enter a name for your automation and click Save
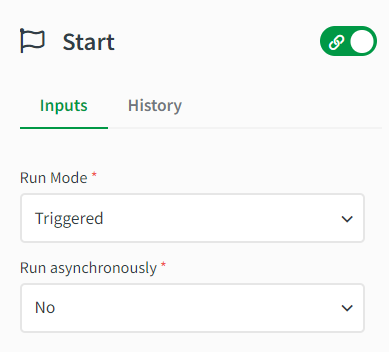
- Select the Start block and then set the Run Mode to Triggered
- Now navigate to your Qlik Sense app and find the Automation trigger extension and add it to your sheet
- Go to the extension properties and go to the Automation section and select your automation
- Click on the Copy input block and then click on the Automation link to open the automation
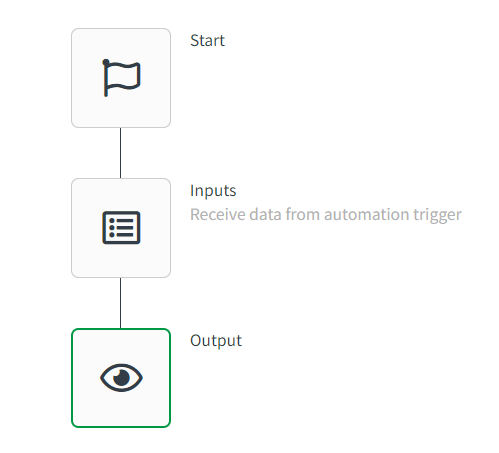
- On the canvas of the automation, right click and select Paste Block(s). You should now see a new block called Inputs on your canvas. This block will parse the data sent from the extension to make it easy to use in your automation
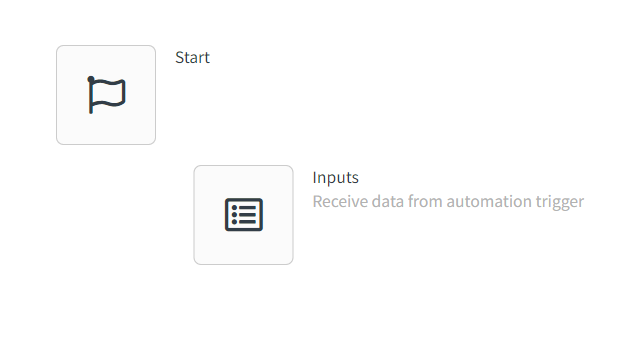
- Drag the new Input block below the Start block so that are connected
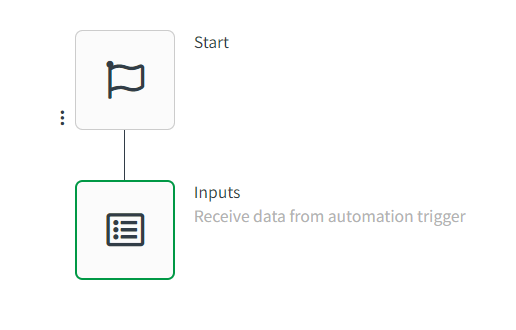
- Now you can use the data from the extension in your automation as it will available in the Input block
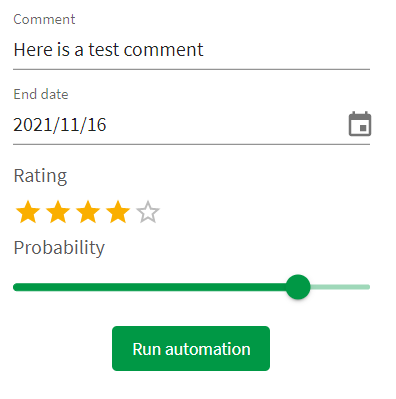
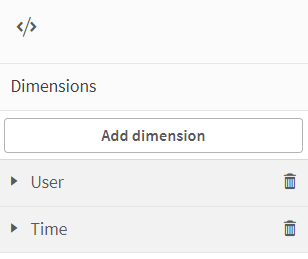
- For this basic example, I have set up several form items and have the dimensions User and Time
- Once I click on the automation, I can then view what the received data looks like by going to the Overview of the automation and selecting the Last Run tab and the Per Block option
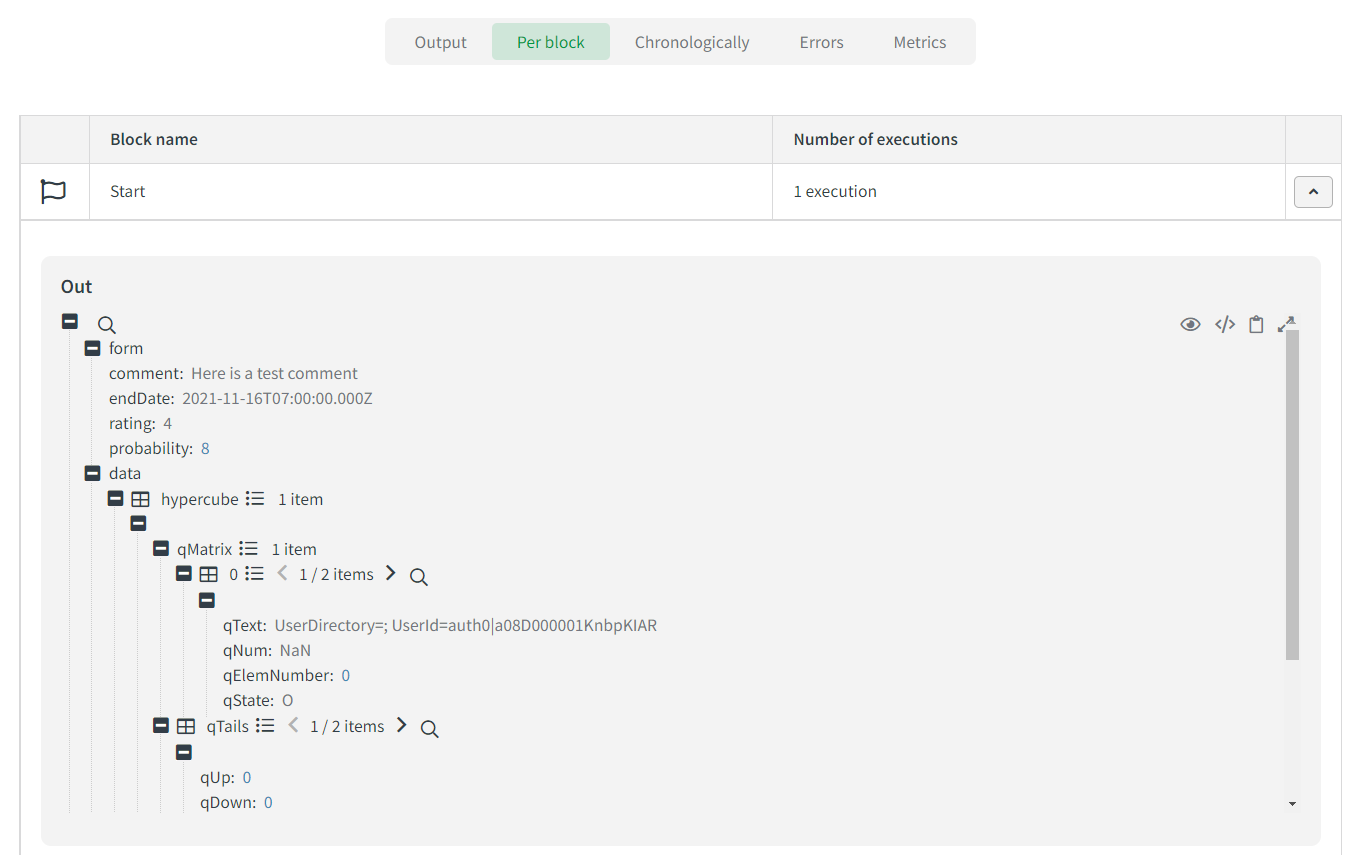
{
  "form": {
    "comment": "Here is a test comment",
    "endDate": "2021-11-16T07:00:00.000Z",
    "rating": "4",
    "probability": 8
  },
  "data": {
    "hypercube": [
      {
        "qMatrix": [
          [
            {
              "qText": "UserDirectory=; UserId=auth0|a08D000001KnbpKIAR",
              "qNum": "NaN",
              "qElemNumber": 0,
              "qState": "O"
            },
            {
              "qText": "16.11.2021 11:33:02",
              "qNum": 44516.48127314815,
              "qElemNumber": 0,
              "qState": "O"
            }
          ]
        ],
        "qTails": [
          {
            "qUp": 0,
            "qDown": 0
          },
          {
            "qUp": 0,
            "qDown": 0
          }
        ],
        "qArea": {
          "qLeft": 0,
          "qTop": 0,
          "qWidth": 2,
          "qHeight": 1
        }
      }
    ]
  },
  "bookmarkid": "",
  "app": "d62893fa-2c18-49cc-8013-31dc47508ea9",
  "sheetid": "ec5e7e0b-6a65-4f73-8271-fb1c5c5e28c0"
}
- If we want to ensure we receive a message when the automation has run, we can add an Output block to our automation. If you also want to redirect users after the automation has run, please refer to the documentation above in the Appearance area
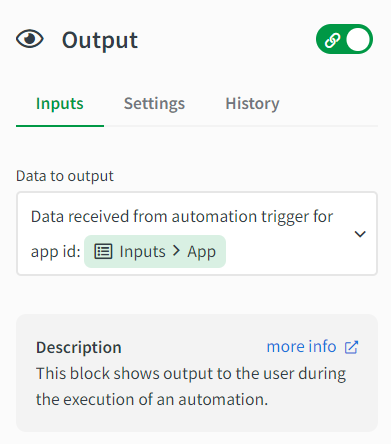
- After adding the Output block to our automation and clicking save, we should see the following notification in the Qlik Sense app after triggering the automation

- The extension will only show the first 100 automations for each user
- The extension can only send a maximum of 20 columns and 500 rows of data to an automation
- If this extension triggers a reload within the same app where it exists, notification messages will be blank. To workaround this you can send the input block before a reload is started
- Clone the repository
- In the package.json file replace
nebula sense --ext src/extDefinition.js --meta ./meta.json && cd ../ && python build.py extensionwithnebula sense --ext src/extDefinition.js --meta ./meta.json - Run
npm i - Run
npm run build - Run
npm run sense - Then zip the contents in the folder automation-trigger-ext and then upload as an extension