


A kubectl plugin for executing commands interactively across multiple pods or containers using tmux,
like csshX or pssh but for Kubernetes.
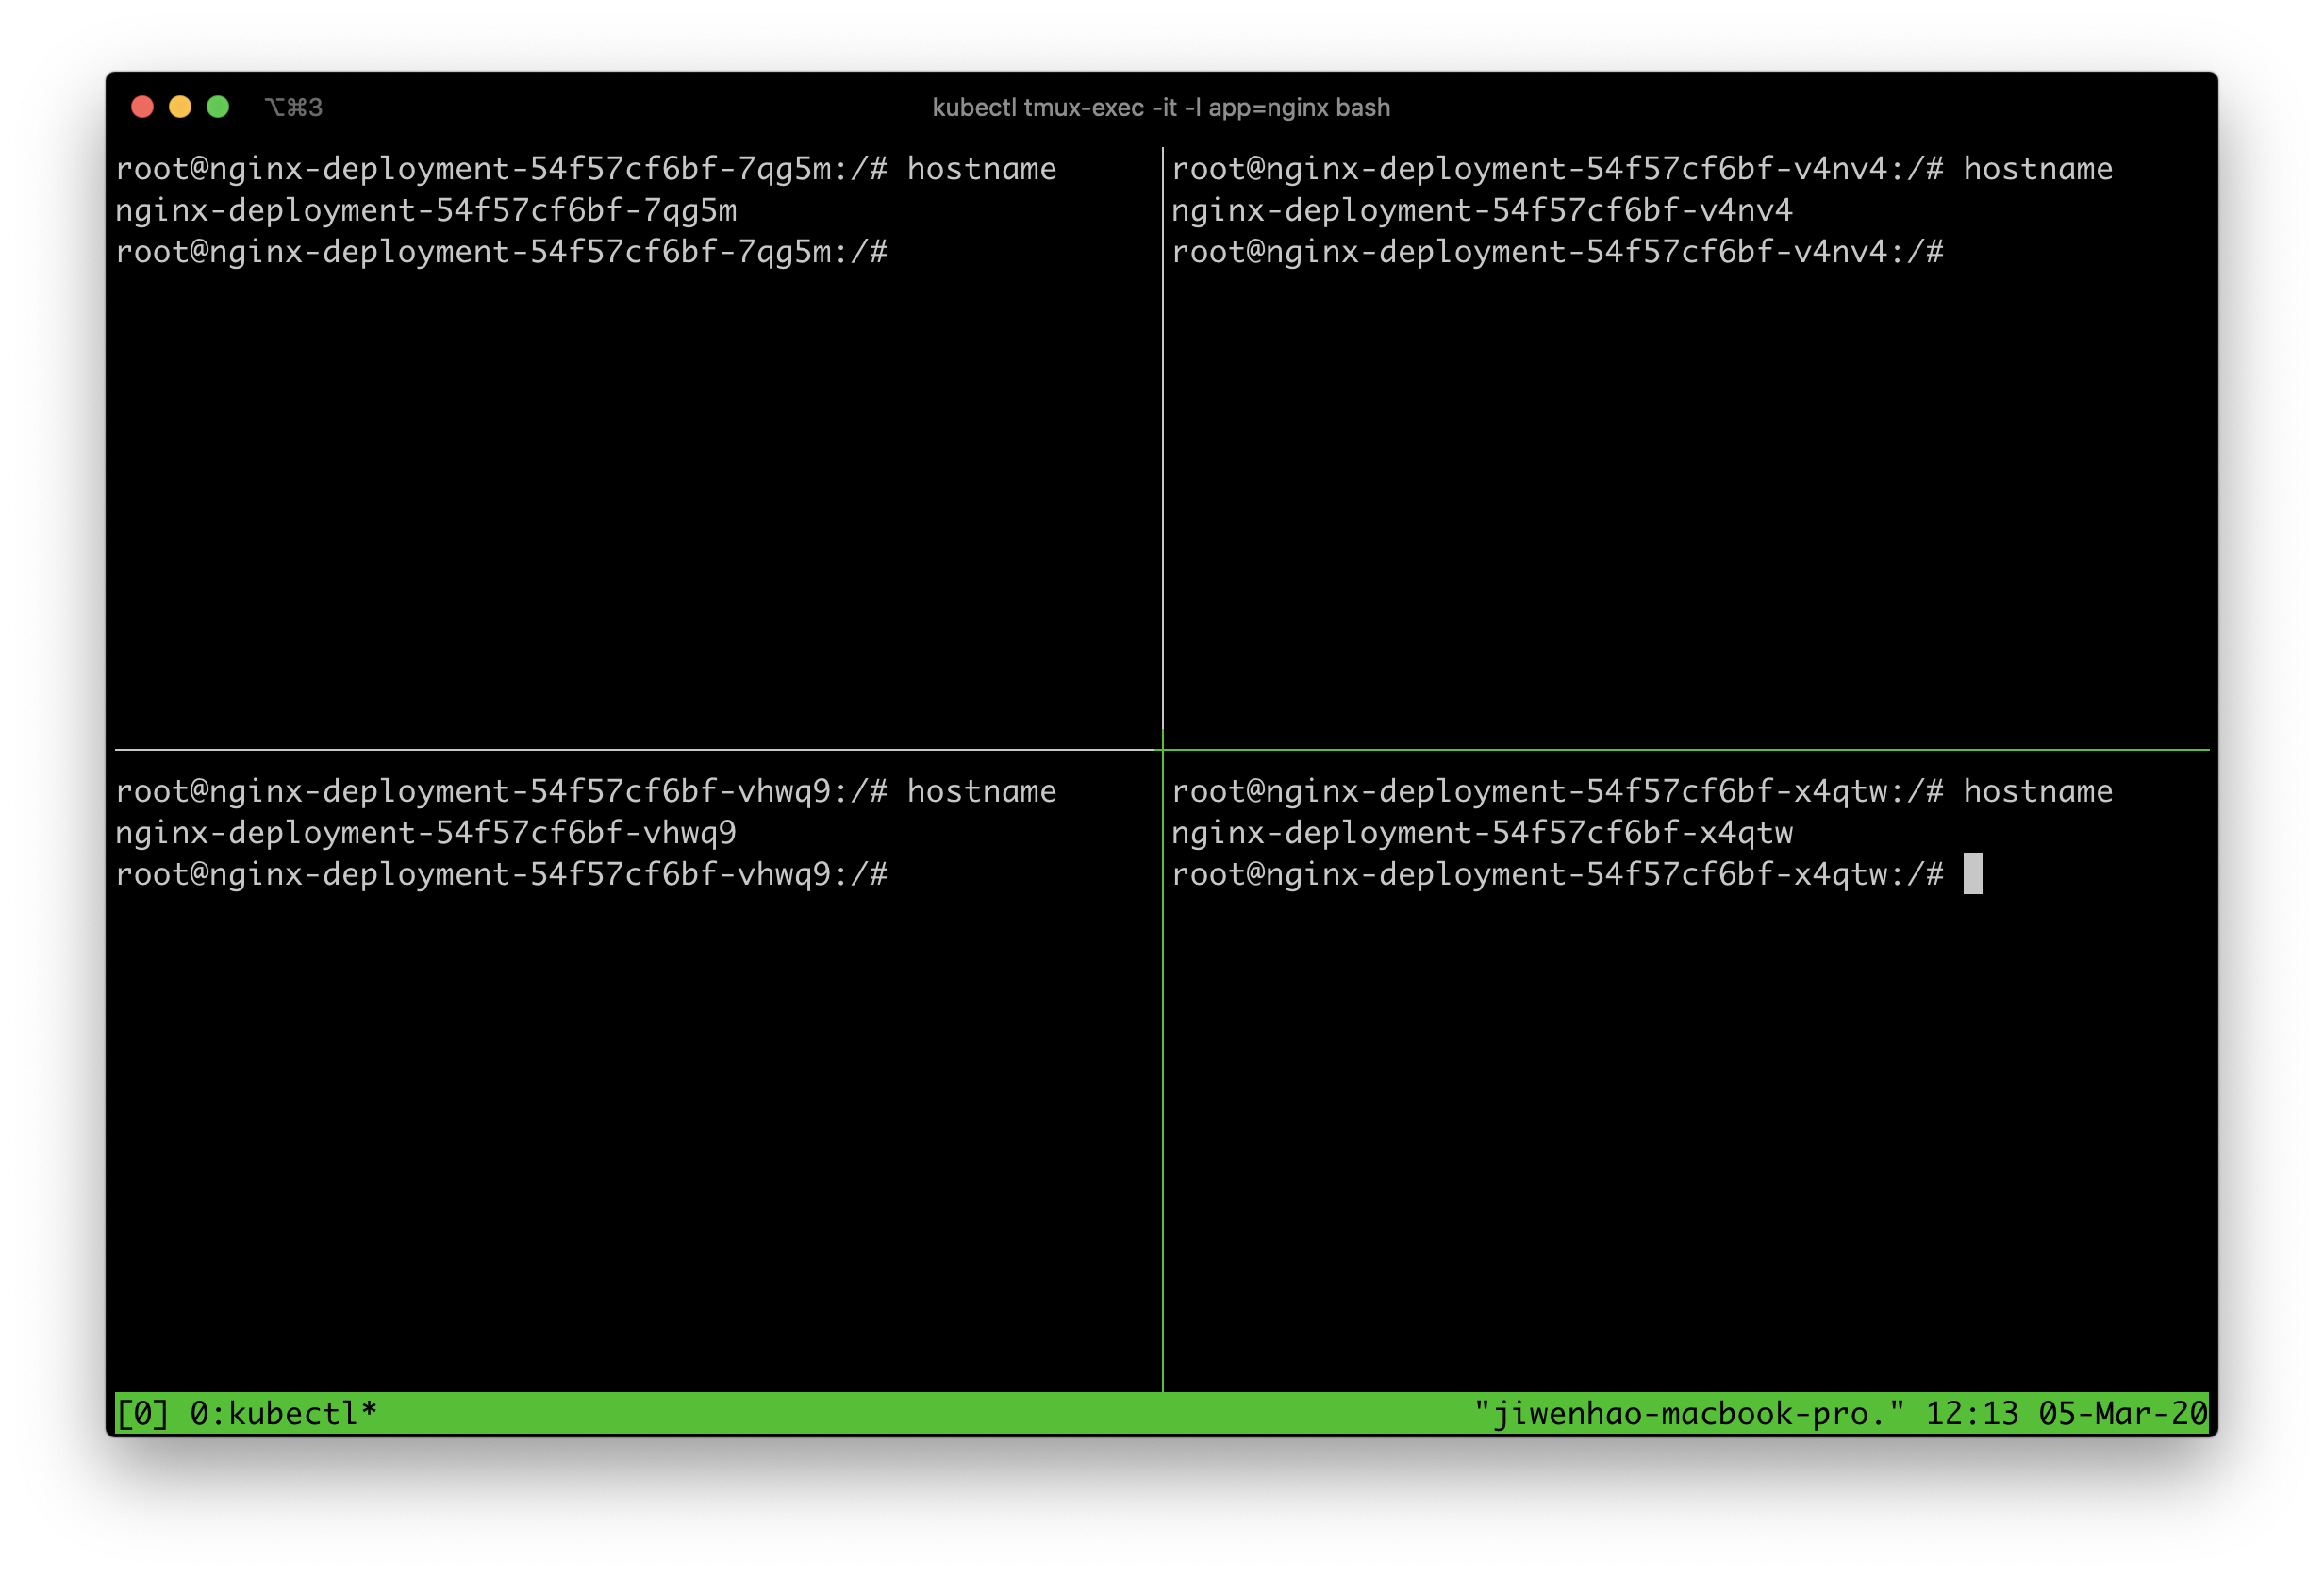
To execute command across all the Nginx containers using bash for example, run:
kubectl tmux-exec -l app=nginx /bin/bashNote: This is for Mac users only.
-
Install Homebrew.
-
brew install predatorray/brew/kubectl-tmux-exec
Finally, ensure /usr/local/bin/kubectl-tmux_exec is in your $PATH.
Note: It is recommended for Linux users.
Although it works both on Mac and Linux, it is not recommended for Mac users, since you still may need to install the dependency
gnu-getoptwith the help of Homebrew.
-
Install Krew by following the user guide.
-
kubectl krew install tmux-exec -
Install the dependencies. (Wiki: How-to-Install-Dependencies)
-
Download the latest release.
-
Unpack the kubectl-tmux-exec-*.tar.gz file and copy all the files to a directory,
/usr/local/kubectl-tmux-execfor instance. -
Add the
bin/directory to your$PATH. For example, add this line to your rc file:export PATH="$PATH:/usr/local/kubectl-tmux-exec/bin". -
Install the dependencies. (Wiki: How-to-Install-Dependencies)
Make sure you have kubectl ≥ 1.12 (plugin support), ideally latest.
Otherwise, execute the script directly: kubectl-tmux_exec [...ARGS].
Check if the script has been successfully added by:
kubectl plugin listThe output should be like
The following compatible plugins are available:

/usr/local/bin/kubectl-tmux_exec
If it does not show in the list, check $PATH env again.
You can use the command below to get the usage of the script.
kubectl tmux-exec --help

# or
kubectl-tmux_exec --help| Flag | Usage |
|---|---|
-V--version |
Print the version information |
-l--selector |
Selector (label query) to filter on, supports '=', '==', and '!='.(e.g. -l key1=value1,key2=value2) You must either use --selector or --file option. |
-f--file |
Read pod names line-by-line from a file. You must either use --selector or --file option. |
-c--container |
Container name. If omitted, the first container in the pod will be chosen |
-i--stdin |
Pass stdin to the container (deprecated, since it's enabled by default) |
-t--tty |
Stdin is a TTY (deprecated, since it's enabled by default) |
-d--detach |
Make the Tmux session detached |
-n--namespace= |
The namespace scope for this CLI request (can be applied multiple times) |
--context |
The name of the kubeconfig context to use (can be applied multiple times) |
-A--all-namespaces |
If present, list and execute the requested object(s) across all namespaces. Namespace in current context is ignored even if specified with --namespace. |
-C--enable-control-mode |
Start tmux in control mode and echo is disabled. (See: iTerm2 Integration) |
--remain-on-exit |
Remain Tmux window on exit |
--select-layout |
One of the five Tmux preset layouts: even-horizontal, even-vertical, main-horizontal, main-vertical, or tiled. |
--session-mode |
Where tmux is opened: auto, new-session, current-session |
The usage of these options is also available by --help.
The tmux-exec is similar to exec, except that it requires label selectors while exec requires a pod name.
To bash into all pod containers that share some common labels, foo=bar for instance.
kubectl tmux-exec -l foo=bar /bin/bashAfter you have successfully bash-ed into your selected containers, a Tmux window is opened actually, where each pane displays the execution result of each pod's container. Your keyboard inputs will be synchronized to all those panes.
If you are not familar with Tmux, you can have a look at tmux's man page or online tutorials. Or you can see the cheatsheet below, which will be sufficient I think.
With -C or --enable-control-mode, it runs in control mode and delegates pane input to iTerm2's "Broadcast Input" feature,
no need for tmux key bindings.
Use ⌘ + ⌥ + i to toggle broadcasting in iTerm2. (synchronize-panes will be disabled automatically in this mode.)
(see: tmux Integration for more information)
kubectl tmux-exec -C -l app=nginx /bin/bash
Please check this wiki for more information.
All Tmux command starts with a PREFIX. By default the PREFIX is Ctrl + b. I will use C-b below to stand for it.
C-b d, detach from the session. After that, the Tmux will be running in the backgroud. You can type tmux a to re-attach.
C-b :setw synchronize-panes off, turn off synchronizing inputs to all panes.
C-b :setw synchronize-panes on, turn on synchronizing inputs to all panes.
C-b <ARROW-KEY>, move cursor between panes.
C-b xy, close the current pane.
C-b &y, close the window including all panes.
- File issues or feature requests via GitHub Issues
- Join the Google Group for discussions
kubectl-alias: the missing alias command for kubectl.
If it saves you time, feel free to buy me a coffee 🙌
