


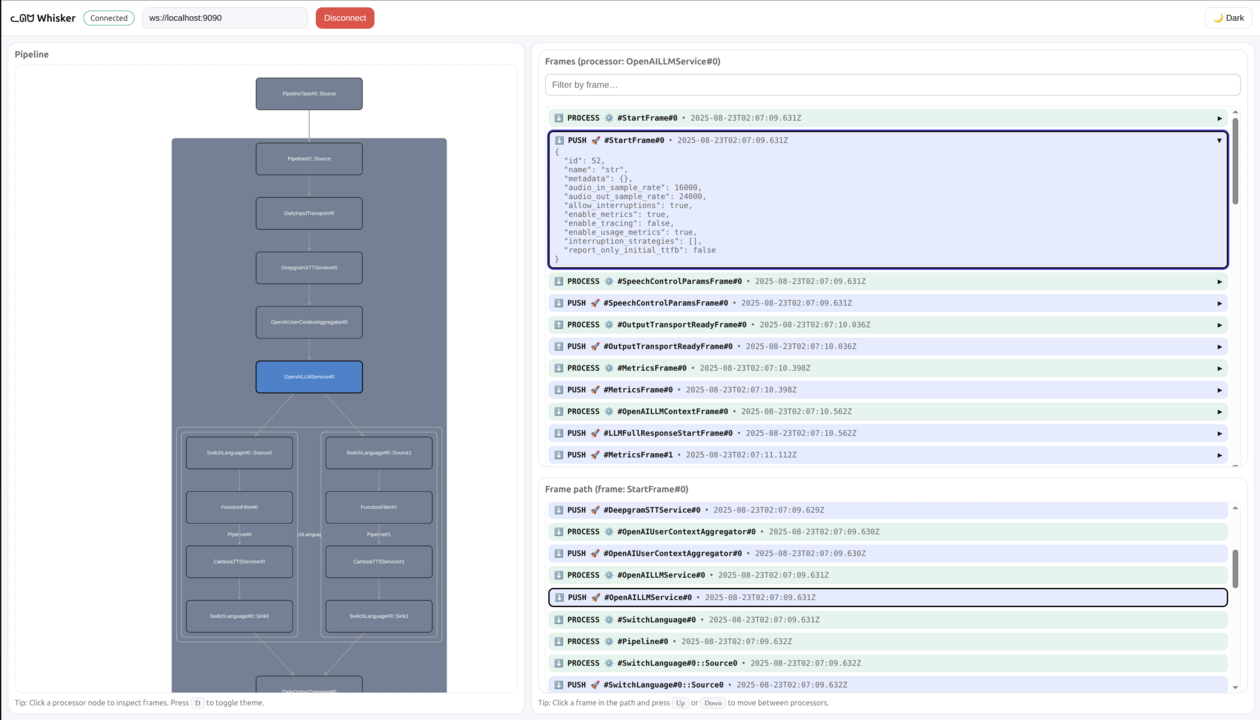
Whisker is a live graphical debugger for the Pipecat voice and multimodal conversational AI framework.
It lets you visualize pipelines and debug frames in real time — so you can see exactly what your bot is thinking and doing.
With Whisker you can:
- 🗺️ View a live graph of your pipeline
- ⚡ Watch frame processors flash in real time as frames pass through them
- 📌 Select a processor to inspect the frames it has handled (both pushed and processed)
- 🔍 Filter frames by name to quickly find the ones you care about
- 🧵 Select a frame to trace its full path through the pipeline
- 💾 Save and load previous sessions for review, collaboration, or troubleshooting
Think of Whisker as trace logging with batteries.
uv pip install pipecat-ai-whiskerfrom pipecat_whisker import WhiskerObserver
pipeline = Pipeline(...)
whisker = WhiskerObserver(pipeline)
task = PipelineTask(..., observers=[whisker])This starts the Whisker server that the graphical UI will connect to. By default, the Whisker server runs at:
ws://localhost:9090
-
Expose your local server with ngrok:
ngrok http 9090
-
Copy the ngrok URL (e.g.,
your-ngrok-url.ngrok.io) -
Open the hosted Whisker UI: https://whisker.pipecat.ai/
-
Connect to your bot:
- In the WebSocket URL field, enter:
wss://your-ngrok-url.ngrok.io - Click connect
- In the WebSocket URL field, enter:
If you prefer to run the UI locally:
-
Clone the repository:
git clone https://github.com/pipecat-ai/whisker.git
-
Start the UI:
cd whisker/ui npm install npm run dev -
Connect to http://localhost:5173
The UI will automatically connect to ws://localhost:9090 by default.
You can also save your sessions to a file, which is helpful for debugging later or sharing with someone for assistance:
whisker = WhiskerObserver(pipeline, file_name="whisker.bin")Load the file using the Whisker client.
- View some examples in the
examplesfolder - See the Pipecat documentation for more about building bots