The goals / steps of this project are the following:
- Perform a Histogram of Oriented Gradients (HOG) feature extraction on a labeled training set of images and train a classifier Linear SVM classifier
- Optionally, you can also apply a color transform and append binned color features, as well as histograms of color, to your HOG feature vector.
- Note: for those first two steps don't forget to normalize your features and randomize a selection for training and testing.
- Implement a sliding-window technique and use your trained classifier to search for vehicles in images.
- Run your pipeline on a video stream (start with the test_video.mp4 and later implement on full project_video.mp4) and create a heat map of recurring detections frame by frame to reject outliers and follow detected vehicles.
- Estimate a bounding box for vehicles detected.
Rubric Points
###Writeup / README
####1. Provide a Writeup / README that includes all the rubric points and how you addressed each one. You can submit your writeup as markdown or pdf. Here is a template writeup for this project you can use as a guide and a starting point.
You're reading it!
###Histogram of Oriented Gradients (HOG)
####1. Explain how (and identify where in your code) you extracted HOG features from the training images.
The code for this step is contained in lines 14 through 24 of the file called car_detect_train.py.
I started by reading in all the vehicle and non-vehicle images. Here is an example of one of each of the vehicle and non-vehicle classes:

I then explored different color spaces and different skimage.hog() parameters (orientations, pixels_per_cell, and cells_per_block).
I grabbed random images from each of the two classes and displayed them to get a feel for what the skimage.hog() output looks like.
Here is an example using the YCrCb color space and HOG parameters of orientations=9, pixels_per_cell=(8, 8) and cells_per_block=(2, 2):

I tried different combinations of features, here are the summary:
| Features | Feature vector size | Test set accuracy |
|---|---|---|
| HOG | 5292 | 97.89% |
| HoG + Spatial | 6060 | 98.93% |
| HoG + Spatial + Histogram | 6156 | 99.35% |
For HoG, I used orientations=9, pixels_per_cell=(8, 8) and cells_per_block=(2, 2). Since the final combination
gives accuracy of 99.35%, I used this configuration for the rest of my experiments.
####2. Explain how you settled on your final choice of HOG parameters.
As shown in the above table, orientation=9, pix_per_cell=8, cell_per_block=2 for HoG, along with spatial and histogram
features give pretty promising results on the test set, so I settled with this setting.
Moreover, I could have tuned those parameters to make the feature vector smaller, and therefore reduce the computation time, but this configuration is not too slow, so I moved on with it.
####3. Describe how (and identify where in your code) you trained a classifier using your selected HOG features (and color features if you used them).
I trained a linear SVM using a combination of HoG on the YCrCb space, color histogram (of 32 bins) and spatial bins of size 32 x 32.
At the end, the feature vector has 6156 dimensions. I think this is more than enough.
I use scikit-learn Pipeline to build a pipeline containing a StandardScaler and a LinearSVM. The code is
in between lines 90 and 98 of car_detect_train.py. Using a Pipeline allows me to persist the whole model
once training is done, along with all the parameters. The code for that is between lines 100-106 of car_detect_train.py.
On the provided dataset, SVM gave 99.4% accuracy, so I thought I don't need to tune it more.
###Sliding Window Search
####1. Describe how (and identify where in your code) you implemented a sliding window search. How did you decide what scales to search and how much to overlap windows?
Vehicles appear in the video at various scales, so instead of tuning for a single scale, I run the feature detector
at 8 scales (0.7, 0.8, 1, 1.25, 1.5, 1.7, 2.9, 2). The code for sliding windows are in lines 15-79 of car_detect.py.
The overlap between windows is decided by using 2 cells per step (on line 39 of car_detect.py)
Searching on multiple scales makes it significantly slower. I then use multiprocessing to process each scale in a separated
process, and all the detected candidates will be combined before being fed into a final filtering step.
The code for multiprocessing is in lines 256-273, 299-307 of car_detect.py.
####2. Show some examples of test images to demonstrate how your pipeline is working. What did you do to optimize the performance of your classifier?
Here are some example images:

####1. Provide a link to your final video output. Your pipeline should perform reasonably well on the entire project video (somewhat wobbly or unstable bounding boxes are ok as long as you are identifying the vehicles most of the time with minimal false positives.) Here's a link to my video result
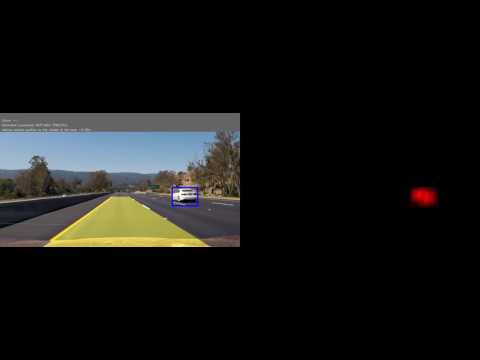
Using the lane detection pipeline in the last project, I was able to detect lanes and vehicles simultaneously.
Video was generated with python car_detect.py project_video.mp4 -d -l -p 10.
####2. Describe how (and identify where in your code) you implemented some kind of filter for false positives and some method for combining overlapping bounding boxes.
False positives are eliminated in several ways:
- Any detected window of size less than 1000 pixels will be discarded. This roughly corresponds to image patches of size
32 x 32, which is quite small. The code is in lines 134-135 and 292 of
car_detect.py. - A detected car, if missed more than 3 consecutive frames, will be dropped from the set of tracking cars. The code for this is in line 150.
- A newly detected car should have been presented at least in 3 consecutive frames before it is considered "reliable", and got plotted. The code is in lines 167-169.
Overlapping boxes are combined if the intersect area is more than 70% of the area of the smaller box.
The code is in lines 142-143, 217-228 of car_detect.py.
The final position of the car on the image is an adjusted average of its position in the last 10 frames. I used a weighted average where the last frame has higher weight than frames in the past. The code is in lines 201-208 and 168-169. This smoothing technique hopefully makes tracking more stable.
###Discussion
####1. Briefly discuss any problems / issues you faced in your implementation of this project. Where will your pipeline likely fail? What could you do to make it more robust?
The most important issue is the process is quite slow (around 1-2 seconds per frame). I believe it is because the feature extraction step is a bit heavy. Probably if we reduce the number of features (e.g. using LBP features) then this could be improved. Another idea is to get rid of the feature engineering altogether, and train a "relatively" small CNN to detect cars. With a GPU, using CNN on top of image patch will likely to be faster.
The detected boxes are not very tight. We can improve this by having a finer sliding windows, where we take smaller steps between the windows. However that will further slow down the detection process, so there has to be some trade-off between accuracy and processing speed.
The training set for SVM might be small. It could have been improved by using a bigger training set.
Finally, detecting cars on the road is just the first step. The goal should be to do something about it. I am looking forward to learning more on that.