Home
Use AlarmThing to connect your DSC alarm system to SmartThings!
- DSC Alarm System
- IT-100 interface
- Arduino MEGA
- Arduino RS232 shield
- Arduino SmartThings shield
Connect the IT-100 interface to the communication and power lines of the DSC alarm panel (AUX+/AUX- for power and GRN/YEL for data).


The output of the IT-100 interface is RS232 at 12V levels therefore it can't be directly connected to the Arduino board (it will only accept 5V levels), therefore an RS232 shield is used to convert to the right levels.
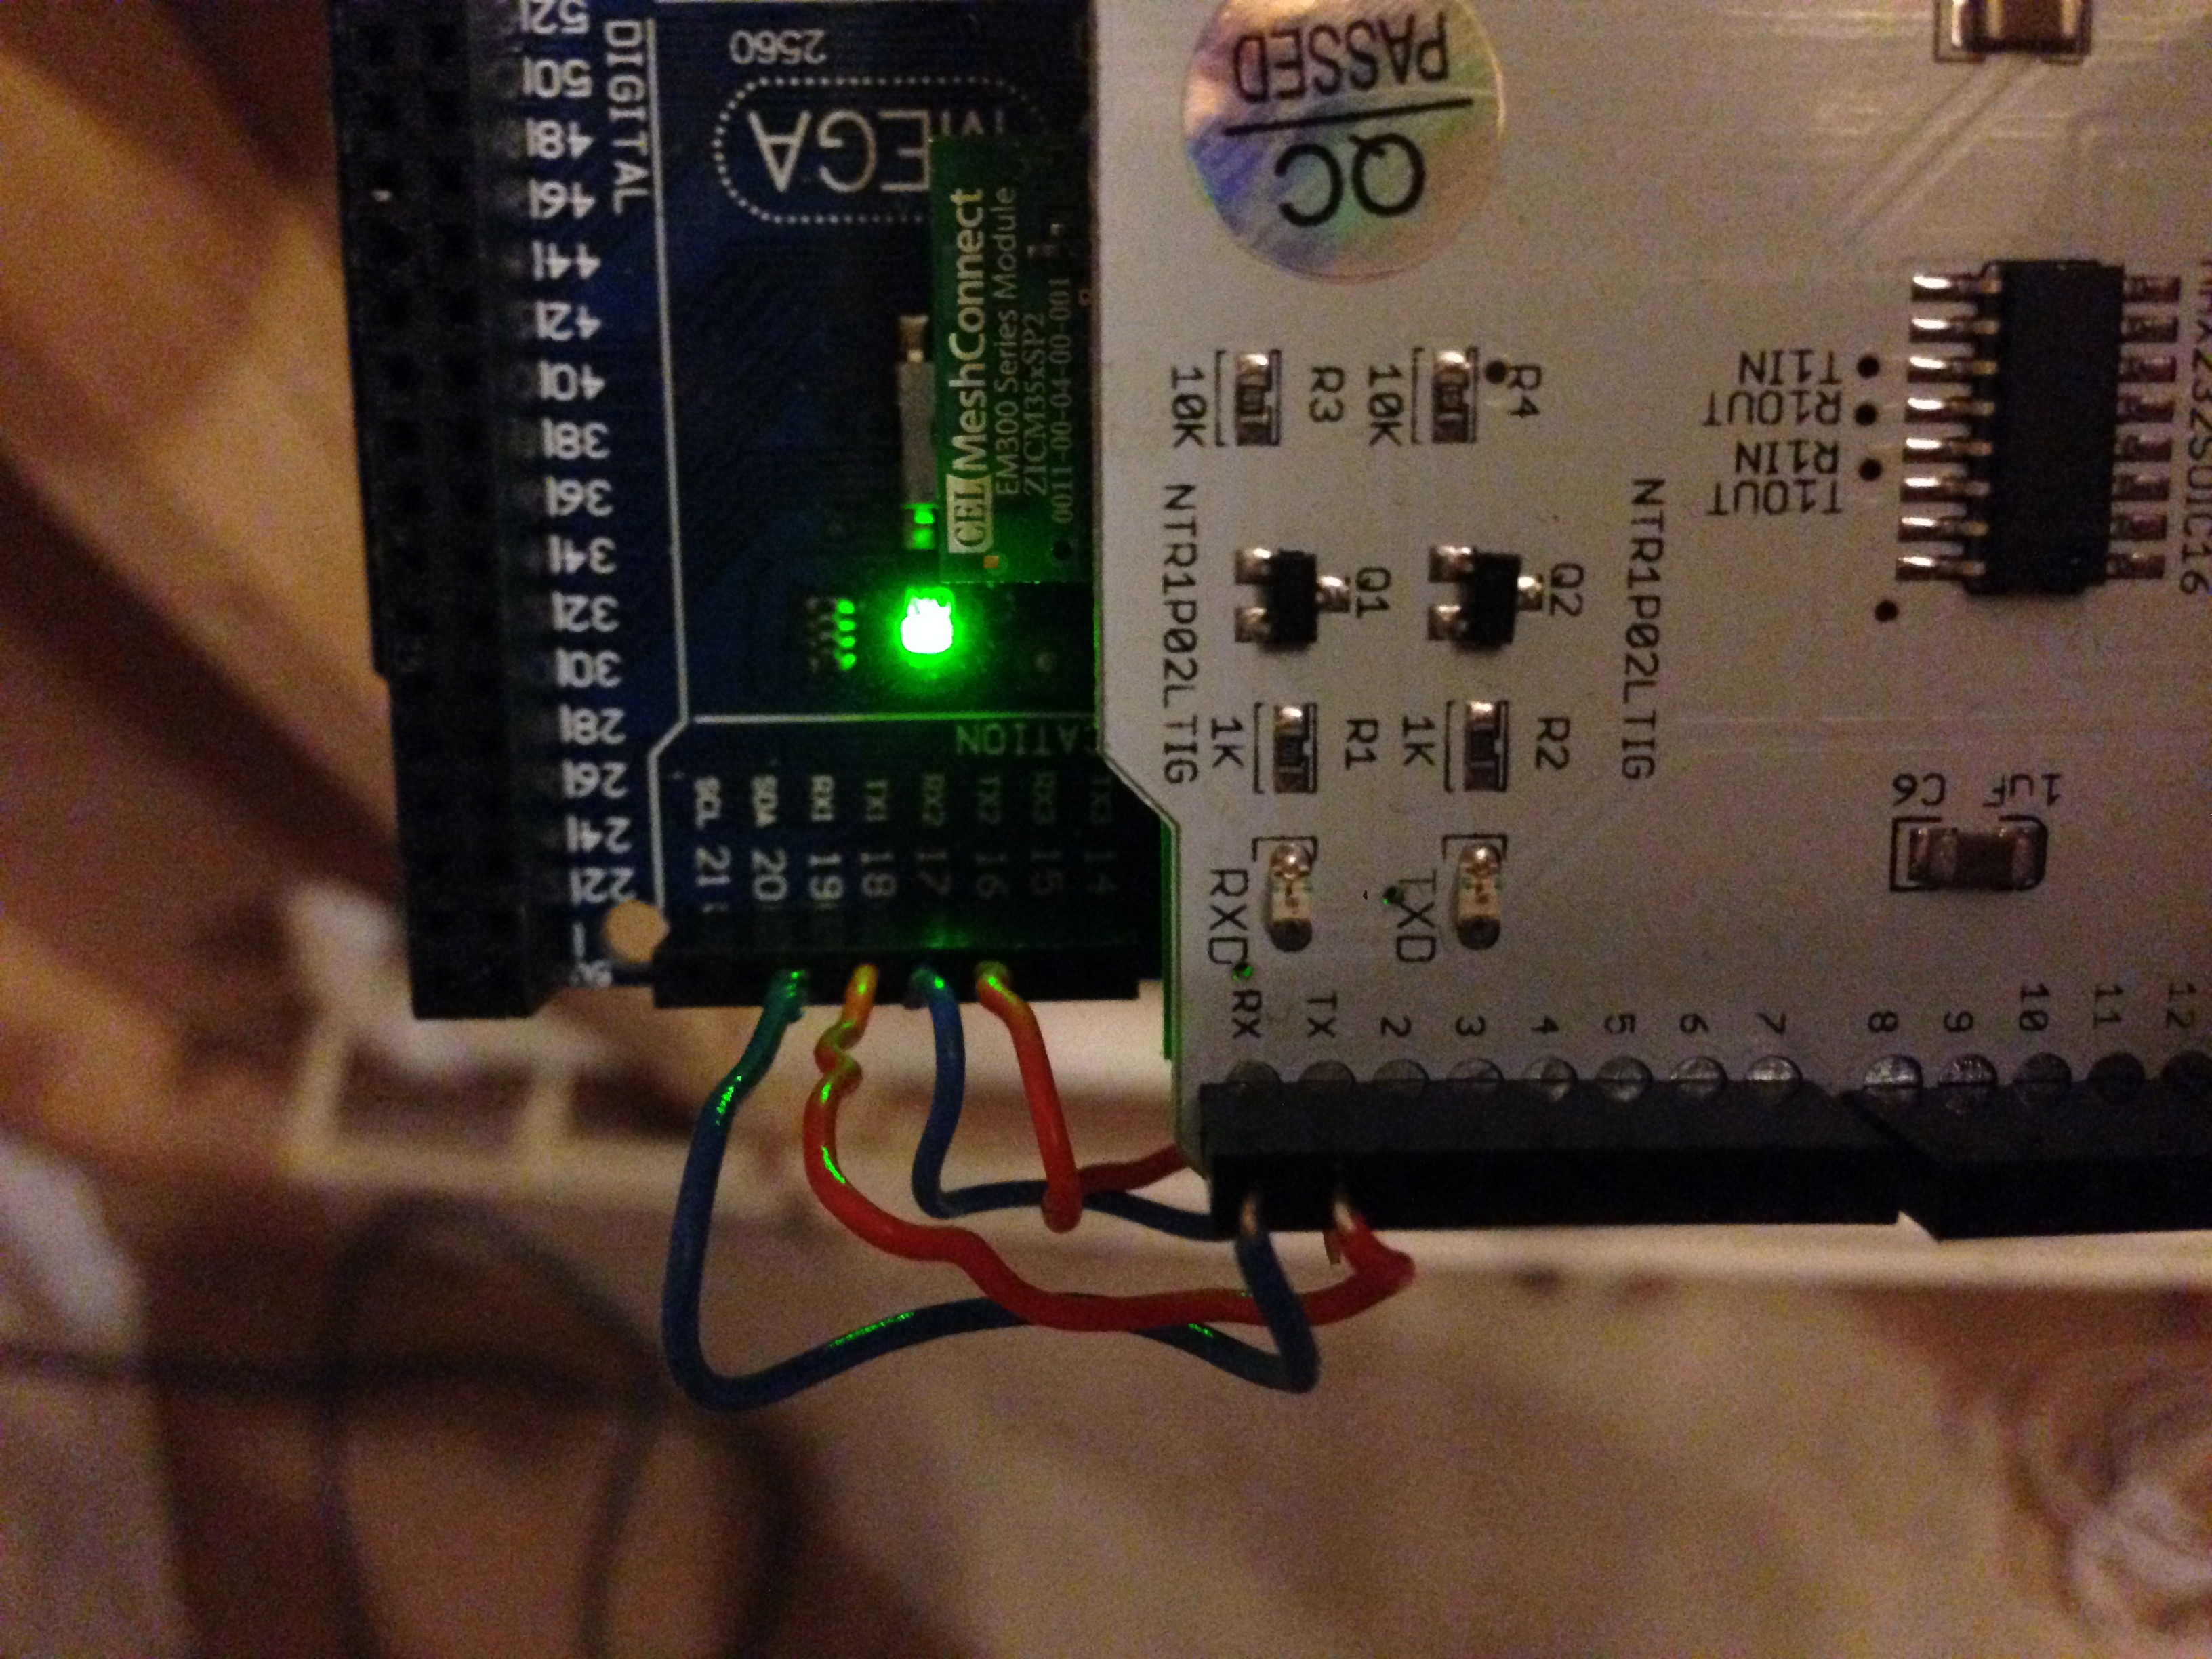
 This picture shows the Arduino Mega, with the SmartThings shield on top, and the RS232 shield on top of that. A SmartThings shield is used to interface with the SmartThings hub and cloud. The Arduino needs to be capable of receiving and transmitting through two serial ports (one for the IT-100 and another for the SmartThings shield). An Arduino Mega was chosen since it has more than two serial ports. An attempt was made to use an Arduino Uno with one hardware and one software serial port but it was not fast enough to handle all communications and as a result messages were lost. The SmartThings serial port is operating a 2400 bps and if a software serial port is used it blocks all other communication while a message is sent to the hub, which at those speeds it could be several ms.
The official SmartThings Arduino library will only support a software serial port, as a result the library had to be modified in order to utilize a hardware serial port. By default the RS232 shield will use pins 1, 2 and the SmartThings shield will use pins 3, 4. All four of those lines had to be re-routed to the dedicated serial ports of the Arduino Mega. I did this by bending the pins, and running wires to the appropriate ports. The Rx and Tx pins of the RS232 shield are bent, and wires are run to connect Rx to port 19 (Rx1) of the MEGA, and Tx to port 18 (Tx1). Similarly, the Rx and Tx pins of the SmartThings shield are bent and wires are run to pins 17 (Rx2) and 16 (Tx2), respectively.
IMPORTANT Note that a straight through serial cable does not work, you need a null modem cable. This frustrated me for about a week, so hopefully I can save someone some time by adding this note!

Install the Arduino software from Arduino directory, being sure to insert your alarm code where noted in the code.
On the software side, there are several new SmartThings device types, and a SmartApp. The main device type (AlarmThing.groovy) defines the connection to the SmartThings shield. Then, there are virtual device types defined for motion, glass break, and contact sensors. The SmartApp creates these virtual devices for all of the alarm zones, so that each shows up as its own device in SmartThings. Install and publish all of these through the SmartThings IDE. See the documentation from SmartThings or the community site for assistance.
Once the software is installed pair the SmartThings shield with your hub. In the SmartThings app, from the Dashboard, tap the "+", then "Connect New Device". Press the "SWITCH" button on the SmartThings shield to put it in pairing mode, and it should show up. Give it a name in the app. Back in the SmartThings IDE, find the device under "My Devices" and click its name. Click the "Edit" button. Under "Type", select "AlarmThing" from the dropdown (self-published device types are near the bottom of the list). The alarm will now show up in your "Things" section on the SmartThings app.
Next, install the SmartApp by again tapping the "+". This time, swipe over to "My Apps" and select "AlarmThing Manager". Select your alarm and hub, then you can fill in the name and types of each of your zones. When you finish installing the app, it will generate virtual devices for all of those which you filled in. These virtual devices can now be used just like a real device.
- Timer library from Simon Monk
- SmartThings shield library from SmartThings (modified for ArduinoMega)
- Original code forked from Vassilis Varveropoulos