Screen.Recording.2022-07-29.at.4.25.17.PM.mov
- Instruction
- Initialize spring boot project
- application properties
- Add objects
- Test this basic data structure
- Make HomeController and home.html
- Create PostController, and post.html
- Make Account feature
- Add new post feature
- Add security feature
- Edit, Delete feature
- References
A simple blog application built with spring boot, spring jpa, h2, and security.
- Built a spring boot application with Spring Web, Spring Boot DevTools, Thymleaf, Lombok.
- Developed CRUD feature for post by using models, controllers and services.
- Made data communication with JPA between repositories and services.
- Implemented login authority feature with spring security.
- Divided user authority roles such as delete posting depends on the login status.
First of all, we can generate spring boot project in here.
- Maven project
- Java 18
- Spring Boot 2.7.1
- Dependencies: Spring Web, Spring Boot DevTools, Spring Data JPA, H2 Database, Validation, Thymleaf, Lombok
# setup server port to be 3000
server.port=3000

# setup local h2 database config
spring.datasource.url=jdbc:h2:file:./data/blogapp
spring.datasource.driver-class-name=org.h2.Driver
spring.datasource.username=admin
spring.datasource.password=password
spring.jpa.database-platform=org.hibernate.dialect.H2Dialect

spring.h2.console.enabled=true
spring.h2.console.path=/h2-console

spring.jpa.hibernate.ddl-auto=create-drop
- server.port: change the localhost port number
- spring.datasource: define datasource of this spring project url, driver class name, username, password
- spring.jpa.database-platform: Name of the target database to operate on, auto-detected by default. Can be alternatively set using the "Database" enum.
- spring.h2.console: Whether to enable the console and path at which the console is available.
- spring.jpa.hibernate.ddl-auto: DDL mode. This is actually a shortcut for the "hibernate.hbm2ddl.auto" property. Defaults to "create-drop" when using an embedded database and no schema manager was detected. Otherwise, defaults to "none".
- none: Disable DDL handling.
- validate: Validate the schema, make no changes to the database.
- update: Update the schema if necessary.
- create: Create the schema and destroy previous data.
- create-drop: Create and then destroy the schema at the end of the session.
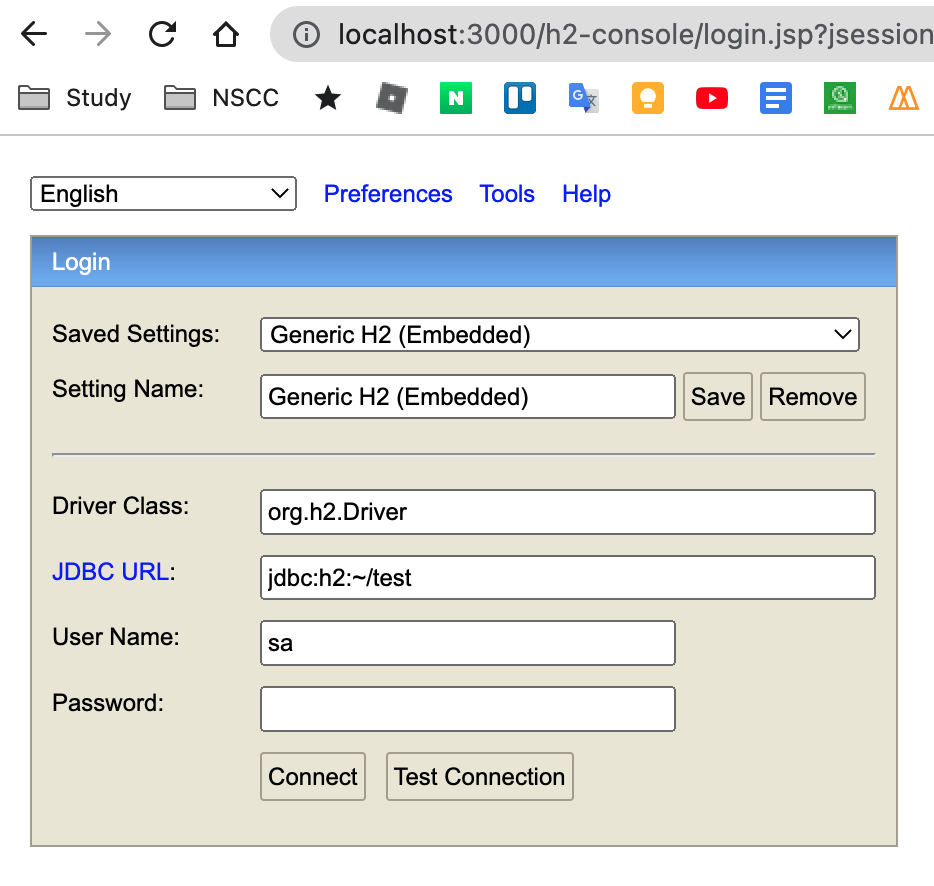
Now, we can check changed server port with loacalhost:3000, and h2 console in localhost:3000/h2-console.
Inside of models, we create Post public class with id, title, body, and local date time information.
Annotations
- Entity: The @Entity annotation specifies that the class is an entity and is mapped to a database table.
- Getter, Setter: You can annotate any field with @Getter and/or @Setter, to let lombok generate the default getter/setter automatically. You can also put a @Getter and/or @Setter annotation on a class. In that case, it's as if you annotate all the non-static fields in that class with the annotation.
- Id, GeneratedValue: The @Id annotation specifies the primary key of an entity and the @GeneratedValue provides for the specification of generation strategies for the values of primary keys.
- Column: @Column annotation is used for Adding the column the name in the table of a particular MySQL database.
After that, you need to make Repository for handeling Post object with JpaRepository.
Annotations
- Repository: @Repository is a Spring annotation that indicates that the decorated class is a repository. A repository is a mechanism for encapsulating storage, retrieval, and search behavior which emulates a collection of objects.
And we can controll Post data with PostService class. Inside of that, getById, getAll, and save method would be added.
Annotations
- Service: It is used to mark the class as a service provider. So overall @Service annotation is used with classes that provide some business functionalities. Spring context will autodetect these classes when annotation-based configuration and classpath scanning is used.
- Autowired: The @Autowired annotation provides more fine-grained control over where and how autowiring should be accomplished. The @Autowired annotation can be used to autowire bean on the setter method just like @Required annotation, constructor, a property or methods with arbitrary names and/or multiple arguments.
Let's make SeedData class and create private object postService. So you can use postService.getAll(), postService.save(), and setter methods such as setTitle() and setBody.
Annotations
- Component: @Component is an annotation that allows Spring to automatically detect our custom beans. In other words, without having to write any explicit code, Spring will: Scan our application for classes annotated with @Component. Instantiate them and inject any specified dependencies into them.
- Override: The @Override annotation indicates that the child class method is over-writing its base class method. The @Override annotation can be useful for two reasons. It extracts a warning from the compiler if the annotated method doesn't actually override anything. It can improve the readability of the source code.
In Spring, the objects that form the backbone of your application and that are managed by the Spring IoC container are called beans. A bean is an object that is instantiated, assembled, and otherwise managed by a Spring IoC container. Otherwise, a bean is simply one of many objects in your application.

As shown in the figure above, @Service, @Controller, and @Repository all inherit @Component, and classes registered with the corresponding annotation are automatically generated by the spring container and reported as spring bins. Auto-wiring automatically maps a spring bin object to a specific reference variable and uses an annotation called @Autowired. Create a java file by implementing the CommandLineRunner interface. CommandLineRunner is used to implement code launched by the spring boot application and executed with the CommandLine factor. The run() method must be overridden.
For make html file with variables on controller, we need to use thymeleaf. Thymeleaf is a Java-based library used to create a web application. It provides a good support for serving a XHTML/HTML5 in web applications. At first, you can make HomeController to control home.html with url mapping.
Annotations
- Controller: @Controller annotation indicates that the annotated class is a controller. It is a specialization of @Component and is autodetected through classpath scanning. It is typically used in combination with annotated handler methods based on the @RequestMapping annotation.
- GetMapping: The @GetMapping annotation is a specialized version of @RequestMapping annotation that acts as a shortcut for @RequestMapping(method = RequestMethod. GET) . The @GetMapping annotated methods in the @Controller annotated classes handle the HTTP GET requests matched with given URI expression.
In the home.html, we can add thymeleaf attribute to use th method and variables.
<html xmlns:th="http://www.thymeleaf.org">If you run debug with SeedData, it can be seen like below.

As HomeController, you can add PostController with getPost public class. If requested post id exists, the post would be shown. If not, 404.html will be occured.
Annotations
- PathVariable: @PathVariable is a Spring annotation which indicates that a method parameter should be bound to a URI template variable. It has the following optional elements: name - name of the path variable to bind to. required - tells whether the path variable is required. value - alias for name.
    @GetMapping("/posts/{id}")
    public String getPost(@PathVariable Long id, Model model) {
        // find the post by id
        Optional<Post> optionalPost = postService.getById(id);
        // if the post exists, then show it into the model
        if (optionalPost.isPresent()) {
            Post post = optionalPost.get();
            model.addAttribute("post", post);
            return "post";
        } else {
            return "404";
        }
}In this stage, we will make Account festure by using Jparepository.
First of all, make an Account class on the models package. Such as Post class, @Entity, @Getter, @Setter, @Id, @GeneratedValue annotations would be needed. Relationship betweem account and posts is OneToMany, so @OneToMany annotation is added with mappedBy account.
Connection between posts and account would be ManyToOne relationship. To make this connectivity, we need to add code like below.
// Connection with account
@NotNull
@ManyToOne
@JoinColumn(name = "account_id", referencedColumnName = "id", nullable = false)
private Account account;In order to save account repository, you can create AccountRepository interface inside of repositories package.
AccountService class can do a role as a service for saving account into the account repositories. After that, we can test this by changing SeedData class.
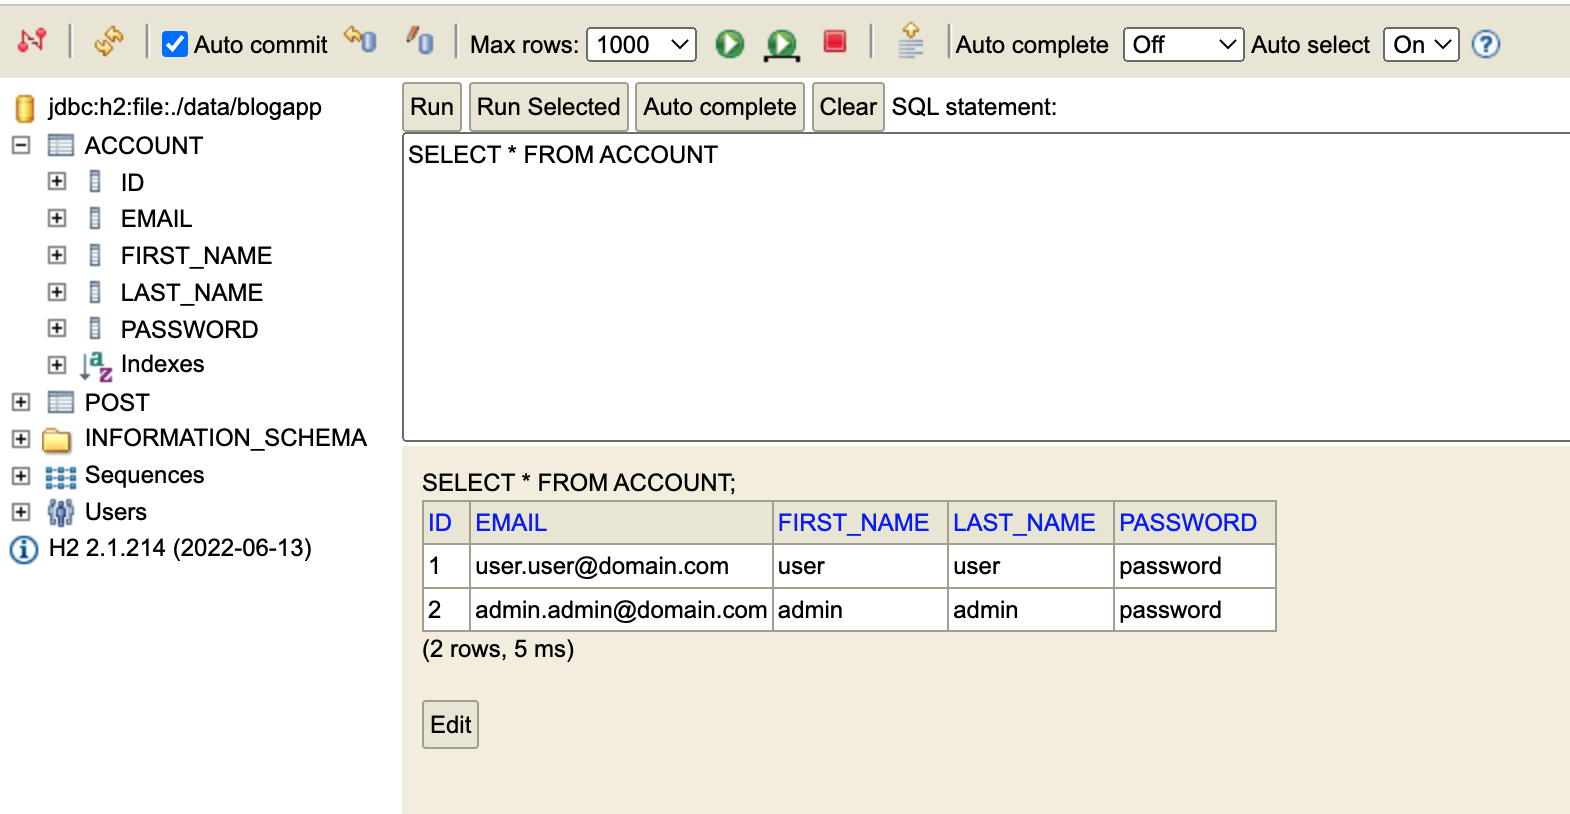
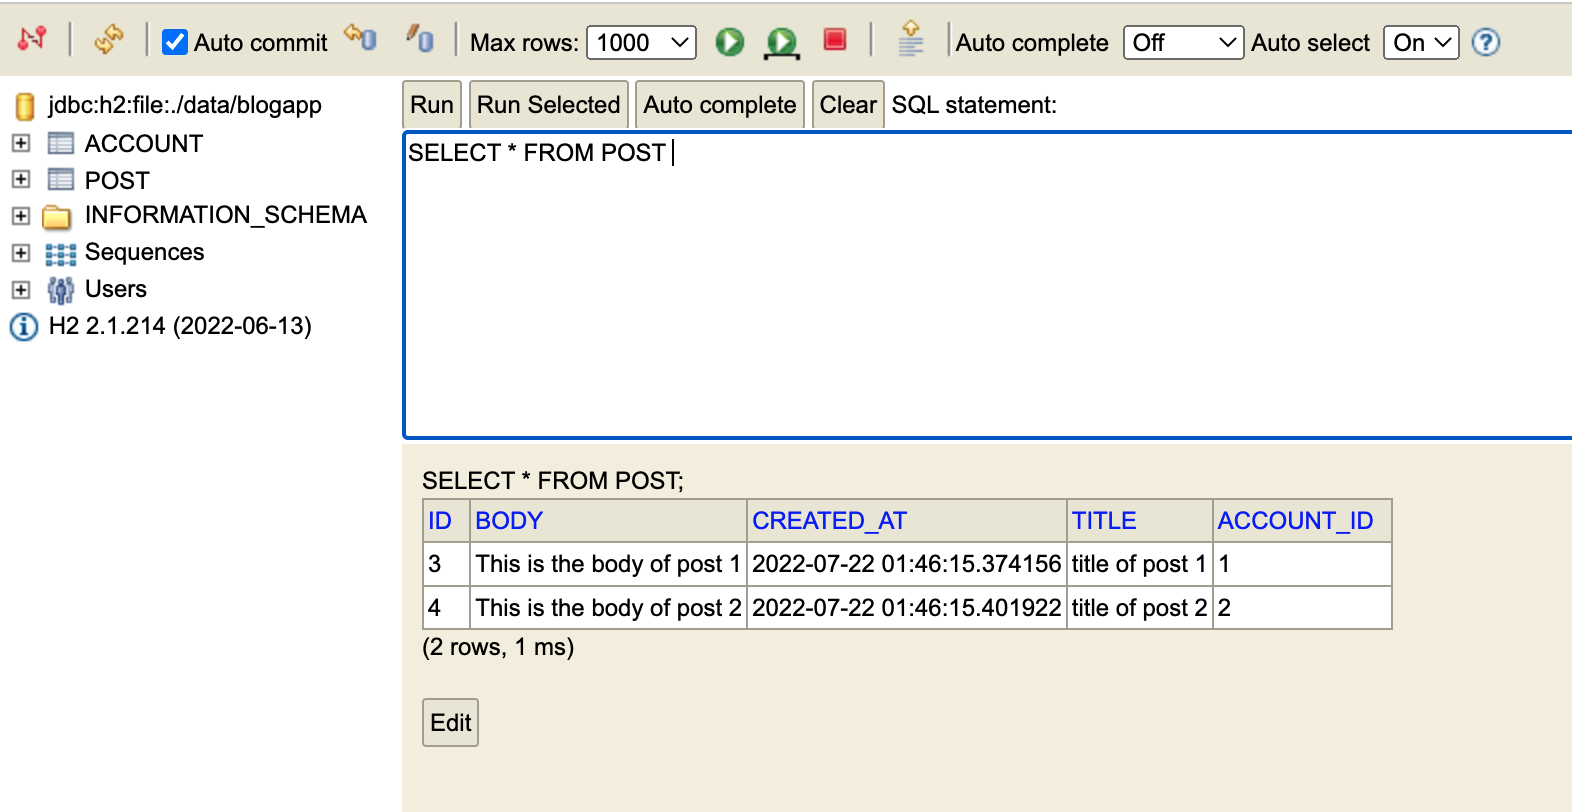
You can see the Account column and each of posts connected with account_id.
For now, we should make feature for adding new post. To doing this, PostController,AccountService,AccountRepository need to be modified.
First of all, you can add mapping on the PostController to connect new post url.
@GetMapping("/posts/new")
    public String createNewPost(Model model) {
        Optional<Account> optionalAccount = accountService.findByEmail("[email protected]");
        if (optionalAccount.isPresent()) {
            Post post = new Post();
            post.setAccount(optionalAccount.get());
            model.addAttribute("post", post);
            return "post_new";
        } else {
            return "404";
        }
    }

@PostMapping("/posts/new")
public String saveNewPost(@ModelAttribute Post post) {
    postService.save(post);
    return "redirect:/posts/" + post.getId();
}
New post should be matched with account information, so accountService obeject needed.
    @Autowired
private AccountService accountService;In order to find account, findByEmail method has to be made.
    public Optional<Account> findByEmail(String email) {
        return accountRepository.findOneByEmail(email);
    }
As you can see, findByEmail method need information from accountRepository. So we need to add findOneByEmail method on the accountRepository.
public interface AccountRepository extends JpaRepository<Account, Long> {
Optional<Account> findOneByEmail(String email);
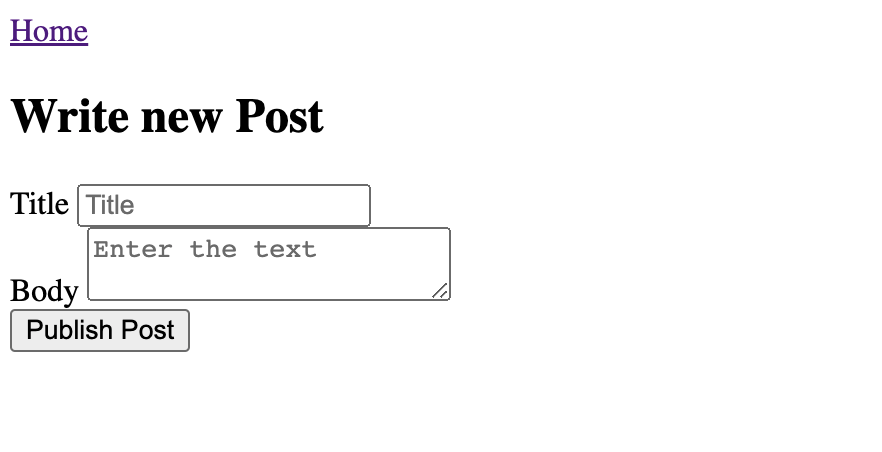
}Finally, we need post_new.html page.
<div class="container">
    <a th:href="@{'/'}">Home</a>
    <form action="#" th:action="@{'/posts/new'}" th:object="${post}" method="POST">
        <input type="hidden" th:field="*{account}" />
        <input type="hidden" th:field="*{createdAt}" />
        <h2>Write new Post</h2>
        <div>
            <label for="new-post-title">Title</label>
            <input id="new-post-title" type="text" th:field="*{title}" placeholder="Title" />
        </div>
        <div>
            <label for="new-post-body">Body</label>
            <textarea id="new-post-body" type="text" th:field="*{body}" placeholder="Enter the text"></textarea>
        </div>
        <button type="submit">Publish Post</button>
    </form>
</div>
Eventually we can check post_new page like below.
Now we can handle post and account information, but security feature is not set. For doing this, pom.xml dependencies have to be added. Add dependency like below and reload this project.
		<dependency>
			<groupId>org.springframework.boot</groupId>
			<artifactId>spring-boot-starter-security</artifactId>
		</dependency>
		<dependency>
			<groupId>org.thymeleaf.extras</groupId>
			<artifactId>thymeleaf-extras-springsecurity5</artifactId>
		</dependency>
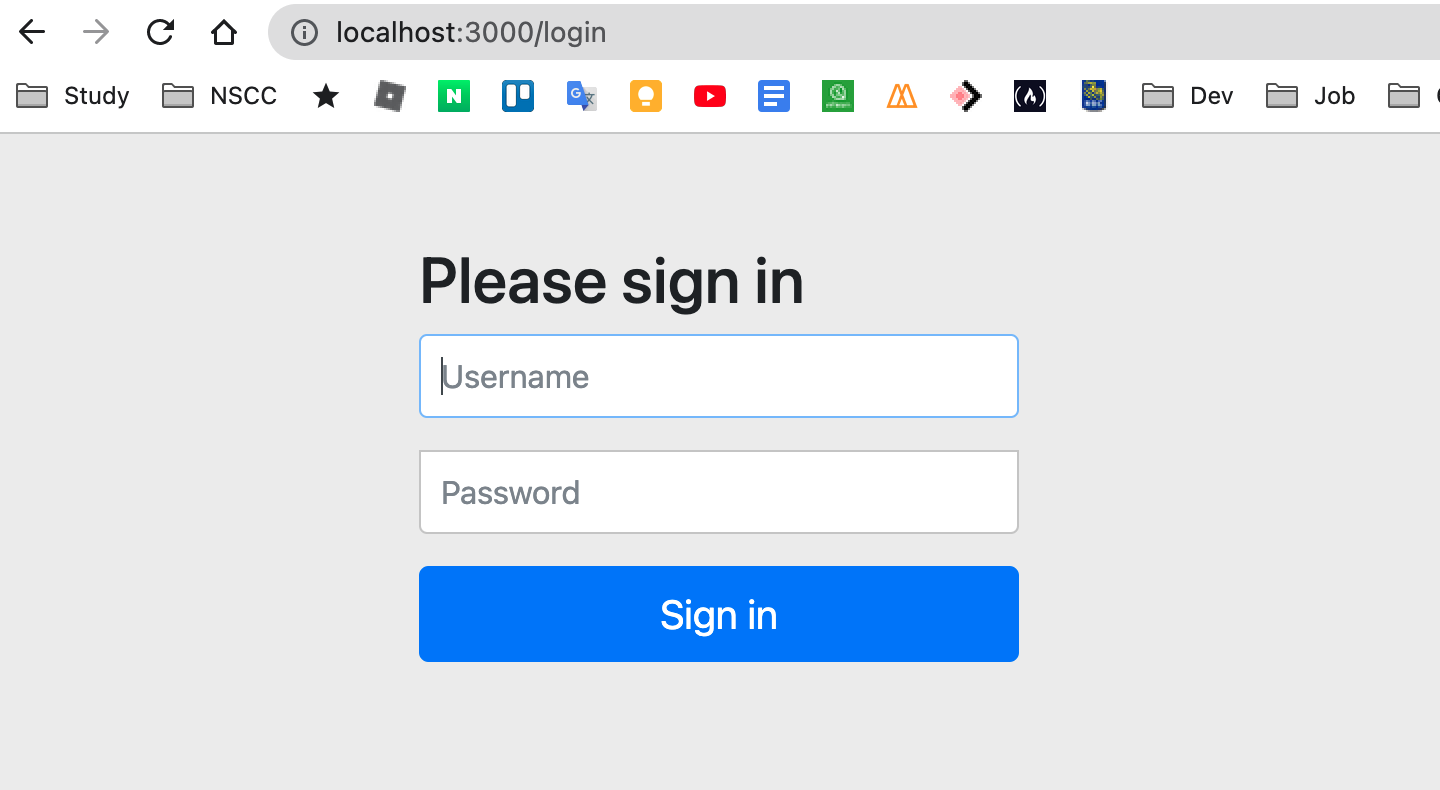
Restart server and check localhost:3000. You can see this new login page.
After adding security dependency, WebSecurityConfig file should be added to control accessibility.
@EnableWebSecurity
@EnableGlobalMethodSecurity(prePostEnabled = true, securedEnabled = true)
public class WebSecurityConfig {

    private static final String[] WHITELIST = {
            "/"
    };

    @Bean
    public SecurityFilterChain filterChain(HttpSecurity http) throws Exception {
        http
                .authorizeRequests()
                .antMatchers(WHITELIST).permitAll()
                .anyRequest().authenticated();

        return http.build();
    }
}
Annotations
- EnableWebSecurity: The WebSecurityConfig class is annotated with @EnableWebSecurity to enable Spring Security's web security support and provide the Spring MVC integration. It also extends WebSecurityConfigurerAdapter and overrides a couple of its methods to set some specifics of the web security configuration.
- EnableGlobalMethodSecurity: The prePostEnabled property enables Spring Security pre/post annotations. The securedEnabled property determines if the @Secured annotation should be enabled. The jsr250Enabled property allows us to use the @RoleAllowed annotation.
What is SecurityFilterChain?
Spring Security maintains a filter chain internally where each of the filters has a particular responsibility and filters are added or removed from the configuration depending on which services are required. The ordering of the filters is important as there are dependencies between them.
A HttpSecurity is similar to Spring Security's XML element in the namespace configuration. It allows configuring web based security for specific http requests. By default it will be applied to all requests, but can be restricted using requestMatcher(RequestMatcher) or other similar methods.
In order to use spring-security, starting point would be an adding attribute on the html tag.
home.html
<html xmlns:th="http://www.thymeleaf.org"
      xmlns:sec="http://thymeleaf.org/extras/spring-security">
Now you can use security feature with sec, such as sec:authorize, sec:authentication.
<!--        When user is NOT authenticated-->
        <ul sec:authorize="!isAuthenticated()">
            <li><a th:href="@{/register}">Register</a></li>
            <li><a th:href="@{/login}">Login</a></li>
        </ul>
<!--        When user is authenticated-->
        <div sec:authorize="isAuthenticated()">
            <form action="#" th:action="@{/logout}" method="POST">
                <div class="form-group">
                    <label>Hi, <span sec:authentication="name">Username</span></label>
                </div>
                <button type="submit">Logout</button>
            </form>
        </div>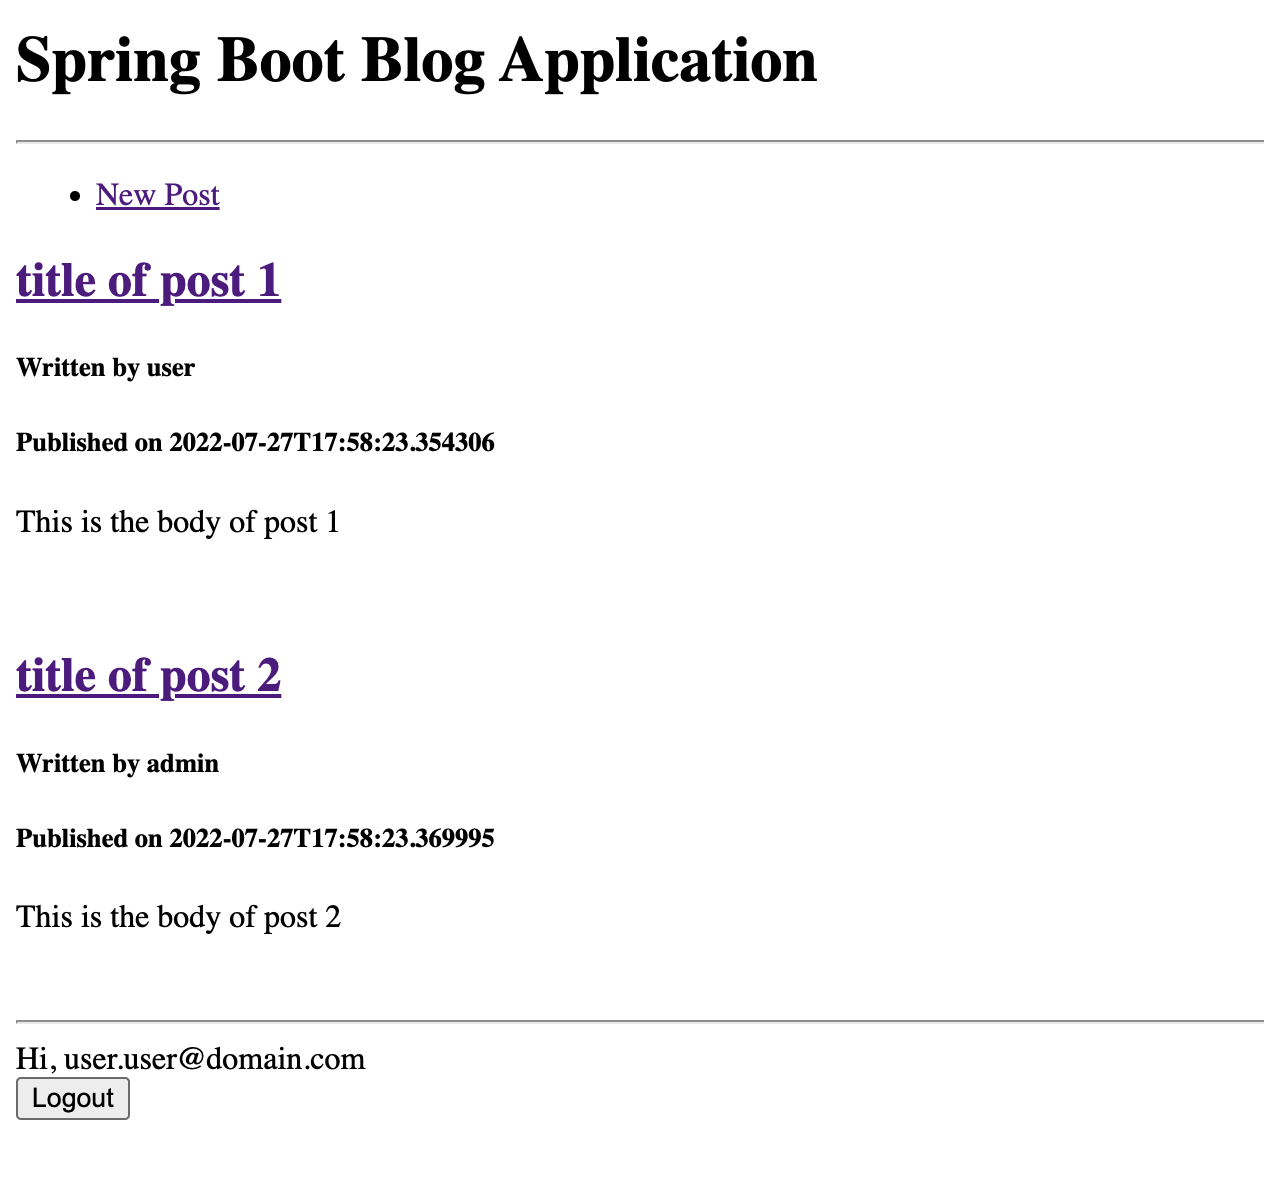
Finally, the only feature that you probably want to add is Update and Delete. For doing this, we need to make several codes on some part of this system.
We already record local date and time with createdAt variable on the Post.java. And additional variable for recording updated date and time is updatedAt. And it can be added toString method to print created and updated time like below.
Post.java
private LocalDateTime updatedAt;

@Override
    public String toString() {
        return "Post{" + "id=" + id + ", title='" + title + "'" + ", createdAt='" + createdAt + "'" + ", updatedAt='" + updatedAt + "'" + "}";
}In order to add Edit and Delete link, we need to add xmlns:sec="http://thymeleaf.org/extras/spring-security" attribute on the post.html. After that, sec:authorize="isAuthenticated()" attribute can help these links shown up only for authorized login user.
    <ul sec:authorize="isAuthenticated()">
        <li><a th:href="@{'/posts/' + ${post.id} + '/edit'}">Edit</a></li>
        <li><a th:href="@{'/posts/' + ${post.id} + '/delete'}">Delete</a></li>
</ul>PostController.java
//    Post mapping for Edit and Delete feature
    @GetMapping("/posts/{id}/edit")
    @PreAuthorize("isAuthenticated()")
    public String getPostForEdit(@PathVariable Long id, Model model) {

        // find post by id
        Optional<Post> optionalPost = postService.getById(id);
        // if post exist put it in model
        if (optionalPost.isPresent()) {
            Post post = optionalPost.get();
            model.addAttribute("post", post);
            return "post_edit";
        } else {
            return "404";
        }
    }

//    Mapping for post edit
    @PostMapping("/posts/{id}")
    @PreAuthorize("isAuthenticated()")
    public String updatePost(@PathVariable Long id, Post post, BindingResult result, Model model) {

        Optional<Post> optionalPost = postService.getById(id);
        if (optionalPost.isPresent()) {
            Post existingPost = optionalPost.get();

            existingPost.setTitle(post.getTitle());
            existingPost.setBody(post.getBody());

            postService.save(existingPost);
        }
        return "redirect:/posts/" + post.getId();
    }
And we can add post_edit.html to update post title and body.
To make delete functionality working, you should make another deletePost public method for mapping and checking authorize.
PostController.java
//    Delete post
    @GetMapping("/posts/{id}/delete")
    @PreAuthorize("hasAuthority('ROLE_ADMIN')")
    public String deletePost(@PathVariable Long id) {

        // find post by id
        Optional<Post> optionalPost = postService.getById(id);
        if (optionalPost.isPresent()) {
            Post post = optionalPost.get();

            postService.delete(post);
            return "redirect:/";
        } else {
            return "404";
        }
    }
And finally, delete method for PostService would be needed for above codes.
PostService.java
    public void delete(Post post) { postRepository.delete(post); }
}