-
Notifications
You must be signed in to change notification settings - Fork 0
Using OpenStudio with Git and GitHub
Wiki ▸ Using OpenStudio with Git and GitHub
- Interacting with Git
- Creating an SSH Key
- Configuring Git Settings
- Information for Third Party Collaborators
- OpenStudio's Git Workflow
- Cloning the Repository to Your Local Computer
- Listing Branches
- Creating a Branch
- Switching to an Existing Branch
- Committing Your Changes
- Checking For Modifications
- Updating Your Local Repository, and Stashing
- Reintegrating a Branch into Develop
- Pushing All of Your Local Commits to GitHub
- Deleting A Branch
- Synchronizing Your Fork with NREL/OpenStudio
- Other Useful Commands
Depending on your operating system and personal preferences, there are a variety of options for interacting with the repository on your computer:

A very simple, intuitive GUI for Windows users. This GUI will be sufficient for most third party contributors. Only works with github.com.

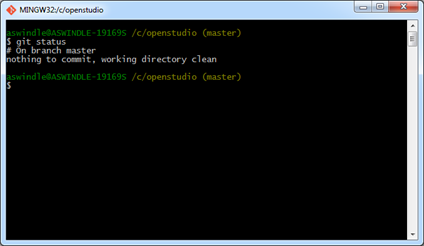
Ideal for power users and for running commands directly on the repository. It also includes a basic Git GUI, as well as gitk, a low-level Git GUI. This may be a prerequisite for some of the following tools, and also comes packaged with some of the following tools.

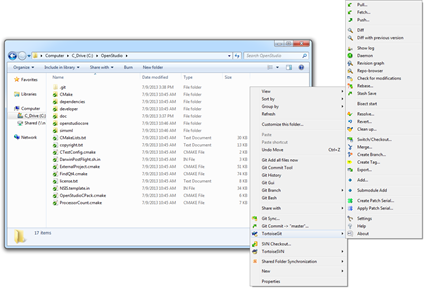
A helpful GUI for normal users who are already familiar with TortoiseSVN and its Explorer integration. In some cases, the interface can be unintuitive.

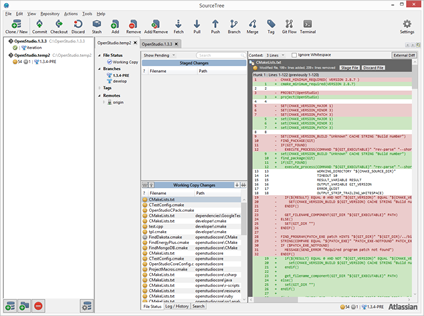
The best graphical interface for Git – Understand that the non-commercial license can ONLY be used for open-source, non-commercial projects, such as OpenStudio.

A powerful, intuitive GUI rivaling SmartGit that can be used freely for commercial projects.

A useful GUI for visualizing tree changes, Git Extensions also includes context-menu integration in Explorer.
Establishing a secure connection to GitHub.com can be achieved over HTTPS with a username and password, or with SSH keys and an optional passphrase. SSH keys are highly recommended for security and performance. GitHub has thoroughly documented the process: Carefully follow the instructions for your platform to create an SSH key and add it to GitHub.com.
On Windows, some GUI tools like TortoiseGit require a Putty SSH key instead of an OpenSSH key. To convert the key you just generated to Putty format, launch Puttygen from the start menu, load your private key ~/.ssh/id_rsa, and then save the new private key ~/.ssh/id_rsa.ppk:

To start, you should configure some of Git's global settings, which are saved in ~/.gitconfig. If you leave out the --global flag, the settings will be applied only to your current repository, which is also fine.
git config --global user.name "John Doe"
git config --global user.email [email protected]
git config --global push.default simple
git config --global remote.origin.prune true
git config --global branch.autosetuprebase always
The user.name setting can be anything, although we recommend using your real name. The user.email setting should match an email that you have associated with your GitHub account. The push.default setting is just to set the push behavior to the new default for Git 2.0 and avoid notices on the command line. The remote.origin.prune setting will automatically remove remote branches that have been deleted from GitHub.com. Finally, the branch.autosetuprebase setting will automatically use git pull --rebase when you call git pull, which helps avoid messy merge commits and divergent branch history.
There are many more configuration settings as well. To see all of your current settings:
git config --list
If you'd to use a GUI for managing the repository, follow the GUI instructions for third party collaborators.
Otherwise, in the following clone step, replace NREL in the clone URL with your GitHub username.
Finally, when your changes are ready to be approved for inclusion in the main OpenStudio repository, click the  Compare button in your fork and follow GitHub's instructions for submitting a pull request.
All work should be completed in feature branches created from the develop branch. Biweekly iterations will be branched from develop to iteration, and releases will be branched from iteration to master. No commits or development work should be made to iteration or master unless you are authorized to modify that iteration or release.

Modified from http://nvie.com/posts/a-successful-git-branching-model/
Now that you have your SSH key configured, you can create a local clone of the repository. If you want to download the latest stable release, select the master branch. Otherwise, if you want to work with the latest development code, use the develop branch:
git clone -b develop [email protected]:NREL/OpenStudio.git .
The final dot is required if you want to clone into your current directory. Without the dot, this command will create a directory called OpenStudio and clone into that. This clone operation will download ~87MB of files and reconstruct the full develop branch within that directory (which will then total ~337MB). This command also makes all branches available locally.
If you choose to use the HTTPS protocol instead of SSH, you may encounter a SSL certificate issue. This can be caused by enterprise network equipment. If you determine that the warning is a false positive, you can instruct Git to ignore the warning:
git config http.sslVerify "false"When viewing branches, the current branch is marked with an asterisk. To view local branches:
git branch
To view remote branches that you have available:
git branch -r
To view all local and remote branches that you have available:
git branch -a
To create a new local branch and switch to it:
git checkout -b mynewbranch
To make this branch available to everyone, push the branch to GitHub:
git push origin mynewbranch
Alternatively, you can do both these steps by typing the new branch name into the branch filter on GitHub and click Create branch:

To switch to a remote branch that you haven't already downloaded (branches that were created after you cloned the repository or after your most recent fetch/pull), you should run the following command to get an updated list of remote branches and prune your branches. Pruning removes all branches that have been deleted from GitHub:
git fetch -p
Then, you can checkout and switch to any local or remote branch with the following command:
git checkout mybranch
    or
git checkout develop
To track new files, and to stage modified files for commits:
git add mynewfile
    or
git add mymodifiedfile
After creating your branch and making changes, commit all your staged changes and modified/deleted files. The first line of your commit message should be a very brief description of the commit, followed by more details:
git commit -m "#3 Bug number & brief commit summary go here (~65 chars)
> More details can go on the additional lines [delivers #12345678]"
Adding a -a flag to your commit command will automatically commit all modified files, even if you haven't explicitly used git add on them.
To check for staged changes, unstaged changes, and untracked files:
git status
    or
git status -sb
Adding the -s flag produces a very concise status, and the -b flag tells it to indicate the current branch.
To update your local repository and all branches, and update the files in your current branch:
git pull
    or, if you understand the consequences of rebasing,
git pull --rebase
For more information about rebasing, please review the online manual.
If you have uncommitted changes and you're not ready to commit them, you will first need to stash your changes, then perform the pull, and then pop the changes:
git stash
git pull
git stash pop
Without stashing and popping, you may see a message like this:

A good example of when you might want to do this is if you're not ready yet to commit the changes, but for one reason or another you need a clean working directory.
If the pop command triggered merge conflict resolution, the stashed changes won't be removed from the stash stack. To explicitly remove the last item from the stash, use the following command:
git stash drop stash@{0}
To view the current contents of the stash stack:
git stash list
To view the contents of an individual stash:
git stash show
If a code review is necessary and your changes are complete, click the  Compare button in your branch and follow GitHub's instructions for submitting a pull request. After creating the pull request, you can assign it to the bug or ticket owner for review.
However, if your branch does not require a code review, then it can be merged immediately:
git checkout develop
git merge --no-ff mybranch
The no-fast-forward --no-ff flag is important for merging to maintain branch history, and it stays consistent with GitHub's automatic merge settings:

Credit: nvie
When you're ready to share your changes and commits from any branch with the rest of the team:
git push origin
To delete a local branch:
git branch -d mybranch
To delete a remote branch directly, use the  button on GitHub. Alternatively, you can use the following command:
git push origin --delete mybranch
Note that if you delete an unmerged branch, the branch and all commits to it will be permanently deleted.
If you want to update your fork with the latest changes from OpenStudio's main repository, you will first have to add an upstream remote, and then merge the latest changes to your fork:
# set the upstream remote once
git remote add upstream [email protected]:NREL/OpenStudio.git

# grab the upstream remote's branches
git fetch upstream

# merge NREL/OpenStudio's develop branch into your fork's develop branch
git checkout develop
git merge upstream/develop
If you have made commits to your fork but want to reset it:
git fetch upstream
git checkout develop
git reset --hard upstream/develop
git push origin develop --force To produce the SHA1 hashes of the latest commit, such as 932bca9f7dfab0d698dcdc04032762b6525237d5 or 932bca9:
# full 40 byte hash
git rev-parse HEAD

# 7 byte hash
git rev-parse --short HEAD

# 10 byte hash
git rev-parse --short=10 HEAD# full log
git log
# last 5 commits, one line per commit
git log --oneline --decorate -5
# show a tree graph of commits and merges succinctly
git log --graph --oneline
# view committed changes that haven't yet been pushed
git log origin/develop..developTo revert all uncommitted changes in your working directory:
git reset --hard
To destroy all untracked files and directories from your working directory:
# dry run - make sure you're not deleting something you want
git clean -f -d -n

# delete all untracked files and directories, not including directories that are ignored by git
git clean -f -d
To change the commit message of your last commit:
git commit --amend -m "New commit message"To undo the last commit (while still keeping the file changes):
git reset --soft HEAD^
To revert a single file:
git checkout path/to/file/to/revert
To delete a file from your file system and the repository:
git rm myfile
To rename or move a file:
git mv myfile mynewfile
To create a shorthand command for a long command that you use frequently, you can create an alias.
To create the command git rev that returns a 10 byte revision hash and copies it to your clipboard:
# Windows with Git Bash
git config --global alias.rev '!git rev-parse --short=10 HEAD | tr -d "\n" | clip; git rev-parse --short=10 HEAD'

# OS X
git config --global alias.rev '!git rev-parse --short=10 HEAD | tr -d "\n" | pbcopy; git rev-parse --short=10 HEAD'

# Linux
sudo apt-get install xsel
git config --global alias.rev '!git rev-parse --short=10 HEAD | tr -d "\n" | xsel -b; git rev-parse --short=10 HEAD'
To make a much prettier log command with git lg (Credit: jukie.net):
git config --global alias.lg "log --graph --pretty=format:'%Cred%h%Creset -%C(yellow)%d%Creset %s %Cgreen(%cr) %C(bold blue)<%an>%Creset' --abbrev-commit --date=relative"To make a small command to stash your changes, rebase with the latest commits, and pop your changes using git p:
git config --global alias.p '!git stash; git pull --rebase; git stash pop'To delete an alias:
git config --global --unset alias.myAlias