Have a few Xfinity Home cameras but don't have Xfinity Home? Yes, you can still use them!

- Homebridge
- Sunoo's Camera FFmpeg plugin for Homebridge
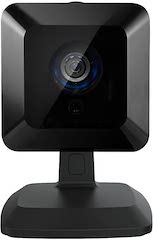
- A Sercomm iCamera 2 (aka 2nd Gen Xfinity Home Camera)
- Patience
If you had Xfinity Home at one time but no longer do, you might be surprised to learn that you own the equipment - the cameras, door/window sensors, etc (everything but the touchscreen, which you lease). The prevailing logic is that it's hard to leave a service when you've paid for the equipment outright and can't use it elsewhere... or can you?
This tutorial should take some of the pain out of re-purposing these otherwise solid cameras. Be mindful though: you're not going to get HD quality picure on these things, as the max resolution is 1280 x 720 (720p), and there's no ability to record the feed. However, all other functionality like night mode should still work. (Update: if you're looking for a on-prem/cloud recording solution, check out Shinobi).
⚠️ Caution: If you're looking for a way to get your existing Xfinity Home system integrated within HomeKit, check out the Homebridge-XfinityHome by @bloomkd46. It's an excellent option to gain XH access within the HomeKit app, allowing you to ditch Xfinity's Home app. and keep everything in one place. Features may vary.
The first stop on getting the iCamera 2 set up for Homebridge integration is performing a factory reset on the device and manually tweaking some settings. Don't worry though, it's scarier than it sounds. You can read all about this process over on the dependency primer.
{
    "name": "[CAMERA_LOCATION_NAME]",
    "manufacturer": "Sercomm",
    "model": "iCamera2",
    "serialNumber": "[CAMERA_SERIAL_HERE]",
    "videoConfig": {
        "source": "-i rtsp://administrator@[CAMERA_IP]:554/img/media.sav",
        "stillImageSource": "[LEAVE_THIS_BLANK]",
        "audio": true
    }
}
-
In Homebridge, click Plugins in the top menu. Locate the Homebridge Camera FFmpeg plugin and click Settings.
-
Start by naming your camera whatever you'd like, but remember that the name you choose is what it will appear as within HomeKit. I named my outdoor camera "Balcony".
-
The video source should always start with
-rtsp_transport tcp -i, followed by the URL of the camera in the format ofrtsp://administrator@[CAMERA_IP]:[PORT_NUMBER]/img/media.sav. This will call to the camera and force streaming over TCP to be then handled by the FFmpeg plugin. -
Leave the "Still Image Source" blank. I originally thought that this had to be filled in based on the very detailed technical dive provided by edent in their Sercomm-API repo, however, as it turns out leaving it blank is the way to go since will pull a snapshot from the live feed every 15-30 seconds.
-
Make sure Enable Audio and Unbridge Camera are both checked.
At this point, your screen should look something similar to this:

-
The following options are just that -- optional. They do not impact the functionality of the camera, but they sure make it easier to troubleshoot especially if you have more than one iCam.
Branding Options
- Manufacturer:
Sercomm - Model:
iCamera2 - Serial Number:
can be found at XYZ - Firmware Revision:
leave blank

Video Output
- Maximum Concurrent Streams:
2 - Maximum Width:
0 - Maximum Height:
0 - Maximum Framerate:
30 - Maximum Bitrate:
299 - Force Maxmiums:
leave unchecked

- Manufacturer:
-
I do not recommend playing with any of the options in the "EXPERIMENTAL - WIP" section as you can really mess up your setup.
- edent's Sercomm Camera API documentation
- Sunoo's Homebridge Camera FFmpeg plugin