Most of the home UPS has only one USB connection to one device, to notify it to shutdown gracefully in case of a power outage. For multiple devices, Network UPS Master Server can be used to notify the clients.
QNAP NAS supports "Network UPS Slave" mode. But it does not have "Network UPS Master" implemented (Figure 1). I have therefore used a Rasberry Pi to act as the UPS Master to protect my multiple QNAP NAS.
 (Figure 1)
Tested Environment
- UPS: APC ES700G-UK
- NAS: QNAP TS253BE & QNAP TS431P (Firmware: 4.3.6.0923)
- Network UPS Master: Raspberry Pi 3 B+ (OS: Raspbian GNU/Linux 9 (stretch), NUT version: nut/stable,now 2.7.4-5)
1. Install nut package on Raspberry Pi
sudo apt-get install nut
2. Download .zip and unzip them
sudo unzip UPS-Master-Server-for-Qnap-on-Raspberry-Pi-master.zip -d /
And make sure the files unzip under /etc/nut have the permission of 640
sudo chmod 640 /etc/nut/*
3. Edit the following files under /etc/nut
- ups.conf
replace "APC BE700G" with your UPS model. It is for description only and should not affect the functionality
- upsd.conf
make sure your Raspberry Pi is running a Static IP
find the line "LISTEN 192.168.1.210 3493" and replace 192.168.1.210 with the IP address of your Raspberry Pi
- upsd.user
find the line "password = <<PASSWORD>>" and replace <<PASSWORD>> with the admin password of your QNAP
4. Autostart during boot
nut-server and nut-client are created under /etc/init.d during nut package installation and these services are supposed to auto start during boot; however it was not the case for me. I found that upsdrvctl server could not start automatically. So I have edited /etc/rc.local to enable it
Add the following in /etc/rc.local before the line "exit 0"
(sudo upsdrvctl start
sleep 30
sudo service nut-server start
sudo service nut-client start)&
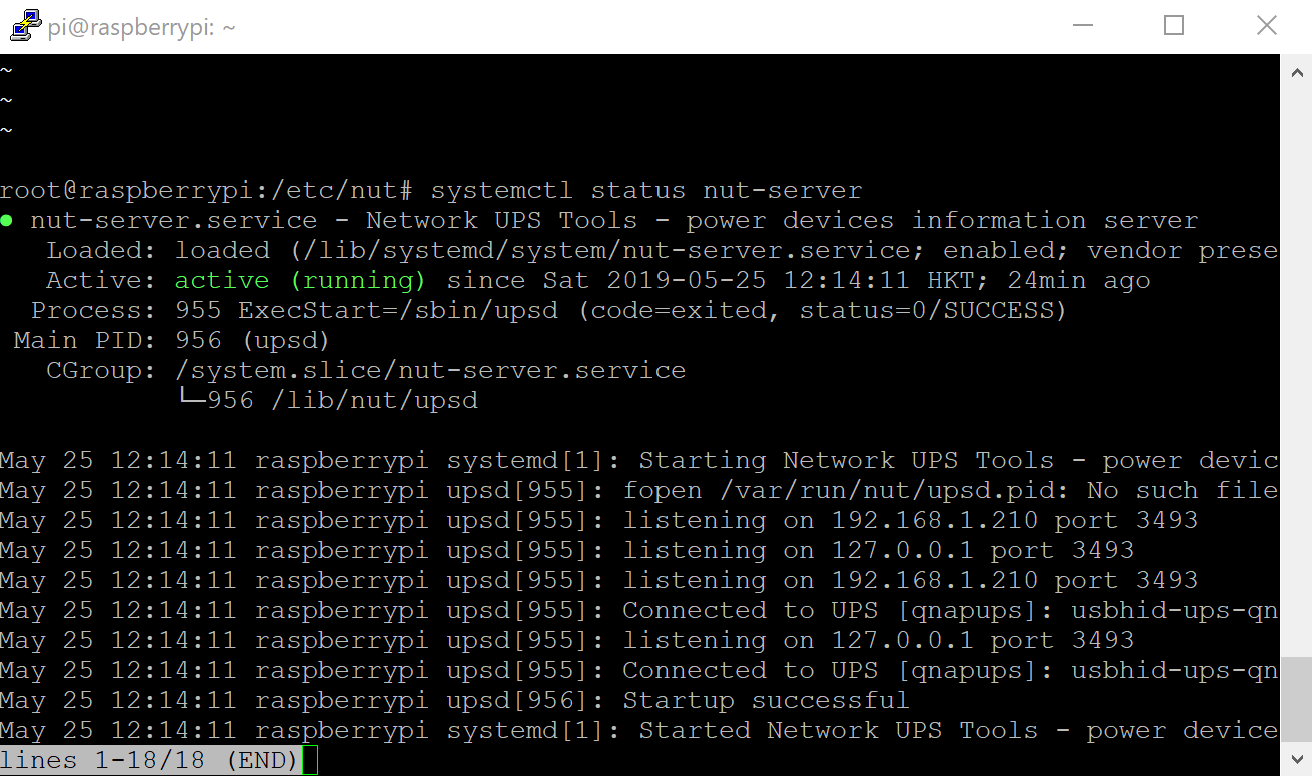
5. Run the following for status check
sudo systemctl status nut-server
Output similar to the follow screen capture will be shown
 (Figure 2)
sudo systemctl status nut-client
The last line of the output should be showing that
Communications with UPS qnapups@localhost established
6. Connect the USB cable of the UPS to Raspberry Pi, and plug 1) Raspberry Pi, 2) QNAP NAS and 3) the network switch connecting them to the UPS for power
7. Add the UPS Master to QNAP
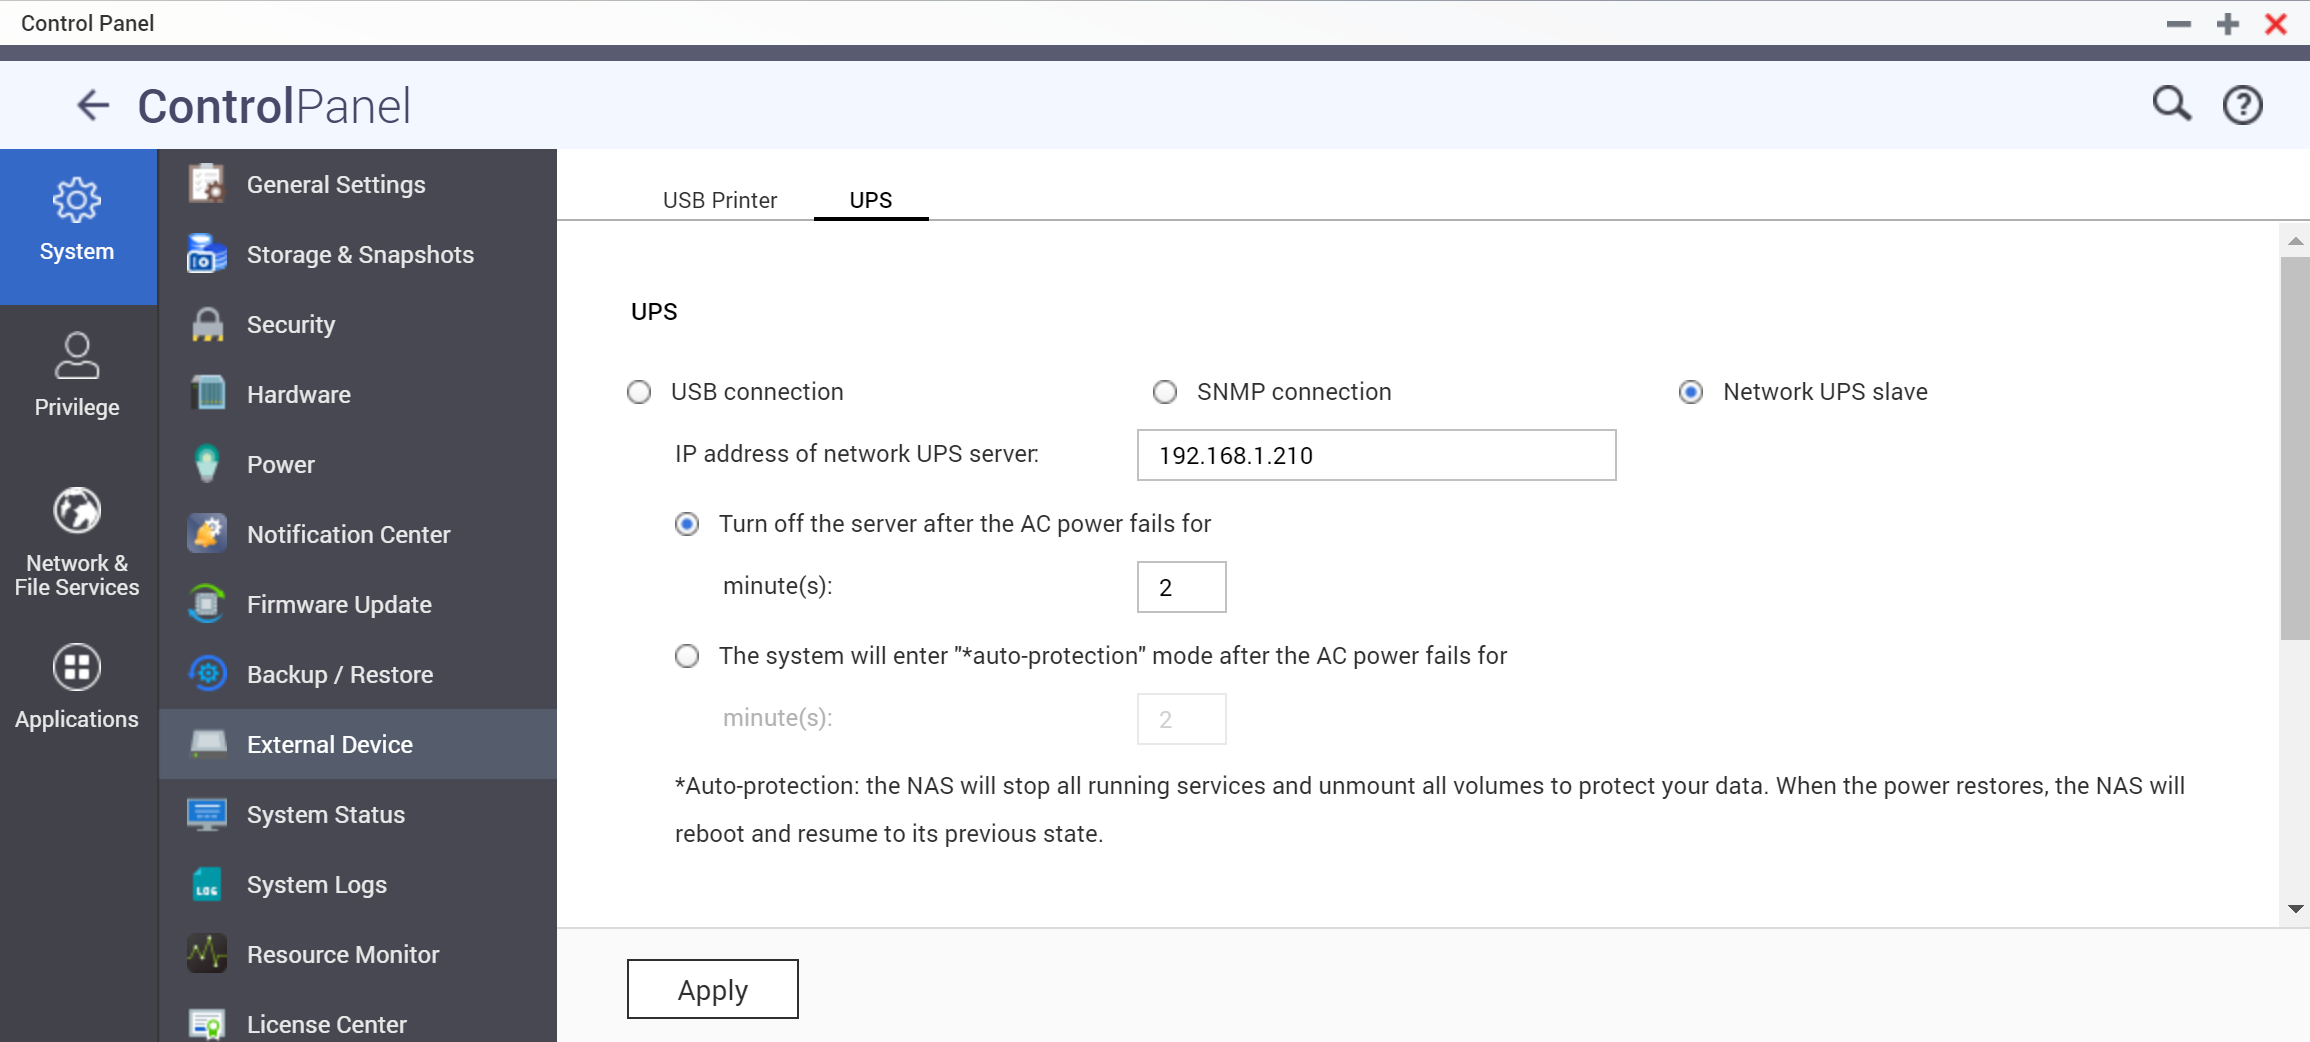
On QNAP Management, under "Control Panel" > "External Device" > "UPS", choose "Network UPS Slave", and enter the IP address of your Raspberry Pi and click Apply
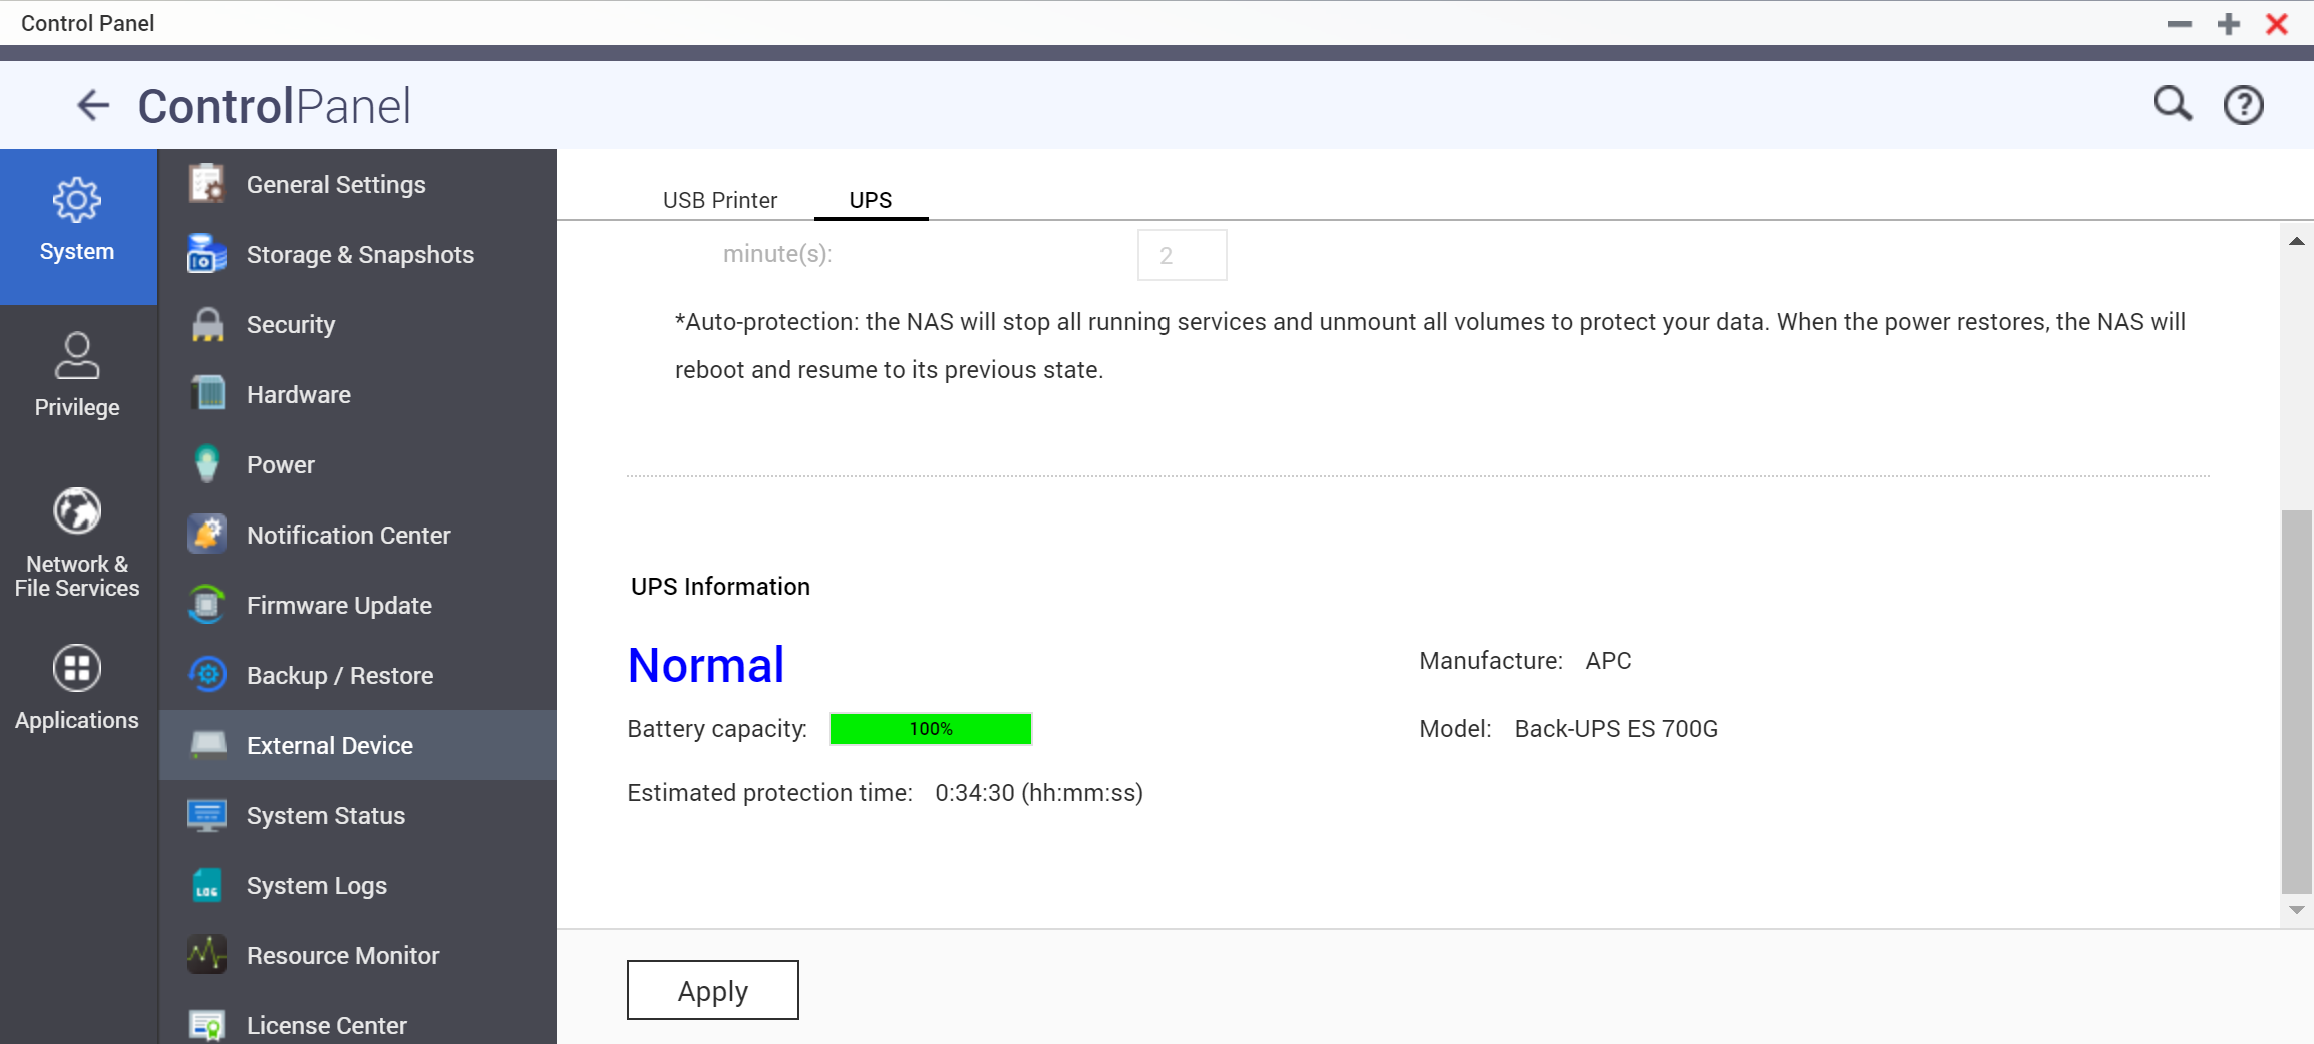
The UPS Information with "Normal" status will be shown
 (Figure 3)
References
https://www.reddit.com/r/homelab/comments/5ssb5h/ups_server_on_raspberry_pi/