Working Example
To illustrate VERDICT, an architecture model of a representative delivery drone system was constructed. This model was created in AADL within the OSATE toolchain. The drone system is a part of the delivery operation which consists of a van with packages to be delivered and one or more of these delivery drones. After the van arrives at a location that is close to multiple delivery sites, the delivery drones are initialized with their current position, delivery location, and the package to be delivered is loaded up. After a delivery drone is launched, it uses the inputs from the GPS and IMU to navigate to the delivery location. When the drone reaches the delivery location, it uses its Camera to capture an image of the receiving site to confirm that it is free of obstacles and it is safe for the package to be dropped off. For a high-value package, the Delivery Planner will use the Radio to get confirmation from the operator in the van. If there are no obstacles on the receiving site and confirmation (if needed) is received from the operator, then the Delivery Planner will activate the Delivery Item Mechanism to drop off the package. The Delivery Drone also needs to avoid certain locations and airspace, for example airports, schools and government buildings. The GPS and IMU are subcomponents of GNC to illustrate model hierarchy.

To analyze the system design of the Delivery Drone using VERDICT, the system designer will have to model the system architecture in AADL, specify the properties of the system and its sub-components in VERDICT annex along with the defense properties, and specify safety and cyber requirements at the system and sub-component level.
The system designer creates the architectural model of the delivery drone in AADL modeling language.


The following figure shows Component, Cyber Defense and Design Assurance Level (DAL) properties being applied to the radio AADL model component.

Next, define the Mission, Cyber and Safety Requirements at the system level using the VERDICT annex.


Feedback on each mission, cyber and safety requirement – localized to components is returned.
Right click on a failed requirement to view failure paths.

List of failure paths are displayed.

At this point, the user can manually update the Cyber Defenses in the AADL Model. Once the defenses have been implemented, update the AADL model accordingly and rerun MBAA.
As an alternative to the manual analysis iteration loop, VERDICT also provides an automated Synthesis capability. The Synthesis feature allows the user to select a cost model for each of the defenses, then automatically generate a solution that satisfies all of the resiliency constraints with the minimum cost. The following figure shows the pull down menu used to configure and run VERDICT Synthesis. Select "Use Implemented Defenses" if you want the tool to consider the defenses already captured in the model.

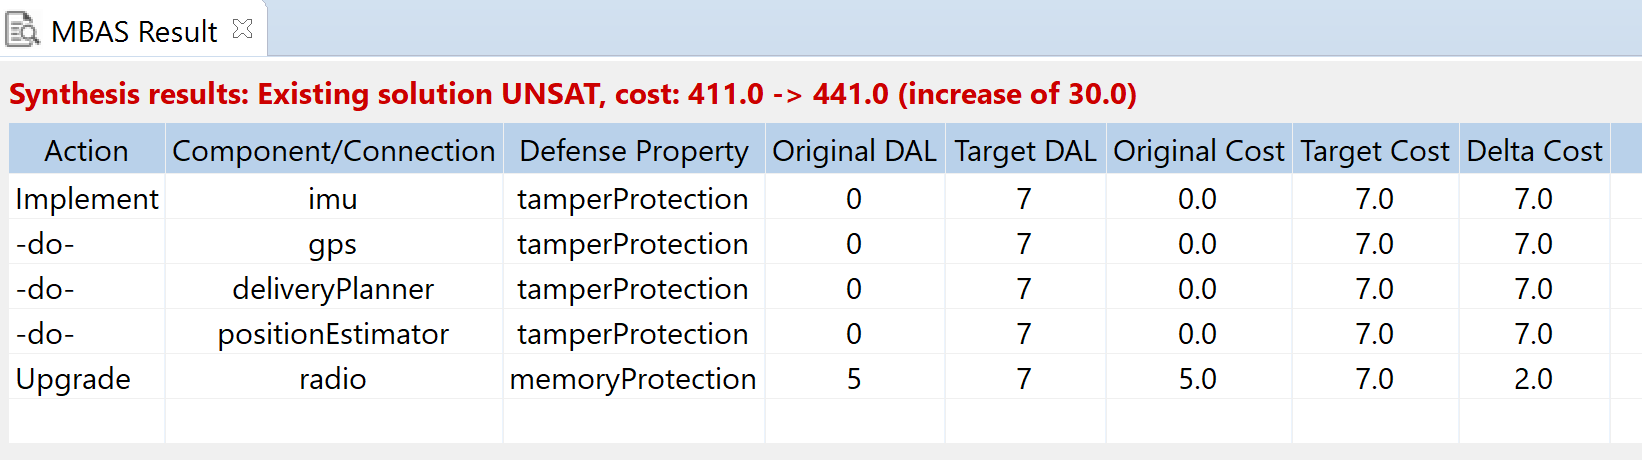
The following figure shows the results from Synthesis. The tool recommends adding tamper protection to 4 components and increasing the memory defense on the radio from design assurance level 5 to 7.
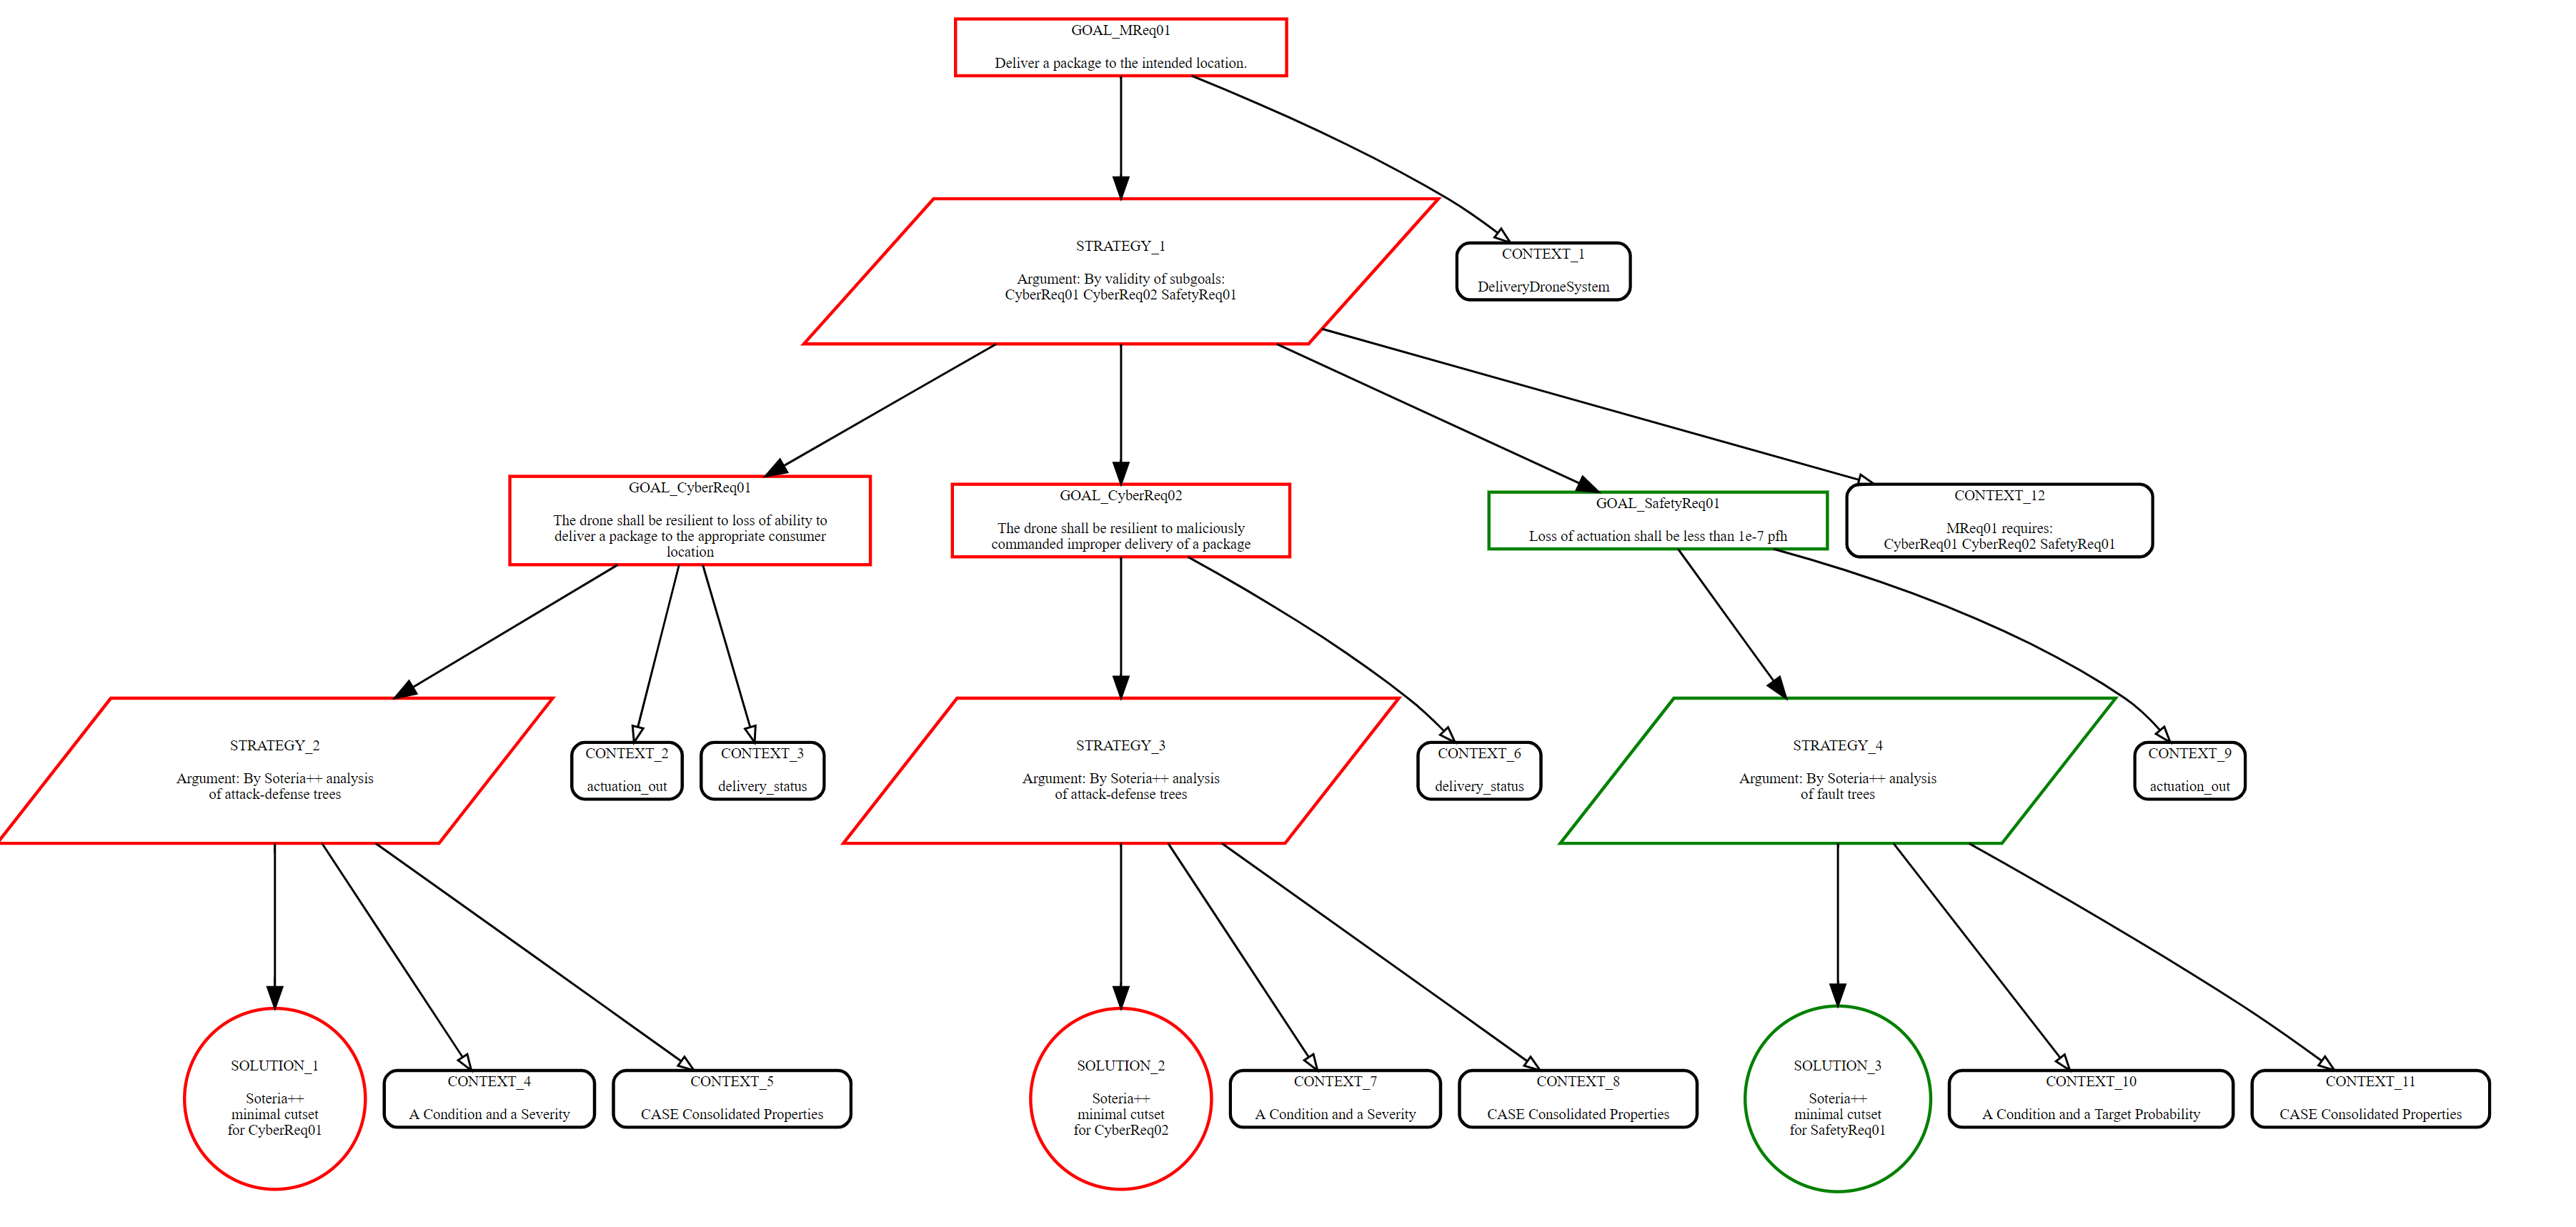
VERDICT provides feedback to the designer in the console, in generated fault and attack-defense trees, and it also generates assurance case fragments. The following figure shows example results from running the "Create GSN Assurance Case Fragments" function. The GSN output is also saved in xml format.

Add behavior for the components in the architectural model of the Delivery Drone system. For example, for the component "DeliveryItemMechanism", if a delivery command is issued, the delivery status must become different from not started. This is formalized by adding the following guarantee (in AGREE) to the AADL model,
guarantee "If delivery command is issued, status is different from NOT_STARTED":
true -> (release_cmd => delivery_status_out <> Agree_Constants::NOT_STARTED_STATUS);
The next step is to review the list of safety functional requirements for the system that may affect its integrity and formalize them as formal cyber-resiliency properties in the AGREE language.
For instance, let's consider the cyber-requirement for the Delivery Drone that requires P7: The drone never initiates packet release to an off-limits location. This cyber-requirement is expressed using the following guarantee:
eq started: bool = (delivery_status <> Agree_Constants::NOT_STARTED_STATUS);

guarantee "P7: The drone never initiates packet release to an off-limits location":
  started => not Agree_Nodes::InRestrictedArea(delivery_location);

node InRestrictedArea(p: Data_Types::Position.impl) returns (f: bool);
let
    f = (X0 <= p.x and p.x <= X1) and
    (Y0 <= p.y and p.y <= Y1);
tel;
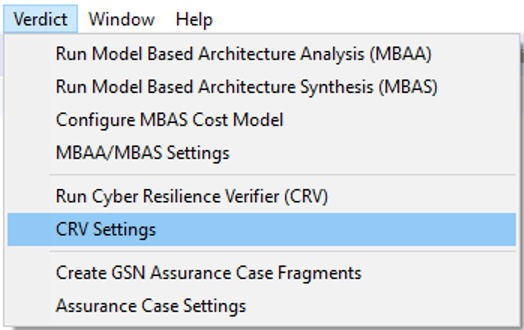
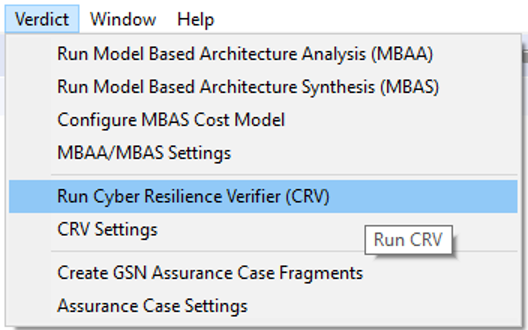
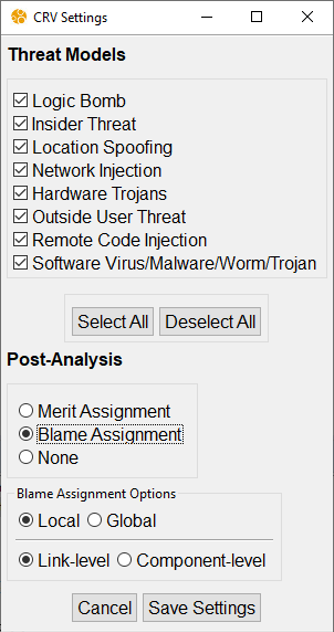
Once the properties of interest are specified formally, to check if the system design model satisfies the properties in a benign scenario, that is, without considering the effects of any threat model open the CRV Settings window:
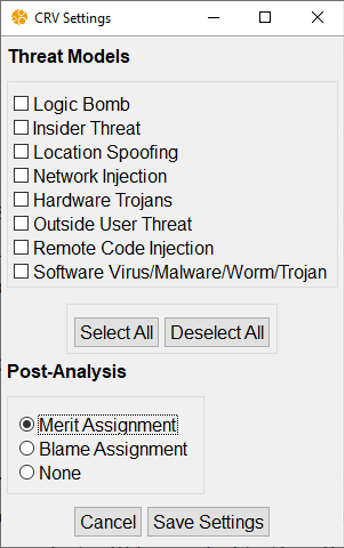
Make sure no Threat Model is selected, Merit Assignment is enabled, and save the settings:
Select Delivery Drone model on the left pane, and click on Run Cyber Resilience Verifier (CRV) the Verdict menu:
CRV will find scenarios where properties are violated:

In case of violations, right click over the property and select View Counter-example to display a sequence of input values that lead the system to the violation of the property. Examining the trace, one can identify and fix the reason for the violation. Re-running CRV after the fix, should result in property satisfaction.

Right clicking over the property and selecting View Inductive Validity Core, displays a set of components that are responsible for the satisfaction of the property.

To analyze the behavioral model under an adversarial environment, repeat the steps described in the previous, but all threat models should be selected along with the Blame Assignment option.
Run CRV with the new settings and review the results.

Right click over the property and select View Counter-Example to display trace that leads the system to the violation of the property.

Once the vulnerable components and ports are identified, the user can address the root cause of the attack. Once the root cause is identified and mitigated, rerun CRV to ensure property satisfaction.
