@flyskywhy/react-native-gcanvas is a C++ native canvas 2D/WebGL component based on gpu opengl glsl shader GCanvas which is a lightweight cross-platform graphics rendering engine for mobile devices developed by Alibaba. It is written with C++ based on OpenGL ES, so it can provide high performance 2D/WebGL rendering capabilities for JavaScript runtime. It also has browser-like canvas APIs, so it's very convenient and flexiable for use, especially for web developers.
Supported operating systems are Android 4.1+ (API 16) and iOS 9.0+.
Since Alibaba feat: delete weex bridge & reactive bridge, here comes this @flyskywhy/react-native-gcanvas package.
- Performance Test Result
- Getting Started
- Example As Usage
- Documentation
- Built With
- Opening Issues
- Contributing
- License
With 200 circles backgroundColor generate (1 ms) and render continually, the render ms and final fps with Chrome Performance on Windows:
setState  80 ms        means 12 fps  (stuck for human eyes)
canvas    1.5 ms       means 400 fps (smooth for human eyes)
With 800 circles backgroundColor generate and render continually, the final UI fps and JS fps with react-native developer menu Perf Monitor on an old Huawei Honor 6 Play smartphone released in 2017 (Mediatek MT6737T 1.4 GHz, 2 GB RAM, Android 6):
setNativeProps        UI: 20 fps       JS: 1 fps  (stuck for human eyes)
expo-2d-context       UI: 56 fps       JS: 1 fps  (stuck for human eyes)
react-native-gcanvas  UI: 56 fps       JS: 20 fps (smooth for human eyes)
On an old iPhone 7:
With 800 circles backgroundColor generate and render continually
setNativeProps        UI: 60 fps       JS: 15 fps (smooth for human eyes)
react-native-gcanvas  UI: 20 fps       JS: 59 fps (stuck for human eyes)
react-native-gcanvas in release mode              (smooth for human eyes)
With 1400 circles backgroundColor generate and render continually
setNativeProps        UI: 59 fps       JS: 7 fps  (smooth for human eyes)
react-native-gcanvas  UI: 10 fps       JS: 58 fps (stuck for human eyes)
react-native-gcanvas in release mode              (smooth for human eyes)
gl-react maybe can deal with the performance problem, but it need developer directly code with GLSL (OpenGL Shading Language), and there is no way to let many React components developed by browser-like canvas APIs be easily ported to React Native.
react-three-fiber maybe can deal with the performance problem, but memory leak when meshes update, Leaking WebGLRenderer and more when unmounting, Suggestion: Dispose of renderer context when canvas is destroyed?, and there is no way to let many React components developed by browser-like canvas APIs be easily ported to React Native.
expo-2d-context can let many React components developed by browser-like canvas APIs be easily ported to React Native, but it need ctx.flush() that not belongs to canvas 2d APIs, and expo-2d-context(with expo-gl@8) performance is too low, maybe expo-2d-context(with JSI expo-gl@11) performance is high enough.
Ref to Experiments with High Performance Animation in React Native, it use many ways include setNativeProps and React Native NanoVG. Maybe nanovg can deal with the performance problem, but for now (2020.12) there is no React Native canvas component using nanovg to let many React components developed by browser-like canvas APIs be easily ported to React Native.
So for now (2020.12), @flyskywhy/react-native-gcanvas is the best choice.
- react-native-particles-bg just ported one file to Support react-native from particles-bg which based on Proton. You can also compare it with react-native-particles-webgl which based on memory leaking react-three-fiber. Here is a result in my APP PlayLights.
- zdog actually no need modify any code of itself as described in @flyskywhy/react-native-browser-polyfill, and here is a result.
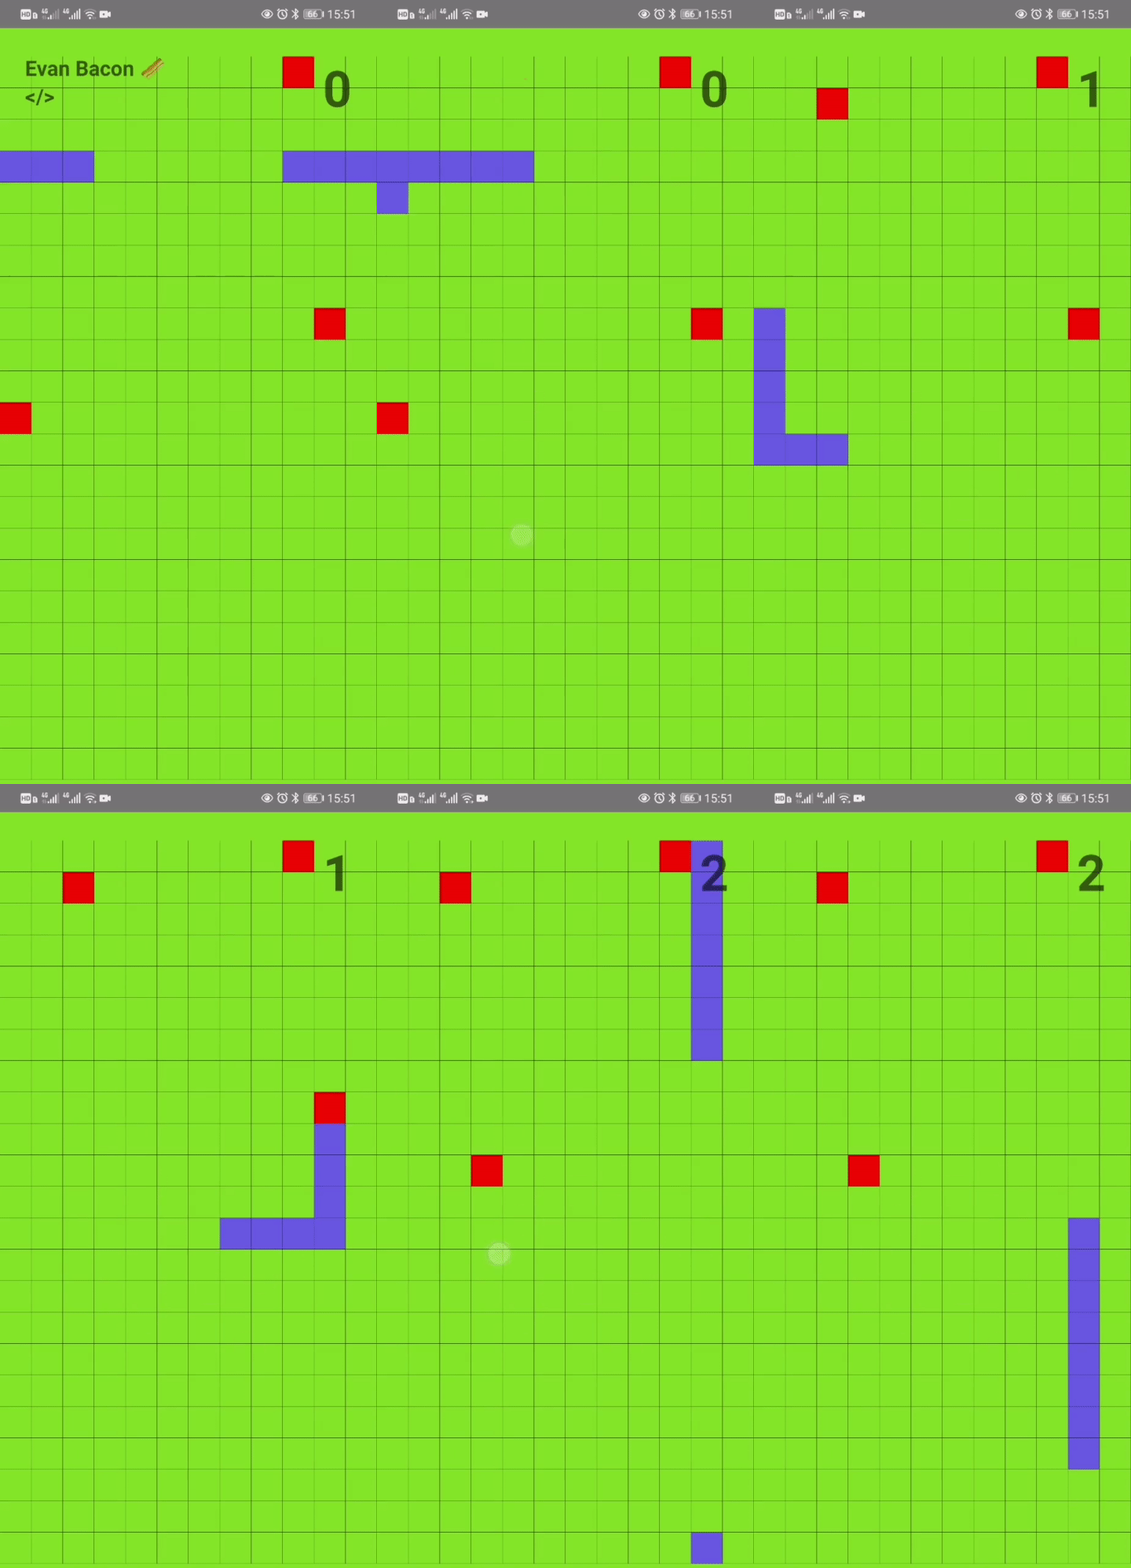
- Pixi.js 2d game snakeRN base on react-native-pixi.
- Pixel Art Animation Editor PixelShapeRN.
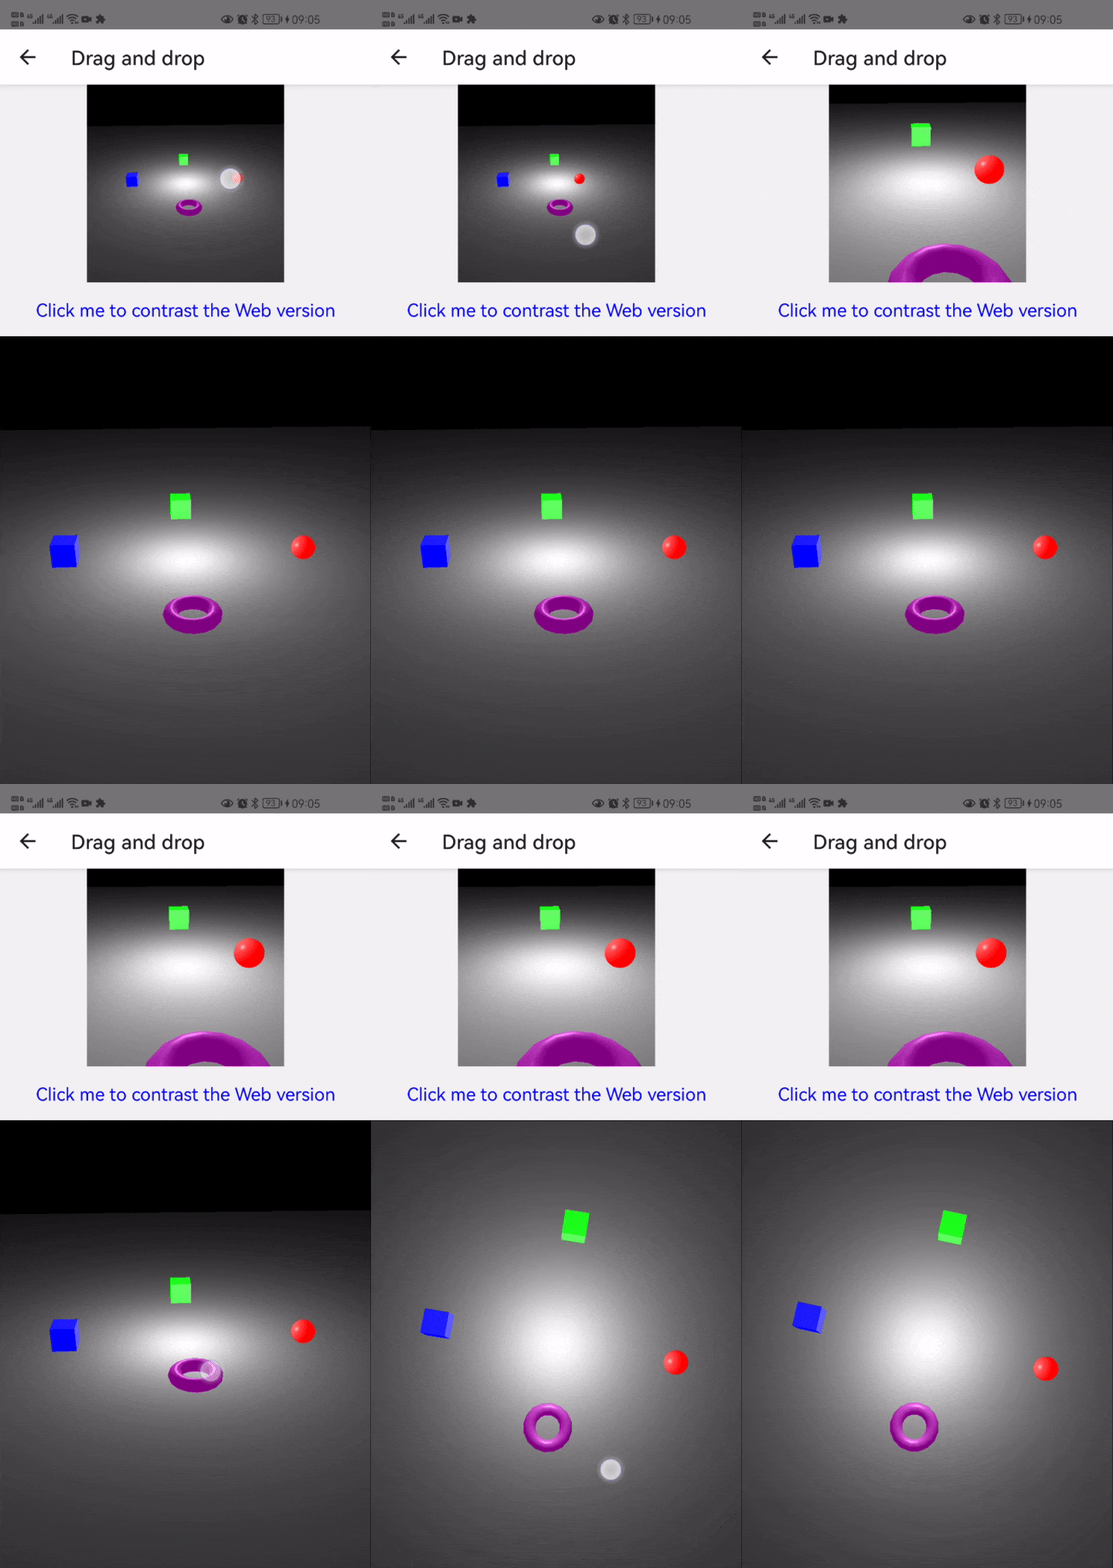
- Babylon.js 3d game demo GCanvasRNExamples base on react-native-babylonjs. And the react-babylonjs multiple touches demo Drag 'n' Drop just ported a few codes to react -> react-native.
Only support RN >= 0.62 as described in android/gcanvas_library/build.gradle
npm install @flyskywhy/react-native-gcanvas --save
Add below into /android/settings.gradle
include ':android:gcanvas_library'
project(':android:gcanvas_library').projectDir = new File(rootProject.projectDir, '../node_modules/@flyskywhy/react-native-gcanvas/android/gcanvas_library')
include ':android:bridge_spec'
project(':android:bridge_spec').projectDir = new File(rootProject.projectDir, '../node_modules/@flyskywhy/react-native-gcanvas/android/bridge_spec')
include ':android:adapters:gcanvas_imageloader_fresco'
project(':android:adapters:gcanvas_imageloader_fresco').projectDir = new File(rootProject.projectDir, '../node_modules/@flyskywhy/react-native-gcanvas/android/adapters/gcanvas_imageloader_fresco')
include ':android:adapters:bridge_adapter'
project(':android:adapters:bridge_adapter').projectDir = new File(rootProject.projectDir, '../node_modules/@flyskywhy/react-native-gcanvas/android/adapters/bridge_adapter')
Add below into /react-native.config.js
const path = require('path');

module.exports = {
  dependencies: {
    '@flyskywhy/react-native-gcanvas': {
      platforms: {
        android: {
          packageImportPath: 'import com.taobao.gcanvas.bridges.rn.GReactPackage;',
        },
      },
    },
  },
};
Sometimes will meet compile error java.io.FileNotFoundException: SOME_PATH/.cxx/cmake/SOME_PATH/android_gradle_build.json (The system cannot find the file specified) after upgrade this pacakge by npm install, can solve it by add --rerun-tasks to your gradlew command once like
./android/gradlew assembleDebug --rerun-tasks -p ./android/
If compile error Could not get resource 'https://maven.google.com/com/facebook/react/react-native/maven-metadata.xml', you can remove 'https://maven.google.com/' in react-native-gcanvas/build.gradle .
If compile error Expected output file at .../libpng16d.so for target png but there was none, please not use com.android.tools.build:gradle:7.3.1 in /android/build.gradle, just use com.android.tools.build:gradle:7.4.1 or other version according to https://developer.android.com/studio/releases/gradle-plugin#cmake-imported-targets.
Add below into /ios/Podfile
pod "GCanvas", :path => "../node_modules/@flyskywhy/react-native-gcanvas/GCanvas.podspec"
cd YOUR_PROJECT/ios
pod install
The root cause is described beside 'GCanvasReady' in components/GCanvasComponent.js, to suppress this warning, you can add below into your APP code:
  require('react-native').LogBox.ignoreLogs([
    '`GCanvasReady` with no listeners',
  ]);
When I use react-native-web, I also use react-app-rewired as described in my blog:
With react-app-rewired, my [email protected] and RN 0.63+ without expo project works fine, you can try it.
3D webgl examples recommend https://github.com/flyskywhy/GCanvasRNExamples.
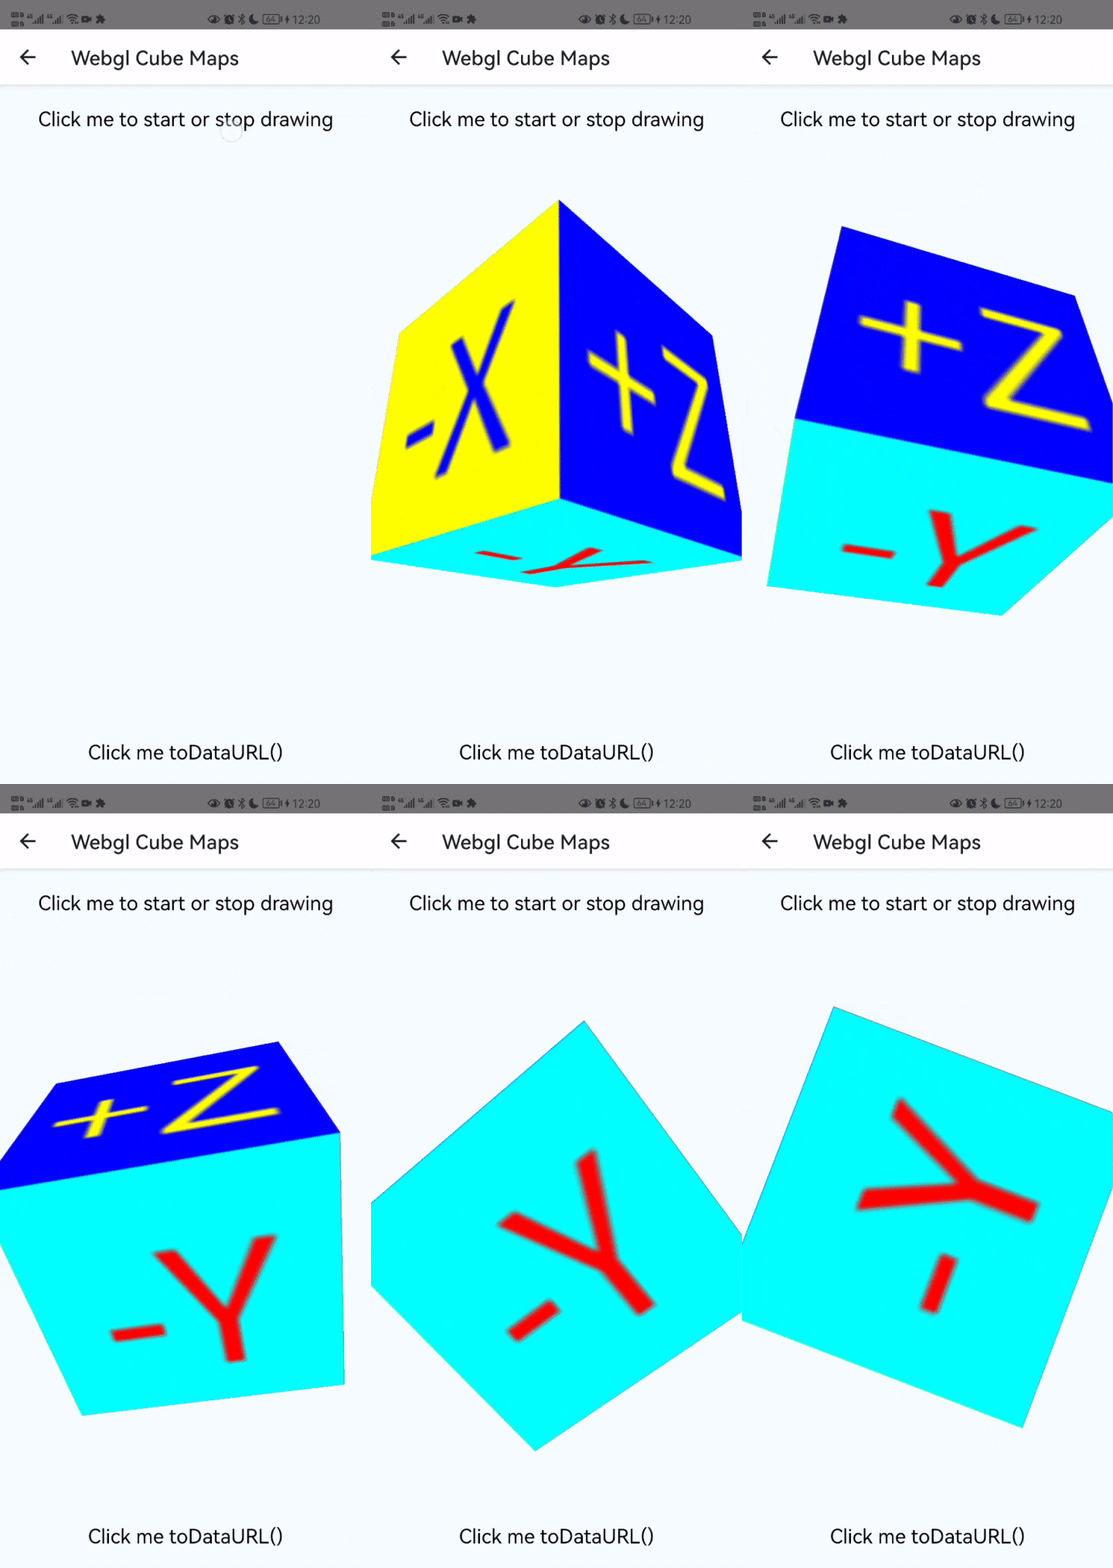
Here is the result of Webgl Cube Maps.
PS: gl.UNPACK_FLIP_Y_WEBGL is not support in webgl_demo/texture.js which is used as example before, and will not be supported ref to y-orientation for texImage2D from HTML elements.
Below code ref to https://github.com/flyskywhy/GCanvasRNExamples/blob/master/app/components/Canvas2dDemo.js.
import React, {Component} from 'react';
import {
  Platform,
  StyleSheet,
  Text,
  TouchableOpacity,
  View,
} from 'react-native';
import {GCanvasView} from '@flyskywhy/react-native-gcanvas';
import {Loader} from 'resource-loader';
import {Asset} from 'expo-asset';

function sleepMs(ms) {
  return new Promise((resolve) => setTimeout(resolve, ms));
}

export default class App extends Component {
  constructor(props) {
    super(props);
    this.canvas = null;
    this.state = {
      debugInfo: 'Click me to draw some on canvas',
    };

    // only useful on Android, because it's always true on iOS
    this.isGReactTextureViewReady = true;
  }

  componentDidMount() {
    if (Platform.OS === 'web') {
      const resizeObserver = new ResizeObserver((entries) => {
        for (let entry of entries) {
          if (entry.target.id === 'canvasExample') {
            let {width, height} = entry.contentRect;
            this.onCanvasResize({width, height, canvas: entry.target});
          }
        }
      });
      resizeObserver.observe(document.getElementById('canvasExample'));
    }
  }

  initCanvas = (canvas) => {
    if (this.canvas) {
      return;
    }

    this.canvas = canvas;
    if (Platform.OS === 'web') {
      // canvas.width not equal canvas.clientWidth but "Defaults to 300" ref
      // to https://developer.mozilla.org/en-US/docs/Web/HTML/Element/canvas,
      // so have to assign again, unless <canvas width=SOME_NUMBER/> in render()
      this.canvas.width = this.canvas.clientWidth;
      this.canvas.height = this.canvas.clientHeight;
    }
    // should not name this.context because this.context is already be {} here and will
    // be {} again after componentDidUpdate() on react-native or react-native-web, so
    // name this.ctx
    this.ctx = this.canvas.getContext('2d');
  };

  onCanvasResize = ({width, height, canvas}) => {
    canvas.width = width;
    canvas.height = height;

    // if isResetGlViewportAfterSetWidthOrHeight is true, you can use below
    this.drawSome();
  };

  drawSome = async () => {
    // On Android, sometimes this.isGReactTextureViewReady is false e.g.
    // navigate from a canvas page into a drawer item page with
    // react-navigation on Android, the canvas page will be maintain
    // mounted by react-navigation, then if you continually call
    // this drawSome() in some loop, it's wasting CPU and GPU,
    // if you don't care about such wasting, you can delete
    // this.isGReactTextureViewReady and related onIsReady.

    if (this.ctx && this.isGReactTextureViewReady) {
      this.ctx.clearRect(0, 0, this.canvas.width, this.canvas.height);

      this.ctx.beginPath();

      //rect
      this.ctx.fillStyle = 'red';
      this.ctx.fillRect(0, 0, 50, 50);

      //rect
      this.ctx.fillStyle = 'green';
      this.ctx.fillRect(50, 50, 50, 50);

      this.ctx.fill();

      this.ctx.beginPath();

      //circle
      this.ctx.fillStyle = 'blue';
      this.ctx.moveTo(100, 150);
      this.ctx.arc(125, 125, 25, 0, Math.PI * 2, true);

      this.ctx.fill();

      const imagedata = this.ctx.getImageData(25, 25, 50, 50);
      this.ctx.putImageData(imagedata, 100, 100, 12, 12, 25, 25);

      // const imageHttpSrc =
      //   '//gw.alicdn.com/tfs/TB1KwRTlh6I8KJjy0FgXXXXzVXa-225-75.png';
      // if use `//` above, will be convert to `http:` in `packages/gcanvas/src/env/image.js`,
      // then in Android release mode, will cause error:
      // `CLEARTEXT communication to gw.alicdn.com not permitted by network security policy`,
      // so use `https://` below
      const imageHttpSrc =
        'https://gw.alicdn.com/tfs/TB1KwRTlh6I8KJjy0FgXXXXzVXa-225-75.png';
      // `await Asset.fromModule` needs `expo-file-system`, and `expo-file-system` needs
      // `expo-modules` or old `react-native-unimodules`.
      // https://github.com/expo/expo/tree/sdk-47/packages/expo-asset said it needs
      // https://docs.expo.dev/bare/installing-expo-modules/ which also described how to
      // migrating from `react-native-unimodules`.
      // The installation of old `react-native-unimodules` can ref to
      // [install react-native-unimodules without install expo](https://github.com/flyskywhy/g/blob/master/i%E4%B8%BB%E8%A7%82%E7%9A%84%E4%BD%93%E9%AA%8C%E6%96%B9%E5%BC%8F/t%E5%BF%AB%E4%B9%90%E7%9A%84%E4%BD%93%E9%AA%8C/%E7%94%B5%E4%BF%A1/Tool/%E7%BC%96%E7%A8%8B%E8%AF%AD%E8%A8%80/JavaScript/React%E4%BD%BF%E7%94%A8%E8%AF%A6%E8%A7%A3.md#install-react-native-unimodules-without-install-expo)
      const imageRequireAsset = await Asset.fromModule(
        require('@flyskywhy/react-native-gcanvas/tools/build_website/assets/logo-gcanvas.png'),
      );
      const imageRequireSrc = imageRequireAsset.uri;

      // const loader = new Loader();
      // const setup = (loader, resources) => {
      //   this.ctx.drawImage(resources[imageHttpSrc].data, 70, 0, 112, 37);
      //   this.ctx.drawImage(resources[imageRequireSrc].data, 0, 100, 120, 120);
      // };
      // loader.add(imageHttpSrc); // imageHttpSrc can be simple string url
      // loader
      //   .add({
      //     url: imageRequireAsset.uri,
      //     // imageRequireAsset must set loadType in this object when build release
      //     loadType: Loader.Resource._loadTypeMap[imageRequireAsset.type],
      //   })
      //   .load(setup);

      // you can use Loader() above instead of Image() below, or vice versa

      // because already `import '@flyskywhy/react-native-browser-polyfill';` in GCanvasView, so can `new Image()`
      // not `Platform.OS === 'web' ? new Image() : new GImage()` here
      const imageHttp = new Image();
      imageHttp.crossOrigin = true; // need this to solve `Uncaught DOMException: Failed to execute 'toDataURL' on 'HTMLCanvasElement': Tainted canvases may not be exported.` on Web in production mode
      imageHttp.onload = () => {
        this.ctx.drawImage(imageHttp, 70, 0, 112, 37);
      };
      imageHttp.onerror = (error) => {
        this.setState({
          debugInfo: error.message,
        });
      };
      imageHttp.src = imageHttpSrc;

      // // to [Call drawImage() in loop with only one GImage instance](https://github.com/flyskywhy/react-native-gcanvas/issues/41)
      // for (let i = 0; i < 10; i++) {
      //   await sleepMs(1000);
      //   if (i % 2) {
      //     imageHttp.src =
      //       'data:image/png;base64,iVBORw0KGgoAAAANSUhEUgAAAAIAAAACCAIAAAD91JpzAAAADklEQVR4AWP4nwZCUAoAKxYFld+CjjoAAAAASUVORK5CYII=';
      //   } else {
      //     imageHttp.src =
      //       'https://gw.alicdn.com/tfs/TB1KwRTlh6I8KJjy0FgXXXXzVXa-225-75.png';
      //   }
      // }

      const imageRequire = new Image();
      imageRequire.onload = () => {
        this.ctx.drawImage(imageRequire, 0, 100, 120, 120);
      };
      imageRequire.onerror = (error) => {
        this.setState({
          debugInfo: error.message,
        });
      };
      imageRequire.src = imageRequireSrc;
    }
  };

  takePicture = () => {
    if (this.canvas) {
      const data = this.canvas.toDataURL();
      console.warn(data);
    }
  };

  render() {
    return (
      <View style={styles.container}>
        <TouchableOpacity onPress={this.drawSome}>
          <Text style={styles.welcome}>{this.state.debugInfo}</Text>
        </TouchableOpacity>
        {Platform.OS === 'web' ? (
          <canvas
            id={'canvasExample'}
            ref={this.initCanvas}
            style={
              {
                flex: 1,
                width: '100%',
                //
                // width: 200,
                // height: 300,
              } /* canvas with react-native-web can't use width and height in styles.gcanvas */
            }
          />
        ) : (
          <GCanvasView
            onCanvasResize={this.onCanvasResize}
            onCanvasCreate={this.initCanvas}
            onIsReady={(value) => (this.isGReactTextureViewReady = value)}
            isGestureResponsible={true /* Here is just for example, you can remove this line because default is true */}
            isAutoClearRectBeforePutImageData={false /* default is false, only for canvas 2d, if you want to be exactly compatible with Web, you can set it to true */}
            isResetGlViewportAfterSetWidthOrHeight={true /* default is true, generally true for canvas 2d and false for webgl 3d */}
            isEnableFboMsaa={false /* default is false, only for Android, only for canvas 2d, if you want anti-aliasing present same behavior on Android and Web, you can set it to true */ }
            devicePixelRatio={undefined /* Here is just for example, you can remove this line because default is undefined and means default is PixelRatio.get(), ref to "About devicePixelRatio" below */}
            style={styles.gcanvas}
          />
        )}
        <TouchableOpacity onPress={this.takePicture}>
          <Text style={styles.welcome}>Click me toDataURL()</Text>
        </TouchableOpacity>
      </View>
    );
  }
}

const styles = StyleSheet.create({
  container: {
    flex: 1,
    justifyContent: 'center',
    alignItems: 'center',
    backgroundColor: '#F5FCFF',
  },
  gcanvas: {
    flex: 1,
    width: '100%',
    // above maybe will cause
    //     WARN     getImageData: not good to be here, should refactor source code somewhere
    // if let this component as a children of another component,
    // you can use below
    // width: 200,
    // height: 300,

    // backgroundColor: '#FF000030', // TextureView doesn't support displaying a background drawable since Android API 24
  },
  welcome: {
    fontSize: 20,
    textAlign: 'center',
    marginVertical: 20,
  },
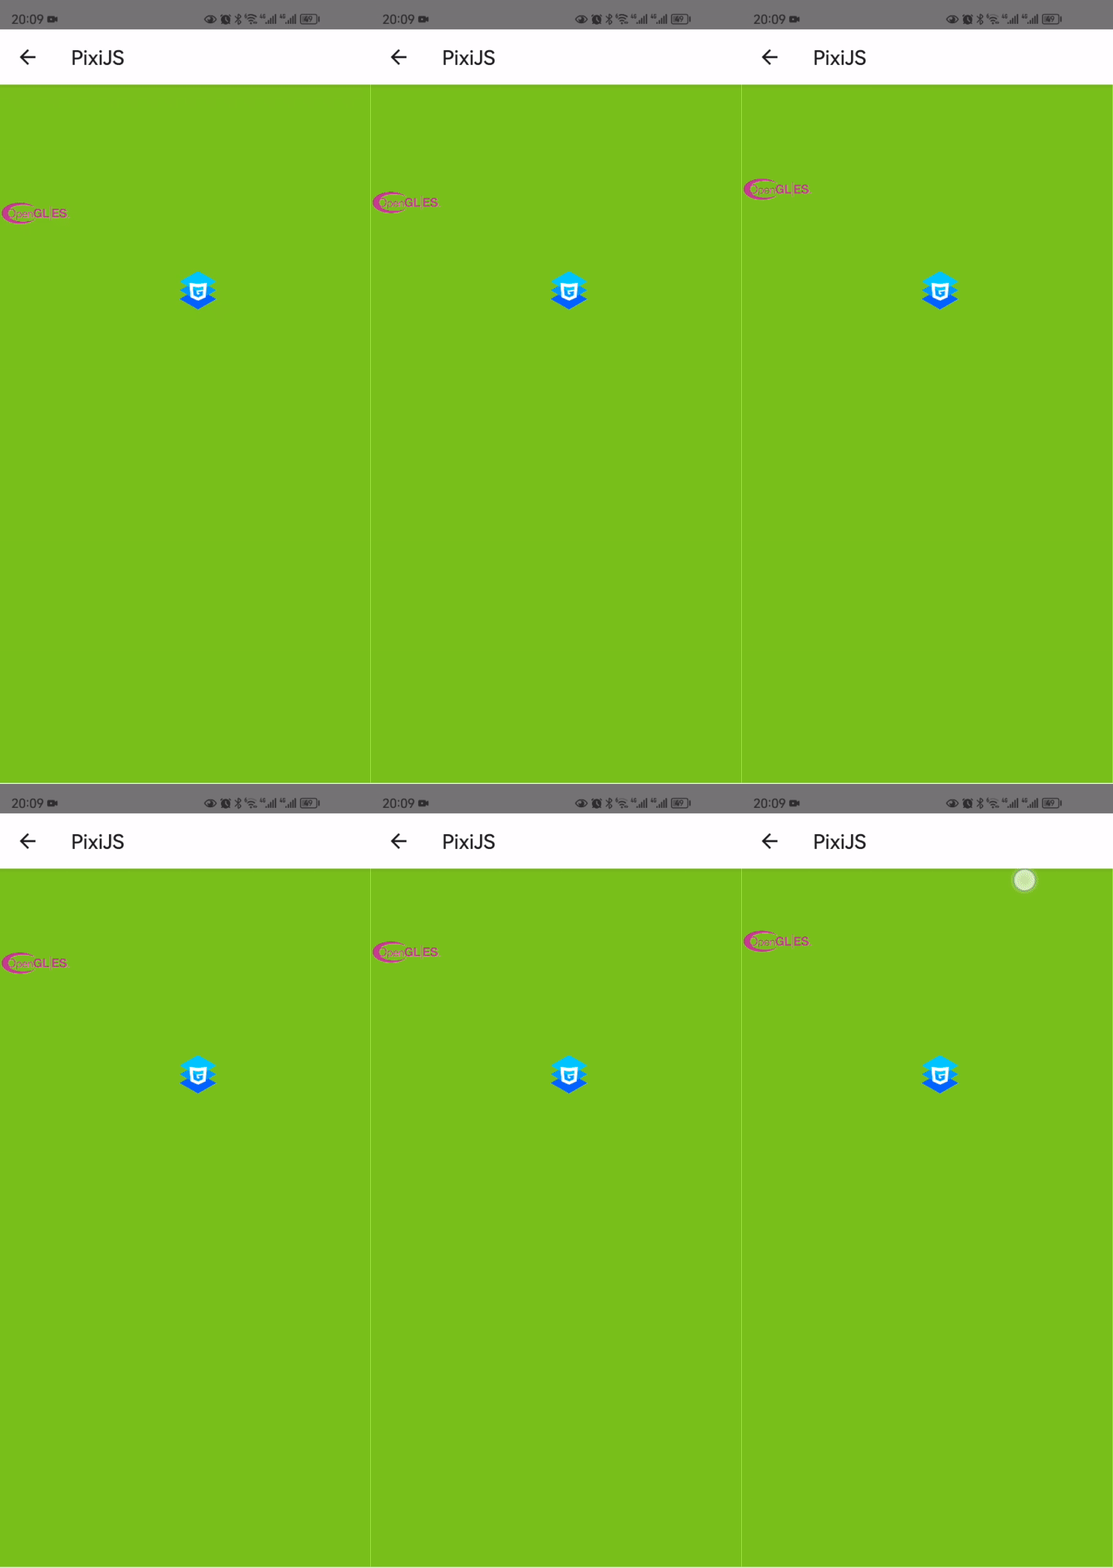
});You can follow the comments in example https://github.com/flyskywhy/GCanvasRNExamples/blob/master/app/components/Pixi.js which code is similar to 2D canvas above to use pixi.js @4, @5, @6 or @7.
Take width as example, in Window.devicePixelRatio:
- "display size (css pixels)" means
canvas.clientWidth - "actual size in memory" of GPU means
canvas._context.drawingBufferWidth
To avoid "blurry canvas" described in Window.devicePixelRatio
, @flyskywhy/react-native-gcanvas always set "actual size in memory" of GPU with physical pixels (despite of values into canvas.width = and canvas.height =), so canvas._context.drawingBufferWidth (WebGLRenderingContext's property) always equals canvas.clientWidth * PixelRatio.get() .
To be here if you want to code with css pixels, in other words, to code like the device full view width is (full physical width)/PixelRatio.get(), and iOS and Android will have the same x y scale with Web against same JS code. FE designer may prefer it.
Replace code in Window.devicePixelRatio with
canvas.width = Math.floor(size * scale);
canvas.height = Math.floor(size * scale);
if (Platform.OS === 'web') {
  ctx.scale(scale, scale);
}
and the rest code will works well.
To be here if you want to code with physical pixels. Game designer may prefer it.
Without modification, code in Window.devicePixelRatio will works well.
Usage is described in flyskywhy/react-native-browser-polyfill/src/window.js. On iOS, maybe need layout offscreen canvas then layout normal canvas like what this.state.hasOc1 && do in this GCanvasRNExamples APP commit react -> react-native: Zdog and Tests step5 document.createElement('canvas') with offscreenCanvas works well.
Since offscreen canvas is used frequently with ctx.drawImage(), so please pay attention to the quirk of @flyskywhy/react-native-gcanvas:
this.ctx.drawImage(offscreenCanvas, 0, 0, 100, 100, 0, 0, 100, 100);

// if ctx.drawImage(offscreenCanvas) is not follow by some ctx.some(),
// will cause image not display on screen #59, so just ctx.some() here.
this.ctx.fillStyle = '#19491001';
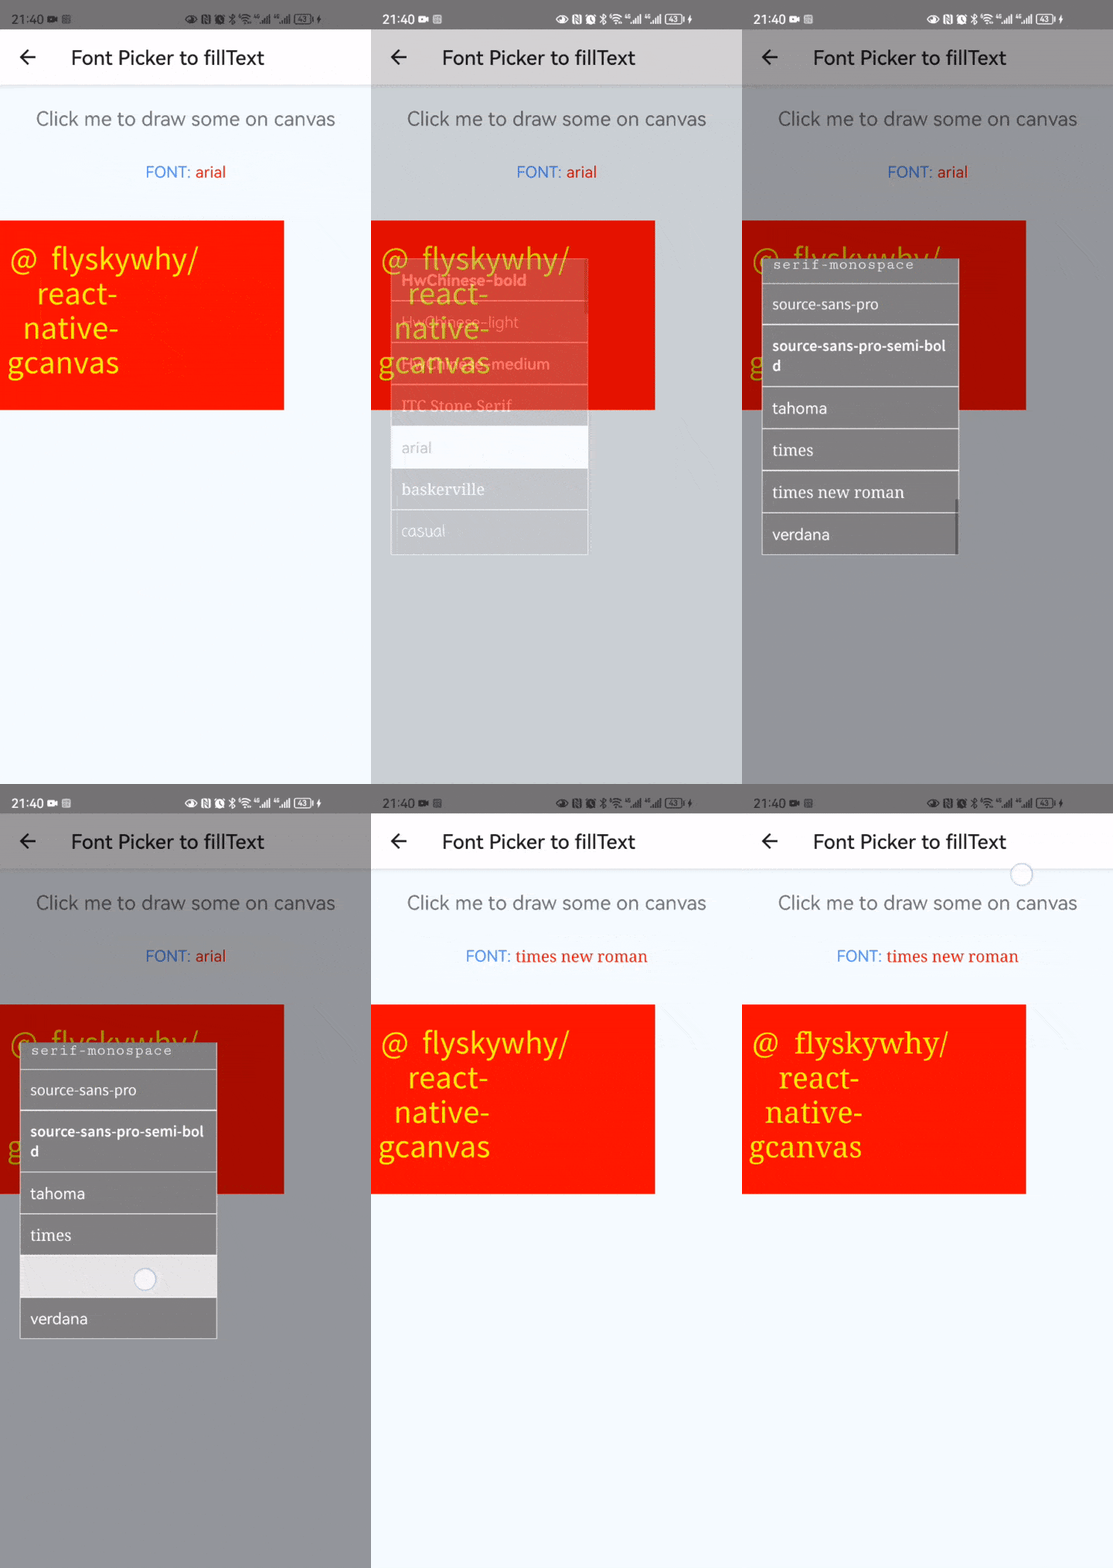
Here is the result of Font Picker to fillText on @flyskywhy/react-native-gcanvas by react-native-font-picker.
If want to use custom fonts in @flyskywhy/react-native-gcanvas as well as React <Text/>, please install custom fonts ref to https://mehrankhandev.medium.com/ultimate-guide-to-use-custom-fonts-in-react-native-77fcdf859cf4 and https://github.com/callstack/react-native-paper/blob/291d9a90ea2bf2d9a3416170a9a3a1791cf051b0/docs/docs/guides/04-fonts.md?plain=1#L32, need rename font file name, maybe https://gist.github.com/keighl/5434540 can do the rename work.
Or just see how the simple install steps of react-native-font-sim can install e.g. KaiTi.ttf, and the same steps can also install ttf files in e.g. react-native-vector-icons.
import {getFontNames, registerFont} from '@flyskywhy/react-native-gcanvas';
if (Platform.OS !== 'web') {
  var RNFS = require('react-native-fs');
}

console.log(getFontNames());
// Android print: ['SomeSystemFontFamily', 'some system font family']
// iOS print:     ['SomeCustomFont-Regular', 'SomeCustomFont-Bold', SomeSystemFontFamily', 'some system font family']
...
  copyFileAssets = async () => {
    if (Platform.OS === 'android') {
      const files = await RNFS.readDirAssets('fonts');
      if (files.length) {
        // If >= Android 11 , destFontsPath can only be under
        // RNFS.DocumentDirectoryPath (/data/user/0/com.domain.appname/files/)
        // or
        // RNFS.ExternalDirectoryPath (/storage/emulated/0/Android/data/com.domain.appname/files)
        // If < Android 11 and destFontsPath is e.g. `/sdcard/fonts/`, write code here to request filesystem permission
        // If `adb push` SomeCustomFont-Bold.ttf , also need `adb shell chomd 660` SomeCustomFont-Bold.ttf
        const destFontsPath = `${RNFS.ExternalDirectoryPath}/fonts`;

        if (!(await RNFS.exists(destFontsPath))) {
          await RNFS.mkdir(destFontsPath);
        }

        for (let file of files) {
          const dest = `${destFontsPath}/${file.name}`;
          if (!(await RNFS.exists(dest))) {
            await RNFS.copyFileAssets(`fonts/${file.name}`, dest);
          }

          registerFont(dest);
        }
      }
    }

    console.warn(getFontNames());
    // Android print:   ['SomeCustomFont-Regular', 'SomeCustomFont-Bold', SomeSystemFontFamily', 'some system font family']
    // iOS still print: ['SomeCustomFont-Regular', 'SomeCustomFont-Bold', SomeSystemFontFamily', 'some system font family']
  }

  drawCanvas = async () => {
    if (Platform.OS === 'android') {
      await this.copyFileAssets();
    }
    ...
    // this.ctx.font = '50px SomeSystemFontFamily';
    // this.ctx.font = '50px times new roman';
    this.ctx.font = '50px SomeCustomFont-Regular';
    ...
  }
Ref to https://developer.android.com/about/versions/15/behavior-changes-all#png-emoji-font, since Android 15 removed PNG-based emoji font NotoColorEmojiLegacy.ttf, you can
cd android/app/src/main/assets/fonts/
ln -s ../../../../../../node_modules/@flyskywhy/react-native-gcanvas/fonts/NotoColorEmoji.ttf ./
cd -
then use copyFileAssets() in "custom fonts" above.
NotoColorEmoji.ttf here is adb pull before Android 13.
Even if some font file in /system/fonts/ on Android is not included in the return of getFontNames(), you can still use it by registerFont()! e.g.
registerFont('/system/fonts/NotoSansThai-Regular.ttf', {family: 'Thai'});
this.ctx.font = '30px Thai'; // or just this.ctx.font = '30px';
this.ctx.fillText('ภาษาไทย泰语Thai', 20, 100);
or just
registerFont('/system/fonts/NotoSansThai-Regular.ttf');
this.ctx.font = '30px NotoSansThai-Regular'; // or just this.ctx.font = '30px';
this.ctx.fillText('ภาษาไทย泰语Thai', 20, 100);
Actually if not registerFont() here, still can fillText 'ภาษาไทย泰语Thai' correctly as NotoSansThai-Regular.ttf is already one of fallback fonts in /etc/fonts.xml on Android, so registerFont() here is just an example:P
- Cross-platform, support popular iOS and Android.
- High performance, accelerate graphic draw by OpenGL ES.
- Provide JavaScript runtime, such as Weex and ReactNative. Convenient to use JavaScript API like HTML canvas.
- Scalable Architecture, easy to implement a GCanvas bridge by yourself following the guide Custom Native Bridge.
- Small size.
See the Introduction to GCanvas for a detailed introduction to GCanvas.
Follow Weex Setup Guide to integrate GCanvas on Weex.
GCanvas has browser-like canvas APIs, so almost all of the APIs are exactly same as HTML5 canvas. At this moment, we have already supported 90% of 2D APIs and 99% of WebGL APIs. You can find out those informations in 2D APIs and WebGL APIs.
Check Documentation for more information.
- Freetype - Used for font rendering on Android
New Changelog record in CHANGELOG for details.
If you encounter a bug with GCanvas we would like to hear about it. Search the existing issues and try to make sure your problem doesn’t already exist before opening a new issue. It’s helpful if you include the version of GCanvas and OS you’re using. Please include a stack trace and reduced repro case when appropriate, too.
Please read CONTRIBUTING for details on our code of conduct, and the process for submitting pull requests to us.
- GCanvas Open Source Team
- Li Zheng [email protected]
To support my work, please consider donate.
This project is licensed under the Apache License - see the LICENSE file for details


