ArachniCMS is a Content Management System, designed for small businesses, organizations, or individuals who want simple yet effective blogging and website features. This version of ArachniCMS was built with Laravel 6.0, Tailwind CSS, and a number of the Spatie Laravel packages, being a traditional, server-side rendered web application. ArachniCMS supports one user account, so it may be inappropriate for large organizations with multiple people in different roles involved in the publishing process (e.g. multiple writers, an editor, a proofreader, etc).
ArachniCMS was created by Dave VanderWeele of ArachniDev LLC.
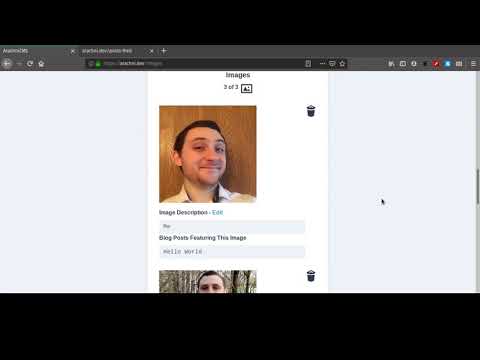
If videos are more your thing, here's a recent video tour of the software:
- Smart Light & Dark Theme Switcher in site header that, when clicked by user, will save preference of that user in web browser so user's preference is remembered on every page for every visit.
- Dynamic Sitewide Color Scheme Options, covering practically every color of the rainbow, with each one being compatible with the Smart Light & Dark Theme Switcher.
- Full Blogging experience with WYSIWYG Editor, automatic social media share buttons at the end of each post, and even a font picker.
- Blog Comment System with full comment-moderation system (note that IP Address tracking for comments may not function properly if this software is deployed behind a reverse-proxy or load balancer).
- Easily upload your own Hero Image, Title, and Subtitle for landing page.
- Add Testimonials to landing page with links to favorable reviews and mentions elsewhere on the web.
- Easily upload your own Logo for Navigation/Header area.
- Backup system, if you wish to use it, which nightly creates a zip file containing a dump of your database and uploaded images (i.e. all the user generated content).
- Sitemap that regularly updates itself as you continue to blog and add pages to your website.
- Integration with Mailchimp so you can collect email addresses on your landing page and after each blog post. Start building your Newsletter!
- Public Contact Form that (like all public-facing forms on the site) is protected from spambots by a smart honeypot system. Integrates with Transactional Mail Providers like Mailgun, etc.
- Easily add logo/icon links in the footer of your site that point to your various social media profiles around the web.
- Easily add links to your Patreon and/or Liberapay profiles, and logo links to those pages will automatically generate on your landing page and at end of each blog post.
- An RSS Feed for your blog posts is automatically generated and updated regularly.
- A clever system allows you to manage a vault of uploaded images, that you can reference dynamically from as many blog posts as you desire. This means you only have to upload each image once, and it can be used an unlimited amount of times on your blog. This helps save space on your web server.
- Embedding Youtube Videos has never been easier. Instead of copying and pasting complicated iframe embed code, you can just copy and paste the video code for the video itself one time, and after that you can embed it as many times as you want in blog posts with just the click of a button.
- A Cookie Consent pop-up that, after accepted by a user, won't show up again.
ArachniCMS is free to use and licensed under Creative Commons Attribution-ShareAlike 4.0. For the attribution requirement, I'd like you to leave the link in the footer that says "Made with Love by ArachniDev LLC" with a link to the ArachniDev LLC website.
You will need to understand the basics of deploying a web application to a VPS provider such as Digital Ocean, Linode, etc. This application should not be used on a Shared Host as many features will be broken, but I'm not stopping you. Additionally, you will also need to know the specifics of deploying a Laravel application.
I'm not going to go over the details of all of that, as there are many different ways for you to configure your application. However, there are some specific deployment details that are relevant to this application that I will go over.
You'll want to checkout the latest tag in this app's git repo for deployment. In this case, v2.1.1.
You will want at least PHP 7.3 installed, as well as the other prerequisites specified in the Laravel docs.
Make sure to do your composer install, npm install, and npm run production.
You will want to take a look at the .env.example file distributed with this application, as it is different than the standard .env.example file distributed with Laravel. Make sure the following fields in that file are filled out so the application functions as expected:
- APP_NAME = Make sure you give your application a name.
- APP_ENV = Make sure this is set to either local or production. Failure to set this accurately will cause issues with https and essentially break the website in a number of critical ways.
- APP_KEY = This needs to be set securely using the standard "php artisan" procedure that ships by default with Laravel.
- APP_DEBUG = only set this to true in your development/testing environment. In production, it needs to be false.
- APP_URL = in development this will likely be something like http://localhost:8000. In production, make sure it is accurately set and includes https. Example: https://example.com.
- ASSET_URL = in development this will also likely be http://localhost:8000. In production, also make sure it is accurately set and includes https. Example: https://example.com.
- DB_CONNECTION = I set this to MySQL because that's what I use with this application. That doesn't mean you can't use another database, just that I haven't tested it and don't vouch for it.
- DB_HOST, DB_PORT, DB_DATABASE, DB_USERNAME, DB_PASSWORD = these should be filled out appropriately with the details of your database connection.
- MAIL_DRIVER, MAIL_HOST, MAIL_PORT, MAIL_USERNAME, MAIL_PASSWORD, MAIL_ENCRYPTION = I've only tested mailgun, but I'm sure others work just as well.
- MAIL_FROM_ADDRESS = Make sure you set this right, otherwise your emails might get flagged as failing some kind of host mismatch test or something. Basically, you don't need a REAL email address here. Just something for the transactional email provider to attach to the email. So if you put your APP_URL field above to your website's domain name, say "https://example.com", then just put something like "[email protected]" or "[email protected]" for this field so you don't get that mismatch error when the email is delivered. Furthermore, whether or not the email you put here is real, DO NOT put the same email address that you are going to use to login or your contact form emails have a very high likelihood of not being delivered. Later when you fill out the UsersTableSeeder.php file in order to create your user account, the login account email address from that file will become the email address that these contact form submissions are sent to. You can also change what email the contact form submissions are sent to later on from your website's global site settings page, but just remember to NEVER set that to the same email address you are putting for this MAIL_FROM_ADDRESS field.
- MAILGUN_DOMAIN, MAILGUN_SECRET = In my case, I used Mailgun, so that's why I filled these fields out. Your configuration may be different if you're using a different MAIL_DRIVER.
- MAILCHIMP_APIKEY, MAILCHIMP_LIST_ID = It's recommended to use the mailchimp features that come with this application so you should fill these out with the appropriate details from your own mailchimp account. However, this is optional. If you're not using mailchimp, then just make sure after you're finished installing this that you keep the mailchimp email collection forms set to disabled via your global site settings page.
Now that your environment file is setup, run the applications migrations via laravel's artisan tool.
Next, make sure you edit the UsersTableSeeder file and add your own email address and password that you would like to seed the database with. When you are deploying to production, you will need to make sure that you do your migrations AS WELL AS seed the database, but ONLY the Users Table, and then the Settings Table. It'll be something like the following after you fill out your UsersTableSeeder file, which is found here within application files /database/seeds/UsersTableSeeder.php.
- php artisan migrate
- php artisan db:seed --class=UsersTableSeeder
- php artisan db:seed --class=SettingsTableSeeder
Don't run any of the other seeders or you're going to fill your database and assets directory up with a bunch of garbage testing data.
TO BE CONTINUED...