Orthographic camera
This page presents the OrthographicCamera class and usage.
The orthographic camera is to be used in 2D environments only as it implements a parallel (orthographic) projection and there will be no scale factor for the final image regardless where the objects are placed in the world.
The Camera class operates as a very simple real world camera. It is possible to
- move and rotate the camera around,
- zoom in and out,
- change the viewport,
- project/unproject points to and from window coordinate/ world space
Using the camera is the easy way to move around a game world without having to manually operate on the matrices. All the projection and view matrix operations are hidden in the implementation.
The following little app demonstrates the use of a simple OrthographicCamera to move around a flat world. To represent the world (map), a simple Mesh representing a square plane was used with a map texture on top of it. The map is a huge square (1024x1024 pixels) and the viewport is 480x320 pixels.
The viewport is the rectangular area visible at any given time from the whole world. If we zoom in, the smaller the rectangular area gets. Because the screen size does not change, the viewport is scaled up to the actual resolution.
public class OrthographicCameraController implements ApplicationListener {

	static final int WIDTH 	= 480;
	static final int HEIGHT = 320;

	private OrthographicCamera 	cam;
	private Texture 			texture;
	private Mesh				mesh;
	private Rectangle 			glViewport;
	private float				rotationSpeed;

	@Override
	public void create() {
		rotationSpeed = 0.5f;
		mesh = new Mesh(true, 4, 6,
				new VertexAttribute(VertexAttributes.Usage.Position, 3,"attr_Position"),
				new VertexAttribute(Usage.TextureCoordinates, 2, "attr_texCoords"));
		texture = new Texture(Gdx.files.internal("data/sc_map.png"));
		mesh.setVertices(new float[] {
			          0,      0, 0, 0, 1,
			      1024f,      0, 0, 1, 1,
			      1024f,  1024f, 0, 1, 0,
			          0,  1024f, 0, 0, 0
		});
		mesh.setIndices(new short[] { 0, 1, 2, 2, 3, 0 });

		cam = new OrthographicCamera(WIDTH, HEIGHT);
		cam.position.set(WIDTH / 2, HEIGHT / 2, 0);

		glViewport = new Rectangle(0, 0, WIDTH, HEIGHT);

	}

	@Override
	public void render() {
		handleInput();
		GL10 gl = Gdx.graphics.getGL10();

		// Camera --------------------- /
		gl.glClear(GL10.GL_COLOR_BUFFER_BIT);
		gl.glViewport((int) glViewport.x, (int) glViewport.y,
				(int) glViewport.width, (int) glViewport.height);

		cam.update();
		cam.apply(gl);

		// Texturing --------------------- /
		gl.glActiveTexture(GL10.GL_TEXTURE0);
		gl.glEnable(GL10.GL_TEXTURE_2D);
		texture.bind();

		mesh.render(GL10.GL_TRIANGLES);

	}

	private void handleInput() {
		if(Gdx.input.isKeyPressed(Input.Keys.A)) {
			cam.zoom += 0.02;
		}
		if(Gdx.input.isKeyPressed(Input.Keys.Q)) {
			cam.zoom -= 0.02;
		}
		if(Gdx.input.isKeyPressed(Input.Keys.LEFT)) {
			if (cam.position.x > WIDTH / 2)
				cam.translate(-3, 0, 0);
		}
		if(Gdx.input.isKeyPressed(Input.Keys.RIGHT)) {
			if (cam.position.x < 1024 - WIDTH / 2)
				cam.translate(3, 0, 0);
		}
		if(Gdx.input.isKeyPressed(Input.Keys.DOWN)) {
			if (cam.position.y > HEIGHT / 2)
				cam.translate(0, -3, 0);
		}
		if(Gdx.input.isKeyPressed(Input.Keys.UP)) {
			if (cam.position.y < 1024 - HEIGHT / 2)
				cam.translate(0, 3, 0);
		}
		if(Gdx.input.isKeyPressed(Input.Keys.W)) {
			cam.rotate(-rotationSpeed, 0, 0, 1);
		}
		if(Gdx.input.isKeyPressed(Input.Keys.E)) {
			cam.rotate(rotationSpeed, 0, 0, 1);
		}
	}

	@Override
	public void resize(int width, int height) {
		// TODO Auto-generated method stub
	}

	@Override
	public void resume() {
		// TODO Auto-generated method stub
	}

	@Override
	public void dispose() {
		// TODO Auto-generated method stub
	}

	@Override
	public void pause() {
		// TODO Auto-generated method stub
	}
}
The above class is the libGDX application that will use the orthographic camera to move around the world. Again, the world is a 1024x1024 pixel square. To represent it, a textured square plane of the same size was used. The orthographic camera makes it easy to work in pixels, even if OpenGL doesn't like it. Because there is no Z axis, we can safely define our world as 1024 units wide and long. If the image used for the texture is 1024x1024 and the mesh is also 1024x1024 units wide and long, we use a pixel perfect projection.
static final int WIDTH 	= 480;
static final int HEIGHT = 320;
Hardcoded the width and height to be used for the viewport.
private OrthographicCamera 	cam;					// #1
private Texture 			texture;			// #2
private Mesh				mesh;				// #3
private Rectangle 			glViewport;			// #4
private float				rotationSpeed;			// #5
#1 - The OrthographicCamera instance we will control to look at the world.
#2 - The texture image we will display as the map (world).
#3 - The Mesh the texture will be applied to. A simple square.
#4 - Rectangle representing the viewport.
#5 - The speed in angles with which the camera is rotated with every render call.
@Override
public void create() {
	rotationSpeed = 0.5f;							// #1
	mesh = new Mesh(true, 4, 6,
			new VertexAttribute(VertexAttributes.Usage.Position, 3,"attr_Position"),
			new VertexAttribute(Usage.TextureCoordinates, 2, "attr_texCoords"));	// #2
	texture = new Texture(Gdx.files.internal("img/sc_map.png"));		// #3
	mesh.setVertices(new float[] {
			      0,      0, 0, 0, 1,
			  1024f,      0, 0, 1, 1,
			  1024f,  1024f, 0, 1, 0,
			      0,  1024f, 0, 0, 0
	});									// #4
	mesh.setIndices(new short[] { 0, 1, 2, 2, 3, 0 });			// #5
	cam = new OrthographicCamera(WIDTH, HEIGHT);				// #6
	cam.position.set(WIDTH / 2, HEIGHT / 2, 0);				// #7
	glViewport = new Rectangle(0, 0, WIDTH, HEIGHT);			// #8
}
The onCreate method sets everything up.
#1 - Sets the current rotation speed to 0.5 degree.
#2 - Creates the square mesh. The first attribute tells libgdx to make the mesh static. The second parameter tells that the mesh will hold 4 vertices (it is a square). The 3rd parameter is the number of indices to be used. A square is composed of 2 triangles and each triangle has 3 vertices, thus 2*3 = 6. The 4th parameter tells the Mesh that the position is described by 3 values (x, y, z). The 5th parameter sets 2 for the texture position attribute.
#3 - Create the texture from the sc_map.png file. Download the file here and add it to the assets/src directory.
#4 - Sets the vertex array for the mesh. The first 3 elements are the x, y, z coordinates, while the following 2 describe the texture coordinates for that vertex. Note that the z coordinate is 0 as we are in 2D. There are 4 vertices (the 4 rows).
#5 - Setting the indices for the vertices to result in a square.
#6 - Create the OrthographicCamera. The 2 parameters specify the width and height of the viewport that will be created. We will use the window size.
#7 - Setting the camera's initial position to point to the middle of the screen. Remember that (0,0) is in the bottom left corner so the camera's initial position will be the bottom left part of the world.
#8 - Create a rectangle with the bottom left at (0,0) having the width and height specified by the constants (equal to the window size).
The setup has been done. The camera has been created and positioned (pointed) to the bottom left corner of the world.
@Override
public void render() {
	handleInput();				// #1
	GL10 gl = Gdx.graphics.getGL10();	// #2

	// Camera --------------------- /
	gl.glClear(GL10.GL_COLOR_BUFFER_BIT);	// #3
	gl.glViewport((int) glViewport.x, (int) glViewport.y,
		(int) glViewport.width, (int) glViewport.height);	// #4

	cam.update();			// #5
	cam.apply(gl);			// #6

	// Texturing --------------------- /
	gl.glActiveTexture(GL10.GL_TEXTURE0); 	// #7
	gl.glEnable(GL10.GL_TEXTURE_2D);	// #8
	texture.bind();				// #9

	mesh.render(GL10.GL_TRIANGLES);		// #10

}
#1 - Controls the camera by updating its position, zooming, rotation based on different keys being pressed.
#2 - Obtains the OpenGL instance. It has to be version 1 as version 2 is not supported for OrthographicCamera.
#3 - Clears the screen (actually the colour buffer).
#4 - Sets the viewport for the OpenGL context to be the viewport we defined at creation time. We are not handling resizing currently.
#5 - Updates the camera - Very important step. As the projection matrix was modified in the handleInput method, this simply tells the camera to recalculate the projection matrix and the frustum for this camera. This method needs to be called every time the camera has been changed.
#6 - Sets the current projection and model-view matrix of the camera. It is called after update.
#7 - #9 - Activates the texture and binds it to the context. #10 - Renders the mash which is the map.
	private void handleInput() {
		if(Gdx.input.isKeyPressed(Input.Keys.A)) {
			cam.zoom += 0.02;
		}
		if(Gdx.input.isKeyPressed(Input.Keys.Q)) {
			cam.zoom -= 0.02;
		}
		if(Gdx.input.isKeyPressed(Input.Keys.LEFT)) {
			if (cam.position.x > WIDTH / 2)
				cam.translate(-3, 0, 0);
		}
		if(Gdx.input.isKeyPressed(Input.Keys.RIGHT)) {
			if (cam.position.x < 1024 - WIDTH / 2)
				cam.translate(3, 0, 0);
		}
		if(Gdx.input.isKeyPressed(Input.Keys.DOWN)) {
			if (cam.position.y > HEIGHT / 2)
				cam.translate(0, -3, 0);
		}
		if(Gdx.input.isKeyPressed(Input.Keys.UP)) {
			if (cam.position.y < 1024 - HEIGHT / 2)
				cam.translate(0, 3, 0);
		}
		if(Gdx.input.isKeyPressed(Input.Keys.W)) {
			cam.rotate(-rotationSpeed, 0, 0, 1);
		}
		if(Gdx.input.isKeyPressed(Input.Keys.E)) {
			cam.rotate(rotationSpeed, 0, 0, 1);
		}
	}
The handleInput() method simply polls the input and if certain keys were pressed, it modifies the camera accordingly.
The Arrows move the camera, Q and A zoom in respectively out, and W & E rotate the camera. There are a few guards to not allow the camera to leave the world.
The main application to bootstrap the listener is a simple LWJGL application.
public class DesktopCameraController {
public static void main(String[] args) {
new LwjglApplication(new OrthographicCameraController(), "2D Camera", 480, 320, false);
}
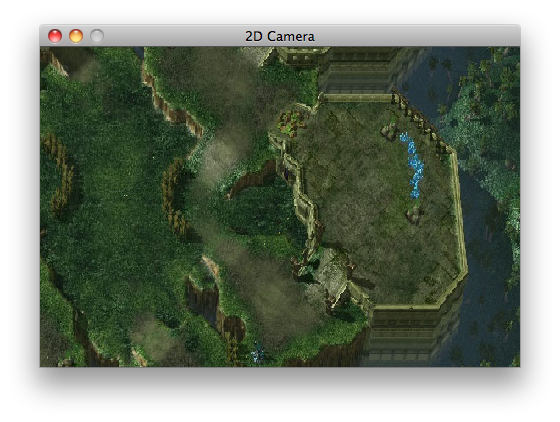
}The result is the following application:
Most of the time, one should not need to access the internals of a camera as the most common use-cases are covered by the following methods:
| Method | Description |
|---|---|
lookAt(float x, float y, float z) |
Recalculates the direction of the camera to look at the point defined by the coordinates on all axes. - The z axis is ignored for 2D |
translate(float x, float y, float z) |
Moves the camera by the given amount on each axis. - Note that z is ignored for the OrthographicCamera |
rotate(float angle, float axisX, float axisY, float axisZ) |
Rotates the direction and up vector of this camera by the given angle around the given axis. The direction and up vector will not be orthogonalized. The angle is persisted so the camera will be rotated by angle relative to its previous rotation. |
update() |
Recalculates the projection and view matrix of the camera and the frustum planes |
apply(GL10 gl) |
Sets the current projection and model-view matrix of this camera. It needs to be called after update() and it takes the OpenGL (1.0 or 1.1) instance as a parameter. It works only with version 1.x. Currently there is no support for version 2.0. |