This data engineering project involves pulling data streams from a mock music streaming service event simulator into Confluent via Kafka, then passing those streams simultaneously to Snowflake and ClickHouse (each modelled by CI/CD-powered dbt projects) and then visualizing them in Preset. The ClickHouse data is also populated into the custom app tool Retool to create a data app POC.
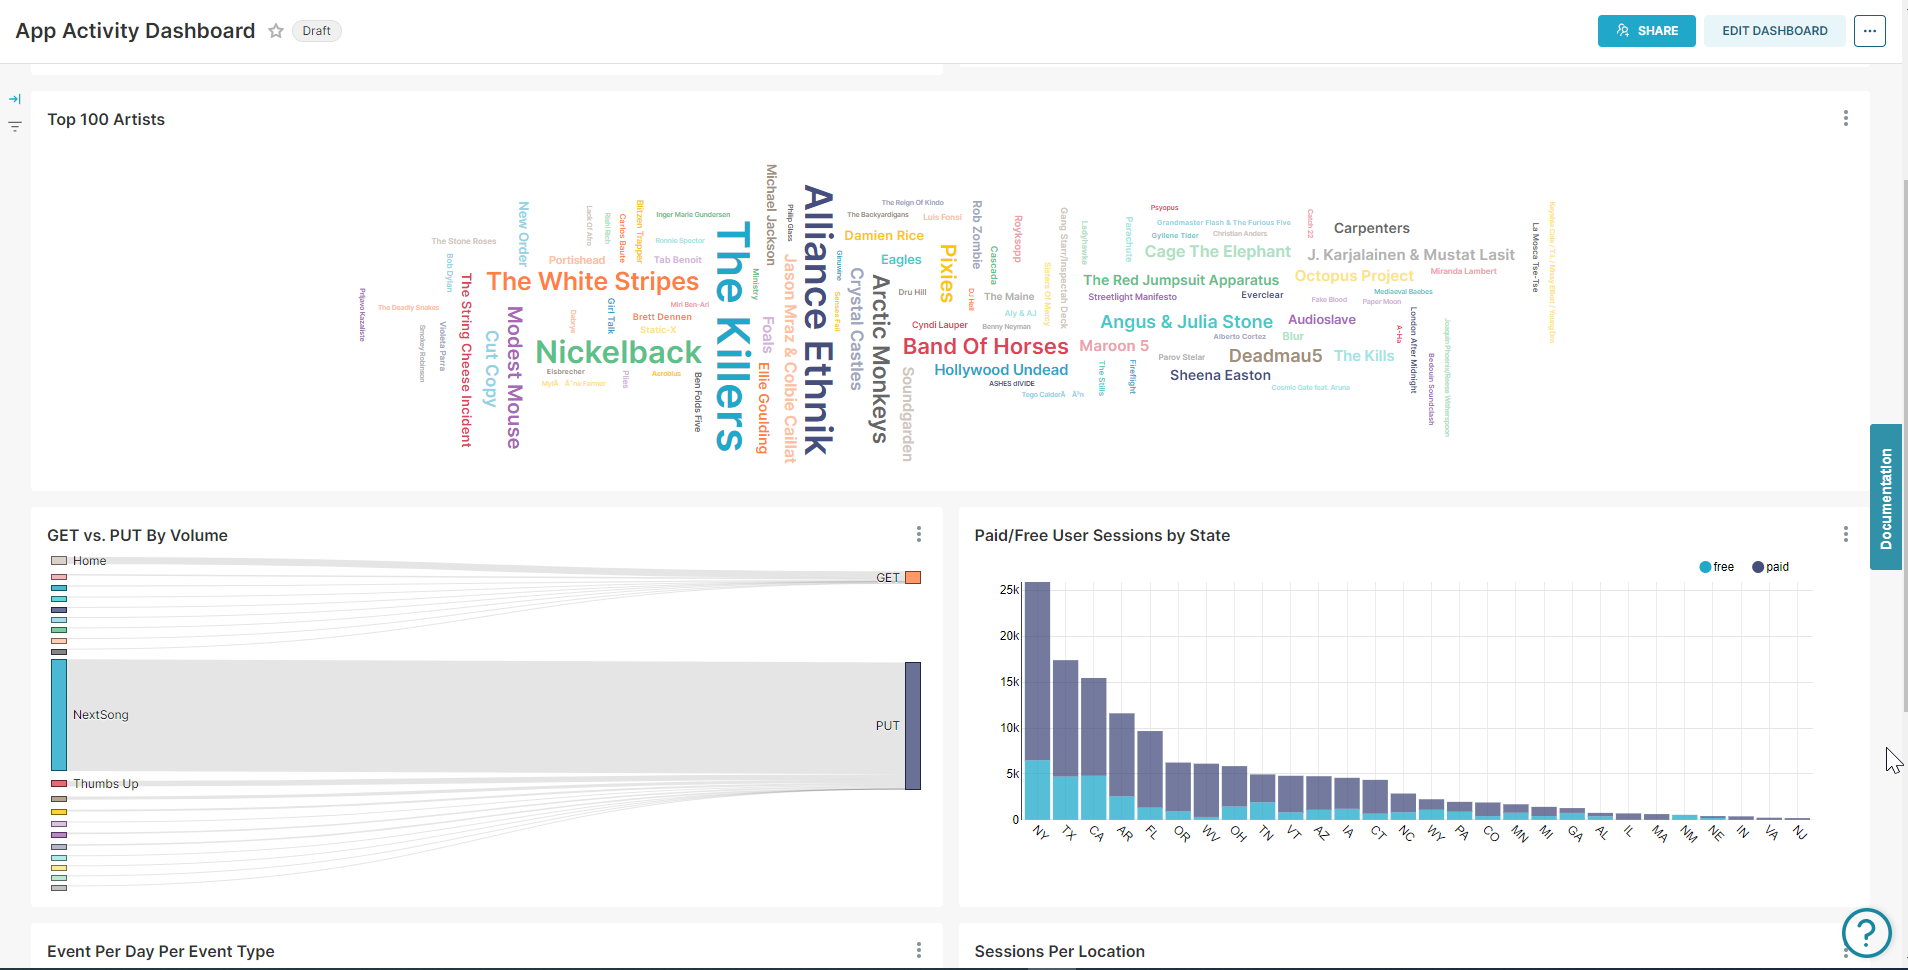
The Snowflake batch data served in Preset is modelled into facts and dims as well as a One Big Table to enable sophisticated BI dashboards.
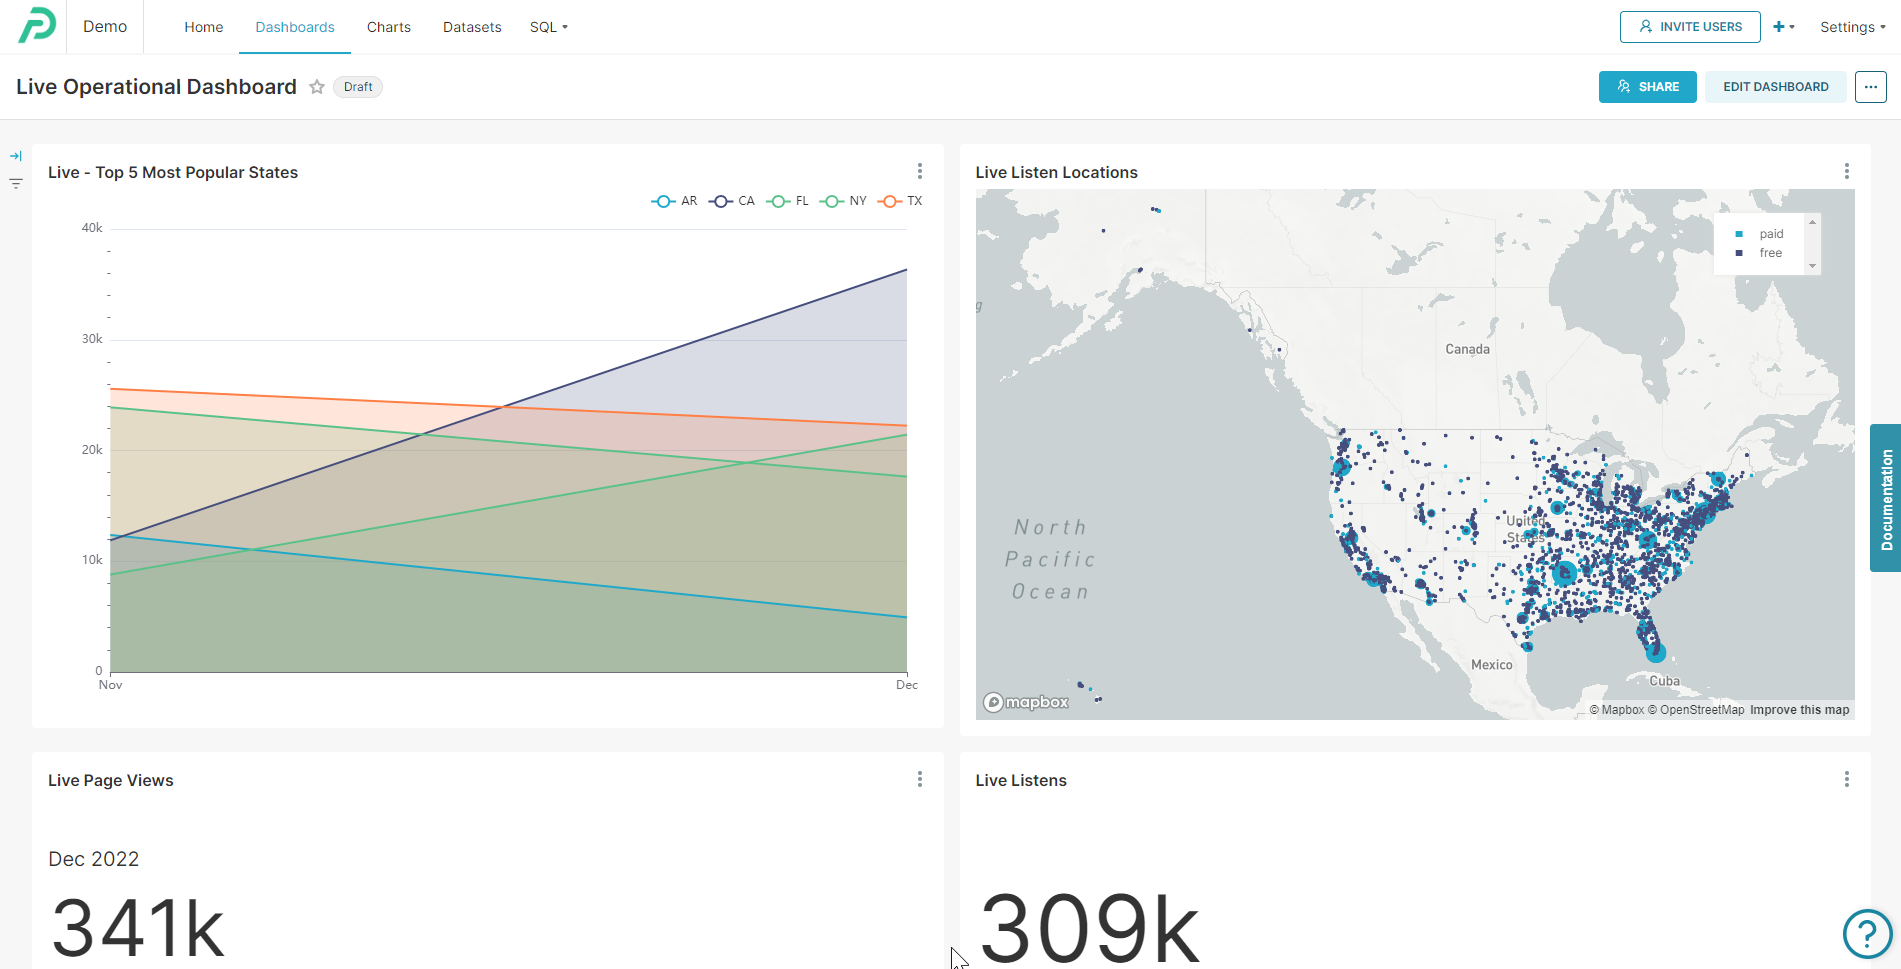
The ClickHouse data streaming into Preset is used to power real-time operational analytics use cases.

Preset ClickHouse real-time dashboard
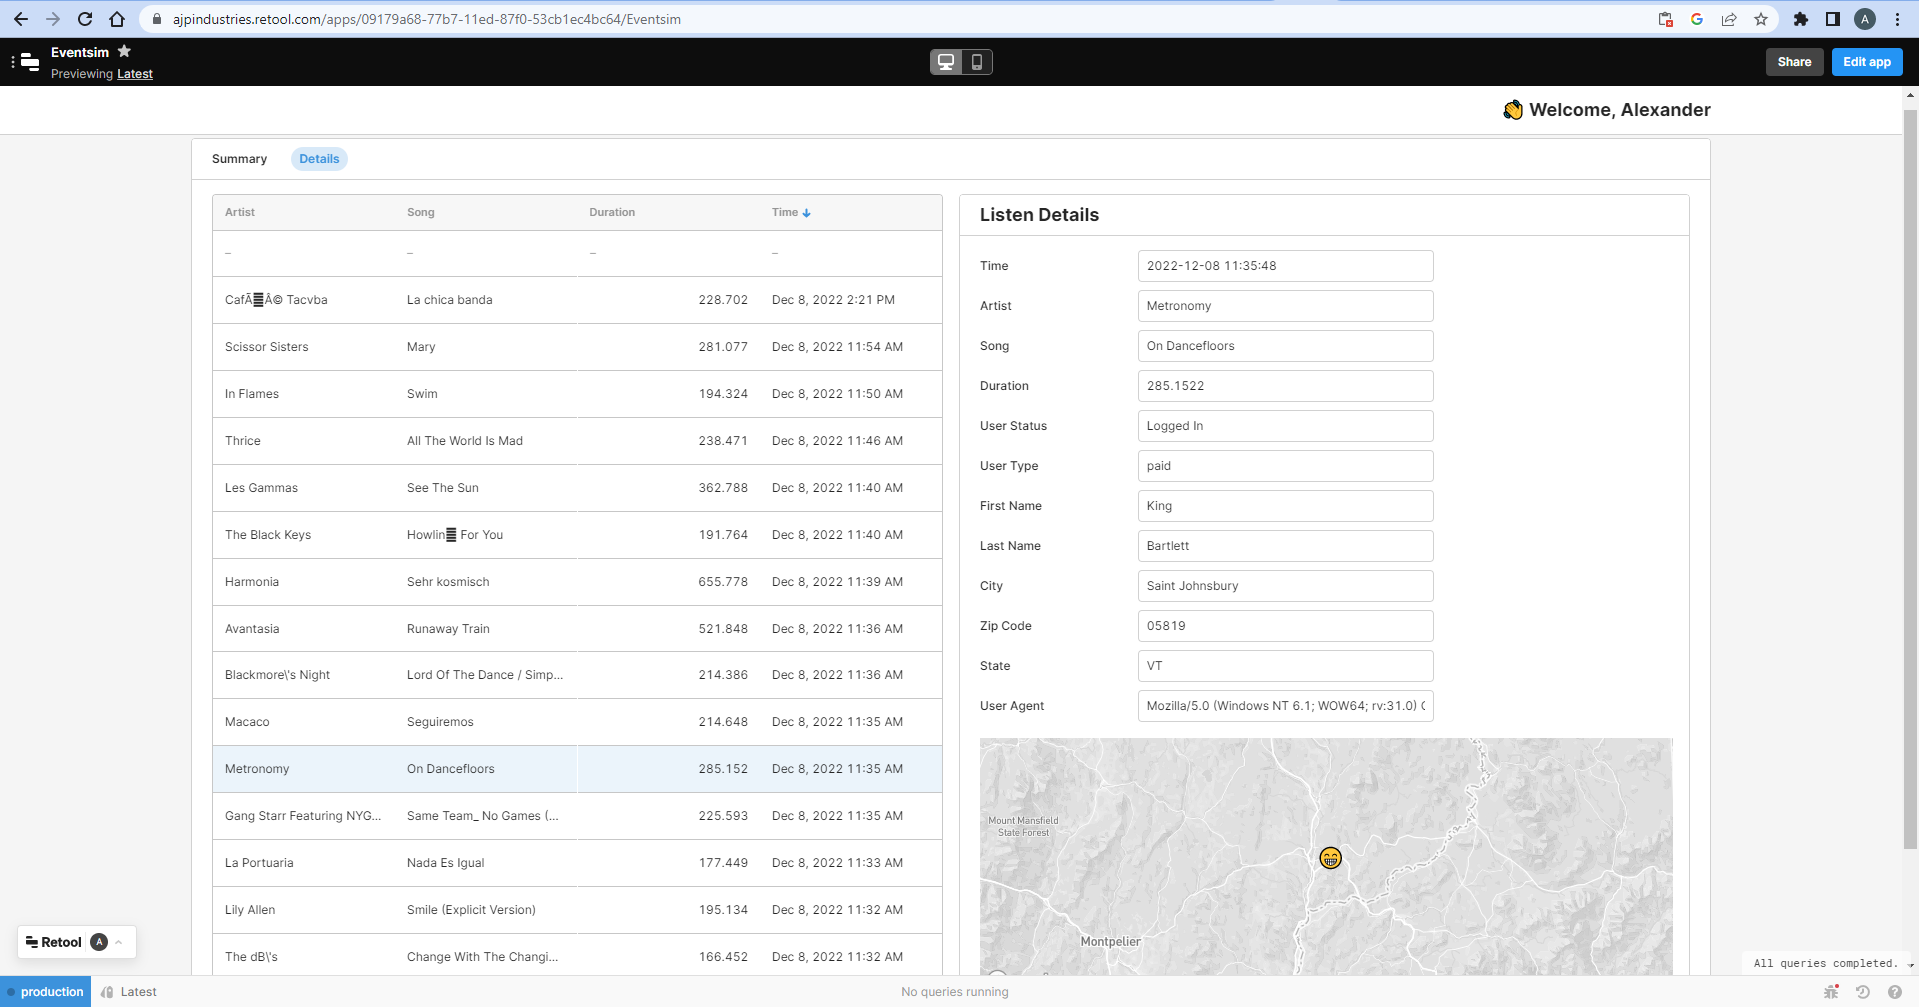
The ClickHouse data streaming into Retool is used to create an interactive data app, allowing navigation across points of interest in the streamed data.
Eventsim - synthetic music streaming service data simulator written in Scala code. The original repo hasn't been maintained for 7+ years, so we based the project code on GitHub user viirya's forked repo that updated the Scala code and relevant library dependencies to make the code work with more recent versions of Scala. We then extended this to work with Confluent in the cloud (rather hastily to meet project timelines - TBD making this into a proper extension).
Source: Eventsim - Scala application running in ECS container
Ingestion: Apache Kafka - managed service via Confluent
Storage: ClickHouse for real-time OLAP storage, Snowflake for batch storage.
Transformation: dbt projects for Snowflake and ClickHouse each, running in ECS container.
CI/CD: GitHub Actions triggers CI/CD pipelines for both dbt projects. The linting tool SQLFluff is applied to SQL code during the CI process, flagging any issues in the code syntax.
Serving: Preset for dashboards. Retool* as a simple data app PoC.
*Note: Retool does not allow syncing code to existing repositories so is only available online.
There's dbt projects for Snowflake and ClickHouse each.
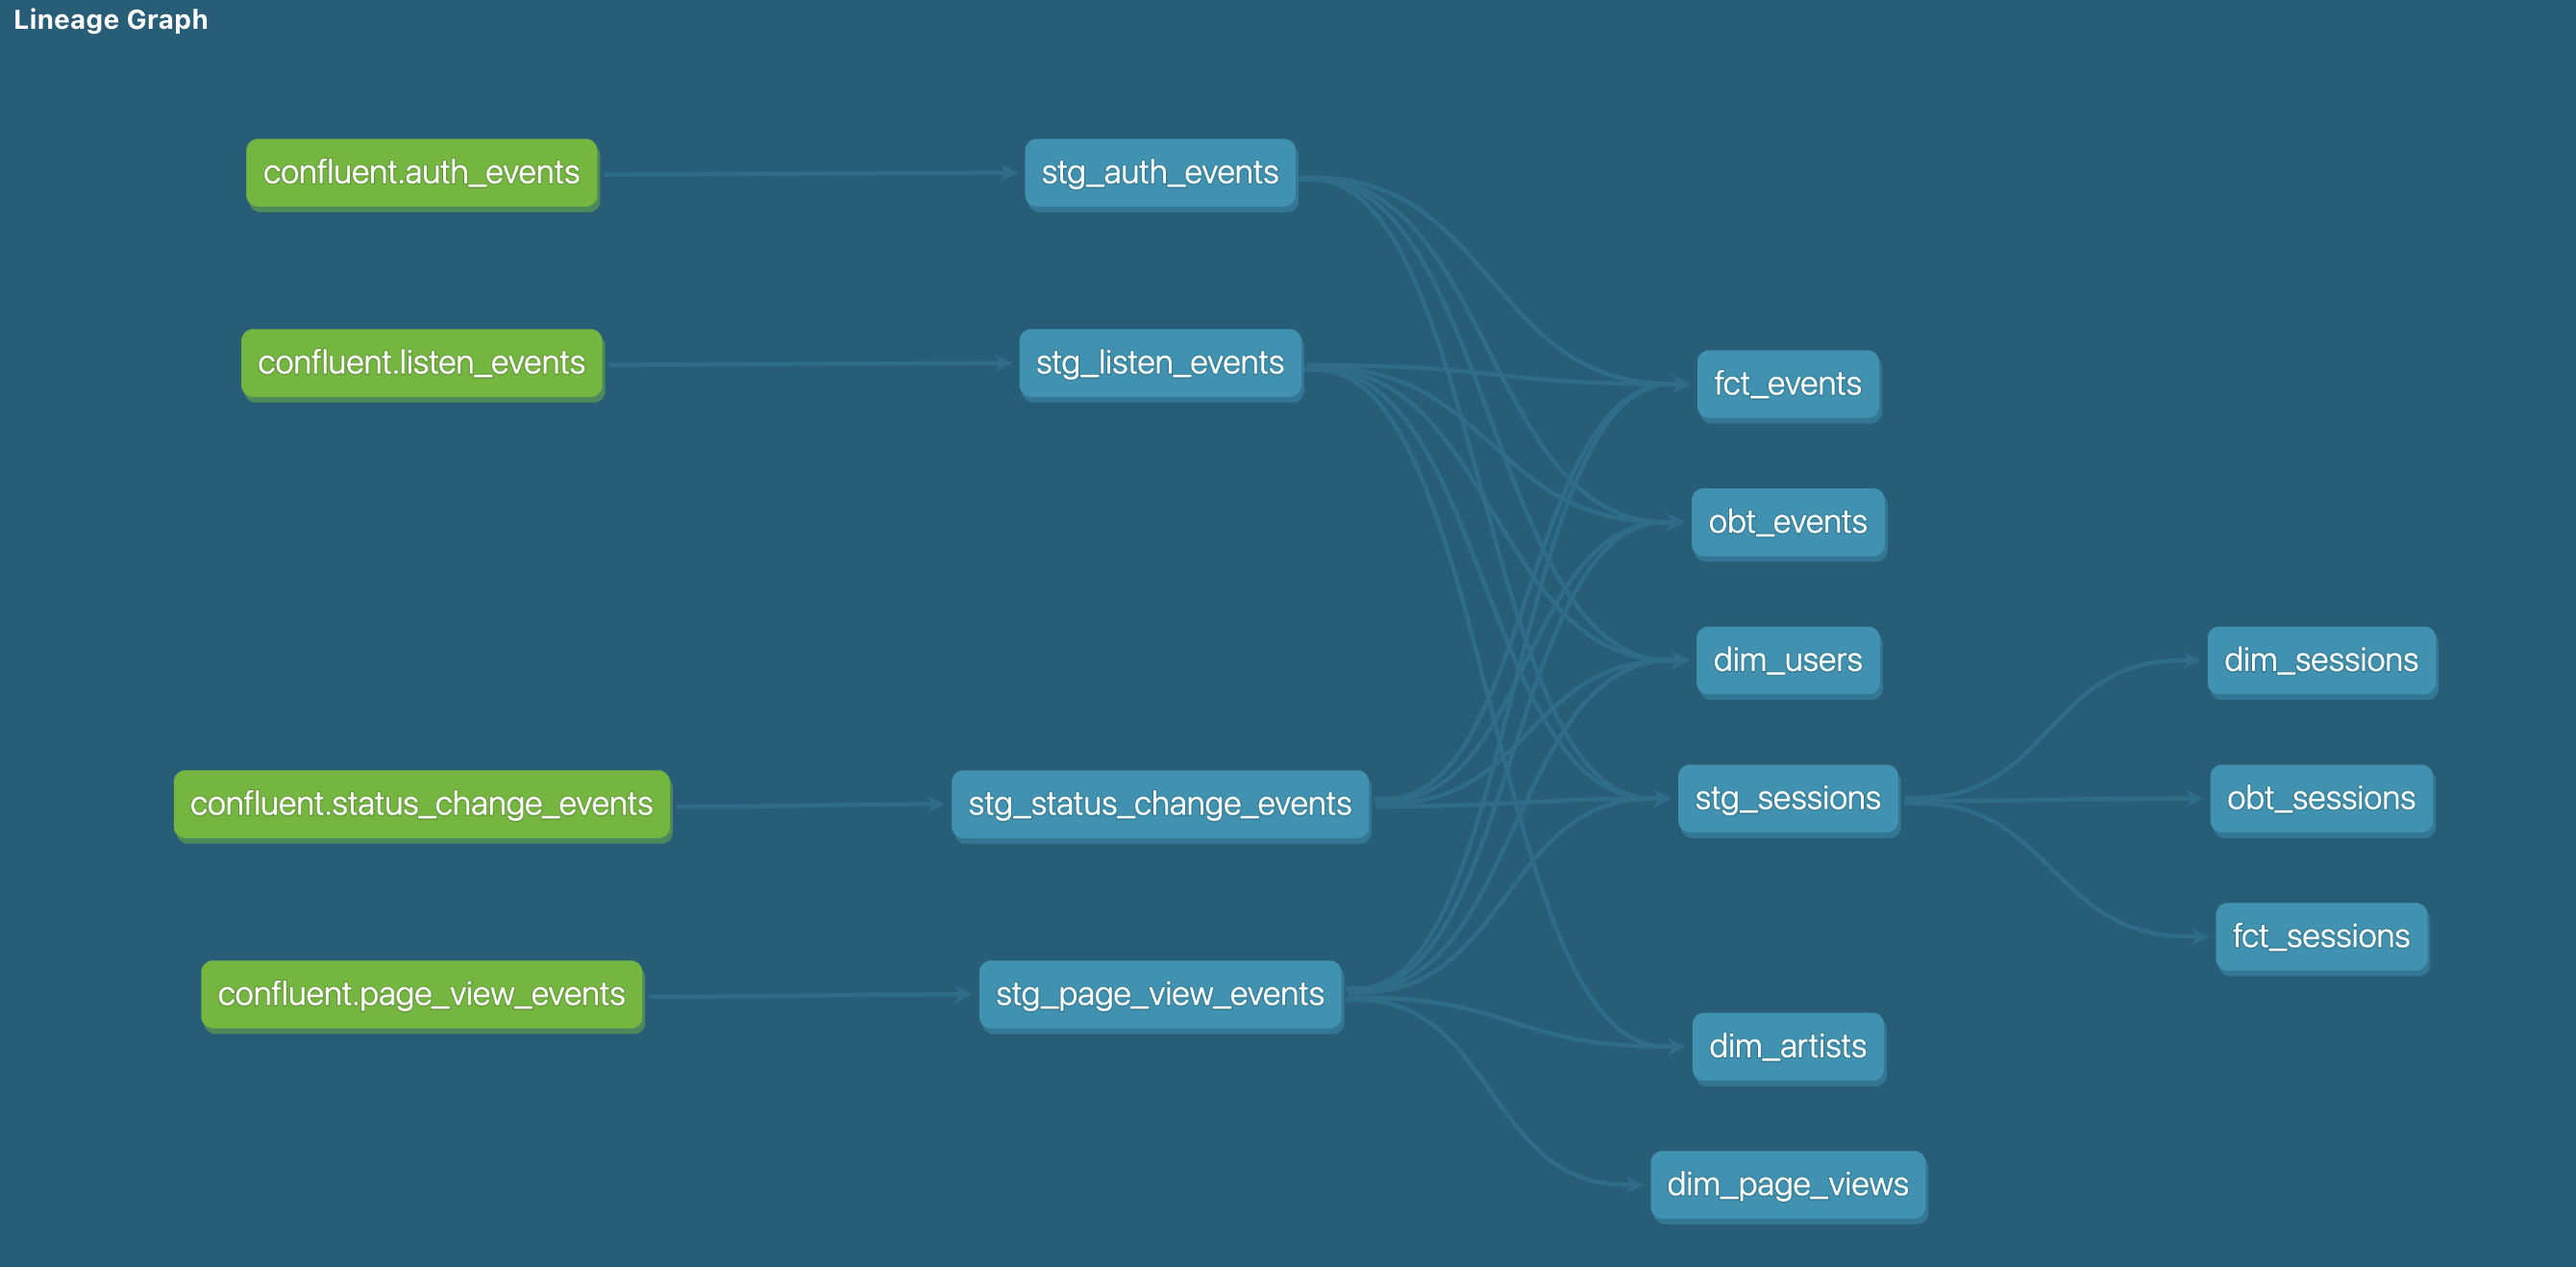
For Snowflake, each of the 4 Kafka streams is transformed into staging models, which are then transformed into dimension and fact tables as well as event and session-scoped OBTs.

Snowflake dbt models lineage graph
For ClickHouse, since the data is streaming from Kafka real-time, the dbt model is used to create a view per each stream.
The application/eventsim folder contains the source data application code, the application Dockerfile, and the schemas for Confluent (if you wish to use them).
The infrastructure folder contains relevant Terraform code to start up the application - WIP on hold for now.
The warehouse/clickhouse folder contains the ClickHouse dbt project with each of the 4 Kafka streams defined as views and a Dockerfile for the dbt project image to run in ECS.
The warehouse/clickhouse folder contains the ClickHouse dbt project with each of the 4 Kafka streams transformed into staging models, dimension and fact tables and OBTs, as well as a Dockerfile for the dbt project image to run in ECS.
- A Dockerfile is provided to build eventsim to run as required
- Add a file for storing environment variables. We recommend doing this in the
application/eventsimfolder for local development - This file must have the following schema:
# Required connection configs for Kafka producer, consumer, and admin
# bootstrap.servers
BOOTSTRAP_SERVERS=<YOUR CONFLUENT URL AND PORT>
# security.protocol
SECURITY_PROTOCOL=SASL_SSL
# sasl.jaas.config
SASL_JAAS_CONFIG=org.apache.kafka.common.security.plain.PlainLoginModule required username='<YOUR CONFLUENT API ID>' password=<YOUR CONFLUENT API KEY>;
# sasl.mechanism
SASL_MECHANISM=PLAIN

# Required for correctness in Apache Kafka clients prior to 2.6
client.dns.lookup=use_all_dns_ips

# Best practice for higher availability in Apache Kafka clients prior to 3.0
session.timeout.ms=45000

key.serializer=org.apache.kafka.common.serialization.ByteArraySerializer
value.serializer=org.apache.kafka.common.serialization.ByteArraySerializer

# Best practice for Kafka producer to prevent data loss
acks=all- Build the Docker image. At the moment, the following command is used:
CMD ./bin/eventsim -c configs/Guitar-config.json --from 90 --nusers 20 -k 1. This will simulate 90 prior days of data, with 20 fake users. Feel free to change these as required. Keep the -k parameter to publish to Confluent, or remove it to output to file only. - If running locally, use
docker run --env-file=.env -t <YOUR IMAGE TAG>to include environment variables
- Sign up for a free Confluent trial.
- Within Confluent, create an Environment with default settings. Make sure you enable Schema Registry in your environment to enable the Snowflake Kafka connector.
- Within your Environment, create a Cluster.
- Within the Cluster, go to Topics to set up the relevant topics -
auth_events,listen_events,page_view_events, andstatus_change_events.
- Sign up for a free Snowflake trial. Make sure to create your trial account in the same region as your Confluent account. Log into your Snowflake account.
- In order to create a Snowflake Sink Connector, within Snowflake, set up the necessary connection authentication key-pair, Snowflake database, schema, user role per these instructions.
- Within Confluent, in your Cluster, go to Connectors, create a Snowflake Sink Connector, enabling streaming for the topics and fillng in the necessary credentials and settings to start streaming.
-
Sign up for a Clickhouse trial.
-
Create four tables in Clickhouse's
defaultdatabase - the scripts to create these are in the warehouse/clickhouse/table-definitions folder:auth_eventslisten_eventspage_view_eventsstatus_change_events
-
Create four HTTP sinks in Confluent - one for each topic/table created in a previous step. These must have the following configuration:
- HTTP URL:
https://<YOUR CLICKHOUSE URL>:8443?query=INSERT%20INTO%20default.table_name%20FORMAT%20JSONEachRow(wheretable_name= the topic you're sinking) - Username: default
- Password: Your Clickhouse password
- Endpoint Authentication Type: BASIC
- Input Kafka record value format: JSON
- HTTP Headers: Content-Type: application/json
- Request Body Format: json
- Batch Max Size: 1000
- HTTP URL:
Start up your virtual environment as necessary and install dbt via the command pip install dbt-core and then also install the Snowflake and ClickHouse connectors (pip install dbt-snowflake, pip install dbt-clickhouse).
There are task definitions in both Clickhouse and Snowflake dbt projects to allow automated deployment to an Amazon ECS cluster. These tasks must be created manually in ECS first, with the same names as defined in the prod and preprod task definitions.
The following secrets must be set up to run the CI/CD pipelines properly:
AWS_ACCESS_KEY: Your AWS access key IDAWS_SECRET_KEY: Your AWS secret keyCH_HOST: Clickhouse instance URL (not including port - this is configured in profiles.yml)CH_PASSWORD: Clickhouse instance passwordDBT_PROFILE_SNOWFLAKE_ACCOUNT: Snowflake instance URLDBT_PROFILE_USER: `Snowflake account usernameDBT_PROFILE_PASSWORD: Snowflake account password
These are all injected into various environment variables etc. during the build and deploy process.


