
Self-racing robot using either ceiling lights or traffic cones to localize. Very much a work in progress and documentation will always be severely lacking as this is a constantly moving target!
This is my ongoing entry in the quarterly DIY Robocars competition in Oakland, CA.
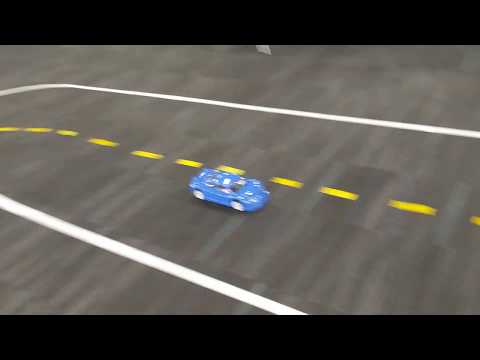
I've switched to a 1/10th scale touring car (for flat ground courses) as it handles much better and also eliminates the very finicky wheel encoders used on the Rustler.
Touring car:
- HobbyKing Blaze R2 ($99)
- Turnigy TrackStar 9.5T sensored brushless motor 4120KV ($34)
- Turnigy TrackStar 80A brushless sensored ESC ($40)
- TrackStar TS-411MG digital servo ($17)
- Basher 6600mAh 2S2P 40C hardcase LiHV pack ($38) (smaller batteries are fine, but I like being able to run the computer all day on one charge)
- Tires appropriate for track (Schumacher Racing SST Mini Pins are the way to go on carpet)
Electronics:
- Raspberry Pi 3 B ($35)
- SanDisk Ultra 32GB microSDHC UHS-I Card ($9) -- it's important to have the right kind of SD card or it won't keep up with recordings, and it's hard to tell ahead of time which ones will work.
- Arducam OV5647 Raspberry Pi 3 camera with LS-40180 fisheye lens ($30)
- ILI9340 SPI 240x320 LCD display, via the fbtft device driver (about $7)
- Some XT60 plugs and an extra 6-wire brushless sensor cable (~$10)
- Logitech F710 wireless game pad w/ USB dongle (~$40)
- Custom HAT board w/ STM32F030 and ICM-20600 IMU: https://easyeda.com/a1k0n/cycloid (PCB + parts is about $5 apiece in qty 10 from JLPCB / LCSC, plus you have to solder it all together)
Total hardware cost for the car comes to under $350, plus the cost of the wireless controller (~$40).
Besides the RC car, there are three 3D-printed parts to mount the camera and
electronics for various cars (Blaze R2, Traxxas Rustler, Exceed Magnet,
WLToys K989). I drill and tap 2.5mm screw holes in most of them. These are
all modeled in OpenSCAD and source code and .stl files are in hw/scad/.
There is a mandatory configuration file called cycloid.ini which allows you
to specify the mode of communication to the ESC and servos (Cycloid HAT
board, GPIO pins supported; code also exists for Teensy and PCA9685) as well
as specify which IMU (all Invensense MPU-9x50, MPU-6050, ICM-2060x supported)
See cycloid.ini.example for full details.
-
tools/ceilslamhas code to turn a datalog saved from the car into a birds-eye view of the track based on ceiling light tracking and reprojecting the pixels which can see the floor. -
tools/trackplan/gui.pycontains a Dear Imgui-based application for defining a racetrack boundary (and cone locations) given a birdseye view of the track. It can also get a birdseye view of the track given two different views and matching sets of points.
Can be compiled on a host PC with a cross compiler (e.g. on macOS you can install this: https://www.jaredwolff.com/toolchains/) or on the Raspberry Pi itself.
If you want to build the code, clone with git clone --recursive https://github.com/a1k0n/cycloid in order to get the Raspberry Pi userland
submodule (otherwise just run git submodule init and git submodule update).
Here's how I build it:
Once you have a raspberry pi cross compiler (see two paragraphs above), edit
crosscompile.cmake to point to the correct compiler name / path, and do this:
$ mkdir build
$ cd build
$ cmake -DCMAKE_TOOLCHAIN_FILE=../crosscompile.cmake ../src -DCMAKE_BUILD_TYPE=RelWithDebInfo
$ make -j4
The main executable will be in build/drive/drive; scp that to your raspberry
pi on the car, create a cycloid.ini, pair a joystick, and run it.