$implify - Winner of the Sunlife Challenge at ConUHacks VII
As students and also as young adults, we sometimes find it difficult to properly track our expenses through our hectic lives. We thought it would be a great idea to create an application that would take care of tracking all of your finances throughout however many banks and accounts you have and centralize everything into one main application that can not only be simple to follow but also helpful in giving tips in saving money and getting more for your buck.
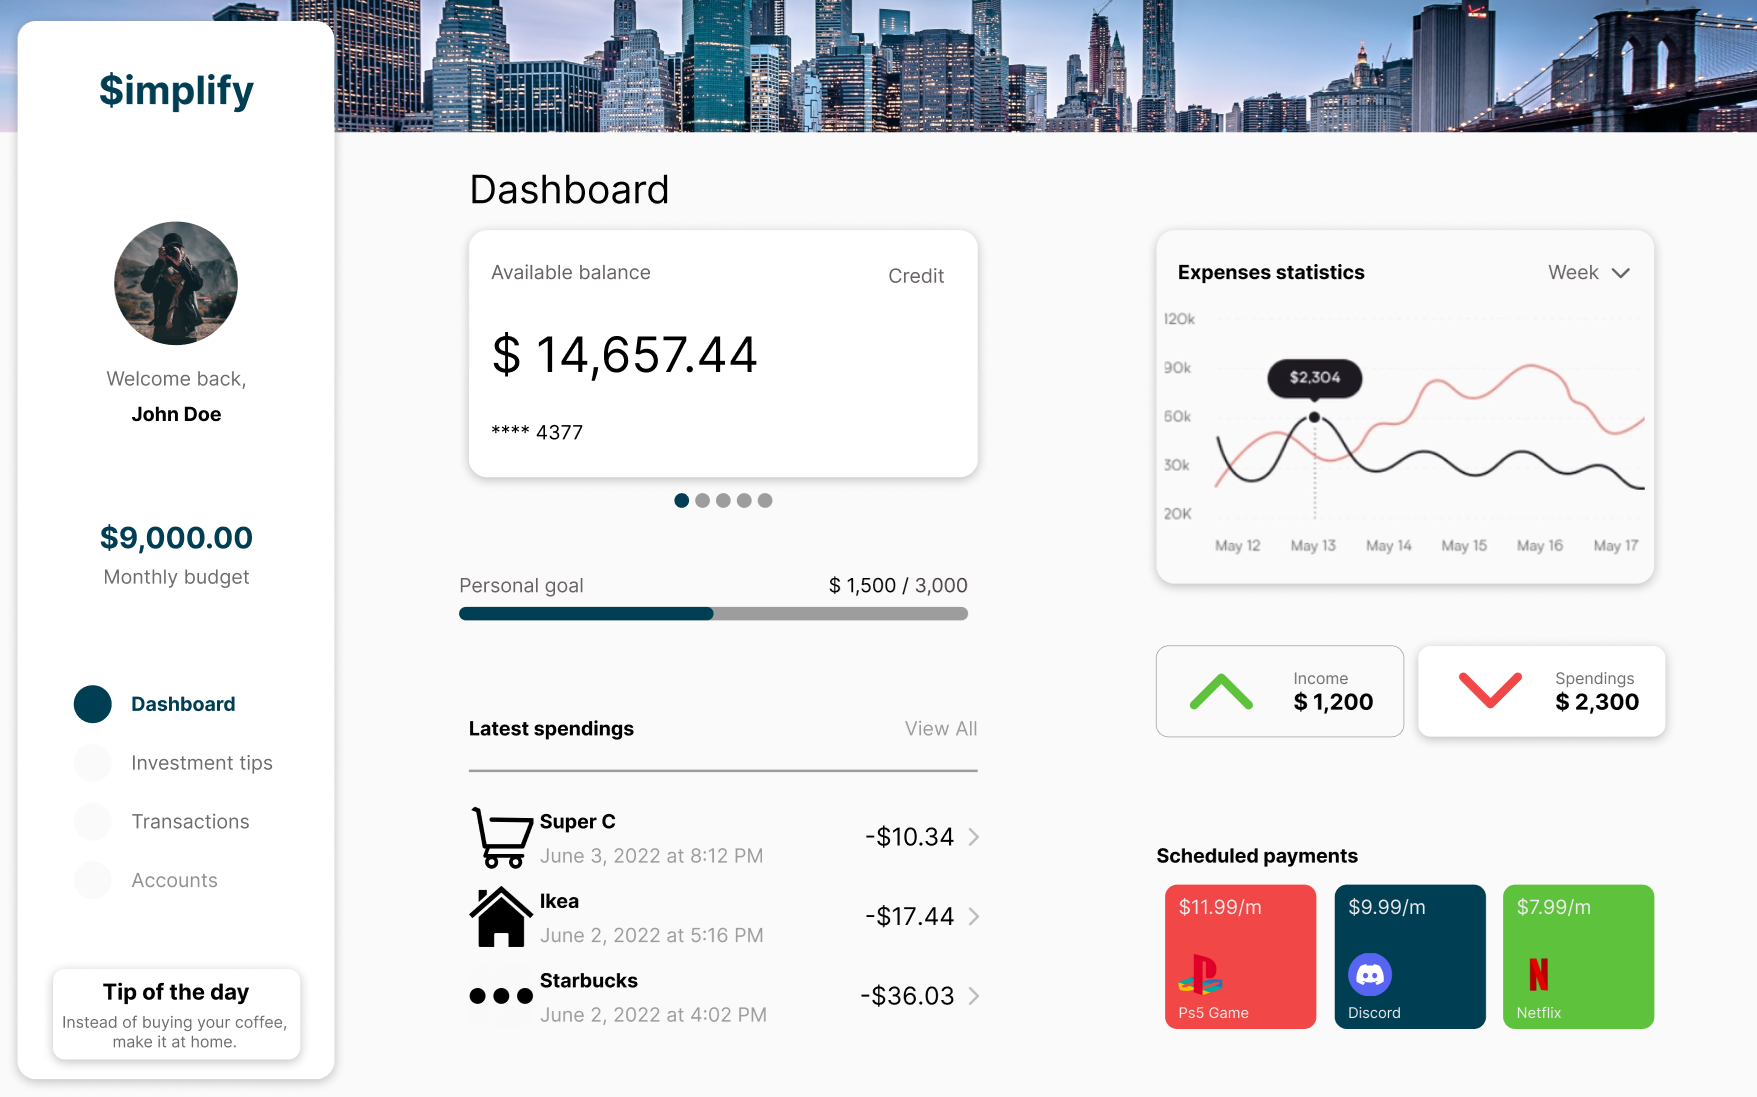
$implify allows a user to enter all their debit and credit cards as well as saving accounts from any bank they want into their account. Those cards will then be cross-tracked and each transaction will be added to the interface. You, as a user, will be able to receive tips on where to save some money with the use of our sophisticated AI that will analyze and recommend cheaper alternatives based on your spending habits. You will also be able to enter your recurring bills such as phone, rent, streaming accounts, and even your paychecks. $implify will then be able to generate detailed graphs showing your income and expenses over various periods and will be overlayed by a second graph that will show you the potential money you could have saved by following our tips.
For the front end, we decided to go with React.JS for the development and we created all of our wireframes using Figma. We used the Django and Django REST Framework for the back end of our application. We used OpenAI's API to analyze and generate recommendations based on user trends. We used Trello to keep track of our tasks and follow each other's progress in the development of the application.
The time frame showed itself difficult to follow as this was our first Hackathon. We ran into some time constraint issues due to the large scope of our application.
We are very proud of our use of so many technologies, especially the use of OpenAI's API. We are happy that we not only made a product that we are proud of but also would love to use in our own lives as those are issues that we face in our own lives. We are also proud of our easy and intuitive UI/UX design that makes the application approachable and easy to use.
We learned a lot about how to manage a large project in such a small time frame. We made some mistakes, as any first-time Hackathon participant would do, but we are happy to say that we are going learn from our mistakes and come back stronger for our next Hackathon!
We will continue the development of $implify on our own time in the future as we are all very interested and committed to the realization of the project. We believe that $implify can show itself very useful to people of all ages and backgrounds but mostly for young adults that might get overwhelmed by the very large and complicated world of self-finance.
Python: Django, Django Rest Framework. JavaScript: React.js. Figma, GitHub, OpenAi, SQLite, Trello
In order to run this application locally on your machine you will need to open a command prompt or a terminal window inside of your IDE of choice and navigate to the location of the Simplify project using 'cd'. Then, enter these following commands in order:
- cd frontend
- npm i --force
- cd ../backend
- python3 -m venv ./env
- source env/bin/activate
- pip install -r requirements.txt
After entering these commands you will need to create a file called '.env' in the simplify folder inside of the backend folder. Then, enter those lines in the newly created file:
SK=somerandomstringthatdoesnotmatter
DEBUG=True
OPEN_AI_API_KEY=your_own_open_ai_api_key
To properly run the application, you will need to navigate to 'https://platform.openai.com/account/api-keys' and login or create yourself an account. Then, you will simply have to click the 'Create new secret key' button and copy the value generated. Go back into the '.env' file you created and replace the 'your_own_open_ai_api_key' with the value that you just generated. Once you are done entering these lines in the file and saved your changes, enter those next commands in the Terminal:
- ./manage.py migrate
- ./manage.py runserver
Finally, open a second Terminal window and navigate back to where your Simplify folder is located on your machine using 'cd' and run those commands:
- cd frontend
- npm start
You are done! Everything should now be working properly. You can now go into a web browser and enter 'http://localhost:3000/dashboard' to see the website. Keep in mind that everytime you will want to see/use the website after closing your machine, you will have to enter the 'source env/bin/activate' command followed by the './manage.py runserver' command inside of the 'backend' folder and the 'npm start' command inside of the 'frontend' folder in order to do so.