-
Notifications
You must be signed in to change notification settings - Fork 23
Install on Centos 7
To complete this tutorial, you will need:
- A newly deployed Vultr Centos 7 Instance.
- A non-root user with
sudoaccess.
Create the file /etc/yum.repos.d/nginx.repo in a text editor and add the following:
[nginx]
name=nginx repo
baseurl=http://nginx.org/packages/mainline/centos/7/$basearch/
gpgcheck=0
enabled=1
Update yum and install NGINX
sudo yum update
sudo yum install nginx
Enable Nginx to start automatically on reboot:
sudo systemctl start nginx
sudo systemctl enable nginx
If you are running a firewall, run the following commands to allow HTTP and HTTPS traffic:
sudo firewall-cmd --permanent --zone=public --add-service=http
sudo firewall-cmd --permanent --zone=public --add-service=https
sudo firewall-cmd --reload
In order to check if Nginx is running, you can visit your IP address via the browser:
http://server_domain_name_or_IP/
Install MariaDB and other "helper" packages:
sudo yum install mariadb-server mariadb
Once the installation is complete, we need to start MariaDB with the following command:
sudo systemctl start mariadb
Next, we need to remove some defaults that are dangerous to use in a production environment. To do this, we have to run the script called "mysql_secure_installation"
mysql_secure_installation
It will prompt you for the root password you set up during installation. then, you will be asked a series of questions, beginning with if you'd like to change the root password.
You should answer "Y" (for yes) to all of the remaining questions.
The last thing you will want to do is enable MariaDB to start on boot. Use the following command to do so:
sudo systemctl enable mariadb
At this point, your database system is now set up and you can move on to installing PHP.
Install PHP packages:
sudo yum install php php-cli php-mysql php-fpm php-zip
Next, tell PHP to only accept URIs for files that actually exist on the server:
sudo sed -i 's/;cgi.fix_pathinfo=1/cgi.fix_pathinfo=0/g' /etc/php.ini
PHP is set to run under the apache user by default, so we need to change the user and group variables in www.conf:
sudo sed -i 's/user = apache/user = nginx/g' /etc/php-fpm.d/www.conf
sudo sed -i 's/group = apache/group = nginx/g' /etc/php-fpm.d/www.conf
Before installing Composer, you'll need to install the necessary dependencies. To do so, run:
sudo yum curl unzip
Make sure you're in the temp directory
cd /tmp
Download Composer using curl:
sudo curl -sS https://getcomposer.org/installer | php
Make Composer globally accessible:
mv composer.phar /usr/local/bin/composer
You can confirm that you have installed Composer correctly by running the following command:
composer
Download and install Git:
sudo yum install git
To test your installation, run:
git --version
Enable EPEL Repository:
sudo yum install epel-release
Now that you have access to the EPEL repository, you can install Node.js using your regular yum commands:
sudo yum install nodejs
Install npm (Node.js package manager):
sudo yum install npm
By following all the previous instructions, you now have all the basic server dependencies required for the application installation.
To create a MySQL database for our application and a user associated with it, you need to access the MySQL client using the MySQL root account:
mysql -u root -p
Enter the appropriate password, which should be the same password used when running mysql_secure_installation.
Create database with:
CREATE DATABASE vultrdash_db;
You have successfully created your application database.
Execute the following command to create a MySQL user and password. You can change the username and password to something more secure:
CREATE USER 'vultrdash-admin'@'localhost' IDENTIFIED BY 'password';
Allow complete access to the vultrdash_db database for the vultrdash-admin user:
GRANT ALL PRIVILEGES ON vultrdash_db.* TO 'vultrdash-admin'@'localhost';
The vultrdash-admin now has all privileges on all the tables inside the vultrdash_db database. To reload the grant tables and apply changes, you need to perform a flush-privilege operation using the flush statement:
FLUSH PRIVILEGES;
You are done creating a new user and granting privileges.
First, create a directory that will serve as the root directory for the application:
sudo mkdir -p /var/www/example.com
If want to work with the project files using a non-root user account, you’ll need to change the folder owner and group by running:
sudo chown yassine:yassine /var/www/example.com
Replace yassine with your sudo non-root username.
Now, you can move into the www directory and clone the application repository on GitHub using git:
cd /var/www
git clone https://github.com/Qoraiche/Vultrdash.git vultrdash
Install PHP dependencies and optimize class autoloader map using composer:
composer install
Install Node.js dependencies using npm:
npm install
Copy and rename the configuration file:
cp .env.example .env
The next thing you should do after creating the configuration file is to set your application key to a random string:
php artisan key:generate
The application is now set. In the next step, you will configure the web server.
You will now configure the web server by creating a new application server block, instead of editing the default one.
Disable the default site configuration provided with the package as an example:
sudo mv /etc/nginx/conf.d/default.conf /etc/nginx/conf.d/default.conf.disabled
Application configuration files should be kept in /etc/nginx/conf.d/. Create a configuration file for your site. and replace example.com with your site’s domain:
sudo nano /etc/nginx/conf.d/example.com.conf
Add the following content to the new server block configuration file:
server {
    listen 80;
    server_name example.com www.example.com;
    root /var/www/example.com/public;

    add_header X-Frame-Options "SAMEORIGIN";
    add_header X-XSS-Protection "1; mode=block";
    add_header X-Content-Type-Options "nosniff";

    index index.html index.htm index.php;

    charset utf-8;

    location / {
        try_files $uri $uri/ /index.php?$query_string;
    }

    location = /favicon.ico { access_log off; log_not_found off; }
    location = /robots.txt  { access_log off; log_not_found off; }

    error_page 404 /index.php;

    location ~ \.php$ {
        fastcgi_split_path_info ^(.+\.php)(/.+)$;
        fastcgi_pass unix:/var/run/php/php7.2-fpm.sock;
        fastcgi_index index.php;
        include fastcgi_params;
    }

    location ~ /\.(?!well-known).* {
        deny all;
    }
}
Save the file and exit the editor.
Open the .env file (located in /var/www/example.com) using your favorite text editor (e.g. with nano: sudo nano .env), and follow the steps bellow:
Add the following lines to the file to configure the production application environment:
APP_ENV=production
APP_DEBUG=false
APP_ENV is an environment variable that specifies that the application is in production, while APP_DEBUG is an environment variable that specifies if the application should run in debug mode or not. You have set it to false for now.
In order to retrieve data from the application’s database you created earlier, you will need to set up and configure the required database credentials from within the Vultrdash application.
DB_CONNECTION=mysql
DB_HOST=127.0.0.1
DB_PORT=3306
DB_DATABASE=[YOUR_DB_NAME]
DB_USERNAME=[YOUR_DB_USERNAME]
DB_PASSWORD=[YOUR_DB_PASSWORD]
Since the application using Vultr API, you will need to enable your personal access token within your vultr account (Members Area → Account → Settings API).
Add the generated access token to the VULTR_AUTHKEY environment variable:
VULTR_AUTHKEY=[YOUR_API_KEY]
To receive notifications on your slack channel, you will need to configure an "Incoming Webhook" integration for your slack team. this integration will provide you with a URL which you can add to the NOTIFICATION_SLACK_WEBHOOK_URL environment variable:
NOTIFICATION_SLACK_WEBHOOK_URL=[YOUR_WEBHOOK_URL]
The .env file will look something like this:
APP_NAME=Vultrdash
APP_ENV=production
APP_KEY=base64:u1uwAyrR2NvyMdQAq/6VUc8uDkMUtO42ORMnkRY2agQ=
APP_DEBUG=false
APP_URL=http://localhost

LOG_CHANNEL=stack

VULTR_AUTHKEY=[YOUR_API_KEY]

NOTIFICATION_SLACK_WEBHOOK_URL=[YOUR_WEBHOOK_URL]

DB_CONNECTION=mysql
DB_HOST=127.0.0.1
DB_PORT=3306
DB_DATABASE=[YOUR_DB_NAME]
DB_USERNAME=[YOUR_DB_USERNAME]
DB_PASSWORD=[YOUR_DB_PASSWORD]

.....
Save the file and exit the editor.
Combine all of application's configuration files into a single, cached file:
php artisan config:cache
You can now use Artisan to update your database with the tables from the application. Run this command to do that:
php artisan migrate
After setting up the required credentials and updating the database schema, you can now easily interact with the database.
In order to start the application with some data, you will load a set of dummy data into the database:
php artisan db:seed
You just concluded the last step required to successfully deploy the Vultrdash application. you configured the web server by creating a server block and properly set the web root in order to make the web application accessible then you built the application database.
Finally, reload Nginx web server:
sudo systemctl reload nginx
You can now run and test out the application. Visit http://your_server_ip in your favorite browser, then log in using the default administrator login credentials:
email: [email protected]
password: admin
Remember to change the default login credentials.
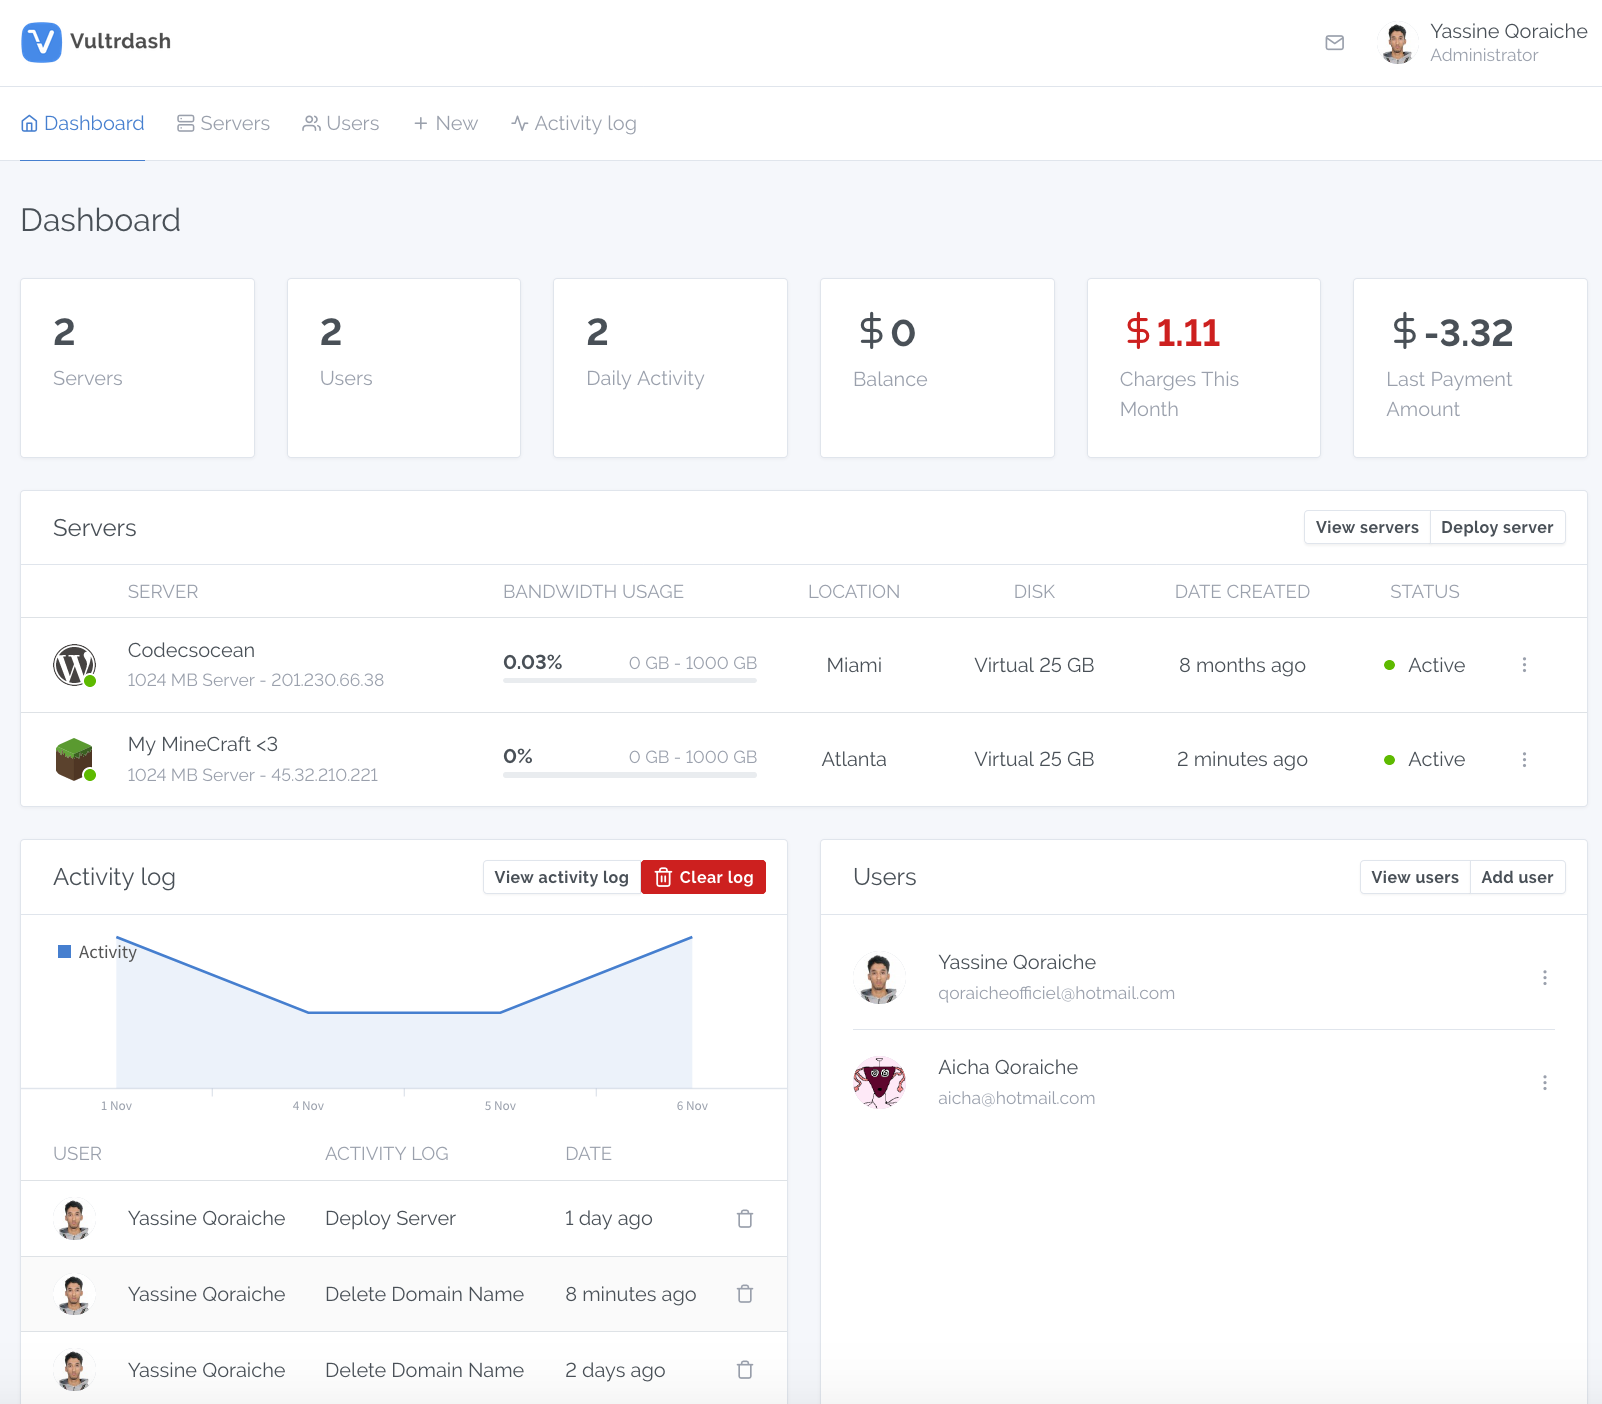
The following image is the screenshot of the Vultrdash application that you should see at your server's IP address:
img[/img]