Blender Addon for building ready-to-export copies of avatars in a scene. The included options are based on my own personal Blender workflow.
There are two main purposes to this addon:
- Quick combining of parts of a work-in-progress avatar so that it can be exported for testing in Unity or other software
- Producing multiple slightly different avatars from a single .blend file, such as one version of an avatar for VRChat and a slightly different version for VRM
- Download: https://github.com/Mysteryem/AvatarBuilder/archive/refs/heads/master.zip
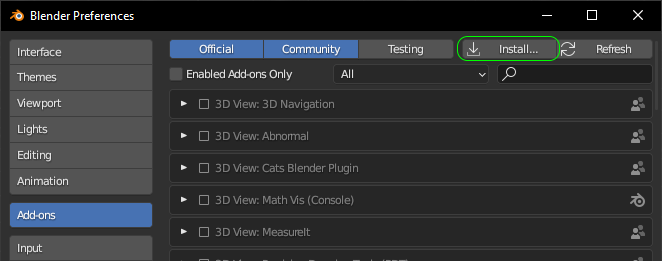
- Go to Edit > Preferences > Add-ons > Install...
- Find the download .zip, select it and click "Install Add-on"
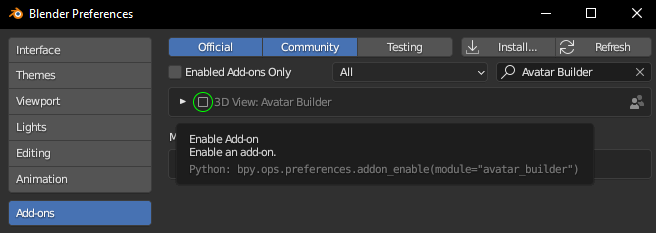
- Enable the addon by clicking the tickbox
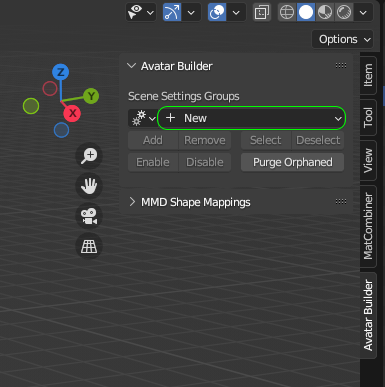
- You should now have an
Avatar Buildercategory in the right shelf of the 3D view (toggle the right shelf withn)
To update the addon, follow the same steps as installation, but either disable or remove the current version of the addon before replacing it with the new version.
Alternatively, after following all the installation instructions, disable the addon and then re-enable it to cause it to reload with the new version.
When updating, make sure to close the Pose Library Asset Picker if the active object is an armature set to use a Pose Library Pose, close any UI popups from the addon and finish using any Operators from the addon, otherwise Blender might crash.
Blender 2.93 or newer (Blender 3.0 or newer is reccomended and may be required in the near future)
Optional integration with Cats Blender Plugin for translating MMD shape keys
Optional integration with Gret for applying modifiers to objects with shape keys
- Create a new settings group from the 3D View
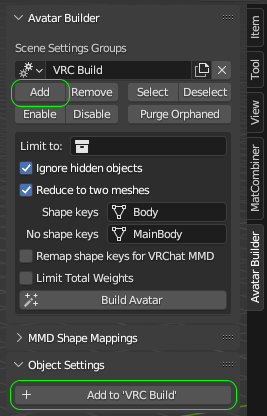
- Add selected objects or the active object to the active settings group
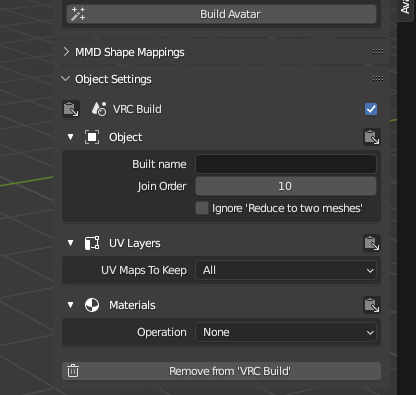
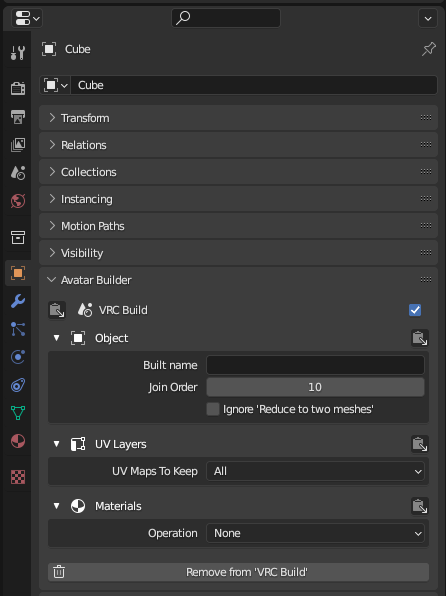
- Individual object settings can be set from either the panel in the 3D View or Object Properties. Depending on the type of object and what types of data the object has (shape keys, vertex groups etc.), different expandable regions of settings will be shown.
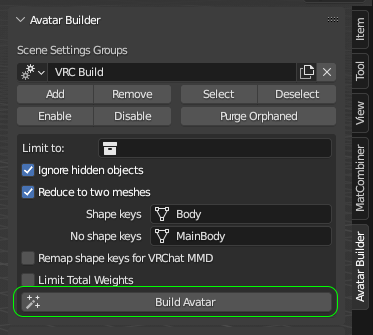
- Click Build Avatar to duplicate all objects and their data that are in the active settings group into a new 'export scene' and build the avatar based on the individual object and scene settings.
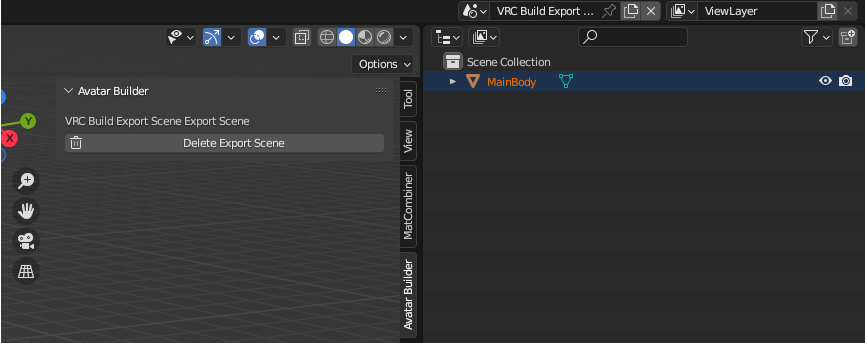
Once you're done exporting the built avatar, clicking Delete Export Scene will delete the 'export scene', all objects in it and all of those objects' data. Adding extra objects or object data to the 'export scene' is not recommended, since Delete Export Scene will delete those too, regardless of whether they are used by other scenes.
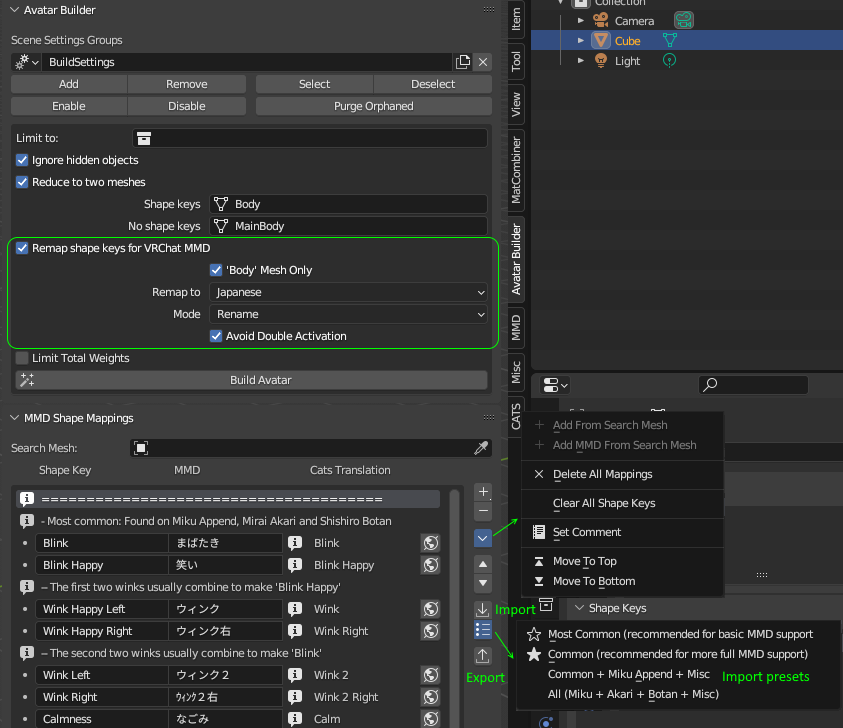
Avatar Builder lets you set up shape key mappings intended for use with MMD dance worlds in VRChat, letting you rename or duplicate and rename shape keys to match those used by MMD dance worlds.
MMD Shape Mappings are set per scene and can be transferred between .blend files by using the export and import buttons. You can also use these buttons to effectively create and use your own preset mappings instead of using the presets included with the addon.
Sets of preset mappings based primarily on the available shape keys in the TDA Miku Append v1.10, Mirai Akari and Shishiro Botan models are supplied. The 'Shape Key' provided by each mapping from these presets is only a suggestion of what the shape key could be called on your mesh, you can clear the 'Shape Key' column from the mappings by clicking on Clear All Shape Keys in the drop down menu.
MMD Shape Mappings can be applied to selected meshes without using the Build Avatar functionality by clicking on Apply MMD Mappings from the Tools panel when in Object mode.
Comments can be added to a mapping by clicking Set Comment (also works to edit existing comments). If a mapping already has a comment, you can hover over the in-line 'i' icon to view the comment, or click the 'i' icon to edit the comment.
If a mapping contains only a comment, the comment will be displayed across the columns and can be edited by double clicking or ctrl+clicking on the comment text.
The main purpose of having Cats Translations is when the Avoid Double Activation setting is enabled. Some MMD dances support both the Japanese MMD shape keys names and the corresponding Cats translations, if your avatar has both the Japanese MMD name and Cats translation for a shape key, those dances will activate both shape keys at the same time. Avoid Double Activation will check for when your avatar has shape keys like this and will rename the one you're not intending to use (by default, shape keys are mapped to the Japanese MMD name, so the shape key matching the Cats translation will be renamed).
The Cats Translation buttons can only be used if you also have the Cats Blender Plugin installed. The Cats Translation column can be edited manually by double clicking or ctrl+clicking on it.
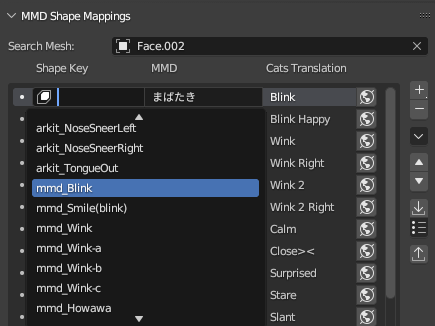
The Search Mesh can be set to any mesh with shape keys. When set, clicking on the Shape Key of a mapping will prompt you to pick a shape key from that mesh instead of requiring you to type in the shape key name manually.
Additionally, Add From Search Mesh and Add MMD From Search Mesh in the drop down menu can be used to create new mappings from the shape keys of the Search Mesh, setting the 'Shape Key' or the 'MMD' of each mapping depending on which was clicked. These are useful if you want to create your own preset mappings or want to create mappings without starting from a preset.
If a Shape Key doesn't exist on the Search Mesh, it will be displayed in red.
A few standalone tools are provided in the Tools panel of the Avatar Builder tab. The panel's contents and visibility will change according to your current mode.
Available in Object mode.
Opens a dialog for deleting objects in the current scene that aren't used by any other objects or data (other than collections and scenes). The default settings check only objects that aren't part of any Build, but it can be useful to check only objects that are selected/unselected or hidden/visible.
Available in Object mode.
Applies the current MMD Shape Mappings to the selected meshes.
See the MMD Shape Mapping section for details.
Available in Pose mode and Weight Paint mode.
Delete the selected bones and merge their weights into their respective parents or delete the selected bones other than the active bone and merge their weights into the active bone.
This is very similar to the same tool available in Cats, except it finds the affect meshes like Blender, which are all meshes that have the armature in an armature modifier. It also works with multi-editing (more than one armature in Pose mode at a time).
Available in Pose mode and Weight Paint mode.
Subdivide the selected bones and their weights across the length of the subdivided bone.
This is very similar to first subdividing a bone in Edit mode and then swapping to Weight Paint mode and drawing with the Gradient tool across two bones at a time. The actual Gradient tool ignores locked vertex groups, which makes it very difficult to use it manually across only two bones at a time. The Subdivide Weights tool automates this process on all affected meshes.
When it draws the gradients, it will use the falloff of the specified Weight Paint Brush, defaulting to Smooth falloff if no Brush is specified. If using a custom falloff curve, it is recommended to ensure the curve starts at 1.0 and finishes at 0.0.
Like with the Subdivide operator found in Edit mode, that only subdivides bones and not weights, you can change the number of cuts through the Redo Toolbar Panel that appears in the bottom left of the 3D view.
Only Mesh and Armature objects are currently supported
Meshes that contain the same material in multiple material slots will have those slots combined. This is a limitation of Blender that happens when joining meshes. For consistency, this limitation will also be applied when a mesh isn't being joined with any other meshes.
Since object names are unique, when building an avatar, existing objects will be renamed if the built version of an object wants the same name as an existing object. The Built Name of the objects getting renamed will be set automatically to their old names if the Built Name has not already been set.
