GPSLogger is an Android app that logs GPS information to GPX, KML or text files and has options for annotating and sharing.
You can download it from Google Play.
You can download the APK directly from the releases. The oldest Android 2.x release is here.
You can help with translations
You can also submit pull requests for bug fixes and new features.
Licensed under GPL v2.
You can donate Bitcoins to 1ArYCJf8pvwELiCSGerih5NQrczLJQdJpY
The project is based on the new Android build system plugin for Gradle. Feel free to adopt and document your own OS and IDEs. These instructions are for Ubuntu Linux with IntelliJ 13.1.2 onwards.
Follow the instructions on the Android Developer Website to set up your computer for development.
On Ubuntu 64bit, you may also need ia32-libs, follow these instructions. I did not need this for Ubuntu 14.04.
Download and install IntelliJ IDEA Community Edition, which is free. Note that the Android build system version 0.9 does not work well with anything earlier than IntelliJ 13.1.2.
This project uses certain Google libraries, you will need to add them. Run
<AndroidSDK>/tools/android
Which brings up the Android SDK manager. In here, choose
- Tools > Android SDK build tools 19.0.3
- Extras > Android Support Repository
- Extras > Android Support Library
- Extras > Google Play services
- Extras > Google Repository
git clone git://github.com/mendhak/gpslogger.git
IntelliJ/Android Studio may not detect your ANDROID_HOME environment variable, so create a file called local.properties, pointing at your Android SDK directory.
cd gpslogger
echo "sdk.dir=/home/mendhak/Programs/Android" > local.properties
Open up IntelliJ and choose to import a project. Select the topmost build.gradle file under GPSLogger.
If you get an Import dialog, choose to Import project from external model
On the next screen, choose the defaults and proceed (default gradle wrapper)
Give it a minute and IntelliJ/Gradle will configure the projects and download the various libraries.
IntelliJ may not know where your Android SDK is. You can find this under File > Project Structure... where you should set the Project SDK. You will want to use Java 1.6 with Android 4 or above.
Create a test.xml in the project at res/values/test.xml with an empty resources tag
<resource />
This file can be used to store OAuth keys if you want OpenStreetMap and DropBox functionality (below). This file is ignored in the .gitignore file and will not be committed.
Sign up for an account with OpenStreetMap and log in.
Click on 'oauth settings'
Click on 'Register your application'
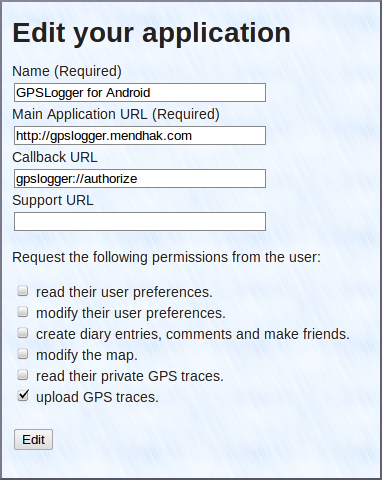
Fill in the form with these details
After registering the application, you will receive a 'Consumer Key' and a 'Consumer Secret'. Place the keys in your test.xml like this:
<string name="osm_consumerkey">ABCDEF</string>
<string name="osm_consumersecret">GHIJKLMNOP</string>
Sign up for an account with Dropbox.com
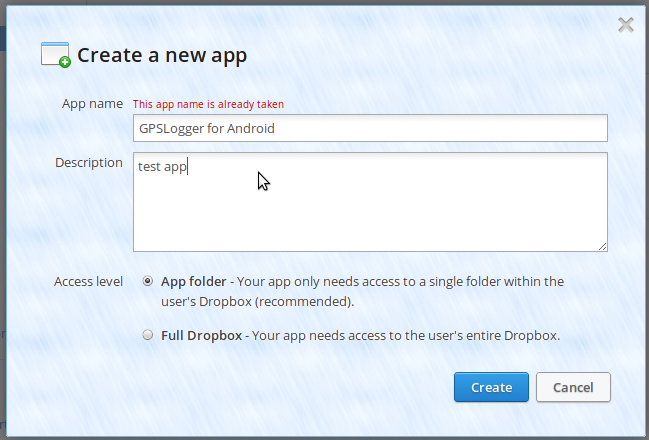
Go to the Dropbox Developers page and click on 'Create an App'
Use these settings, but choose a unique name
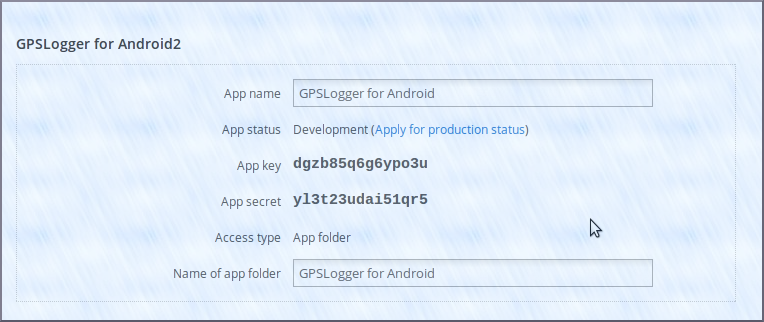
After creating the app, you will receive an app key and secret (the ones in the screenshot are fake)
Add the Dropbox app key to your test.xml file
<string name="dropbox_appkey">12341234</string>
<string name="dropbox_appsecret">abcdabcdefg</string>
Replace the Dropbox app key to your AndroidManifest.xml file
<!-- Change this to be db- followed by your app key -->
<data android:scheme="db-12341234"/>
Go to the Google APIs Console and create a new project.
After registering a project, click on API Access and click the 'Create another Client ID' button
Choose "Installed Application" and then under Installed Application Type, choose "Android". Follow the instructions under Learn More to specify the package name and the SHA1 fingerprint of your debug certificate.
The Google Docs feature requires the Google Play Services Framework, so ensure that the emulator you are using is Android 4.2.2 (API level 17) or greater if you want to use this feature.
You can also debug directly against your phone - all phones Android 2.2 and above should have this framework installed.
This solution has a few Robotium tests. To run them, first ensure that you
have an emulator up and running or your phone is connected. In other words, adb devices should show a connected device.
Then run the tests using the gradle wrapper
./gradlew connectedAndroidTest --info
If a test fails and you want a little more info, you can add the stacktrace and debug flags
./gradlew connectedAndroidTest --debug --stacktrace
You can also try running the tests straight from the IDE. Right click on a test class such as GpsMainActivityTests
or on the src/test/java folder and choose to run it with the Android test instrumentation runner.
And you should get results in the Run tab.
You can run just the quicker @SmallTests using
./gradlew connectedAndroidTest -PtestSize=small --info
GPSLogger is composed of a few main components;
GPSLoggingService is where all the work happens. This service talks to the location providers (network and satellite). It sets up timers and alarms for the next GPS point to be requested. It passes location info to the various loggers so that they can write files. It also invokes the auto-uploaders so that they may send their files to Dropbox, etc.
It also passes information to the GPSMainActivity.
This is the main visible form in the app. It consists of several 'fragments' - the simple view, detailed view and big view.
It takes care of the main screen, the menus and passing information from the GPSLoggingService to the various fragments.
It also passes requests from the fragments to start or stop logging.
Floating about are two other objects. Session contains various pieces of information related to the current GPSLogger run,
such as current file name, the last known location, satellite count, and any other information which isn't static but is
needed for the current run of GPSLogger.
AppSettings is a representation of the user's preferences.
These objects are visible throughout the application and can be accessed directly by any class, service, activity or fragment.


