LSMviewer is a user-interface for calculating the Location Impact Score and Network Impact Score of post-stroke cognitive impairment and dementia, based on lesion-symptom mapping. It offers an online and a standalone version of the tool.
Detailed descriptions of the risk scores used:
- Location Impact Score: https://doi.org/10.1016/S1474-4422(21)00060-0
- Network Impact Score: https://doi.org/10.1161/STROKEAHA.119.025637
Information can also be found on the Meta VCI Map website: https://metavcimap.org/
Developing the application locally means hosting it on the user's device. The local server should work at this URL: http://127.0.0.1:8000. To do this, please follow the instructions below:
- Download or clone the main branch on your device, create and activate the virtual environment using conda on command prompt:
git clone -b main https://github.com/Meta-VCI-Map/LSMviewer
conda env create -f environment.yml
conda activate env
If the repository is already cloned on your device, pull the latest code by using
git pull origin main
LSMviewer/common.pycontains the general Django settings. The local server specific settings can be found inLSMviewer/development.py. Make sure that DJANGO_SETTINGS_MODULE looks for this file in order to run the application locally. Check this inmanage.py:
DJANGO_SETTINGS_MODULE = 'LSMviewer.development'
- Move into the directory of
manage.pyand create an.envfile containing the SECRET_KEY in the following form
SECRET_KEY = ' ... '
Then double-check that the name of this file is referred to in the .gitignore.
- To launch the server, you can run
python manage.py runserver
The local server is working at http://127.0.0.1:8000, as indicated by the LSMviewer/urls.py
If you want to change this URL, edit the urlpatterns in the above file.
To deploy the application on the remote server, please follow the instructions below:
- Log in at https://metavcimap.org:2223/
- Establish a connection with SSH. See more details at https://www.antagonist.nl/help/nl/webhosting/ssh
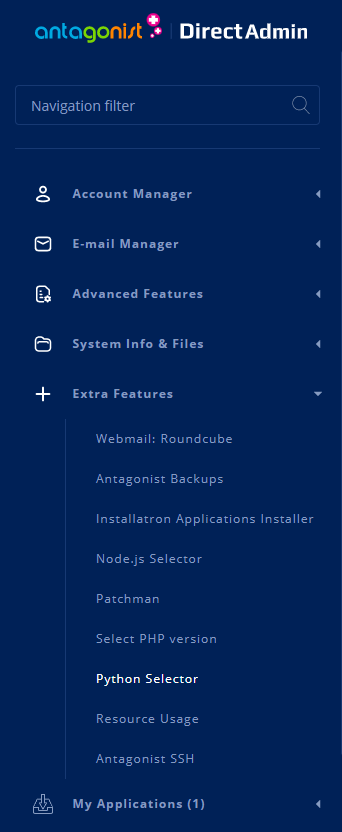
- From the Extra Features section, choose Python Selector to manage the Python application
More details on how Python applications are created are available at https://www.antagonist.nl/blog/beginnen-met-python/
- Activate the virtual environment by
source /home/[user]/virtualenv/lsmviewer/3.7/bin/activate && cd /home/[user]/lsmviewer
The required packages for the environment have been installed by pip install [package-name].
- The web application for the LSMviewer (metavcimap.org/lsmviewer) is already created on the server. The main branch is also cloned in this directory
git clone -b main https://github.com/Meta-VCI-Map/LSMviewer
git checkout main
Pull the latest version of the main branch by using:
git pull origin main
- The code from the GitHub repository can be found in /home/[user]/lsmviewer/LSMviewer/ and the logs file in /home/[user]/logs/lsmviewer.log. From this point onwards, some adaptations on the files have to be made; a new local branch has been created on the remote server (namelly
new_branch_2) to avoid pushing changes to the main branch. Please use
git checkout new_branch_2
when modifying the files on the server.
LSMviewer/common.pycontains the general Django settings. The remote server specific settings can be found inLSMviewer/production.py. Make sure that DJANGO_SETTINGS_MODULE looks for this file in order to run the application locally. Check this inwsgi.py:
DJANGO_SETTINGS_MODULE = 'LSMviewer.LSMviewer.production'
- Move into the directory of
manage.pyand create an.envfile containing the SECRET_KEY in the following form
SECRET_KEY = ' ... '
Then double-check that the name of this file is referred to in the .gitignore.
- Note that on the remote server, you are one directory deeper than on local server. The application should run from /home/[user]/lsmviewer/ but using the Git repository this path is extended by a directory: /home/[user]/lsmviewer/LSMviewer/. So, you will have to modify some parts of the code:
BASE_PATH = 'LSMviewer.'
prod_mode = True
papayaparams_userUpload["images"] = [
 "\\static/MNI152_T1_1mm_brain_uint8.nii",
 "\\static/{{ filename }}"
];
- The remote server is working at the Application URL defined in Python Selector, here at https://metavcimap.org/lsmviewer
- The public_html folder contains a folder with the same name as the application (here lsmviewer), where a
.htaccessfile is placed. This ensures that the server can find the application. In the same directory, folders with the names of the requests used from the application are placed containing.htaccessfiles as well. - Make sure to restart the application from https://metavcimap.org:2223/user/plugins/python_selector#/applications/lsmviewer if changes are applied on the files.
Adding new scores on the tool, requires some modifications in javascript/html and in python.
Handles the calculations in python. For the new score, create a function inside the RequestResultViewSet class that will handle the request for computing the score and will return the result in a json format.
Creates request URLs for the API endpoints. Add the path to which the request for the score calculation mentioned above will be found.
Handles what is shown on screen. For the new score, you can add an option to the form with id="selection_form".
Handles the flow of the operations in html. Add a funtion for the new score that will take as input the file which is uploaded by the user and that creates a POST ajax request looking at the API endpoint's URL previously inserted in the urls.py. This way, the new score will be linked to the correct function for calculation in the views.py.
As mentioned before, this folder ensures that the server can find the application. When adding new scores to the tool, new request URLs for the API endpoints need to be added as well, as described above. These URLs will be visible by the application only if you create subfolders in lsmviewer with the names of the requests and if you place a .htaccess file within.
Important notes:
- If you want to modify javascript or css files on the remote server make sure to do that in the
public_html/static/folder. The changes will not be visible if applied inLSMviewer/static/. For example, instead of modifying thestatic/riskScoreCalculation.js, make changes in thepublic_html/static/riskScoreCalculation.js. - Don't forget to restart the application if changes are applied.
As mentioned above, the local web application can be found at http://127.0.0.1:8000 and remote web application at the Application URL; on the Meta VCI Map website following this link: https://metavcimap.org/lsmviewer
The user can upload a binary mask of a brain infarct of size (182, 218, 182), visualize it on a 3D online viewer and select a risk score for calculation.
The results will be displayed on the screen. An excel file with the detailed results on the Network Impact Score can be downloaded on the user's device if desired.
LSMviewer is developed by Maria Leousi, on behaf of the Meta VCI Map consortium, University Medical Center Utrecht, The Netherlands.