


![]()
Firmware for BigTreeTech's dual-mode touchscreen 3D printer controllers
Warning : Edition for Ender 3 Pro with SKR mini E3 v2.0 and TFT 35 E3 v3.0 Touch screen. Special edition.

- Connect the TFT to the Mainboard
- Menus and Themes
- Update TFT Firmware
- Configuration
- Customization
- Troubleshooting
- Version History
Do the following, to be able to use the touchmode of your screen.
- Connect the 5pin serial cable according to the manual of your mainboard.
- Define a serial port in Marlin, to activate the port used by the TFT.
- Make sure the same BAUDRATE is defined in Marlin and the firmware of your TFT (config.ini)
Do the following, to be able to use the Marlin emulation mode of your screen.
A: In case your TFT does not have an EXP connector at all (TFT28 v1 for example), you can not use the Marlin emulator mode.
B: In case your mainboard provides EXP1 and EXP2, you have to connect 2 ribbon cables connecting EXP1 and EXP2 of the mainboard to EXP1 and EXP2 of the TFT. In the Marlin firmware of your mainboard, make sure that ONLY the "REPRAP_DISCOUNT_FULL_GRAPHIC_SMART_CONTROLLER" is activated in Configuration.h and that all other controllers (especially the "CR10_STOCKDISPLAY") are Deactivated.
C: In case you have an "E3" mainboard which provides a single EXP connector, you have to connect 1 ribbon cable connecting EXP of the mainboard to EXP3 of the TFT. In case your TFT does not provide an EXP3 connector but only two 10pin connectors (TFT24 v1.1 for example) you will need a "Y-split" cable with one 10pin connector on one side (for the mainboard) and two 10pin connectors on the other side (for the TFT). In the Marlin firmware of your mainboard, make sure that ONLY the "CR10_STOCKDISPLAY" is activated in Configuration.h and that all other controllers (especially the "REPRAP_DISCOUNT_FULL_GRAPHIC_SMART_CONTROLLER") are Deactivated.
| Classic Menu Main Screen | Unified Menu Main Screen |
|---|---|
 |
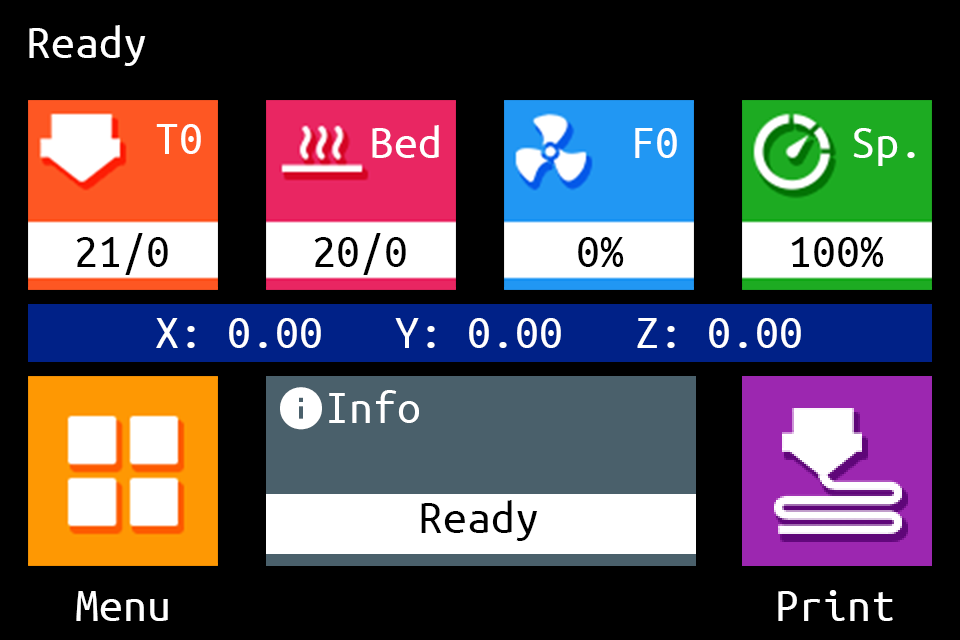 |
| In config.ini define: General Settings UNIFIED MENU / CLASSIC MENU # Select a UI Menu flavour # Options: [Unified Menu: 1, Classic Menu: 0] unified menu: 0 |
In config.ini define: General Settings UNIFIED MENU / CLASSIC MENU # Select a UI Menu flavour # Options: [Unified Menu: 1, Classic Menu: 0] unified menu: 1 |
| Unified Menu Theme | Hybrid Red Material Theme by AntoszHUN | The Round Miracle Theme by Acenotass |
|---|---|---|
|
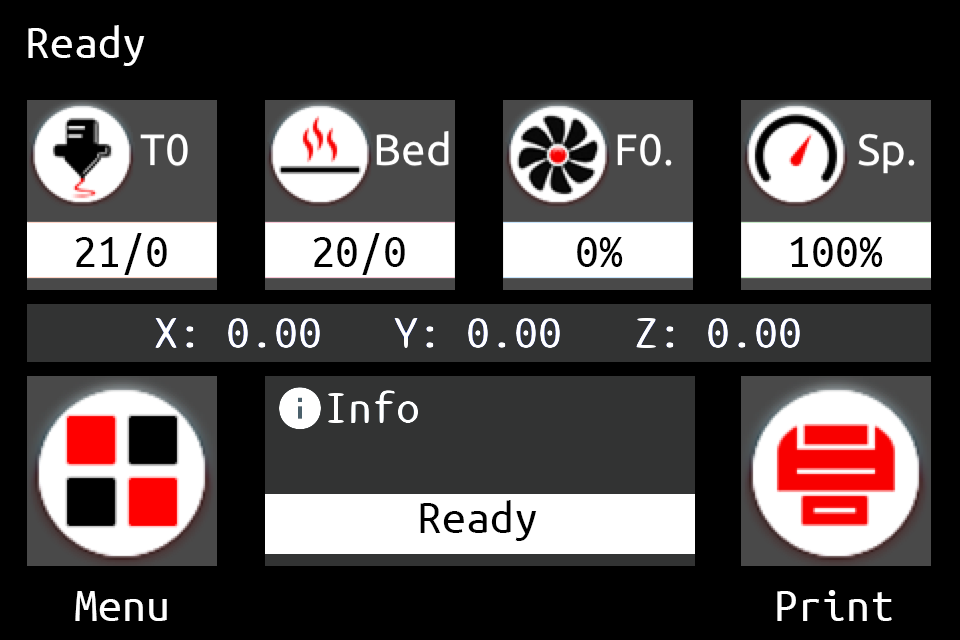 |
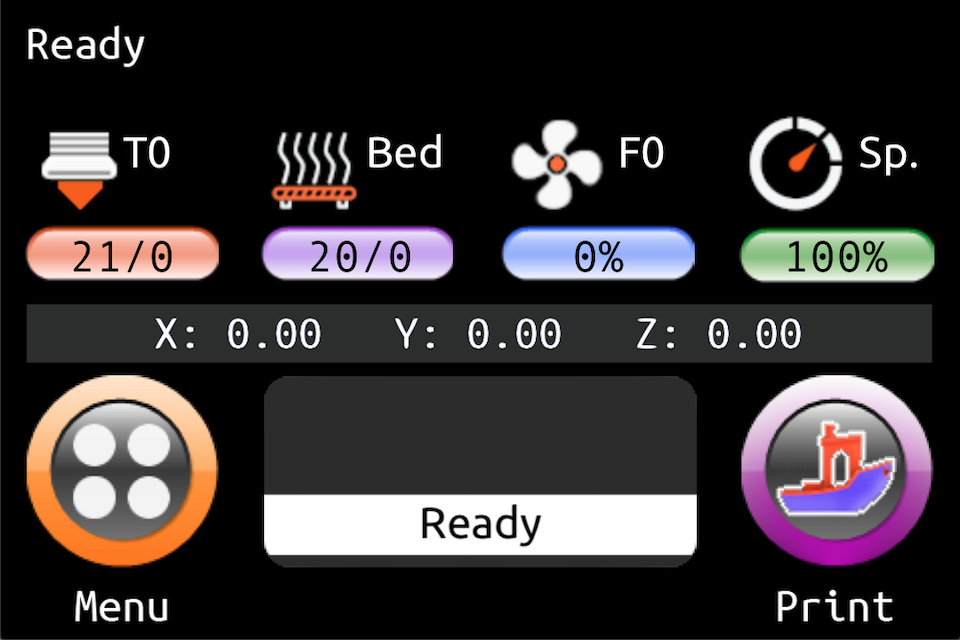 |
Use firmware, icons, and fonts from the Copy to SD Card root directory to update - Unified Menu Material theme folder |
Use firmware, icons, and fonts from the Copy to SD Card root directory to update - Hybrid Red Material theme folder |
Use firmware, icons, and fonts from the Copy to SD Card root directory to update - The Round Miracle theme folder |
TFT firmware updates are comprised of up to four elements:
- The firmware binary (
BIGTREE_TFT*_V*.*.*.bin). Example:BIGTREE_TFT35_V3.0.26.1.bin:BIGTREE_TFT_35: modelV3.0: hardware version26.1: software version
- Fonts and Icons (
TFT*folder):TFT*/font: fontsTFT*/bmp: icons
- The config.ini file
- Optionally a language file
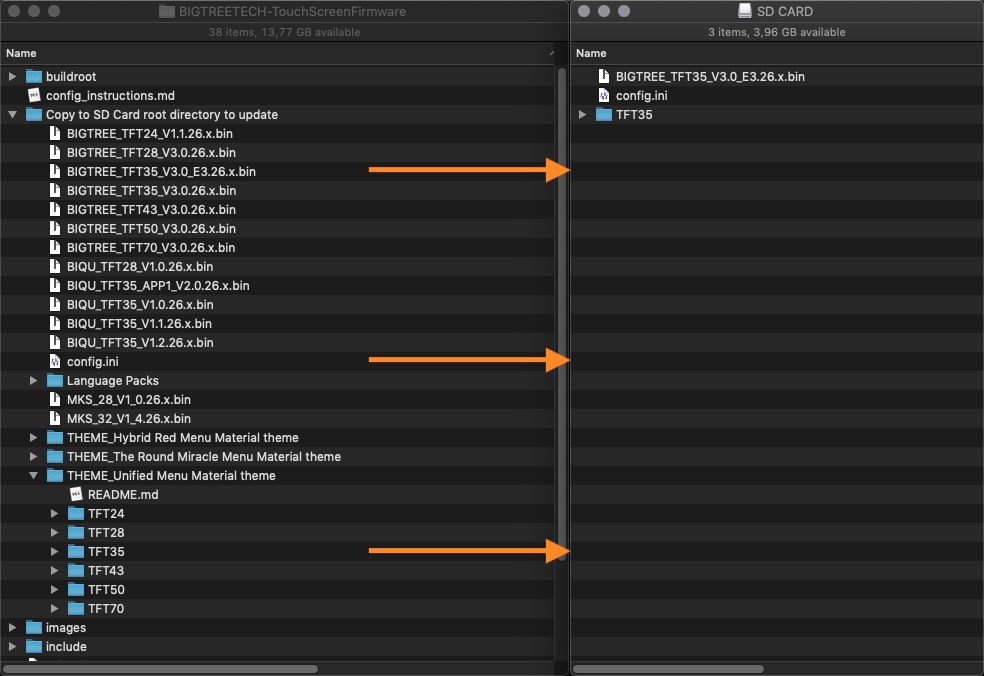
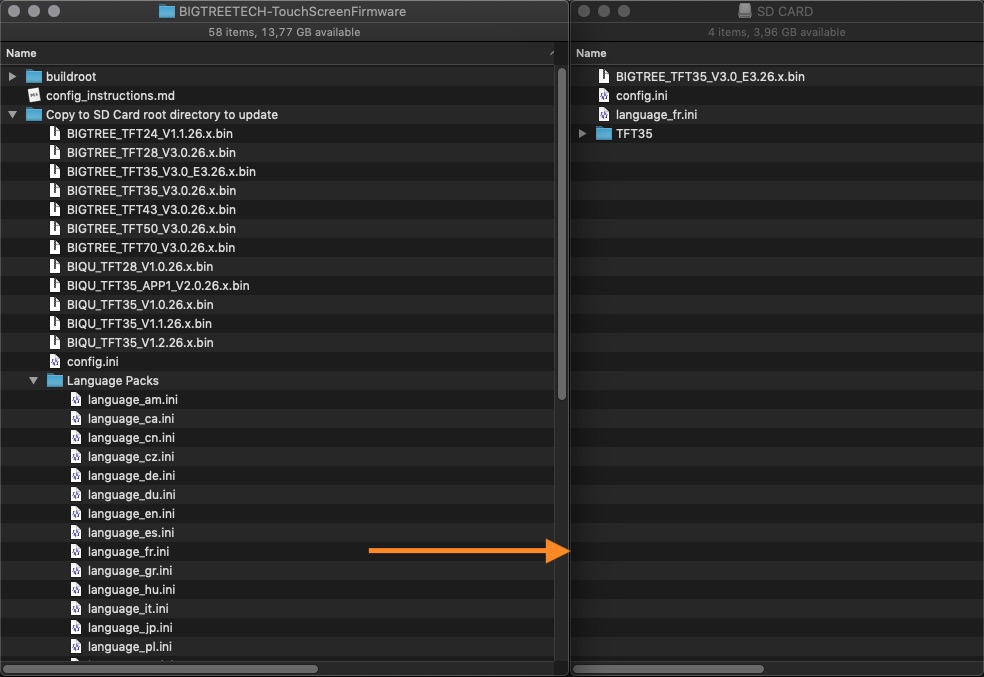
Copy the BIGTREE_TFT*_V*.*.*.bin,the TFT*` folder and the config.ini to the root of a blank SD card that is <8GB and formatted as FAT32:
Optionally, copy one or several language .ini file(s) from Copy to SD Card root directory to update/Language Packs Copy to SD Card root directory to update/Language Packs folder onto the SD card. Doing so will allow you to switch between English and the uploaded language(s), using the corresponding Language function of the TFT. We recommend to upload the minimum amount of languages, to keep the memory usage low. The language .ini file can be edited to change the text shown on the TFT.
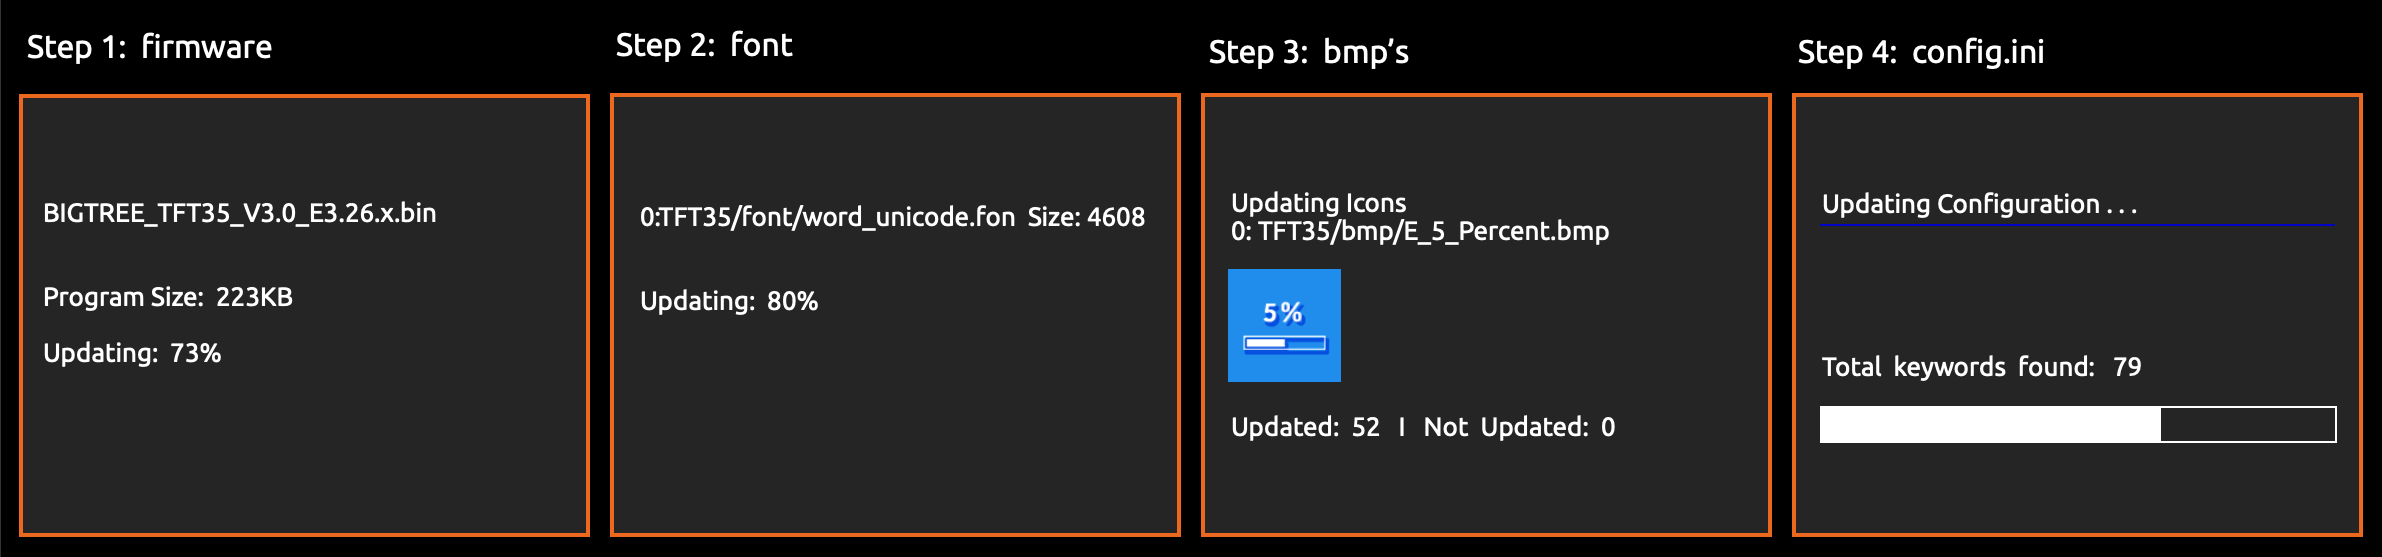
Place SD card with the BIGTREE_TFT*_V*.*.*.bin, theTFT* folder and the config.ini into the TFT's SD card reader and reset your TFT (or optionally - power cycle your printer) to start the update process.
A successful update looks like this on the screen:
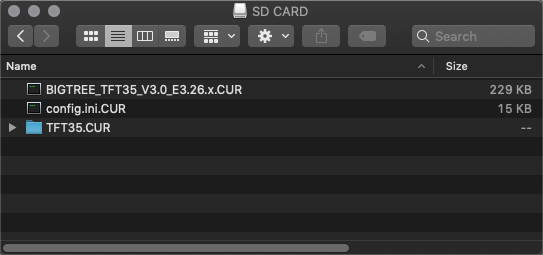
... and the name of the elements on the SD card changes to this:
In case one or several parts of the update failed, an error will be shown. Follow the information on the screen to update the missing or outdated elements.

After the update is done and the files are renamed, it is possible to reuse them again. To do so, change the name of the element(s) to the pre-update name and start the update process again.
Remove the SD card from the TFT and restart the printer.
The Firmware can be configured using the config.ini file from:
Copy to SD Card root directory to update
To edit the config.ini file follow the instruction here: Detailed Instructions here
To update the Firmware configuration:
- Edit the settings in config.ini.
- Copy the config.ini file to the root of the SD card. (The SD card capacity should be less than or equal to 8GB and formatted as FAT32)
- Insert the SD card into the TFT's SD card slot and restart the printer or press the reset buttion of the TFT.
- The TFT will update and store the configuration from config.ini file.
- Make sure to remove the SD card from the TFT and restart the printer.
The config.ini can be edited using a simple text editor (make sure to use UTF encoding) and uploaded again - without the need to upload the firmware or the TFT folder - as long as the firmware and the config.ini have the same version number.
See Customization guides for detailed information.
View full instructions
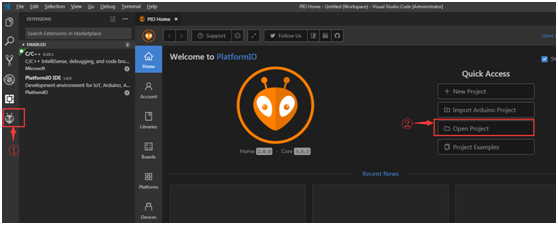
- Setup Visual Studio Code with PlatformIO instructions
- Click on the PlatformIO icon (①) and then click on Open Project (②):
- Find the BIGTREETECH firmware source directory , then click Open:

- After opening the project, edit
platformio.iniand change thedefault_envsto one that matches your TFT model and version:;BIGTREE_TFT35_V1_0 ;BIGTREE_TFT35_V1_1 ;BIGTREE_TFT35_V1_2 ;BIGTREE_TFT35_V2_0 ;BIGTREE_TFT35_V3_0 ;BIGTREE_TFT35_E3_V3_0 ;BIGTREE_TFT28_V1_0 ;BIGTREE_TFT28_V3_0 ;BIGTREE_TFT24_V1_1 ;MKS_32_V1_4 ;MKS_32_V1_4_NOBL ;MKS_28_V1_0
[platformio] src_dir = TFT boards_dir = buildroot/boards default_envs = BIGTREE_TFT35_V3_0
- Click the check mark (✓) at the bottom of VSCode or press
Ctrl+Alt+B(Windows) /Ctrl+Option+B(macOS) to compile.
- A
BIGTREE_TFT*_V*.*.*.binfile will be generated in the hidden.pio\build\BIGTREE_TFT*_V*_*folder. Follow the update process outlined in the About TFT Firmware section above to update your TFT to the latest version.
To reset the TFT's touch screen calibration, create a blank file named reset.txt and place in root folder of the sd card. Insert the SD card into the TFT's SD card reader and power cycle your printer to start the reset process.
See BIGTREETECH-TouchScreenFirmware/releases for a complete version history.