The Sui extension provides seamless support for compiling, deploying, and testing Sui smart contracts directly within VS Code. It enhances development productivity, especially when using GitHub Codespaces, by enabling unified management of front-end and back-end development within a single repository.
-
Compile Sui Smart Contracts: Easily compile your Sui smart contracts from within VS Code.
-
Deploy and Test: Deploy and test your smart contracts using the zkLogin-generated wallet, all from within the extension.
-
GitHub Codespaces Integration: Increase the efficiency of your development workflow with full support for GitHub Codespaces.
-
Unified Development: Manage both front-end and back-end code in a single repository for streamlined development.
-
Upgrade Smart Contracts: Seamlessly upgrade and test your smart contracts.
Note: To upgrade, add an
upgrade.tomlfile in the same directory as yourmove.tomlfile. The format is as follows:[upgrade] package_id = "The address of the deployed package" upgrade_cap = "The UpgradeCap is the central type responsible for coordinating package upgrades."
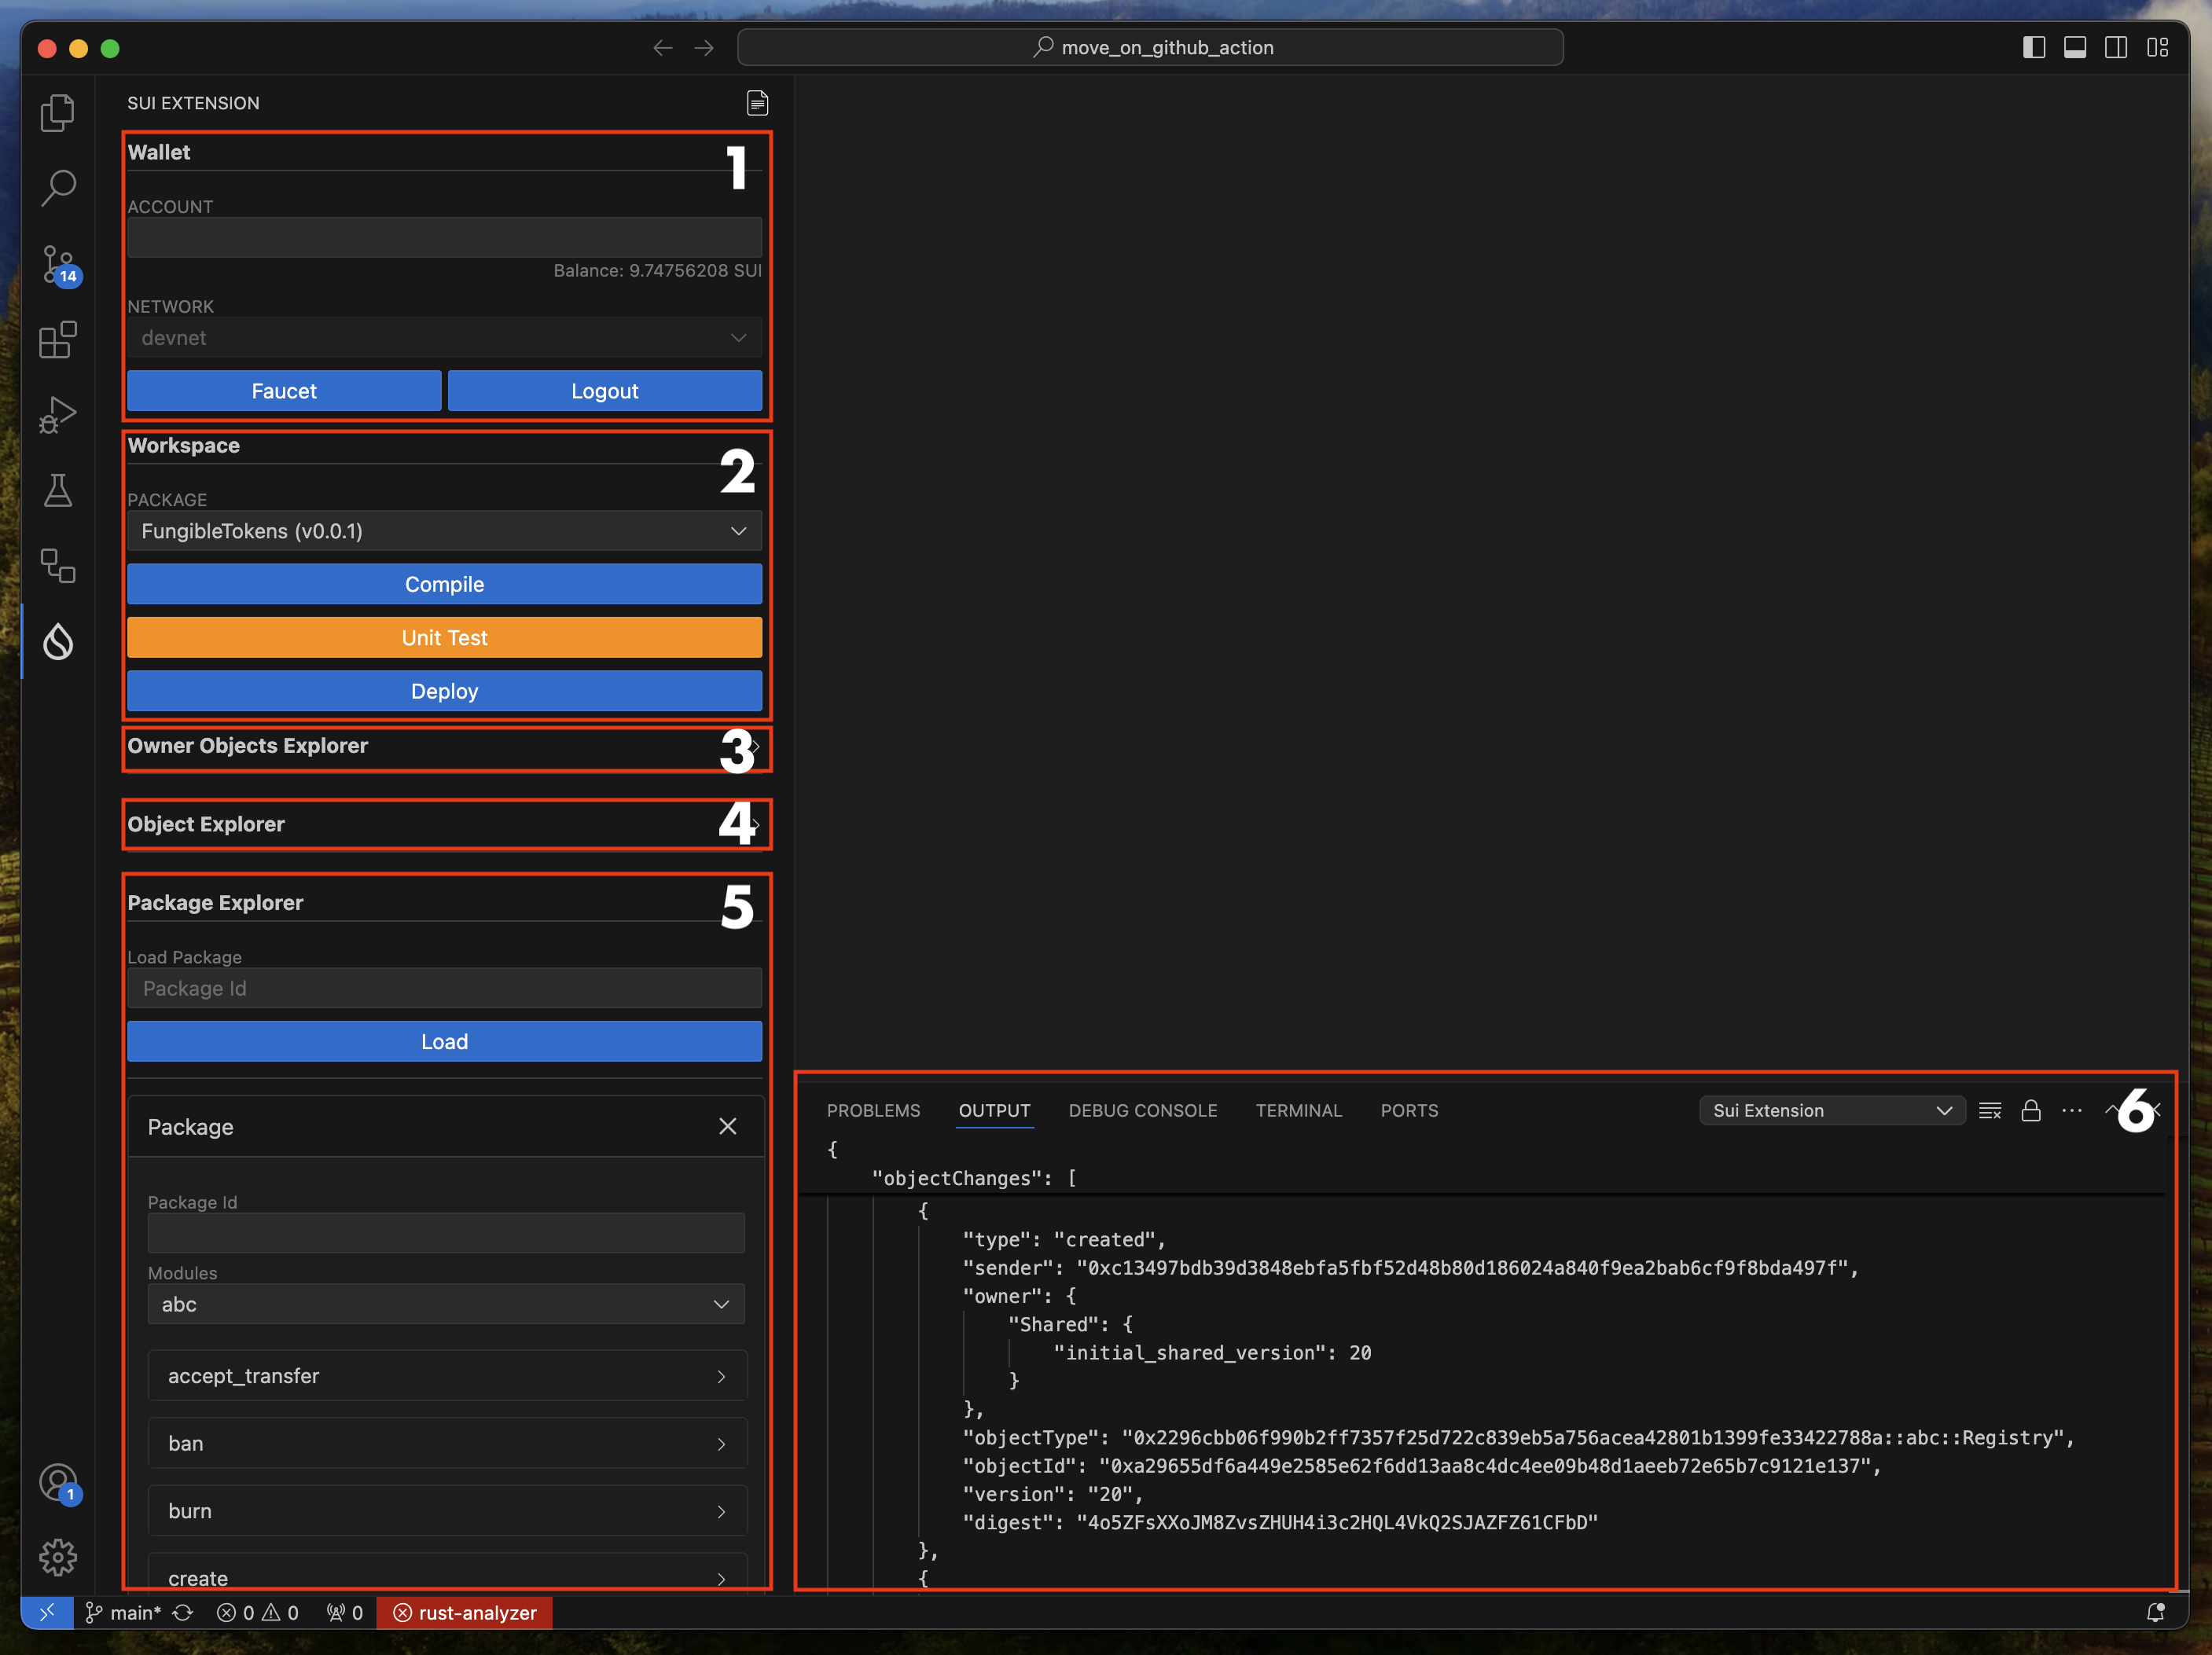
- Wallet: This section of the interface is used to manage wallets. You can create a wallet using Sui’s
zkLogin. After selecting a network, click theGoogle Loginbutton to create a wallet. Please note that wallets created using zkLogin will require re-authentication after a specific period. The currently supported networks areDevnetandTestnet(accessible via Enoki). - Workspace: This section of the interface allows you to compile or deploy Smart Contracts. If you have multiple smart contracts in your repository, you can select the specific smart contract (
Move.toml) and proceed with compilation or deployment. If there is anUpgrade.tomlfile in the same folder as theMove.tomlfile, the contract will be upgraded rather than published. Use theFormatbutton. This ensures your code adheres to a consistent style, improving readability and maintainability. - Owner Objects Explorer: This section of the interface allows you to load and inspect owner objects, one of the key features of Sui. By loading objects, you can check its
typeto verify that it contains the appropriate information required for the function arguments of a deployed smart contract. - Object Explorer: This section of the interface allows you to load and inspect objects, one of the key features of Sui. By loading an object, you can check its
typeto verify that it contains the appropriate information required for the function arguments of a deployed smart contract. - Package Explorer: This section of the user interface allows you to test smart contracts. When you deploy a Smart Contract, it is automatically registered here. You can also manually enter the address of a previously deployed Smart Contract to register it. If the smart contract is loaded correctly, you will see a list of functions available to interact with the contract.
- Output: In this section, you can view the transaction execution data in raw format. Please select
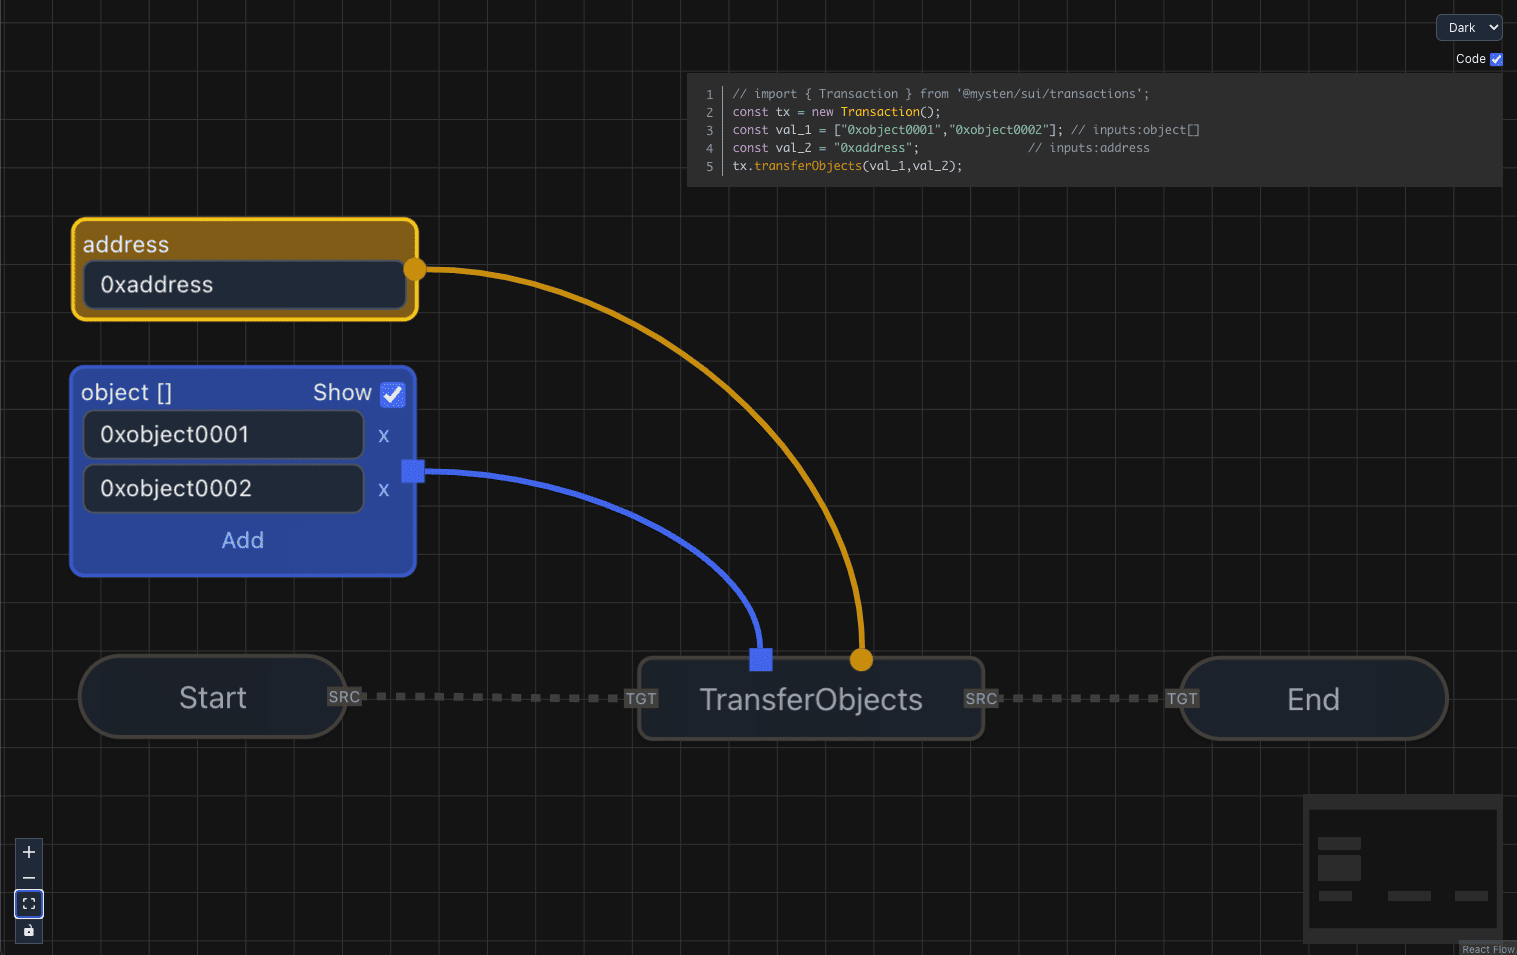
Sui Extensionin the Task. - PTB-Builder: PTB Builder is a visual development tool for Programmable Transaction Blocks (PTBs), a core technology of the Sui blockchain. Designed to create a powerful synergy with Sui’s PTB capabilities, this tool allows both developers and non-developers to easily construct and manage complex transactions, maximizing the potential of this advanced technology and making it more accessible to a broader audience.
- Sui CLI: Install the Sui command-line interface to interact with the Sui blockchain.
Note: If you are using GitHub Codespaces, please install Homebrew from https://brew.sh first to manage and install the Sui CLI.
- zkLogin: Set up zkLogin to generate wallets for contract deployment and testing. A Google account is required.
- No additional configuration is required.

