User Guide
Joplin Pages Publisher is really easy to use. Just follow these steps:
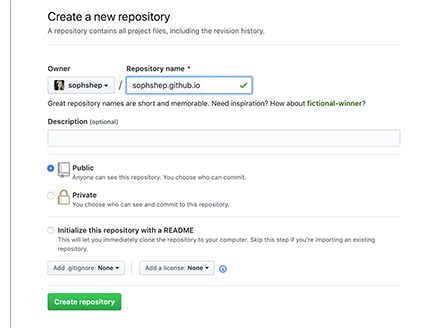
Get a Github account, and create a repository named username.github.io, where username is your username on GitHub.
Then, generate a Github token, and copy it to Joplin Setting Panel of Pages Publisher.

Open Joplin, Menu -> Tools -> Open Pages Publisher, to open this plugin's UI. Now you can see four tabs on top:
- Site
- Pages
- Articles
- Github
In Site panel, you can define some global data and behaviour for you site.
The Theme is the most important configuration item. A theme is a set of pages' templates and configuration. There is a built-in available theme named "Default". Creating you own theme is possible, but in this guide, we'll use the Default theme.
Within the Default theme, Site Name field is required. Fill it and save Site configuration.
In Pages panel, we see four pages in list. This means there will be four types of page in our site, defined by the Default theme.
These four pages are all customizable, which means we can define some data or behaviour for that page. Please customize them one by one, as you like.
In Articles panel, You can search some Joplin notes and add them to Published area. Notes in Published area will be transormed to HTML documents, using the template defined by theme.
In Github panel, fill in your github information. For common users, User Name and Email will be enough.
Click Generate button, all necessary files of your site will be generated. And then click Publish button, they will be pushed into your github repository.
congratulation, Your Github Pages website is ready now!