- Open and navigate an Xcode project file.
- Print a message to the debug console during run time.
In the previous reading we surveyed the layout of Xcode's tools. For this first lab, you're going to open and explore the simplest of Xcode projects and write your first line of code—calling a function that prints a string to the debug console. You'll need to navigate to the correct file, edit the code in the editor area, and watch for the printout in the debug console.
- Open the provided Xcode project inside the lab's directory (
your-first-NSLog.xcodeproj). Explore the different areas of Xcode that the reading just discuessed. - In your Project Navigator, look for the file named
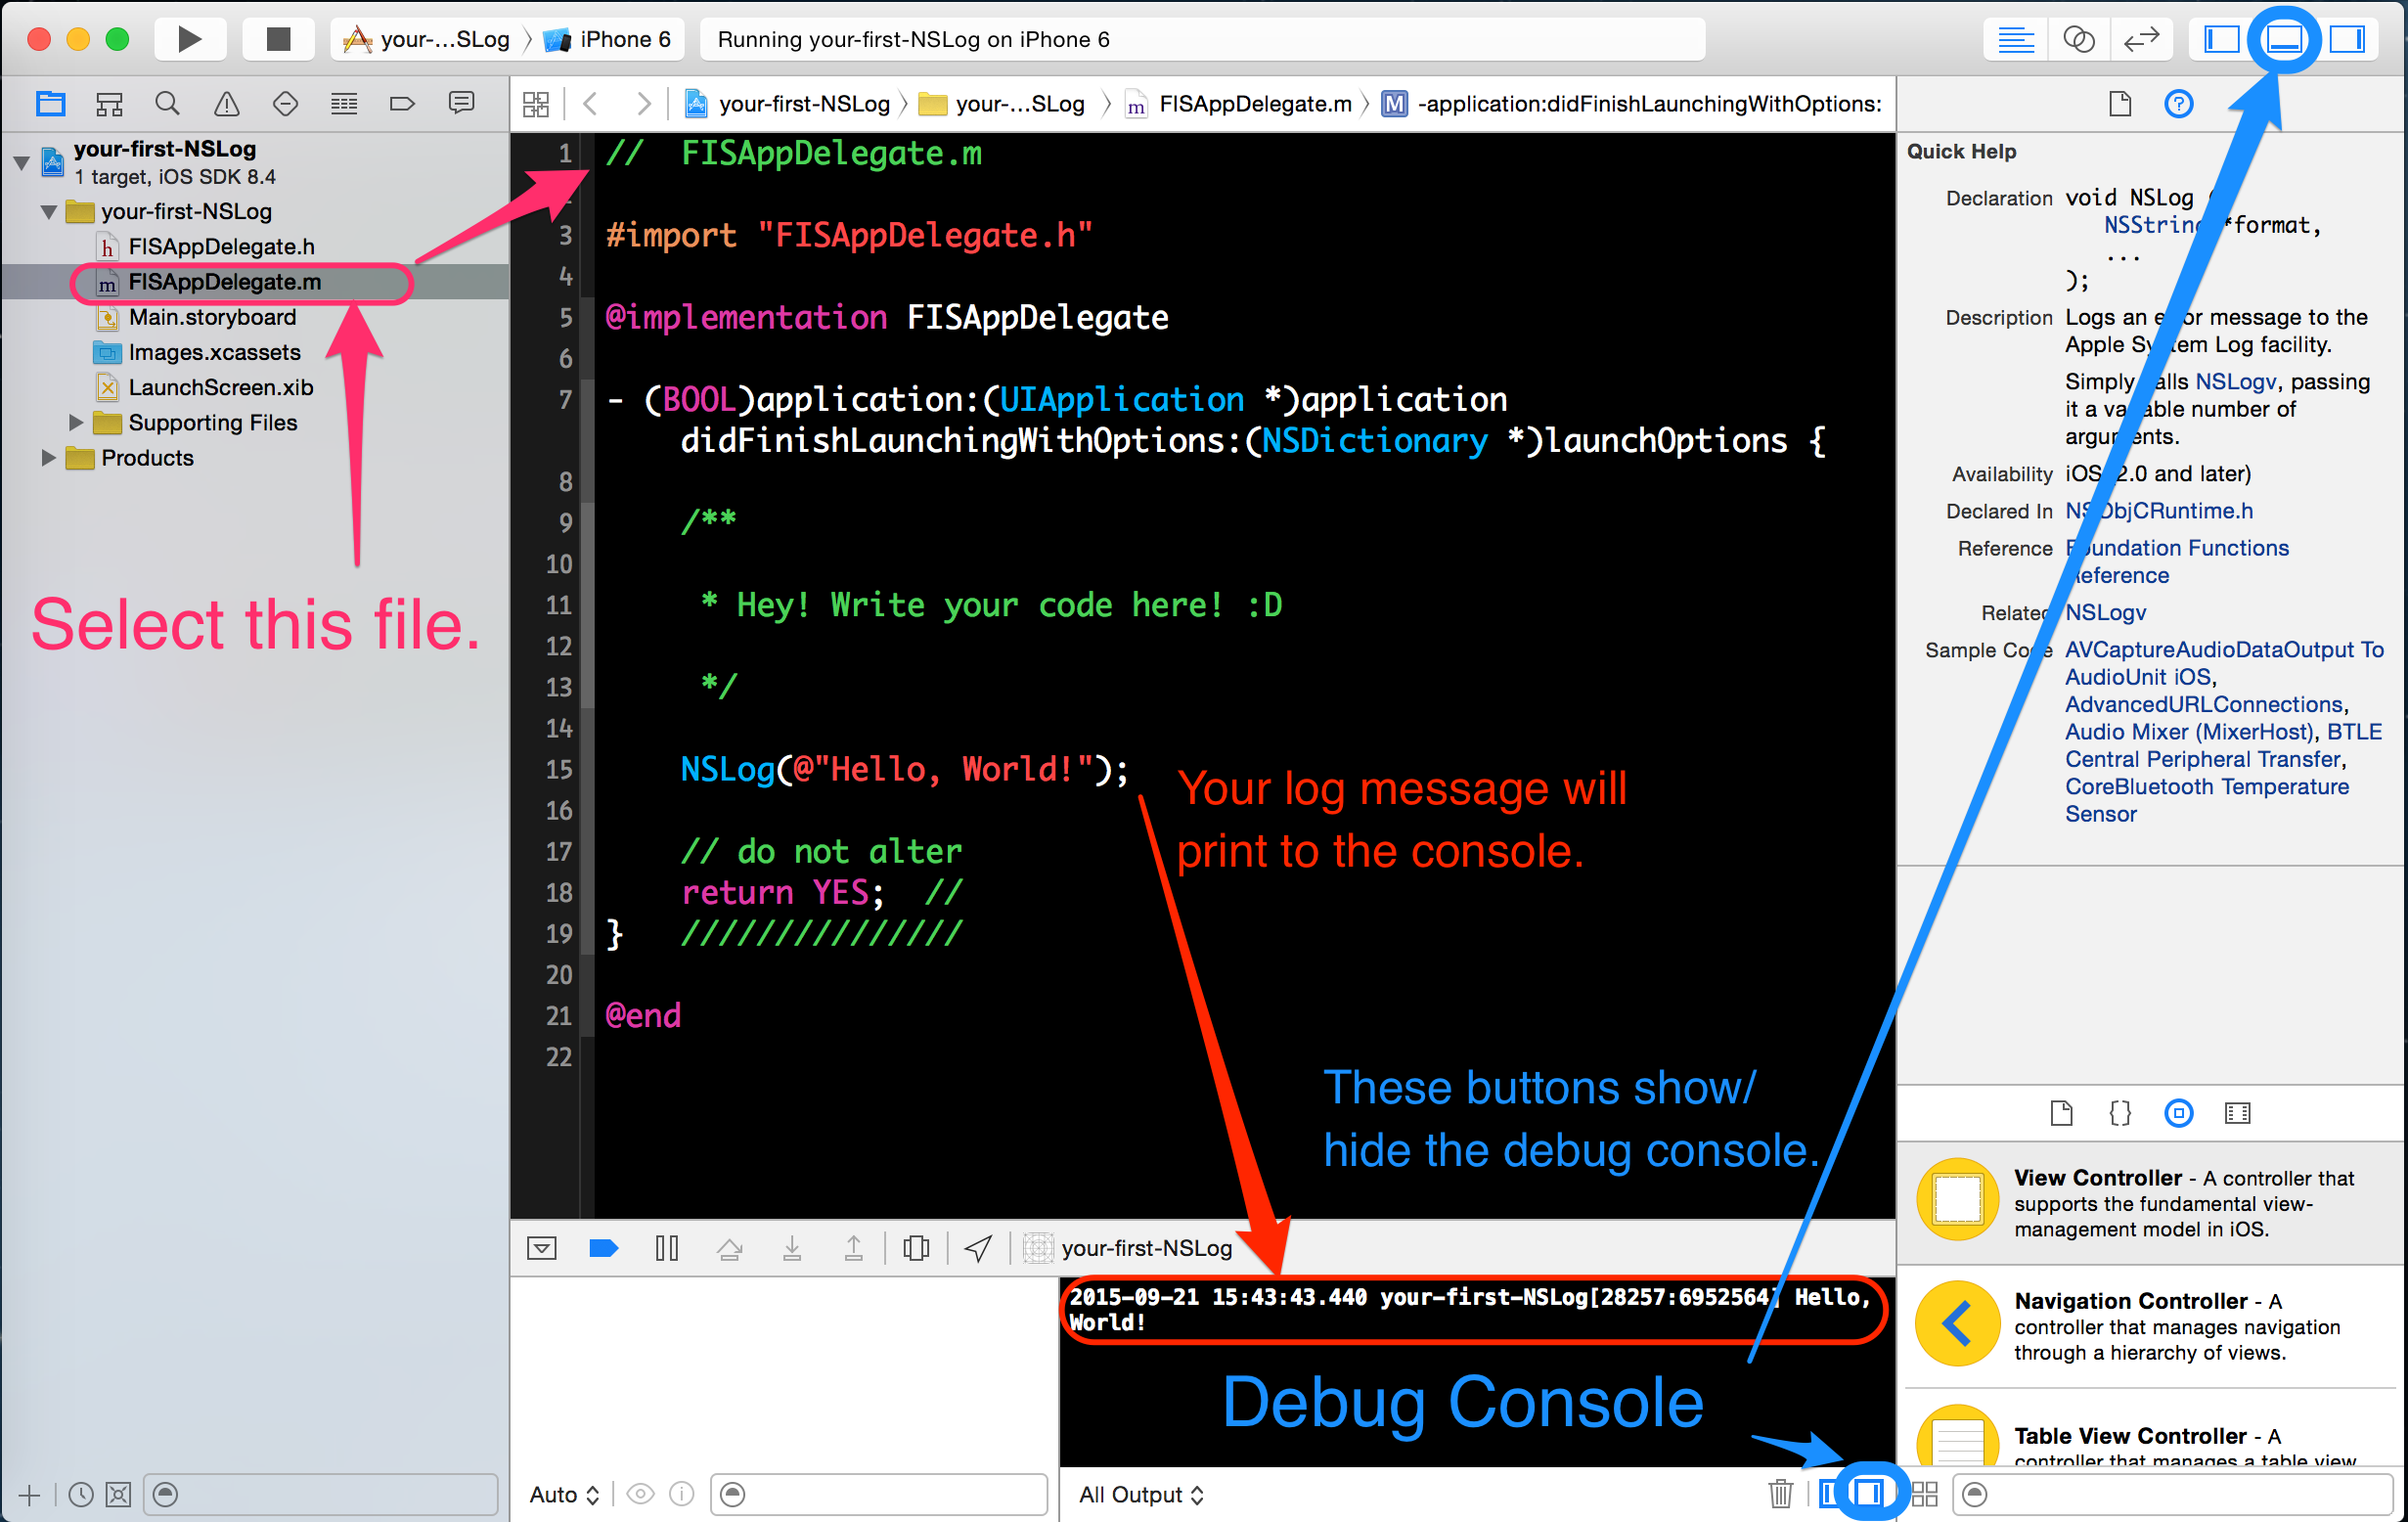
FISAppDelegate.m(this is the "implementation" file for theFISAppDelegateclass). It's within this file that you'll be writing your first line of Objective-C ! Look for this block of code, it's where you'll be adding your firstNSLog():
-(BOOL)application:(UIApplication *)application
    didFinishLaunchingWithOptions:(NSDictionary *)launchOptions {

    // Hey!

    // write your code here!  :D

    return YES;
}-
Type
NSLog(@"Hello, World!");on an empty line within this method—that is, inside the curly braces{ ... }and before thereturnstatement. Top Tip: This is a statement. Don't forget the;("semi-colon") at the end of your line! It ends your statement. -
Now hit
⌘Ron your keyboard and your program will run. The iOS Simulator should launch into a black screen. Nothing's wrong! We just haven't given it anything to display in this program so it loads as a black screen. -
Look at your debugger output console viewer... your message "Hello, world!" should have printed! Here's a helpful image if you're having trouble:
Note: The spot in the code you were directed to add your NSLog() is the standard override point in the AppDelegate at application launch. We'll explain more of what the means later, but just remember that if you're directed to write code in the AppDelegate, it will likely be in this spot.
