Home
There's actually a guide but it was saved to a PDF (no markdown for wiki yet) you can find on the discord help channel. Check it out~
This Guide is targeted towards anyone who seeks to set up and run WAI2K on their machine. As with all written Documentation this work is prone to eventually be outdated. In that case you might want to visit the Projects Discord, where you may find News, Updates and lots of strange people.
This guide is supposed to help you to get WAI2K up and running but also show you how to compile it for yourself in case you want to code any additions of your own. In that case you probably don’t need this guide in the first place but there are some quirks that you should pay attention to.
- Java Runtime 8 (JDK recommended)
- Android Studio (For the emulator, other Emulators don't work that well)
- On Windows install this Visual C Redistributable(Required for Character Recognition)
- Preferably an Intel CPU with Virtualization enabled, otherwise your emulator might run slow
- Some RAM, Emulator and WAI2K do eat some Resources
Download and Install Android Studio from Google. Easy enough, the SDK might complain about some Path Issue. You need to install the SDK for Android 10. You do this in the SDK Manager
Now to set up your Android OS go to the AVD Manager (above the SDK Manager): In the AVD Manager you create a new Device
I recommend using the Pixel 3 preset since it has most of the stuff we need.
Click Next, select your OS. Choose Android 8.1 here or this won’t work.
Click Next again. Now you should be able to switch to advanced Settings. Things to be done here:
- Switch to landscape Mode (Resolution has to be 2160x1080)
- Uncheck Device Frame
- Assign some more RAM ( ~2.5GB worked best so far)
Click finish to create your Device. Configuration File should now look somewhat like this:
AvdId=Pixel_3_API_27
PlayStore.enabled=true
abi.type=x86
avd.ini.displayname=Pixel 3 API 27
avd.ini.encoding=UTF-8
disk.dataPartition.size=7544M
fastboot.chosenSnapshotFile=
fastboot.forceChosenSnapshotBoot=no
fastboot.forceColdBoot=no
fastboot.forceFastBoot=yes
hw.accelerometer=yes
hw.arc=false
hw.audioInput=yes
hw.battery=yes
hw.camera.back=virtualscene
hw.camera.front=emulated
hw.cpu.arch=x86
hw.cpu.ncore=4
hw.dPad=no
hw.device.hash2=
hw.device.manufacturer=Google
hw.device.name=pixel_3
hw.gps=yes
hw.gpu.enabled=yes
hw.gpu.mode=auto
hw.initialOrientation=landscape
hw.keyboard=yes
hw.lcd.density=440
hw.lcd.height=1080
hw.lcd.width=2160
hw.mainKeys=no
hw.ramSize=2536
hw.sdCard=yes
hw.sensors.orientation=yes
hw.sensors.proximity=yes
hw.trackBall=no
image.sysdir.1=system-images\android-27\google_apis_playstore\x86\
runtime.network.latency=none
runtime.network.speed=full
sdcard.path=
sdcard.size=512 MB
showDeviceFrame=no
skin.dynamic=yes
skin.name=2160x1080
skin.path=2160x1080
tag.display=Google Play
tag.id=google_apis_playstore
vm.heapSize=256
You should now be able to start your Emulator. Do that and install the Game.
Now you could skip ahead to setting up WAI2K, but you should make sure Hardware Virtualization is enabled to get decent Performance. If you are using an Intel CPU chances are that it is on already, otherwise you might want to check out your BIOS for a Setting like this:
Enable that. This should allow you to install the SDK Extension for Intel HAXM in the SDK Manager:
This only works for Intel CPUs. If you are using an AMD CPU you can use Hypervisor instead. Google has provided a nice Guide to set up Hypervisor for Android Studio here. Read it carefully (its just 3 Steps, shouldn’t take long) since the first Step might be counterintuitive.
The easy Way: A prebuilt Version of the latest Changes is available here. Just download the .jar File and the asset Folder under Artifacts and place them in a Folder. If you have Java installed correctly you can now the .jar File with a double click. The first time you run WAI2K you will be asked to download additional Files for the Image Recognition to work:
Download them and Place them in the folder that is mentioned on your Client. Lastly, you need the asset folder. Unzip it and place it in the Folder WAI2K has created next to the .jar File. That folder should now look like the following:
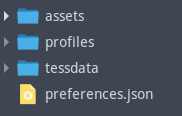
With that you are all set to start using WAI2K. Under Device you should now see a Preview of you Emulator
WAI2K usually will use the first 2 Echelons in your Formations per Default. For the 0-2 Drag you need to set up your first Echelon as Combat Squad with your dragger on Position 2. Your second Echelon just consists of your other dragger on Position 1. Select them both as draggers under Profile/Combat/Draggers, save your Profile and click Start. Everything else should now be taken care of by WAI2K, just watch the magic happen. Since more and more maps were added we set up a guide of which echelons to use on what map here.