Features
So if you didn't yet notice, this thing is a HTTP REST debugger 😃. It allows one to craft arbitrary HTTP requests and send them to servers to see what the result will be.
That's the basic principle of it, any other functions (bookmarks, APS token fetcher) are sugar that is only there to enhance the experience.
RESTClient APS is a fork that is designed to be non-intrusive and therefore provides a stock RESTClient experience if user desires so (just set APS mode to disabled, instructions below).
The most basic workflow to send HTTP request would be:
- Select the request method in [3].
- Enter the request URL in [4].
- If you want to include request body (e.g. for
POSTrequest), enter the text in [6]. - Press the main request sending button [5].

The response panel [15], will fill up with data and you can use its tabs [14] to switch between representations.
Another basic RESTClient feature is the ability to add any custom headers you may want to your request. Just select Headers -> Custom Header in the menu [1].
If you are looking for additions to your HTTP debugging stack, I'd highly recommend Fiddler (for cases when you want to capture requests sent by something other than browser extensions).
The core feature of this fork is the ability to automate fetching of APS authentication token to ease the debugging of APS-related issues.
Currently, the only way to do that is to use PA API. The catch here is that the said API has to be accessible from your machine and that is not always the case, because PA network is often complex and multi-level and having and API (that has no proper permissions model and grants highest level of access possible without SSH to anyone who uses it) available from the outside is a huge security risk.
If the API is not available from your own machine, refer to cURL Integration section below to learn of another possibility to fetch token.
There are several types of tokens that RESTClient APS is able to fetch.
All types have their corresponding POA API method and that method, in turn, has its parameters. Here's a rundown of them:
| Token Type | PA API method | Parameters |
|---|---|---|
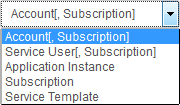
| Account[, Subscription] | pem.APS.getAccountToken |
account_id subscription_id |
| Service User[, Subscription] | pem.APS.getUserToken |
user_id subscription_id |
| Application Instance | pem.APS.getApplicationInstanceToken |
application_instance_id |
| Subscription | pem.APS.getSubscriptionToken |
subscription_id |
| Service Template | pem.APS.getServiceTemplateToken |
service_template_id |
Full description of these and other PA API methods can be found in the corresponding guide.
Token type is chosen via drop-down menu in panel [10] on the left and parameters are entered in the field on the right.
Parameters are typed into a simple text field separated by space. For example, you have selected a type and entered some parameters:

In that case, the request to PA API will contain 1000001 as account_id and 1000002 as subscription_id. If we omit the second parameter, it will be sent as 0.
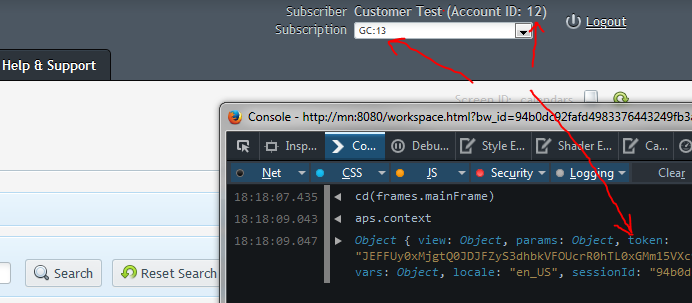
- Note: When using browser to access an APS screen in Customer CP, user is given a token that is equivalent to one that is attained by sending the request in the picture just above (both parameters need to be adjusted accordingly):
Basically, when you've selected token type and entered the parameters, you need to choose where to send the token fetching request (PA API URL) and specify HTTP authentication credentials in fields (fields [8] and [9]) if they are necessary (they are the same crdentials you use on PA login screen in the browser, most of the time, admin user's credentials are used):
img/pa-api-parameters-example.png
-
Note: Field [8] will be auto-filled to default value each time hostname in field [4] is updated. On the picture above, the value was auto-filled from
http://mn:8080/aps/2/resources/in field [4].
The last feature of APS panel is APS mode selector [7]. It defines 3 modes of operation for APS functionality of this extension:
-
Disabled. Stock RESTClient experience. No
APS-TokenHTTP header is sent and no token fetching takes place. -
Manual refresh.
APS-Tokenheader is sent on every request with value from field [12] (you can paste your own token there as well). Token fetching occurs only upon pressingRefresh Tokenbutton [13]. -
Refresh every 25 minutes. A timer that tracks token fetching is introduced. Whenever its value reaches
0(25minutes expire), upon pressing mainSendbutton [5], a token fetch is performed with currently set parameters and then main HTTP request is sent with that token. This timer is reset (set to0) each time when: - Hostname in main URL field [4].
- Different token type is selected in selector [10].
- Parameters are changed in text field [10].
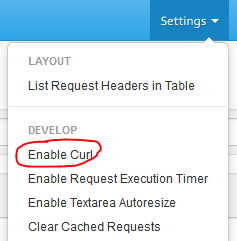
Another functionality original RESTClient already had and that was expanded by this fork is cURL integration. The basic idea is that user can always get a representation of currently set up HTTP request as a string that represents the corresponding cURL command.
RESTClient APS expands on this idea by adding this functionality for APS panel (token fetching request) as well. This allows you to fetch token from hosts other than your machine (the ones where PA API is accessible from).
To activate cURL integration, enable it from the Settings menu :
After that, cURL fields [16] and [17] will be shown:
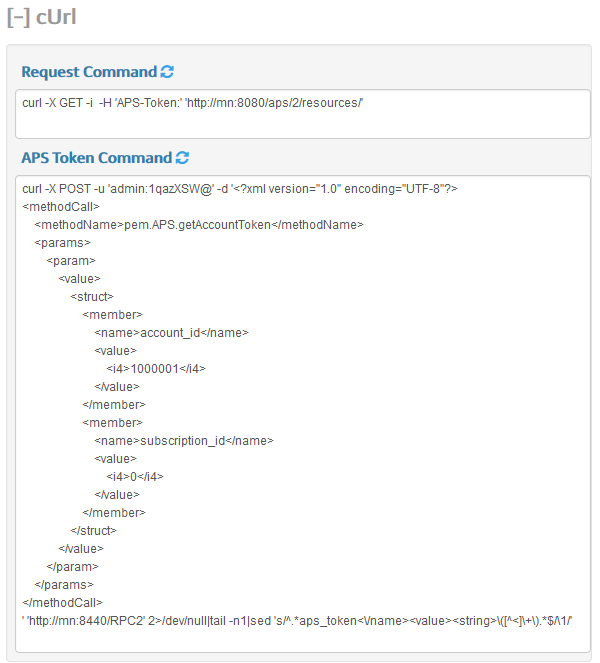
You can use manual refresh buttons (refresh icons next to each fields) to re-construct cURL string from the request that is currently set up. Also, upon pressing main Send button [5], field [16] will be refreshed, same goes for Refresh Token button [13] and field [17].