GitHub Copilot offers much more than just code suggestions. As a Software Engineer, you often need to understand existing code and improve it with documentation, tests, and automation.
In this module, you’ll explore the advanced features of GitHub Copilot, enabling you to interactively work with your code while applying suggestions and insights more effectively.
Using a Python-based HTTP API, you’ll make modifications, fix bugs, create documentation, and write tests for a new endpoint that you’ll implement.
- Who this is for: Developers, DevOps Engineers, Software development managers, Testers.
- What you'll learn: Using Advanced GitHub Copilot features to test, document, and work with code.
- What you'll build: A new HTTP API route, along with documentation and tests to verify its correctness.
- Prerequisites: GitHub Copilot is available to use for free, sign up for GitHub Copilot.
- Timing: This module can be completed in under an hour.
By the end of this module, you'll aquire the skills to be able to:
- Use advanced GitHub Copilot features like inline chat, slash commands, and agents.
- Interact with GitHub Copilot with deeper context on your project and ask questions about it.
- Enable your GitHub Copilot service
- Open this repository with Codespaces
Right click the following Codespaces button to open your Codespace in a new tab
The current API is not exposing country/{country} which needs to be implemented to list cities. The route should allow only GET HTTP requests with a JSON response providing information from the historical high and low for that country, city, and given month.
As with any implementation, this addition should include at least one test function to work with the pytest runner and test framework.
On our first exercise we will create a new route in our API. Go to the main.py file, and by using the inline chat with the following command ctrl + i (on Windows) or cmd + i(on Mac) ask GitHub Copilot to help you create a new API that shows you the cities of a country.
Use the following prompt in inline-chat:
Create a new route that exposes the cities of a country.
This prompt should give you something similar like this:
# Create a new route that exposes the cities of a country:
@app.get('/countries/{country}')
def cities(country: str):
    return list(data[country].keys())
Note
Try your new route and refine your prompt until the result is as desired.
Now that you have created a new route, let's create a test with Copilot Chat for this route that uses Spain as the country. Remember to select your code and ask Copilot Chat to help you with this specific API that we just have created.
Use the following prompt with GitHub Copilot Chat:
/tests help me to create a new test for this route that uses Spain as the country.
Once Copilot has helped you to create your test, try it. If this is not functioning as expected, feel free to share those details with Copilot in the chat. For example:
This test is not quite right, it is not including cities that doesn't exist. Only Seville is part of the API.
It should give you another solution. Keep trying until you achieve the desired result.
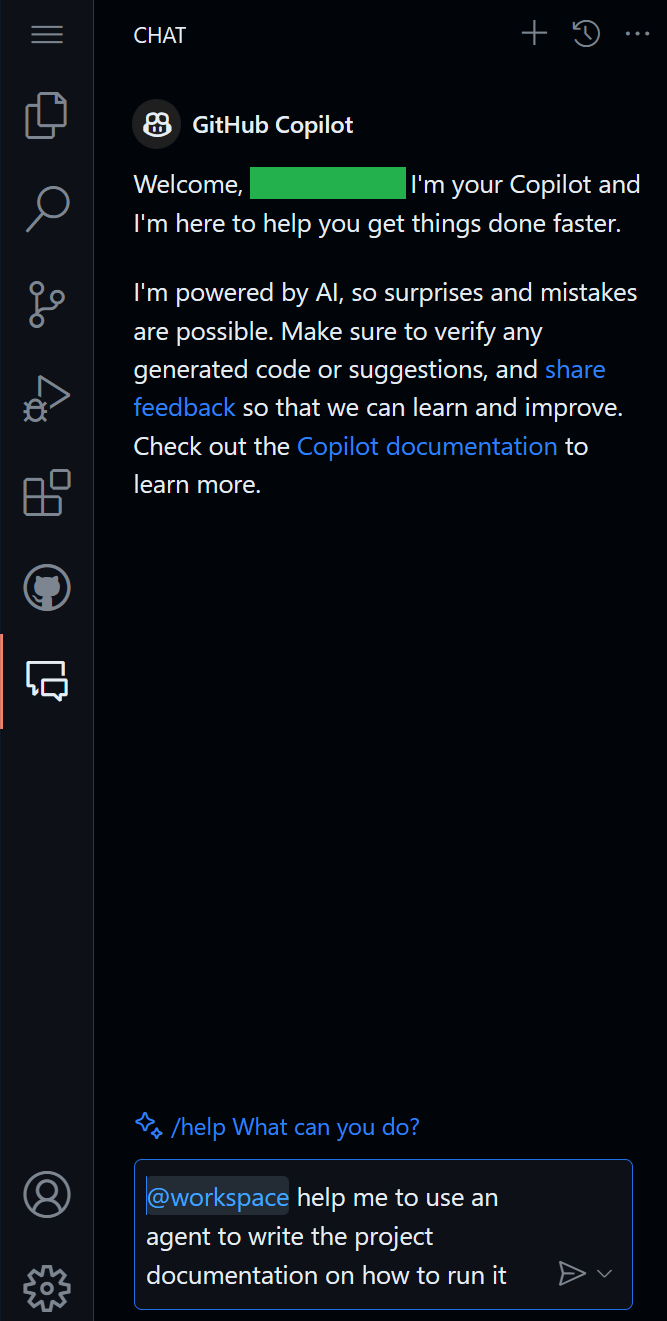
During this step we will be using an agent (workspace) to write the project documentation on how to run this project. In the GitHub Copilot Chat, we will try the following prompt:
> @workspace help me to use an agent to write the project documentation on how to run it .
Finally, verify the new endpoint is working by trying it out by going to the /docs endpoint and confirming that the endpoint shows up.
Now that you've used GitHub Copilot to generate and explain code, you can also explore some other alternative approaches to perform developer tasks. These extra challenges will help you dive deeper into other GitHub Copilot features in addition to the ones you already know. For these extra challenges, you will use the Chat interface. Click on the GitHub Copilot Chat icon on the left sidebar if you don't have it open yet.
🚀 Congratulations, through the exercise, you have used GitHub Copilot with many different features that will allow you to work better with different projects. You interactively used some features to write tests, documentation, and find more about existing code..
Microsoft and any contributors grant you a license to the Microsoft documentation and other content in this repository under the Creative Commons Attribution 4.0 International Public License, see the LICENSE file, and grant you a license to any code in the repository under the MIT License, see the LICENSE-CODE file.
Microsoft, Windows, Microsoft Azure and/or other Microsoft products and services referenced in the documentation may be either trademarks or registered trademarks of Microsoft in the United States and/or other countries. The licenses for this project do not grant you rights to use any Microsoft names, logos, or trademarks. Microsoft's general trademark guidelines can be found at http://go.microsoft.com/fwlink/?LinkID=254653.
Privacy information can be found at https://privacy.microsoft.com/en-us/
Microsoft and any contributors reserve all other rights, whether under their respective copyrights, patents, or trademarks, whether by implication, estoppel or otherwise.
