Let's take a look at another similar example of using Radiance commands.
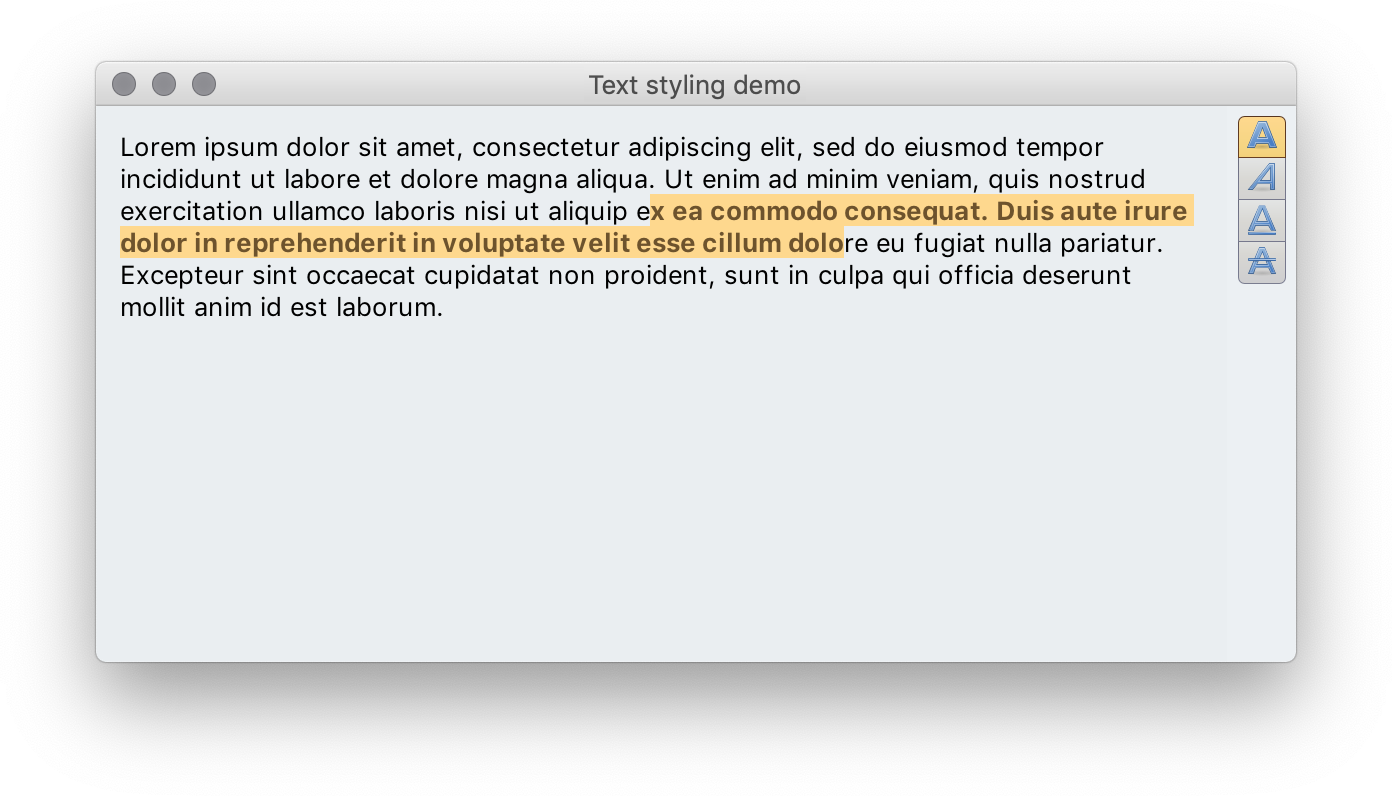
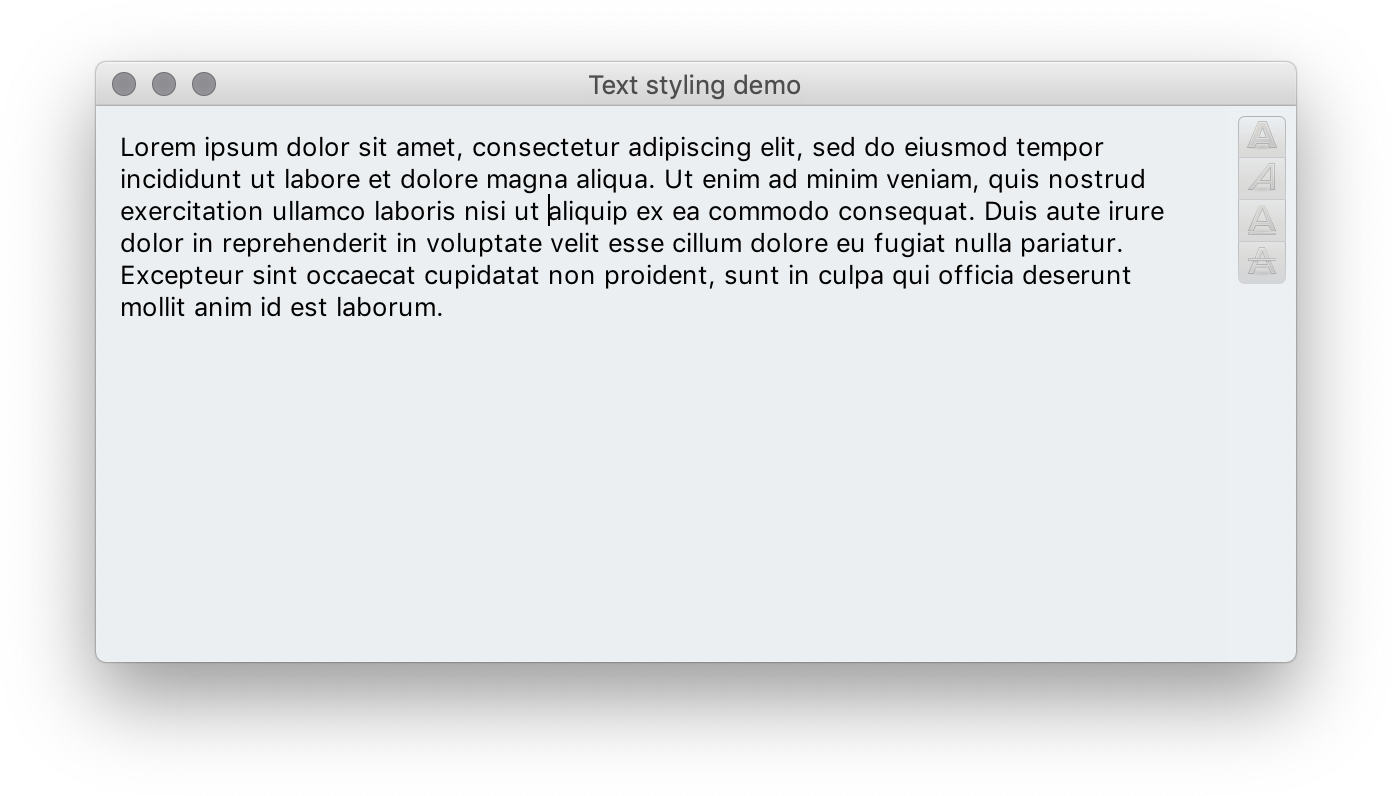
The setup has the same JTextPane and a vertical button strip with four buttons. When there's nothing selected in the text pane, the buttons are disabled. When there is selection, the buttons are enabled. In addition, each button corresponds to bold, italic, underline and strikethrough content style. Each button shows presence of the matching style in the selected content. When clicked, the presence of the matching style is toggled.
For example, selecting some content and clicking the bold button shows this:

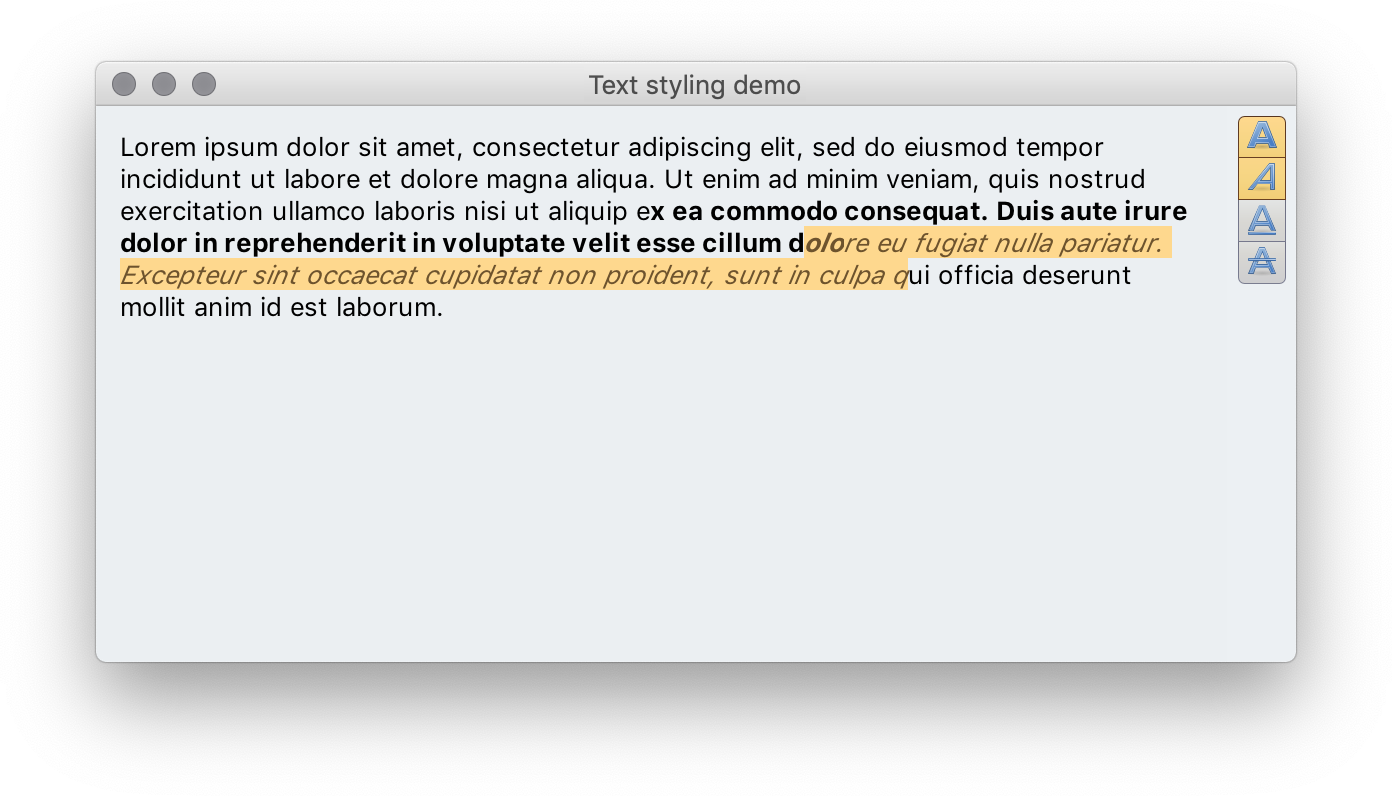
And then selecting another, overlapping, part of content, and clicking the italic button shows this:

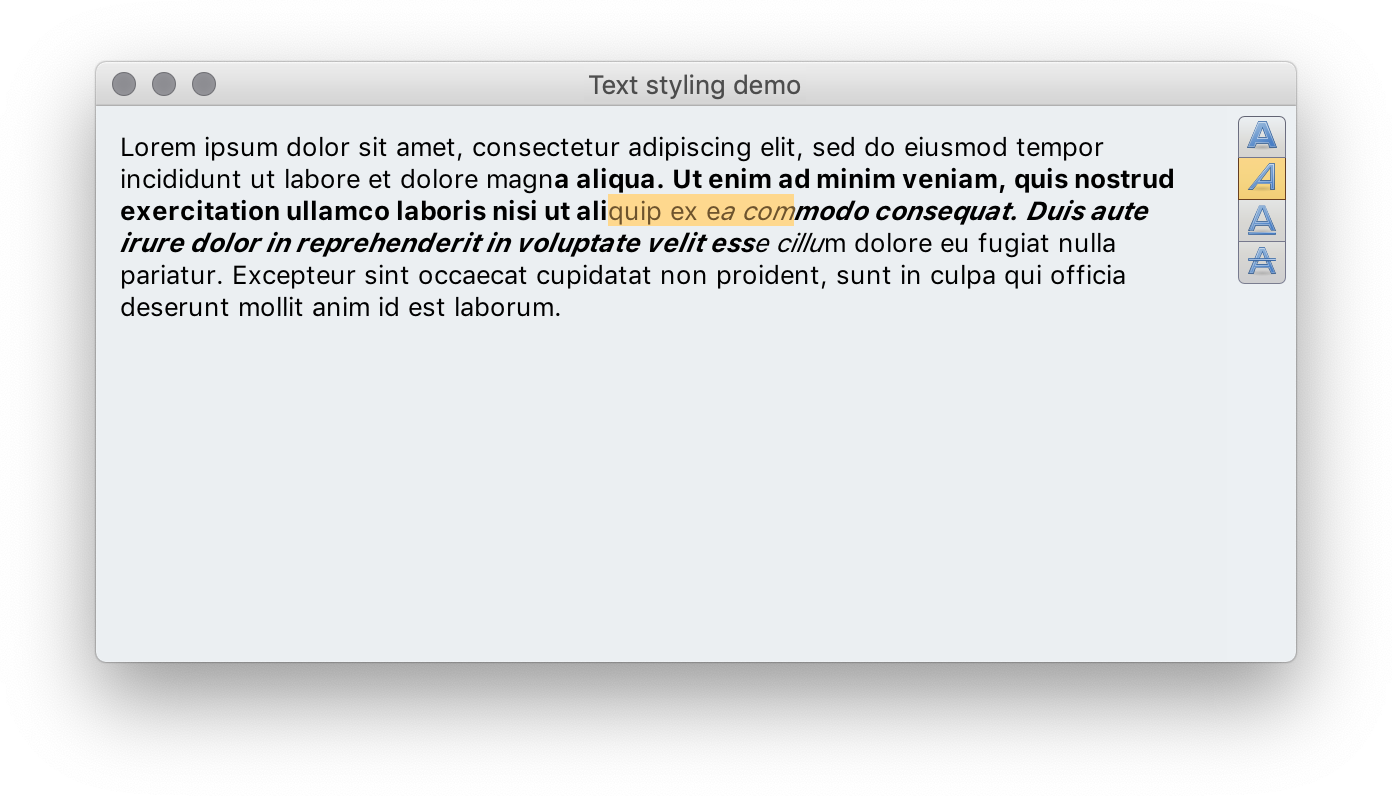
Note how both bold and italic buttons show up as selected, since the currently selected content has both bold and italic presence (not necessarily on the entire selection).
As before, we set up the JTextPane with its content:
JFrame frame = new JFrame("Text alignment demo");
frame.setLayout(new BorderLayout());

// Configure and populate "Lorem ipsum" multiline content
final JTextPane textPane = new JTextPane();
textPane.setText(
        "Lorem ipsum dolor sit amet, consectetur adipiscing elit, sed do eiusmod " +
                "tempor incididunt ut labore et dolore magna aliqua. Ut enim ad minim" +
                " veniam, quis nostrud exercitation ullamco laboris nisi ut aliquip " +
                "ex ea commodo consequat. Duis aute irure dolor in reprehenderit in " +
                "voluptate velit esse cillum dolore eu fugiat nulla pariatur. " +
                "Excepteur sint occaecat cupidatat non proident, sunt in culpa qui " +
                "officia deserunt mollit anim id est laborum.");
textPane.setEditable(true);
textPane.setBorder(new EmptyBorder(12, 12, 12, 12));
// force the display of text selection even when the focus has been lost
textPane.setCaret(new DefaultCaret() {
    @Override
    public void setSelectionVisible(boolean visible) {
        super.setSelectionVisible(true);
    }
});

frame.add(textPane, BorderLayout.CENTER);
And add a panel for the buttons and show the frame in the middle of the screen:
JPanel styleButtonPanel = new JPanel(new FlowLayout());
frame.add(styleButtonPanel, BorderLayout.LINE_END);

// Show our frame in the center of the screen
frame.setIconImage(new BufferedImage(1, 1, BufferedImage.TYPE_4BYTE_ABGR));
frame.setSize(new Dimension(600, 300));
frame.setLocationRelativeTo(null);
frame.setDefaultCloseOperation(WindowConstants.EXIT_ON_CLOSE);
frame.setVisible(true);
Finally, two helper methods to query and toggle content style in the current JTextPane selection:
private static boolean hasStyleInSelection(JTextPane textPane, Object style) {
    for (int index = textPane.getSelectionStart(); index < textPane.getSelectionEnd(); index++) {
        Object attr = textPane.getStyledDocument().getCharacterElement(index)
                .getAttributes().getAttribute(style);
        if (attr instanceof Boolean) {
            if ((Boolean) attr) {
                return true;
            }
        }
    }
    return false;
}

private static void toggleStyleInSelection(JTextPane textPane, Object style) {
    MutableAttributeSet attrSet = new SimpleAttributeSet();
    // Add or remove the style on the entire selection
    attrSet.addAttribute(style, !hasStyleInSelection(textPane, style));
    textPane.getStyledDocument().setCharacterAttributes(textPane.getSelectionStart(),
            textPane.getSelectionEnd() - textPane.getSelectionStart(),
            attrSet, false);
}Now we get to the interesting part. How do we configure the Radiance commands to toggle the matching content style in the current text selection?
// Bold style command
Command commandBold = Command.builder()
        .setIconFactory(Format_text_bold.factory())
        .setAction(commandActionEvent -> {
            // toggle bold in current selection
            toggleStyleInSelection(textPane, StyleConstants.CharacterConstants.Bold);
            // and update command selection state based on the presence of bold
            commandActionEvent.getCommand().setToggleSelected(
                    hasStyleInSelection(textPane,
                            StyleConstants.CharacterConstants.Bold));
        })
        .setToggle(true)
        .setActionEnabled(false)
        .build();

// Italic style command
Command commandItalic = Command.builder()
        .setIconFactory(Format_text_italic.factory())
        .setAction(commandActionEvent -> {
            // toggle italic in current selection
            toggleStyleInSelection(textPane, StyleConstants.CharacterConstants.Italic);
            // and update command selection state based on the presence of italic
            commandActionEvent.getCommand().setToggleSelected(
                    hasStyleInSelection(textPane,
                            StyleConstants.CharacterConstants.Italic));
        })
        .setToggle(true)
        .setActionEnabled(false)
        .build();

// Underline style command
Command commandUnderline = Command.builder()
        .setIconFactory(Format_text_underline.factory())
        .setAction(commandActionEvent -> {
            // toggle underline in current selection
            toggleStyleInSelection(textPane,
                    StyleConstants.CharacterConstants.Underline);
            // and update command selection state based on the presence of underline
            commandActionEvent.getCommand().setToggleSelected(
                    hasStyleInSelection(textPane,
                            StyleConstants.CharacterConstants.Underline));
        })
        .setToggle(true)
        .setActionEnabled(false)
        .build();

// Strikethrough style command
Command commandStrikethrough = Command.builder()
        .setIconFactory(Format_text_strikethrough.factory())
        .setAction(commandActionEvent -> {
            // toggle strikethrough in current selection
            toggleStyleInSelection(textPane,
                    StyleConstants.CharacterConstants.StrikeThrough);
            // and update command selection state based on the presence of strikethrough
            commandActionEvent.getCommand().setToggleSelected(
                    hasStyleInSelection(textPane,
                            StyleConstants.CharacterConstants.StrikeThrough));
        })
        .setToggle(true)
        .setActionEnabled(false)
        .build();
There are some differences in how commands in this application are configured:
- Even though each command is still marked as toggle, there is no mutual exclusion of the selected state. We can have no selected command (if there is no active selection in our text pane, or no styling in the current selection). And we can certainly have more than one selected command - where the current selection has more than one style associated with the characters in it.
- We start by marking each command as disabled with
setActionEnabled(false). - We have two steps in the action associated with each command. The first one updates our main text pane. And the second one updates the toggle selection state of the corresponding action to reflect that change.
The final piece is wiring enabled / disabled state of the commands to changes in the text pane selection:
textPane.addCaretListener(caretEvent -> {
    // Compute selection presence
    boolean hasSelection =
            (textPane.getSelectionEnd() - textPane.getSelectionStart()) > 0;
    // Enable or disable the style commands based on that
    commandBold.setActionEnabled(hasSelection);
    commandItalic.setActionEnabled(hasSelection);
    commandUnderline.setActionEnabled(hasSelection);
    commandStrikethrough.setActionEnabled(hasSelection);

    // For each command, determine whether its toggle selection is "on" based on
    // the presence of the matching style in the text pane selection
    commandBold.setToggleSelected(hasStyleInSelection(textPane,
            StyleConstants.CharacterConstants.Bold));
    commandItalic.setToggleSelected(hasStyleInSelection(textPane,
            StyleConstants.CharacterConstants.Italic));
    commandUnderline.setToggleSelected(hasStyleInSelection(textPane,
            StyleConstants.CharacterConstants.Underline));
    commandStrikethrough.setToggleSelected(hasStyleInSelection(textPane,
            StyleConstants.CharacterConstants.StrikeThrough));
});
Whenever the selection changes we update two things:
- If there is no selection at all, we disable all four commands.
- We update the toggle selection state of each command based on the presence of the matching style anywhere in the current selection of our text pane.
The same way as in our first example, we are now ready to create the content model and the presentation model for our command button strip:
// Create a button strip to change the text styling in our text pane.
CommandStripProjection commandStripProjection = new CommandStripProjection(
        new CommandGroup(commandBold, commandItalic, commandUnderline,
                commandStrikethrough),
        CommandStripPresentationModel.builder()
                .setOrientation(CommandStripPresentationModel.StripOrientation.VERTICAL)
                .setHorizontalGapScaleFactor(0.8)
                .setVerticalGapScaleFactor(1.4)
                .build());
JCommandButtonStrip commandButtonStrip = commandStripProjection.buildComponent();
styleButtonPanel.add(commandButtonStrip);
Note how, as before, there is no logic here around what happens when each specific button is clicked. Or when there is nothing selected in the text pane. Or when there is something selected in the text pane. All of that is configured at the level of each command, and in our caret listener.
Continue to the command overview.

