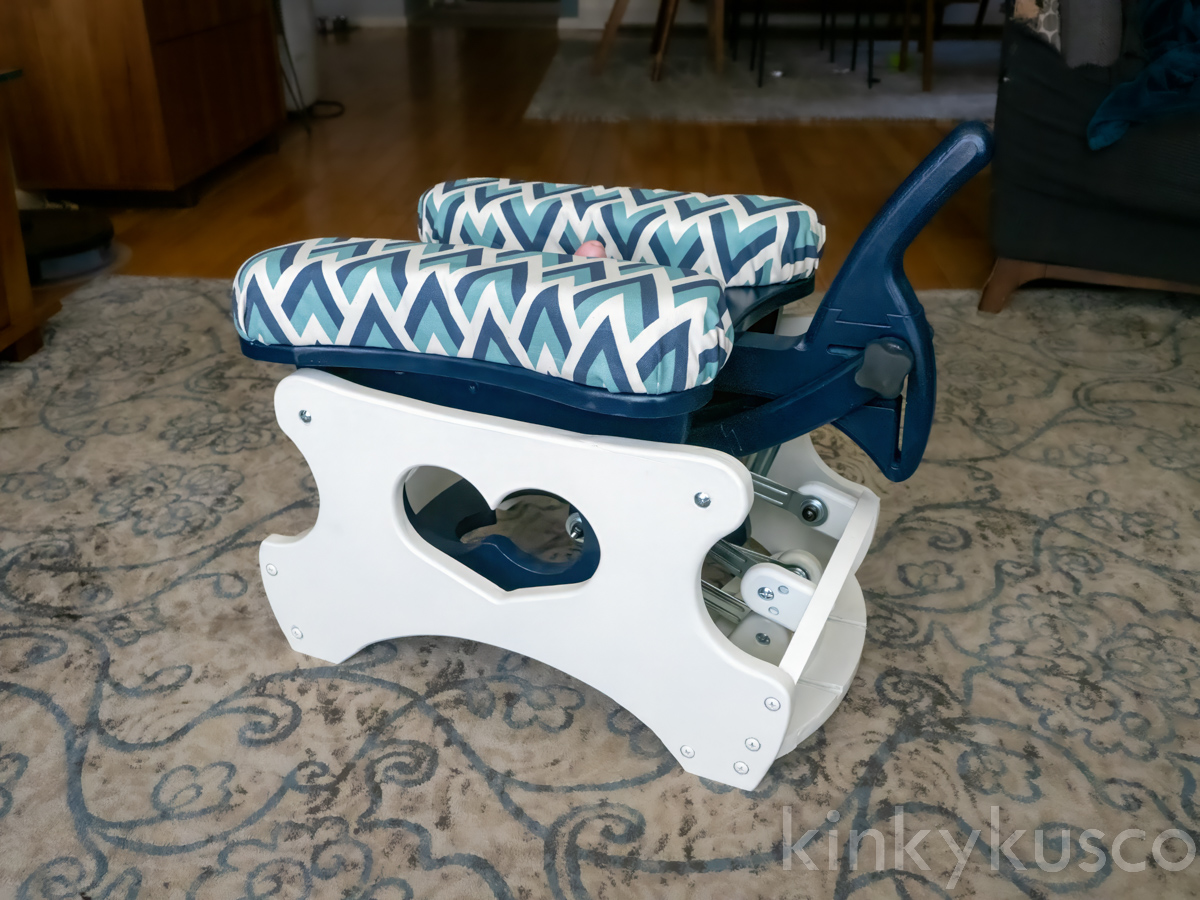
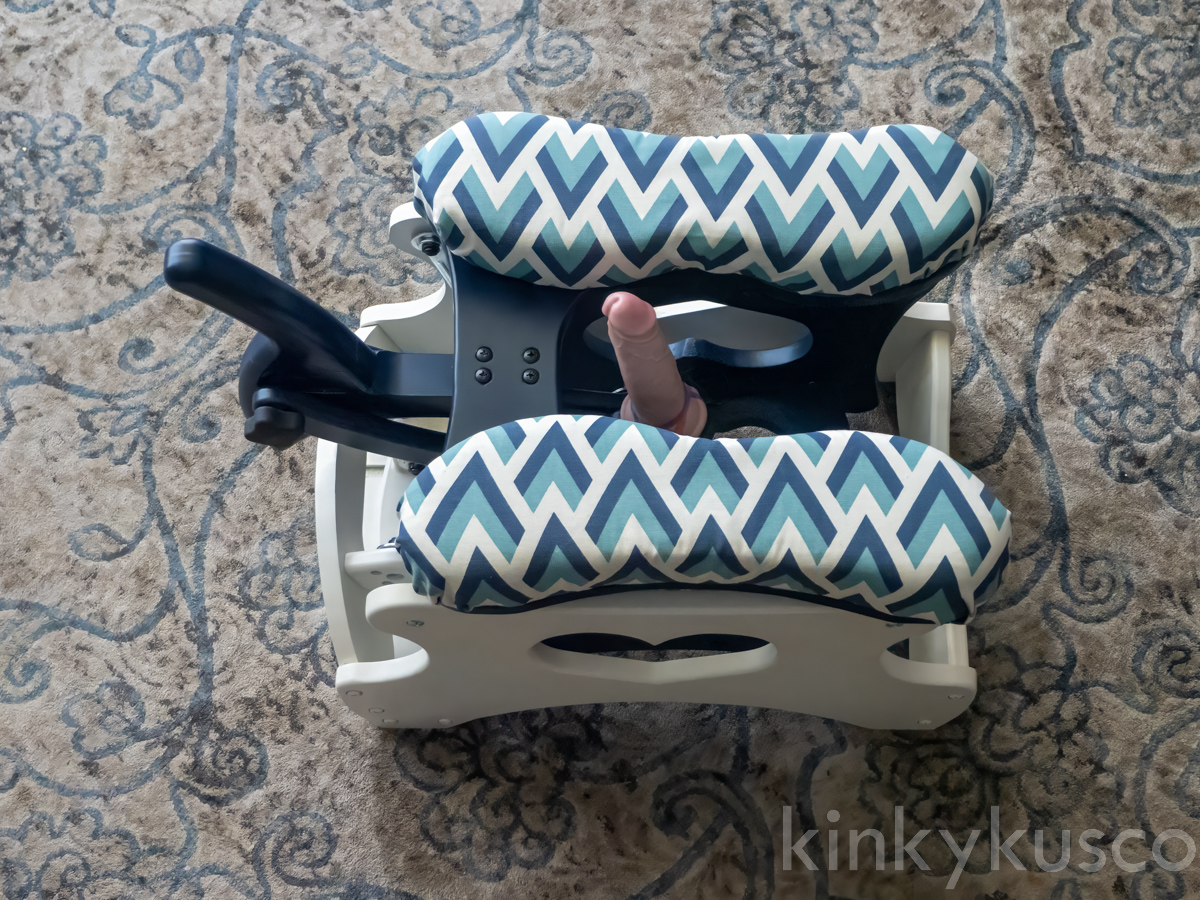
The Funky Rocker (FR for short) is a DIY sex rocker. The plans are for sale from the designer here for a fair price. The FR is a nice design, but is definitely designed without much regard to making it easy to build, or in keeping costs down in terms of parts. The original FR plans require a high degree of accuracy in woodworking, which can be extra challenging with the smaller parts. I switched many of the parts to being 3d printed rather then cut from MDF. Below are a couple photos of my finished rocker - can you tell which parts are 3d printed?


My 3D models are not intended to replace the purchase and use of the original FR plans. You will still need the original plans to make the rest of the parts and to understand the overall assembly of the FR.
The FR plans come in english (imperial) and metric. I am in the US, and used the english plans as the parts were easier to source. Consequently my 3d printed parts are based off the english plans. If you're using the metric FR plans, my parts will probably require some modifications to work.
| Part # | Part name | Notes |
|---|---|---|
| 3 | Aft Support | Included cut in two with a dovetail for printing on smaller print beds and gluing together. |
| 5 | Slide Plate | 5,6,7 all combined as one part |
| 6 | Lower Support - Right | 5,6,7 all combined as one part |
| 7 | Lower Support - Left | 5,6,7 all combined as one part |
| 8 | Slide (2x) | Fits into the above part, glue/epoxy optional |
| 10 | Upper Link Support (2x) | Included cut in two with a dovetail for printing on smaller print beds and gluing together. |
| 14 | Mount Link | 14 + 15 combined as one part |
| 15 | Mount | 14 + 15 combined as one part |
| 17 | Handle | Included cut in two with a dovetail for printing on smaller print beds and gluing together. |
| 33 | Vac-U-Lock adaptor | 3d printed replacements when using the 3d printed version of part 14+15. |
| N/A | Drill Guide | Drill guide for drilling the dowel nut holes on the edge of the MDF. Print upside down. |
For reference I printed all the parts on a Bambu P1S in PLA. Check the readme in each folder for notes about those specific files. The stl's were exported in mm. Most of the parts have an obvious side to print towards the bed. Rounded edges against the bed may not print well unless you allow supports under them. Otherwise These should print fine without supports, and I would avoid allowing supports into the bolt holes as they can be very difficult to remove.
For strength, wall count is generally much more effective then infill. I printed all these parts with a wall count of 6, 20% infill of gyroid or cross hatch. Consider variable layer height, especially for the handle, as you want the grip portion with small layer lines to make it feel less 3d printed and more comfortable.
I finished the 3d parts with light sanding, then three coats of an automotive "building" type spray primer to mostly fill in the layer lines.
- Router
- Jigsaw
- Drill (bits required: 13/32, 5/16, 17/64 (or 1/4, and then widen slightly/expect the bolt to fit tight), 5/8 (with as flat a drill head profile as possible - no spade bits, etc)
- Scroll or Band saw
- Drill press
- 3d printer
I printed the plans full size (if you have bought plans and would like to save some time on blowing up the pdf for printing on 8.5x11 paper, send me an email (username AT gmail) with proof you purchased the plans and I will share my already sized PDF's.). I used scotch spray mount to glue the templates to the mdf, it stuck ok, sometimes the paper would lift up and bind under the jigsaw feet. Use a nail to indent exactly where a hole must be screwed to increase accuracy. A drill press is going to get the best accuracy with your drill holes, but I was able to free hand it with a drill just fine, during assembly I needed to increase the diameter of a couple of holes to accomidate some inaccuracy, but it was minor and did not effect the final build strength. Apply painters tape to your drill bits to mark the depth of the cut, or use a drill bit stop collars.
Some of the parts have long flat edges (base left and right, glider left and right are the important ones). plan to use the factory straight edge on the MDF for those flat portions to get a perfectly straight edge. I did the same with the Forward Lower Support so I could route the channels perpendicular as required. It's imperative the channels are parallel to each other so the slide plate can slide forward and back, so take care to route those channels very accurately.
I cut my MDF parts out with a jigsaw. I found the Diablo brand "Scroll Cut wood" blades worked best, but even so the blade will bend a bit around sharp corners leading to a non perfect 90 degree edge. This was ok with me, but if not acceptable to you, a scroll or band saw is going to be necessary.
Many of the parts call for a larger diameter shallow depression around the bolt holes. This allows the bolt or receiver head to sit flush. The only part where these are a necessity is the top of the seat, so the cushions can sit flush. Otherwise they're entirely for looks. In hindsight I would have just skipped them, the bolts are visible either way.
You need to cut the 1/4" threaded rod. To do so without totally screwing up the thread, this method I found on familyhandyman.com works well. The parts list comes with quite a few extra bolts so no harm if you scratch up a few while cutting the rod. The plans give an approximate rod length for each application which I found too long. Before you assemble the entire bench for the first time, assemble each part assembly which uses a threaded rod by itself with the uncut rod, find the right length, then take it apart and cut the rod.
When you assemble the bench, attach the glider arms to the inner bench section, then place the bench inside the frame and attach the arms to the frame. If you attach the arms to the frame first, you cannot get the screwdriver in to attach the arms to the inner bench.
Below is the parts list from FR updated to take into account changes from the 3d printed parts, along with some swaps I made. Mostly I changed some parts to use black hardware when possible, and tried to match materials to prevent galvanic corrosion, what little a project like ths might have, anyway. My parts list comes out a bit cheaper, but that's almost entirely because you don't need to buy the Vac-u-lock adaptor anymore.
| FR Part # | Qty | 3d print qty | Part name | Cost | Cost 3d printed | Source | Notes |
|---|---|---|---|---|---|---|---|
| 20 | 8 | 8 | Glider Bearing Arm | 69 | 69 | patio furniture rehab | Search for "Glider Bearing arm 30-906". There are many online suppliers, while this one was the cheapest I could find when I purchased, that may no longer be the case. |
| 21 | 12 | 12 | Steel Binding Barrels | 16.01 | 16.01 | McMaster | |
| 22 | 4 | 0 | 1/4"-20, 1/2" long round head screw | 11.81 | 0 | McMaster | |
| 23 | 24 | 20 | 1/4"-20, 1" long truss head screw | 7.43 | 7.43 | McMaster | |
| 24 | 34 | 30 | 1/4"-20, 2" long truss head screw | 18.62 | 18.62 | McMaster | |
| 25 | 17 | 9 | Threaded insert 1/4-20 | 16.28 | 16.28 | McMaster | |
| 26 | 34 | 30 | Dowel Nut for wood | 20.56 | 20.56 | McMaster | |
| 27 | 18 | 18 | Flat washer | 11.88 | 11.88 | McMaster | |
| 28 | 4 | 4 | Locknut | 5.08 | 5.08 | McMaster | |
| 29 | 1 | 1 | threaded rod 1' | 6.49 | 6.49 | McMaster | |
| 30 | 4 | 4 | Ball bearing flanged | 30.08 | 30.08 | McMaster | |
| 31 | 2 | 2 | Four-arm comfort grip knob | 7.14 | 7.14 | McMaster | |
| 32 | 1 | 1 | Clamping handle with threaded stud | 16.15 | 16.15 | McMaster | |
| 33 | 1 | 0 | V-L toy adapter | 32 | 0 | vac-u-lock.com | |
| 34 | Bearing Grease | Honestly if you need this immediately I'm real jealous of how much you're using your rocker. | |||||
| 35 | Seat Foam | Get from local craft store | |||||
| 36 | Seat Covering | Get from local craft store | |||||
| 37 | Felt | Get from local craft store | Other option for feet is plastidip... | ||||
| 38 | 4 | 4 | Bumper | Get from local craft store | Could also print from tpu... | ||
| 39 | 8 | 0 | #4 x 1/2" wood screw | 3.36 | 0 | Home Depot | |
| N/A | 1 | superglue or plastic epoxy | 2.68 | Home Depot | Required if you're 3d printing the cut version of the handle or handlelink, which you probably are unless you have a large bed printer. |