Versions are managed in the versions array located in the website/dbt-versions.js file. This array holds all versions which are selectable from the versions dropdown in the navigation.
The first version in the array is the latest version. This is the default version when a visitor loads the page.
To add a new version to the site, a new object must be added to the versions array in the same format as existing versions. This object holds two properties: version and EOLDate (See End of Life Dates below).
Example Version:
exports.versions = [
	{
		version: "1.2",
		EOLDate: "2023-01-01"
	}
]
The version property is the value shown in the nav dropdown. This value is compared to the VersionBlock component on a docs page to determine whether that section should be visible for the currently active version (See the Versioning the Sidebar section on using the VersionBlock component).
The EOLDate property determines when a version is no longer supported. A version is supported up until 1 year after its release.
When a documentation page is viewed, the EOLDate property for the active version is compared to today’s date. If the current version has reached or is nearing the end of support, a banner will show atop the page, notifying the visitor of the end-of-life status.
Two different versions of the banner will show depending on the end-of-life date:
- When the version is within 3 months of the EOLDate.
- When the version has passed the EOLDate.
The content for these two EOLDate banners are located in the website/src/theme/DocPage/index.js file, in the EOLBannerText property.
If a Docs page is unavailable for the selected version, it is possible to version the entire page. This is managed in the versionedPages array within the website/dbt-versions.js file.
Two things occur when a page is not available for the selected version:
- A banner will appear atop the page, noting this page covers a new feature that isn’t available for the selected version.
- The page is removed from the sidebar
Example of how to version a page in the dbt-versions.js file:
exports.versionedPages = [
    {
      "page": "docs/supported-data-platforms",
      "firstVersion": "0.21",
    }
]page (mandatory): The path of the Docs page to version. This string must match the string for the page in the sidebars.js file.
firstVersion (optional): Sets the first version on which this page is available.
lastVersion (optional): Sets the last version on which this page is available.
The VersionBlock component provides the ability to version a specific piece of content on a docs page.
This component can be added directly to a markdown file in a similar way as other components (FAQ, File, Lightbox).
- firstVersion (optional): Sets the first version this piece of content is available for.
- Defaults to 0 if not set.
- lastVersion (optional): Sets the last version this piece of content is available for.
- If lastVersion prop not set, it will be available from the firstVersion, up to the latest version.
Both properties can be used together to set a range where the content should show. In the example below, this content will only show if the selected version is between 0.21 and 1.0:
<VersionBlock lastVersion="1.6">

	Versioned content here

</VersionBlock>On the Docs Defer page, tabs are used to show different versions of a piece of code. v0.21.0 and later shows --select, while v-.20.x and earlier changes this to --models.
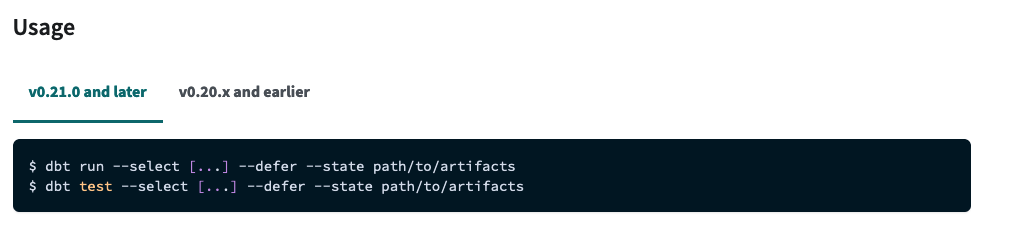
Below is how we can implement the same versioning using the new VersionBlock component:
You see this block when the selected version is >= 0.21:
<VersionBlock firstVersion="0.21">

```shell
$ dbt run --select [...] --defer --state path/to/artifacts
$ dbt test --select [...] --defer --state path/to/artifacts
\```

</VersionBlock>
You see this version block when the selected version is <= 0.20
<VersionBlock lastVersion="0.20">

```shell
$ dbt run --models [...] --defer --state path/to/artifacts
$ dbt test --models [...] --defer --state path/to/artifacts
\```

</VersionBlock>
Global variables can be configured for use throughout the docs.
Using a global variable requires two steps:
- Set the variable in the
website/dbt-global-variables.jsfile. - Use the Var component to add the global variable to a page.
// The dbtCore property is the identifier for the variable,
// while the name property is the value shown on the page.

exports.dbtVariables = {
  dbtCore: {
    name: "dbt Core"
  }
}
// <Var name="dbtCore" /> is converted to dbt Core
You can install <Var name="dbtCore" /> on the command line by using one of these recommended methods:It is possible to version global variables as well. This creates the ability to show different variations of a string based off the current version a visitor has selected.
To extend our dbt-global-variables.js file above, we can add a new variable: note - these versions are not accurate and only shown for this example.
// A new variable called dbtCloud is added below
// This variable includes a versions array
// "Sinter" will replace "dbt Cloud" for versions 0.21 or lower

exports.dbtVariables = {
  dbtCore: {
    name: "dbt Core"
  },
	dbtCloud: {
		name: "dbt Cloud",
		versions: [
      {
        "name": "Sinter",
        "version": "0.21"
      }
    ]
	}
}
You can get started with <Var name="dbtCloud" /> by [Signing up](https://www.getdbt.com/signup/).In the above example, the dbtCloud property has a default name of “dbt Cloud”. The naming for variables cascade down, meaning “dbt Cloud” will show for all versions, until version 0.21 or lower is selected. At that point “Sinter” will replace “dbt Cloud”.
name (required): Expects the identifier for a global variable.
The global <Var /> component can be used inline, for example:
This piece of markdown content explains why <Var name="dbt" /> is awesome.However, a Var component cannot start a new line of content. Fortunately, a workaround exists to use the Var component at the beginning of a line of content.
To use the component at the beginning of a sentence, add a non-breaking space character before the component:
// When starting a new line with a global variable,
// a non-breaking space is required
// Works
<Var name="dbt" /> is awesome!
// Does not work
<Var name="dbt" /> is awesome!To reuse content on different pages, you can use some techniques like partial files or snippets. Partial files, a built-in Docusaurus feature, is the recommended method over snippets.
A partial file allows you to reuse content throughout the docs. Here are the steps you can take to create and use a partial file:
- Create a new markdown partial file in the
website/snippetsdirectory. The file name must begin with an underscore, like_filename.md - Go back to the docs file that will pull content from the partial file.
- Add the following import file:
import ComponentName from '/snippets/_this-is-your-partial-file-name.md';- You must always add an import file in that format. Note you can name
ComponentName(a partial component) can be whatever makes sense for your purpose. .mdneeds to be added to the end of the filename.
- You must always add an import file in that format. Note you can name
- To use the partial component, go to the next line and add
<ComponentName />. This fetches the reusable content in the partial file- Note
anynamecan be whatever makes sense for your purpose.
- Note
You can also use this for more advanced use cases like reusable frontmatter.
- To create a new partial to use throughout the site, first, we will create a new markdown partial file within the snippets directory:
/snippets/_partial-name.md- Add the following reusable content in the
/snippets/_partial-name.mdpartial file:
## Header 2

Lorem ipsum dolor sit amet, consectetur adipiscing elit. Nullam fermentum porttitor dui, id scelerisque enim scelerisque at.- Now, go back to the docs file and add the following code to fetch the reusable content added in the partial file:
Docs content here.

import SetUpPages from '/snippets/_partial-name.md';
<!-- It's important to leave a blank line or a comment between import and usage, otherwise it won't work -->
<SetUpPages />

Docs content here.
import SetUpPages from '/snippets/_partial-name.md';— A partial file that will be imported by other files<SetUpPages />— A component that imports content from the partial file. You can also use it to pass in data into the partial using props (See 'How to use props to pass different content on multiple pages?' below).
- This will then render the content of the docs in the partial file.
How to use props to pass different content on multiple pages?
You can add props on the component only if you want to pass in data from the component into the partial file. This is useful for using the same partial component on multiple docs pages and displaying different values for each. For example, if we wanted to use a partial on multiple pages and pass in a different 'feature' for each docs page, you can write it as:
import SetUpPages from '/snippets/_available-enterprise-only.md';
<!-- It is important to leave a blank line or a comment between import and usage, otherwise it won't work -->
<SetUpPages feature='A really cool feature' />
Then in the /snippets/_available-enterprise-only.md file, you can display that feature prop with:
This feature:
{props.feature}other content etc...
This will then translate to:
This feature: A really cool feature other content etc...
In this example, the component <SetUpPages feature=' is passing 'feature' into the partial. This is useful when using dynamic data (for example if you wanted to use the same partial on multiple docs pages, but change the values within the partial for each page)
The Snippet component allows for content to be reusable throughout the Docs. This is very similar to the existing FAQ component. Using partial files, which is a built-in Docusaurus feature, is recommended over snippets.
Creating and using a snippet requires two steps:
- Create a new markdown snippet file in the
website/snippetsdirectory. - Use the
<Snippet path="filename" />component within a Docs file.
src: Expects the file name of the snippet which lives in the snippets directory
To create a new snippet to use throughout the site, first, we will create a new markdown snippet within the snippets directory:
## Header 2

Lorem ipsum dolor sit amet, consectetur adipiscing elit. Nullam fermentum porttitor dui, id scelerisque enim scelerisque at.
Now, we can add this snippet to a Docs file with the Snippet component:
Docs content here.

<Snippet path="lorem-ipsum" />

Docs content here.