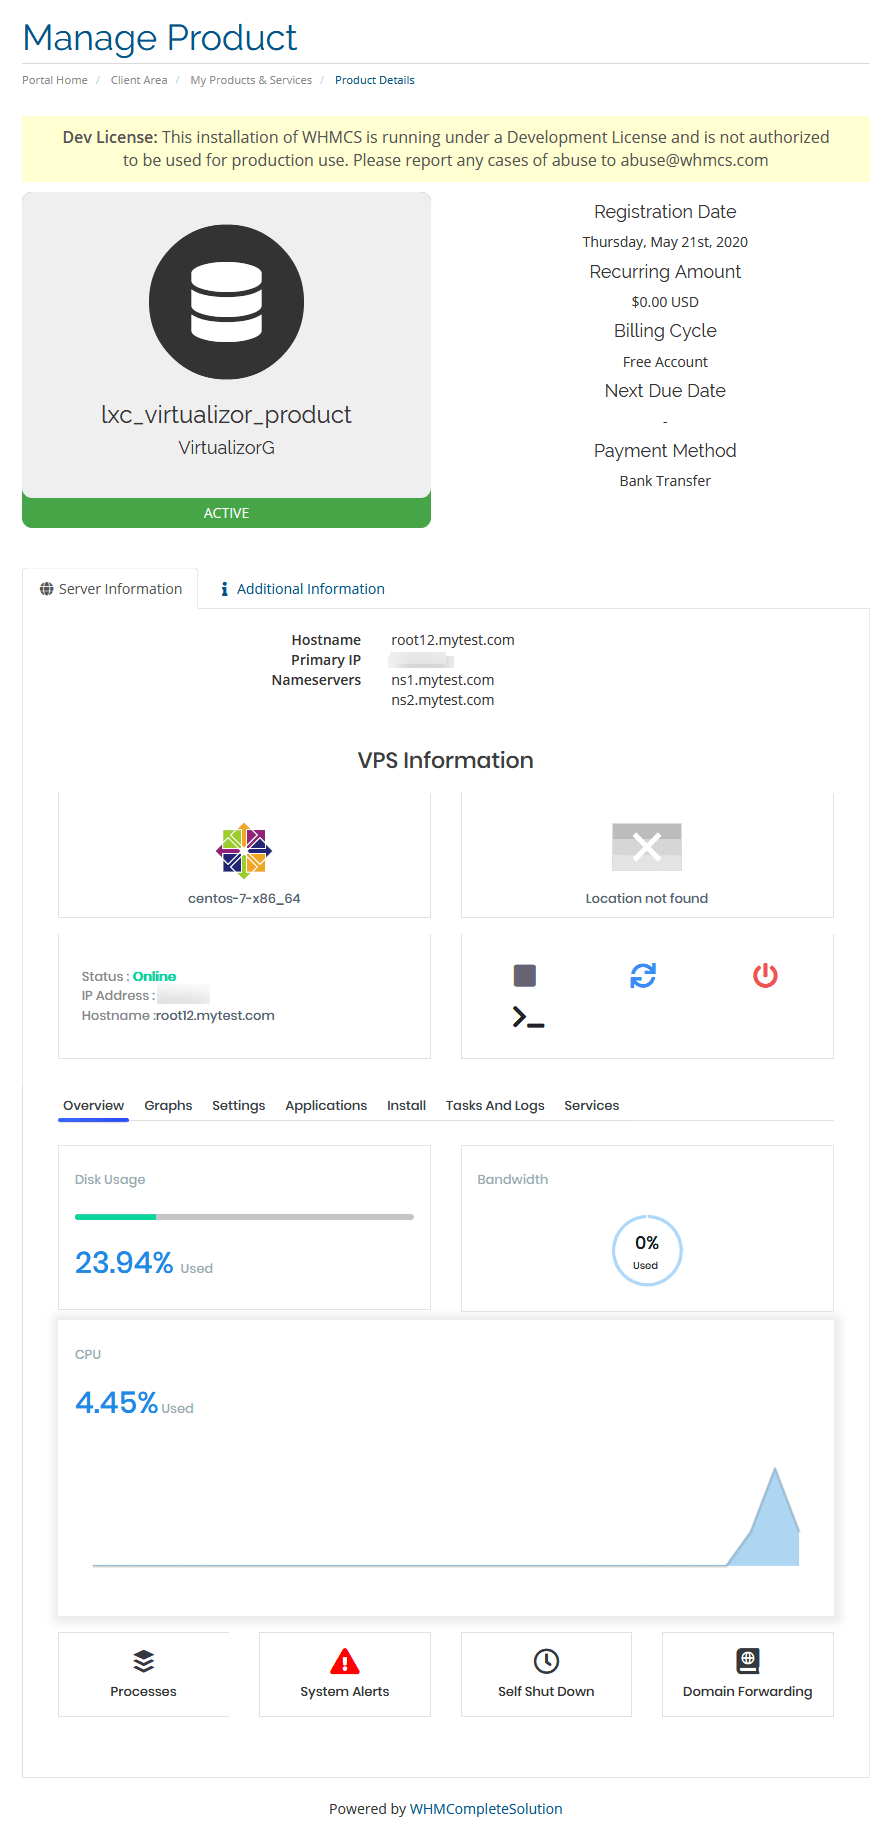
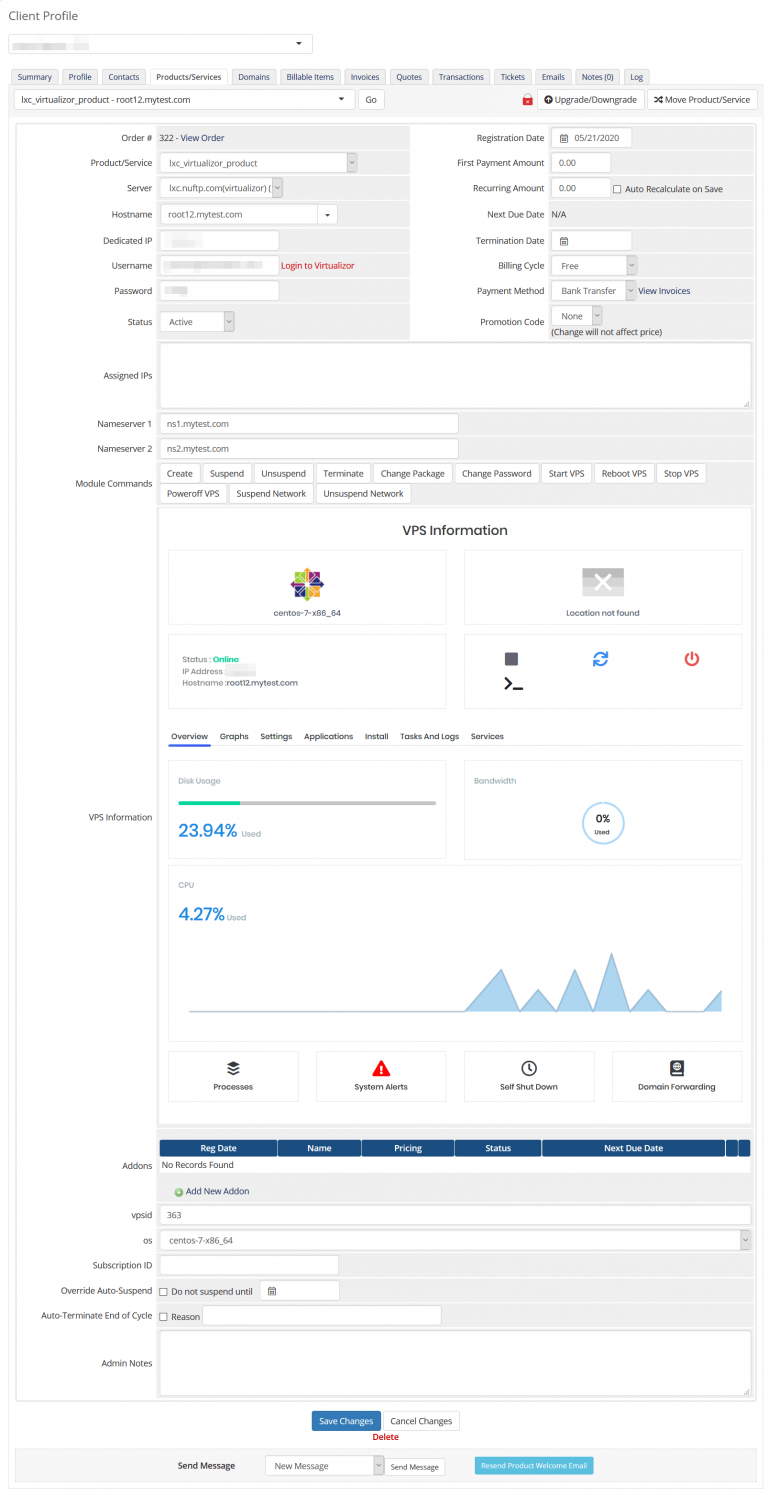
WHMCS server module for provisioning and management of VPS servers from reseller's remote WHMCS installation. Enables reseller to deploy live cloud VMs from custom VPS package configurations. Features robust end-user management interface for reseller's client to manage server from within client area of WHMCS.
- This is a Server Provisioning module for WHMCS to integrate API functionality for VPS resellers, allowing them to remotely manage Rad Web Hosting VPS Servers in remote WHMCS installation. This module also installs Client Area domain management functions for use by end-clients.
- Simplifies the automation of provisioning, selling, and managing VPS Servers, and provides for complete remote control of all VPS functions.
Please read the following system requirements for WHMCS VPS Reseller module:
- Working WHMCS installation (v5.3+)
- Rad Web Hosting VPS API key
Users can gain access to API key by signing up for a VPS Reseller account
- Download the module
- Upload to WHMCS Server Modules directory (i.e. /home/user/whmcs/modules/servers ) and extract the files
- In WHMCS Admin area, navigate to Setup -> Products/Services -> Servers and create the
rad_cloudserver - Enter your API username and API secret. These can be obtained via your VPS Reseller Welcome Email.
Please follow the below guidelines to configure your VPS Reseller with WHMCS integration.
- WHMCS installation
- VPS Reseller account
- WHMCS server has ports 4081-4085 open
- Download and extract the WHMCS integration [HERE].
- Copy the entire directory via FTP, SFTP, SCP, etc. to /<WHMCS_PATH>/modules/servers/rad_cloud/
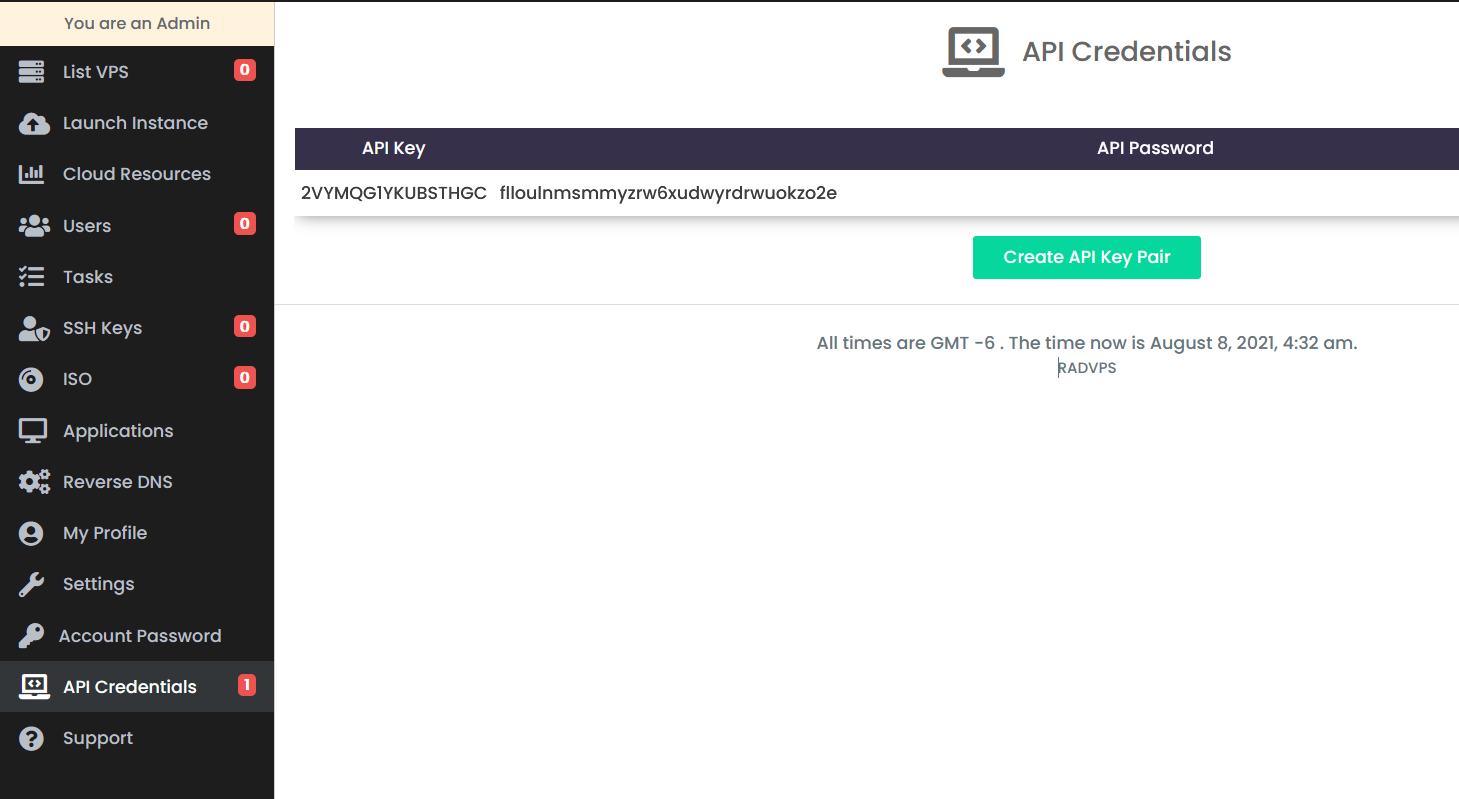
- First, login to the VPS panel with your reseller account details.
- Access the side menu and navigate to "API Credentials".
- Create a API Key Pair by clicking the button.
- API Key Pair success message will display upon successful creation.
- Copy the API key pair credentials (these will be needed to configure WHMCS server connection).
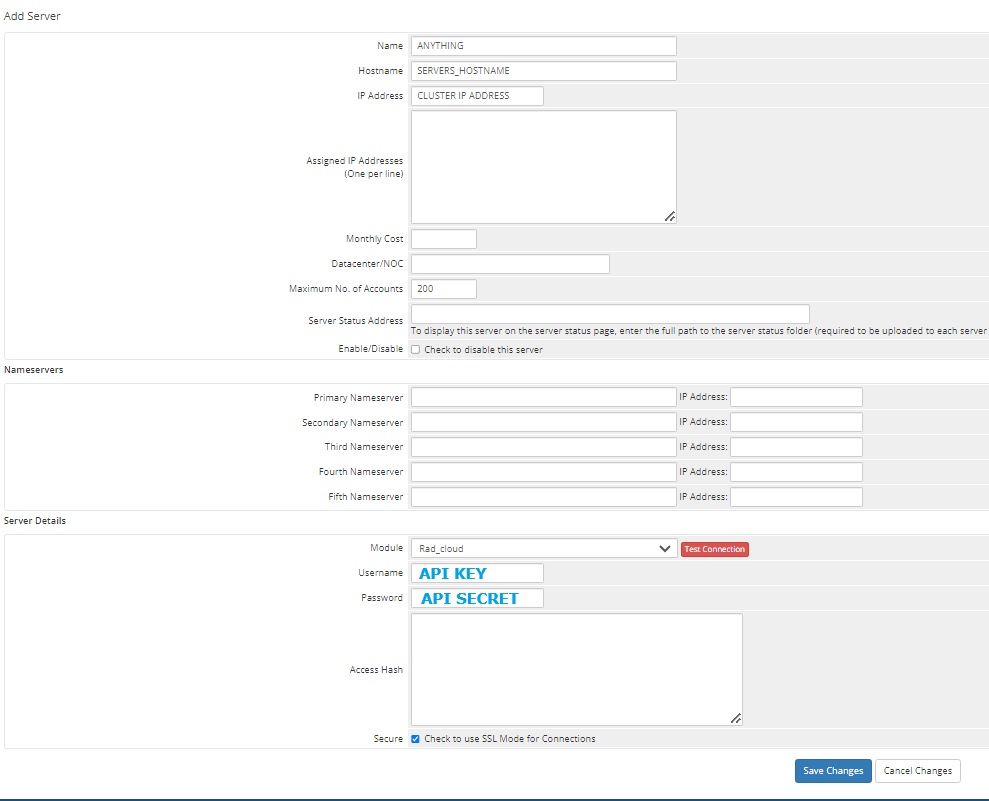
- From WHMCS Admin > Setup > Products/Services > Servers
- Click "Add New Server". Follow directions:
- Name: Can Be Anything
- Hostname: The Hostname of VPS Reseller
- IP Address: This will be provided by the data center.
- Nameservers are not required for this module
- Server Details
- Module: "Rad_cloud" .
- Username: API Key (created in previous step)
- Password: API Password (created in previous step)
- Access Hash: Leave empty
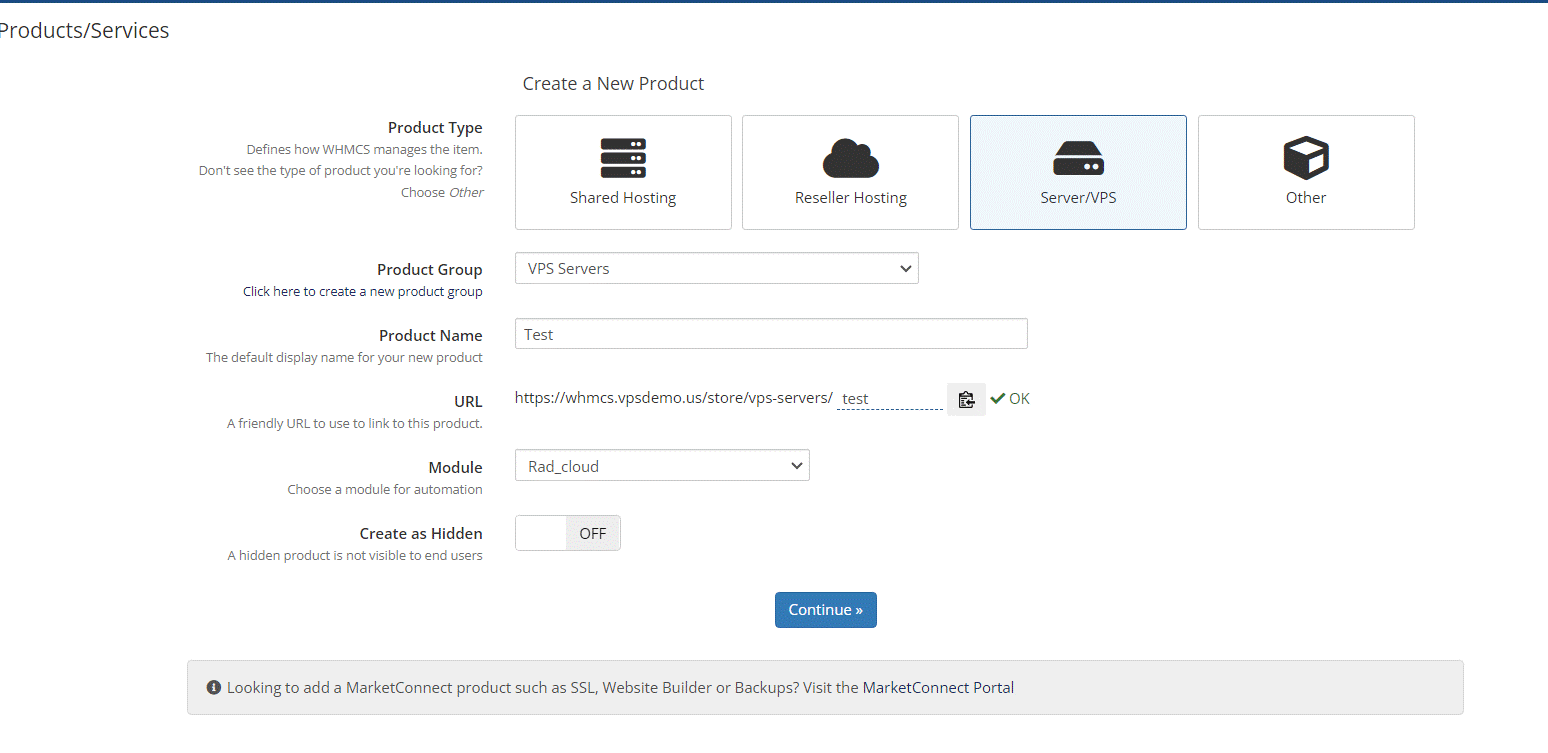
- Navigate to Setup > Products/Services > Products/Services.
- Select "Create a new Product"
- Product Type: Server/VPS
- Product Group: Any
- Product Name: Any
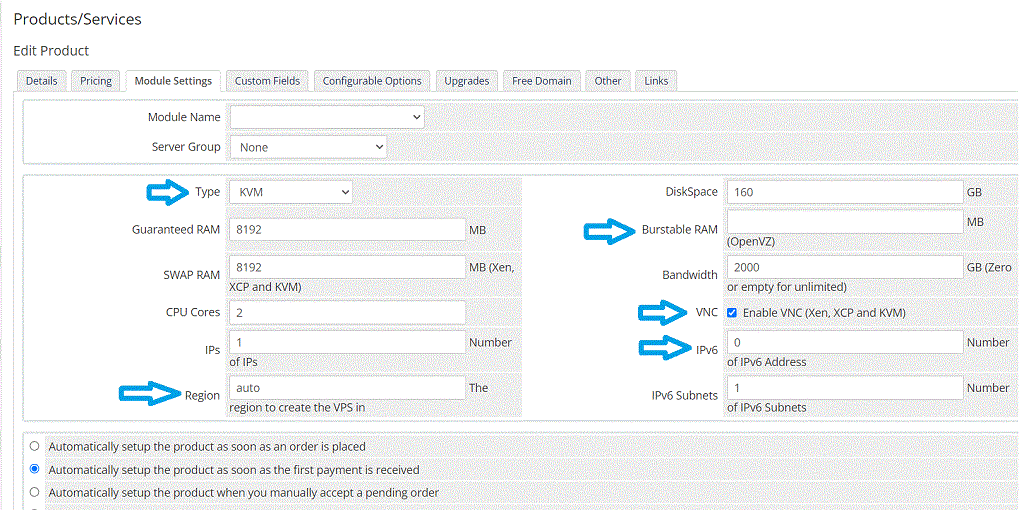
- Go to "Module Settings" tab and enter the following details:
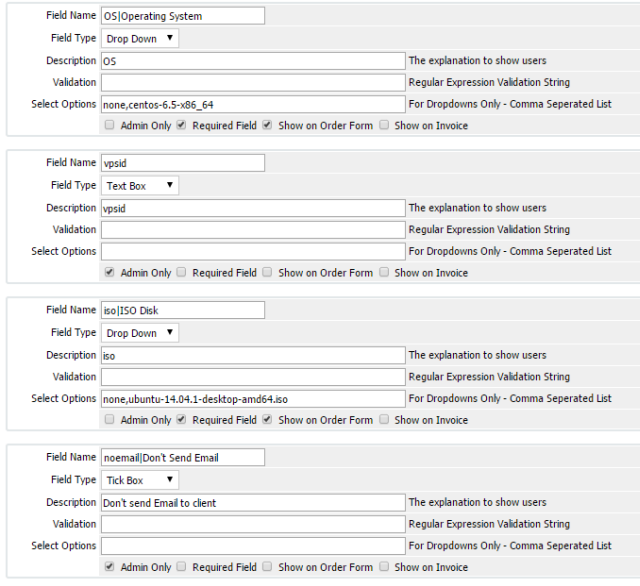
- Go to "Custom Fields" and create new Custom Field with the following details:
- Field Name: vpsid (exactly as written)
- Field Type: Text Box
- Description: The ID of the server from VPS Panel.
- Validation: Leave blank
- Check Admin Only tick box.
- Create new VPS welcome email template. We have provided a custom email template to use for sending VPS server credentials to enduser when VPS is provisioned (created). This template will utilize merge fields and organize important server details better than the default "VPS/Dedicated Server Welcome Email" template that is provided with WHMCS.
- You can add the template from your WHMCS Admin area by navigating to "Setup->Email Templates"
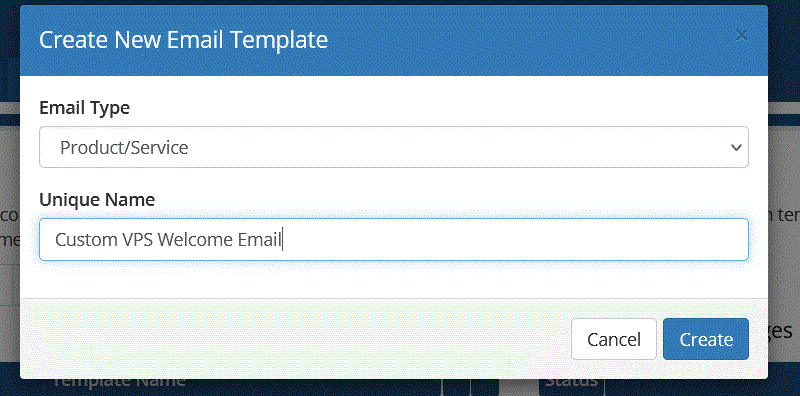
- Choose to "Create New Email Template"
- Choose "Product/Service" from the "Email Type" drop-down menu and give the template a unique name
- Configure the email sending settings
- Add a subject for your email (i.e. "New VPS Server Details")
- To import our pre-made template, click "Enable/Disable Rich-Text Editor" button
- Copy and paste the email template from below:
Dear {$client_name},

We are glad to inform you that the virtual machine you ordered has been set up.

Manager Details
=============================
URL: https://your.master.domain.com:4083
Username: {$service_username}
Password: {$service_password}

Server Details
=============================
Hostname: {$service_domain}
Main IP: {$service_dedicated_ip}
Root Password: {$service_password}
{if $service_assigned_ips}
IP Address Allotted:
{$service_assigned_ips}
{/if}

You can access your server over SSH.
If you are a Windows user, you can use a free SSH client called Putty which can be downloaded from :
http://www.chiark.greenend.org.uk/~sgtatham/putty/download.html

{$signature}
- Instead of creating each VPS product with Custom Field: "OS|Operating System" and drop-down list of all available templates, we recommend creating a "Configurable Options" group with the "Operating System" configurable option.
- Please also refer to this article to find more information about using configurable options in WHMCS.
- Configurable Options group can be assigned to all VPS products (of the same Virtualization)-this will be much more desirable from an administrative perspective, should the available OS templates options ever change.
- In the event of new OS template available for VPS, you can simply modify this single Configurable Option (assuming the group is assigned to multiple VPS products for same Virtualization), as opposed to editing the custom fields drop-down values for every related VPS product individually.
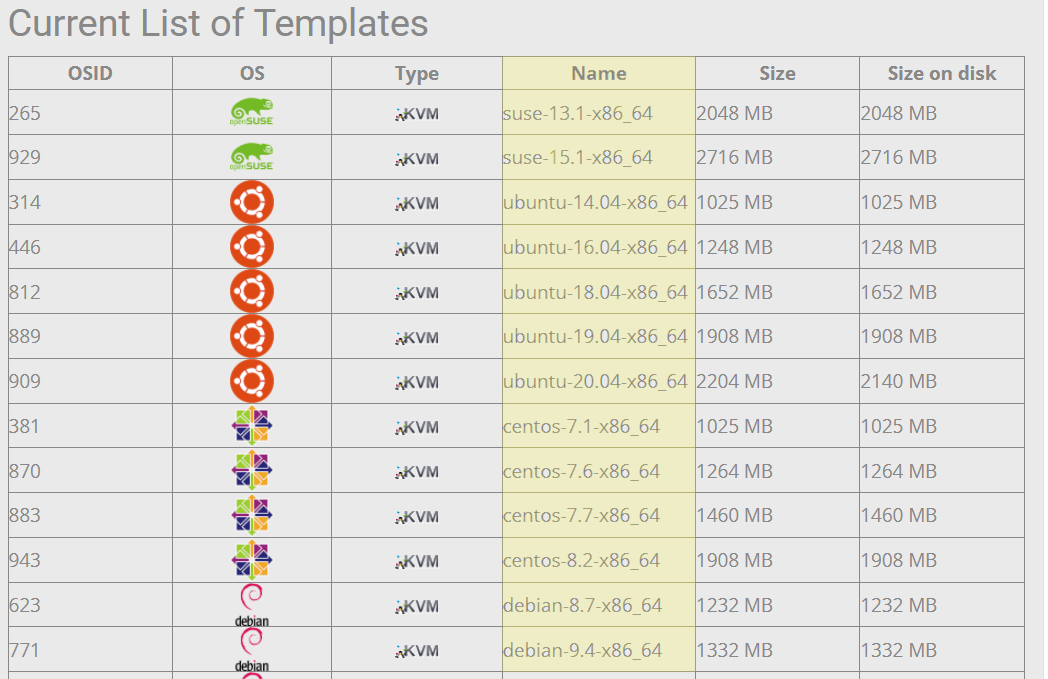
- Where to get the values for available OS templates (for KVM virtualization VPS)?
- Rad Web Hosting keeps a public list of available KVM OS templates in the Knowledgebase, at: VPS Guides -> List of Available OS Templates
- Use the highlighted values (from the "Name" column) in the below image to for the Configurable Options "Operating System" drop-down values (this must be exactly the same for the automated provisioning to work):
Read our guide, 5 Minute Guide to Integrate WHMCS VPS Reseller
For full documentation, please visit the Rad Web Hosting VPS Reseller documentation on the website.
If you have any questions or problems please submit a Support Ticket.
If you discover any bugs or issues with this module, please notify our staff via the 24/7 Helpdesk.
This project is open-sourced software licensed under the MIT license.


