This is a simple but powerful example that will show you how to build a web application with Deno Fresh that allows users to sign up and sign in with a magic link provided by Supabase, as well as update your profile data, including your profile photo.
This repo will demonstrate how to:
- Sign users in with Supabase Auth using a magic link sent by email.
- Store and retrieve data with the Supabase database.
- Store image files in Supabase storage.
- Frontend:
- Fresh: a modern framework for
creating the web application, through the use of
DenoandPreact. - Supabase.js: client library for user management and real-time data syncing.
- Fresh: a modern framework for
creating the web application, through the use of
- Backend:
- supabase.com/dashboard: hosted Postgres database with restful API for usage with Supabase.js.
Sign up to Supabase - https://supabase.com/dashboard and create a new project. Wait for your database to start.
After your database has been initiated, navigate to your project's SQL Editor
and click on Quickstart, then on User Management Starter, which generates a
script for the creation of a public profiles table accessible through your
API. Finally, press the RUN button to execute the script. Once this is
complete, proceed to the Table Editor to view your newly created profiles
table.
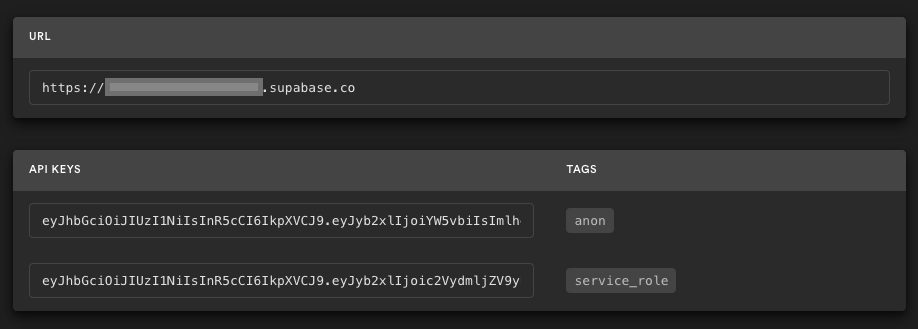
Access Project Settings (via the cog icon), open the API tab, and locate your
API URL and anon key; these are required for the next step.
The anon key is your client-side API key, providing "anonymous access" until a
user logs in. After login, the keys switch to the user's login token, enabling
row-level security.
NOTE: The service_role key has full access to your data, bypassing any
security policies. These keys have to be kept secret and are meant to be used in
server environments and never on a client or browser.
Reference (Steps 1-3 of the Getting Started): Supabase
In the supabase folder, open the config.json file, and set the value of the
following variables with the URL and the anon data respectively:
SUPABASE_URL
SUPABASE_ANON_KEY
For a better development experience, install the Deno extension from the
denoland publisher in Visual Studio Code.
Download in the local cache all of the project's dependencies, by running the the following command:
deno cache dev.ts
Run the application with the command deno task start. Open your browser doing
click on the link https://localhost:8000/ that appears in the terminal, and
you are ready to go 🚀.
It is very simple, a picture is worth a thousand words:
Once the application is ready, deploy it to the cloud. A quick alternative is
through Deno Deploy. Copy the deployed URL. In the
Supabase Dashboard, go to the Project Settings / API option, and replace the
URL in the Project URL section with the one copied to the clipboard. Save the
changes. Test the application again but this time in the cloud.

